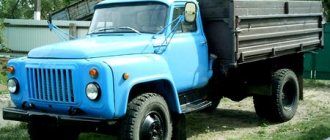
Repair of VAZ 21213
Despite the fact that the VAZ-21213 is considered one of the most successful developments of the Volga Automobile Plant, like all mechanisms, it is prone to breakdowns. Moreover, the more mileage a car has, the more actively it begins to break down - this is typical not only for Niva, but also for all other representatives of the domestic automobile industry. Therefore, a dilemma very quickly arises - constantly contact service centers or learn how to repair the VAZ 21213 yourself. With sufficient skills and “direct” hands, doing the latter is not as difficult as it seems - the main thing is to have all the necessary tools and components on hand.
The most common breakdowns and malfunctions
The most common problems that require VAZ 21213 Niva repair are:
- Carburetor clogged;
- Engine overheating;
- Failure of timing chain tensioners and dampers;
- Wear of the elastic coupling of the shaft;
- Failure of the gearbox;
- Increased vibration;
- Wear of CV joint boots;
- Oxidation of electrical wiring contacts;
- Stove tap leaking;
- Body corrosion.
Some of the problems can be fixed yourself. For example, you can clean the terminals from oxidation or install a new boot on the CV joint in your garage. With certain skills, you can also clean the radiator. But it is better to fix more serious problems with specialists - this requires certain knowledge, tools and equipment.
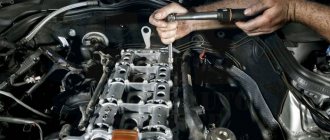
Engine problems - what you need to know
The main disease of the VAZ-21213 engine is the carburetor. When using low-quality fuel - and this problem occurs regularly at our gas stations - the carburetor constantly becomes clogged. If the fuel lines and filters become clogged, simply clean them and, if necessary, install new filters. But if you do not pay attention to this problem for a long time, then very soon the fuel pump will fail and then you will have to change it.
Another problem, which can hardly be eliminated, is engine overheating. The reason for this is the poor design of the cooling system, or rather the blowing system. This is especially noticeable on engines that have undergone major overhauls, since due to boring of the cylinders, the partition becomes thinner and heat transfer increases. It can only be combated by upgrading the blowing system and installing either an additional fan or replacing it with a more efficient one. But you can’t ignore this problem - even novice motorists know the consequences of prolonged engine overheating.
Checking parts and assembling the VAZ-21213, VAZ-21214 engine
Engine disassembly is discussed in the article - “Disassembly of the VAZ-21213, VAZ-21214 engine.”
After disassembly, thoroughly wash the parts with kerosene, blow and dry them with compressed air (especially the oil channels of the parts).
Inspect the block, especially carefully the crankshaft supports.
Cracks in any place in the block are not allowed.
If there is a suspicion of cracks in the block (coolant has entered the crankcase or oil has entered the coolant), check the tightness of the block on a special stand.
Carry out the check in repair shops that have the appropriate equipment. Inspect the cylinders on both sides.
Scratches, nicks and cracks are not allowed.
When inspecting cylinders, we recommend illuminating the cylinder mirrors with a portable lamp - in this case, defects are visible much better.
To determine cylinder wear, we measure the diameter of the cylinder in four zones and two planes (parallel and perpendicular to the axis of the crankshaft) using a bore gauge.
To determine the wear of the piston skirt, use a micrometer to measure the diameter in a plane perpendicular to the piston pin axis, at a distance of 55 mm from the piston bottom.
Using a micrometer we measure the diameters of the connecting rod journals
Using a micrometer, measure the diameters of the crankshaft journals. We grind the crankshaft journals to the nearest repair size if their wear or out-of-roundness is more than 0.03 mm, and also if there are burrs and marks on the journals.
After grinding the crankshaft journals, it is necessary to remove the oil channel plugs, thoroughly rinse the channels to remove abrasive residues and blow them with compressed air.
We assemble the engine in reverse order.
We install new crankshaft bearing shells of nominal or repair size (after grinding the journals).
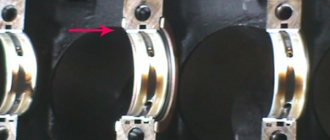
In the first, second, fourth and fifth supports of the cylinder block we install the upper main bearing shells with grooves, and in the third support - a liner without a groove on the inner surface (the same as in the main bearing caps).
Lubricate the main bearing shells with engine oil and place the crankshaft in the supports.
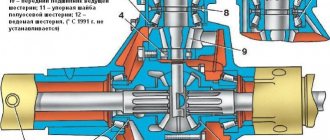
We insert thrust half-rings lubricated with engine oil into the grooves of the fifth support.
We install a steel-aluminum half-ring on the front side of the fifth support, and a metal-ceramic half-ring (yellow) on the rear side.
The surfaces of the half rings with antifriction coating (they have grooves) must face the thrust surfaces of the crankshaft.
We install the main bearing caps in accordance with the marks marked on their outer surface (counting is done from the camshaft drive side).
In this case, the locks of the upper and lower shells of each main bearing must be located on the same side.
Tighten the main bearing cap bolts to a torque of 68.31-84.38 Nm (6.97-8.61 kgf m).
Pistons for cylinders are selected according to classes.
The cylinder diameter class, indicated by letters, is stamped on the bottom plane of the cylinder block (the plane of the oil pan mounting).
The piston skirt diameter classes and piston pin holes are marked on its bottom
When installing it into the cylinder, the arrow on the bottom of the piston should be directed towards the camshaft drive.
When assembling the connecting rod and piston group, it is necessary that the piston pin, lubricated with engine oil, enters the hole of the piston or connecting rod with hand force and does not fall out of them when the pin is in a vertical position.
To check the gap in the piston ring lock, insert the ring into the cylinder and align the ring with the bottom of the piston. Using a set of flat feeler gauges, we check the gap in the piston ring lock.
Lubricate the grooves on the pistons with engine oil. We install rings on the pistons. Install the lower compression ring with the groove (“scraper”) facing down
If there is a mark “TOP” or “TOP” on the ring near the lock, then install the ring with the mark facing up.
The rings should rotate freely in the grooves without jamming. We arrange the rings as follows:
— we orient the lock of the upper compression ring at an angle of 45° to the piston ring axis;
- lock of the lower compression ring - at an angle of 180° to the axis of the lock of the upper ring;
— oil scraper ring lock — at an angle of 90° to the axis of the upper compression ring lock (we place the expander joint on the side opposite to the lock).
Before installing the ShPG parts, lubricate the cylinders, pistons with rings and connecting rod bearings with engine oil.
Before installing the piston into the cylinder, we put an adjustable mandrel on the piston and, tightening the mandrel, compress the piston rings.
Install the piston with connecting rod into the cylinder.
Using the hammer handle against the bottom of the piston, we push it into the cylinder.
When installing the connecting rod cap, the number on the connecting rod and the cap must match and be located on the same side of the connecting rod.
Tighten the connecting rod mounting nuts to a torque of 43.32-53.51 Nm (4.42-5.4 kgf m)
Further assembly is carried out in the reverse order of disassembly.
We replace gaskets and seals with new ones.
When installing the flywheel, we orient it so that the installation (conical hole), located on the rear plane of the flywheel next to the ring gear, is located opposite the connecting rod journal of the fourth cylinder.
Removing the VAZ 21213 engine with your own hands
Remove the hood and spare tire.
We dismantle the spare wheel supports.
Disconnect the tip of the negative wire from the exhaust manifold.
Drain the oil and coolant from the engine.
We remove the radiator (at the same time, on a VAZ-21213 car we remove the fan casing, and on a VAZ-21214 car we remove the electric fans).
Remove the thermostat with the cooling system hoses.
Disconnect the coolant inlet and outlet hoses from the heater radiator pipes. Remove the air filter housing (on an injection engine, remove the housing with the mass air flow sensor).
Disconnect the throttle valve drive cable from the throttle assembly and the receiver of the injection engine.
We disconnect the air and throttle valve drives from the carburetor of the VAZ-21213 engine. We dismantle the generator and starter.
Disconnect the exhaust pipe from the exhaust manifold and gearbox.
Disconnect the brake booster hose from the engine.
Disconnect the air supply and crankcase ventilation hoses from the injection engine throttle assembly.
. as well as the adsorber purge hose.
On the VAZ-21213 engine, disconnect the fuel supply hose from the fuel pump, and the drain hose from the carburetor.
On an injection engine, disconnect the fuel drain hose from the fuel pressure regulator tube.
. and from the fuel rail and fuel filter - a fuel supply tube with a hose (gradually releasing the fuel pressure in the system).
On an injection engine, remove the ignition module and disconnect the “mass” wire from the camshaft drive cover mounting stud; Engine wiring harness connectors from idle speed control, fuel rail, knock sensors, crankshaft and throttle position, coolant temperature (two sensors), oil pressure.
On a carburetor engine, disconnect the engine wiring harness connectors from the carburetor, ignition distributor, oil pressure and coolant temperature sensors. We take the wire harnesses to the side.
Disconnect the central high-voltage wire from the ignition sensor-distributor cover. We unscrew the nuts securing the left and right power unit support cushions to the front suspension cross member brackets. (see picture)
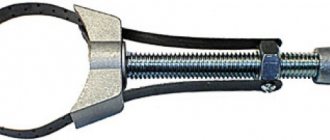
We dismantle the middle steering rod so that it does not interfere. For this.
. Using a 17mm spanner, unscrew the nuts of the two bolts securing the pendulum arm bracket to the right side member.
Remove the bolts securing the pendulum arm bracket.
.and lower the pendulum arm assembly with the middle steering rod.
On the right side of the car.
. Using a 19" socket with a cardan joint, unscrew bolt 1 securing the front axle gearbox, and using a 17" spanner, unscrew nut 2 of the stud securing the right support cushion of the power unit to the cylinder block bracket (or the nut of the stud securing the support cushion to the front suspension cross member bracket) .
. Using a 19" head, unscrew nuts 2 and 3 of the studs securing the front axle gearbox to the front and rear cylinder block brackets, respectively, and with a 17" spanner, unscrew nut 1 of the stud securing the left support cushion of the power unit to the front bracket of the cylinder block (or the stud nut mounting the support cushion to the front suspension cross member bracket).
Engine overhaul @ Niva 4×4
Thanks to everyone who responded!
We agreed, the client left the car with me for repairs.
The car is from 2006, mileage is 120 thousand. The owner says that the engine does not consume oil at all, but there is no traction, it stalls at idle and shoots at the muffler in all operating modes.
Suspicion immediately fell on the cylinder head, which, according to him, was repaired 20,000 years ago (the valves were changed and bolts were installed instead of the main valve) and on the poor performance of the injectors, which were never washed.
In general, we agreed on 12 thousand if for a full cap. repair with boring of block and shaft
(at his expense, but I’m taking the boring myself) or 5,500 for repairing the cylinder head (if only there is a problem) and 500 rubles for replacing the timing chain.
We just haven’t agreed yet which of us will buy spare parts for the engine.
In parallel with the engine, the owner of the car asked to sort out the gearbox (the 4th one was out).
Tomorrow I'll start with a compression test and start removing the cylinder head.
Who thinks that they didn’t sell themselves short with such prices?
Weaknesses of the VAZ 21214 engine
- Water pump;
- Engine, manual transmission and transfer case oil seals;
- Generator;
- Starter;
- manual transmission;
- Valve cover gasket;
- Cooling system pipe connections;
- Radiator;
- Thermostat;
- Expansion tank;
- Vacuum brake booster.
Due to poor quality, oil seals require more frequent replacement than required according to the operating manual.
The generator has a high probability of failure. As a rule, it burns out even on new cars that have not reached 4,000-10,000 km.
The starter has a low service life without repair.
The valve cover gasket loses its properties over time and allows oil to leak out.
The connections of the cooling system pipes in the places where the clamps are installed are not reliable and lose their tightness very early, which is fraught with loss of antifreeze.
The radiator is leaking. The problem occurs due to the appearance of cracks in the radiator pipe package, accompanied by loss of coolant. This defect has become widespread.
The thermostat does not provide thermal conditions for the coolant in the engine cooling system. The manifestation of this problem is no exception. The cause of the defect is a failure of the valve mechanism inside the thermostat. To check that the thermostat is working properly, after starting the engine, simply place your palm on the lower (outlet) hose, through which hot antifreeze circulates into the radiator for cooling. If the thermostat is working properly, after some time the hose should become hot; if the hose remains cold, the thermostat must be replaced.
Vacuum brake booster (VUT). Manifested by a stiff brake pedal. The speed may fluctuate when the brake pedal is pressed, as well as hissing. The problem is solved by replacing failed rubber products and replacing clamps in connections.
- Vibration at speed 80-90 km;
- Unreliable timing tensioner design;
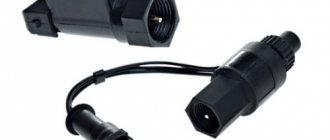
- Ignition module;
- The fuel pump is noisy;
- Low torque;
- Long stroke of the gear lever;
- When the timing chain breaks, the valves bend;
- Vibration of the gear lever;
- Poor dynamics on the highway due to insufficient power.
Conclusion.
PS. Dear Nivovody! I look forward to your comments, questions and feedback on the problems that have arisen, weaknesses and shortcomings during the operation, maintenance and repair of the VAZ 21213 engine.
In this way, L-shaped through channels are obtained. After installing the studs at the factory, the connections remain sealed for some time and the problem is not identified when the quality control department employees accept engine tests. After the sale of new cars with low mileage, during sharp braking, oil begins to seep through the studs onto the hot intake manifold, so much so that smoke from the oil burning in the manifold pours out from under the hood, and accordingly, there is nothing to breathe in the cabin.
A sketch for the technical specifications for eliminating oil leaks from under the exhaust manifold studs.
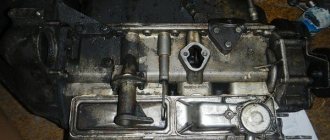
- Remove the GC cover;
- Unscrew the two studs securing the bearing housing (see sketch) and remove oil from the threaded holes;
- Thoroughly degrease the holes and stud;
- Apply sealant UG-10 or its analogues to the lower threads of the studs;
- Place the studs in place;
- Tighten the bearing housing nuts;
- Install the cylinder head cover;
- Wait at least 30 minutes for the sealant to set.
Also interesting: What kind of oil to pour into the Niva: types, choice, rating of the best, quality and purpose of the oil