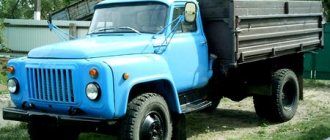
Replacement and repair of the UAZ 31512 UMZ-421 engine
Assembling a new UAZ 31512 engine
We have a completely new engine - UMZ-421, assembled, unlined.
True, it does not have a cylinder head
Well, the assembly of our new engine has begun.
That’s how it turned out, but they capitalized on it. In short, it would be better not to climb there. Why didn’t those who assembled the motor have any other tool at hand other than a hammer? The rings were tightly hammered into the piston grooves, the compression rings were mixed up with the oil scraper rings. The rings were all broken, the grooves on the pistons were broken.
There are also some strange shavings in the pan and on the oil receiver.
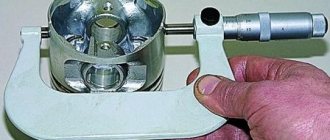
It's just a miracle that there are no scuffs in the cylinders, lucky. The crankshaft and camshaft are new, ideally. Now you need to purchase a set of piston group and liners. Well, one more trouble. There are no markings on the pistons and you will now have to buy a micrometer or caliper to measure them as the block may have been bored out.
The piston group was completely broken due to incorrect installation of the piston rings.
It needed to be replaced. In the morning, a caliper was purchased in order to measure the diameter of the piston. Here's a question for Umz engineers - WHY?
THE PISTON MARKING COULD NOT BE POSTED ON IT RATHER THAN WRITING IT IN WITH PAINT?!
Measured. The diameter turned out to be 100.5 mm. Next, we went to the store, where we purchased a repair kit, which included pistons, mandrels, rings and pins.
And also, in addition to all this, all around inserts were purchased on top.
Everything was purchased at an auto parts store. When everything was purchased, we went to put all the parts in their rightful place. Everything went like clockwork, but when we inserted the 2nd piston, the oil scraper ring came out from under the mandrel and split.
Fortunately, there was another ring in the bins, it got through. in fact, there were no problems with the rest, and the piston quickly fell into place, just like original. Our next goal was to flush the oil receiver. Using gasoline and a needle, the oil receiver mesh and its insides were cleaned. Also, the bell was disconnected from the block in advance, because the bell from the gazelle does not fit
. Well, actually, now all that remains is to install the cylinder head, and the installation of the new engine in the car will begin.
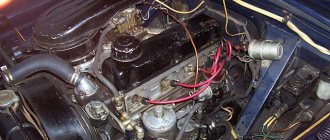
Removing the old UAZ 31512 engine
We finally got there.
We gathered our courage and went to remove the engine. There were problems removing it. But despite all the difficulties, we went to implement it. The cylinder head, everything attached, the cooling system, and the radiator were removed a long time ago.
All this was done to make the engine as light as possible.
Then, the car was rolled onto the inspection pit. The oil was drained from the gearbox, gearbox and engine.
Next, the cardan shafts were removed.
They were held on by two bolts each. How it all didn’t fall apart, I don’t know. The RC and checkpoint were removed. To do this, we removed the cross member on the frame; the box was held on by one (!) bolt. The extensions and awning have also been removed, and the installation of the metal roof will begin soon. That's all for now. The hardest part is ahead, removing the old engine and installing a new one.
The box was held on by one nut, but it was not just a nut, but something incomprehensible, rusted and fused with the stud. Plus, it is also located in a very “convenient” location. Having fixed the box with a crowbar and a cable, jacking up the engine under the bell, we began to struggle with unscrewing this nut. It took about an hour to fix this nasty nut.
Then they pulled out the clutch and disconnected the bell and flywheel.
Well, what happened next was what we were most afraid of, pulling out the engine. Since the previous owner welded the face tightly, the engine had to be raised a good one and a half meters, which is quite difficult. We decided to try to pull it out just the two of us. They attached the engine with belts to the same crowbar, and with heavy efforts they finally pulled it out. Still, this must be done, if not with some kind of lift, then at least with four people.
Installation of a new UAZ 31512 engine
After successfully removing the old engine, after a short break, we began installing the new engine.
In a similar way, using belts we attach the motor to our favorite crowbar, grab it, lift it, and place it. It's simple. But it’s a little hard for two people, even with the muzzle still on :(
Then the bell was set.
https://www.drive2.ru/l/3133627/, https://www.drive2.ru/l/3250099/, https://www.drive2.ru/l/3283796/, https://www .drive2.ru/l/3451082/, https://www.drive2.ru/l/3507485/, https://www.drive2.ru/l/3507579/
Engine repair ZMZ-402 UAZ 469
Disassembly and troubleshooting of the ZMZ-402 engine Assembly of the cylinder block of the ZMZ-402 engine Implementation
Source
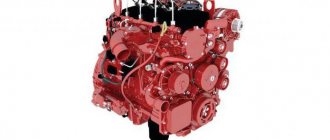
Engine UAZ 421
The UMZ-421 engine has been produced since 1996 and is installed on Ulyanovsk models:
Instead of an oil seal packing, this engine uses a rubber oil seal as the rear crankshaft seal. This motor has the following characteristics:
- volume – 2890 cm³;
- power – 98 l. With.;
- piston diameter – 100 mm;
- compression ratio (compression in cylinders) – 8.2;
- piston stroke – 92 mm;
- type of fuel used - AI-92 gasoline.
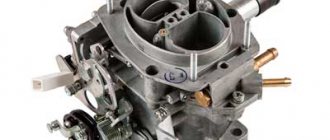
There is also an internal combustion engine version designed for A-76 gasoline fuel, the power of such a power unit is 91 hp. With. (accordingly, the compression ratio is 7.0). UMZ-421 engines are equipped with K-151E type carburetors.
Do-it-yourself UAZ engine overhaul
Changing unsuitable spare parts or restoring them will help to revive the engine and return it to its original agility and obedience. All spare parts must be the correct size. The stores offer a varied selection of pistons, piston rings, intake and exhaust valve seats, and crankshaft connecting rod bearing inserts. The size of the part can be checked with sales consultants.
Bulkhead UAZ engine
Engine wear is significantly affected by deterioration of lubrication of rubbing surfaces, which depends on an increase or decrease in clearances. To rebuild the engine yourself, you first need to dismantle it. This is done as follows:
- drain the antifreeze and oil from the pan;
- separate the air intake filter and unhook the muffler pipe from the engine;
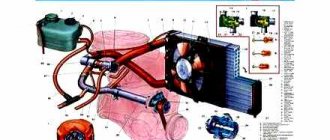
- disconnect the cooling system pipes, oil radiator and heating devices from the engine;
- remove the cooling system radiator;
- separate the throttle and air valve drive rods from the carburetor;
- remove all wiring from the motor;
- Unscrew the bolts of the lower and front support cushions.
Now he removes the engine from the UAZ 3303. For this, a bracket specially designed for this purpose is installed on the cylinder head studs. The engine needs to be jacked up and the gearbox separated from it. The motor can be removed by lifting it up.
Other actions will lead to the need to remove the transfer case and gearbox along with the engine.
Disassembling the UAZ engine
Before starting to disassemble the engine, the gearbox and transfer case are disconnected from it, for which the engine is installed on a rotary stand 647-00-00. Then, using a gripper and an electric hoist, hang the gearbox with the transfer case, unscrew the nuts securing the gearbox with the clutch housing and remove it.
Rice. UAZ-469 engine: a - longitudinal section; b - cross section
After this, disassembly begins:
- remove high voltage wires 23, generator, coil and spark plugs 24;
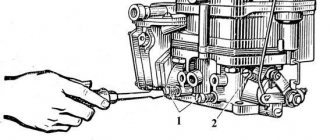
- remove the breaker-distributor 22, having first unscrewed the vacuum regulator tube, the fuel pump, the fuel filter, the fuel line, the carburetor 19, disconnecting from it the vacuum regulator tube, the oil measuring rod tube, the oil filter 17 and the adapter along with the sensors, the inlet and outlet pipelines 18;
- remove the crankcase ventilation filter 20, the cylinder head cover 21, the rocker arm axis 11, remove the pusher rods 12 and then remove the cylinder head 13;
Rice. Valve spring remover: 1 - lever, 2 - snob; 3 - ring 4 - rod; 5 — bar; 6 - cam
Rice. Fastening the sleeves in the block: 1 - washer; 2 — cylinder block; 3 - nut; 4 — hairpin; 5 - spacer sleeve
Rice. Puller for timing gears and crankshaft pulley hubs and water pump
Rice. Device for assembling (disassembling) the crankshaft with the flywheel
Rice. Transmission drive shaft bearing puller
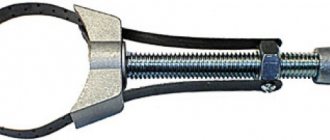
Rice. Cylinder block liner remover
Rice. Tool for removing and installing piston rings
Source
see also
Comments 25
I’ll write you a PM now! Otherwise they will still swear!