Main Causes of Fuel Injection Problems
Fuel-related problems can fall into one of three main categories:
- The check engine light is on, but there are no obvious exhaust or exhaust problems;
- The “check” light is on and there are problems with the exhaust or exhaust;
- No code but drivability or emissions issue.
The first two problems are easier to diagnose because at least you have something to start with (trouble code). The last problem (no code) is the hardest because you only have the symptom(s).
If the Check Engine light is on, you know the computer has encountered one or more diagnostic errors. When you plug in your scan tool, you know you'll find some information that should lead you in the right diagnostic direction.
Without further ado, we all know that some codes are more useful than others. It depends on the code, the conditions that are required to set it, and the diagnostic procedures that follow it. The code indicates that a particular sensor is operating outside its operating range, which is usually a clear sign that there is a problem in the circuit containing the sensor. But if this code is accompanied by other codes, they often indicate an operating condition that disables the sensors.
Having more than one code can sometimes make things worse because you may not know where to start. Should you analyze the errors as a whole, or should you step back and try to figure out what kind of damage is causing many errors? This is a rhetorical question and experts have not had an answer since the invention of the internal combustion engine.
Let's say you have a late model OBD II and a four cylinder engine. The check light comes on and the engine idles a little rough with some vibration. You connect your scan tool and find a code P0131, which indicates that the O2 sensor is disconnected (or low) and a code P0300 indicating a misfire. Is there a problem with the oxygen sensor or something else?
The problem could be a faulty oxygen sensor, but more likely causes are a vacuum leak, low fuel pressure, or dirty injectors due to the fuel mixture, causing the engine to run poorly and misfire.
The cause could also be bad fuel. What you do next will depend on the type of diagnostic equipment and what you think is the most likely cause of the failure.
You can start looking for the problem by checking the intake manifold and vacuum hoses for obvious leaks. If this is not the problem, you can connect a vacuum gauge to see if the vacuum reading is stable at idle and within the normal range.
A low reading may indicate a vacuum leak or possibly a leak in the EGR valve. If the readings are abnormal, further examination of the system will be required to determine the cause.
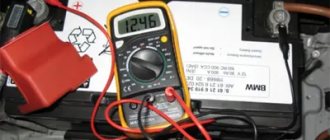
You can then use a multimeter to look at the performance of the O2 sensor. If the O2 sensor responds normally when you temporarily richen the fuel mixture by feeding fuel, or feed mixture by turning off the vacuum line, you can probably assume that the O2 sensor is fine.
And if the engine control system is in closed loop (check the condition of the loop) and the injector is operating in response to changes in the O2 sensor reading, you can assume that the feedback fuel control loop is also operational.
You can then connect a pressure gauge to the fuel line and check the fuel pressure and fuel pressure regulator operation. Check if the pressure changes when you disconnect the regulator vacuum line or clamp the return hose?
Low pressure readings suggest a problem with the pump, while no change in pressure readings when operating the regulator will indicate a valve malfunction.
If the fuel pressure is normal, you can look at the behavior of the injector. Does the position change when you press the throttle or make the mixture rich or lean?
You can also use a multimeter to check the engine's secondary ignition circuit. When one or more (but not all) ignition lines are sloping to the right and ignition timing is shortened, this indicates a lean condition of fuel in the cylinders being tested.
A rich mixture is more conductive than a lean mixture and requires less voltage to maintain a spark. On a fuel injected engine, this may be a symptom of a dirty, clogged, or inoperative fuel injector.
Premature spark extinction can also be caused by poor cylinder performance due to a rounded cam or a leaking exhaust valve.
A lean fuel mixture will also cause the KV value at startup to be higher than normal.
If the fuel mixture is rich because the O2 sensor is not working or the feedback control system is stuck in an open loop, the ignition line section of the secondary ignition circuit will show thin lines (hair-like) from the ignition line. This is caused by the increased conductivity of the rich mixture. KV starting voltages will also be lower than normal and ignition duration will be longer than normal.
Another alternative would be to connect an exhaust emission analyzer to analyze carbon monoxide (CO) and hydrocarbons (CH).
If the CO content is higher than normal, this indicates that the mixture is richer, while an increased CH content indicates the presence of misfire or compression problems (lean mixture, misfire or burnt exhaust valve).
If you use an exhaust gas analyzer in conjunction with a power balance test, you can see if the CH reading changes each time an injector is closed. The absence of changes in CH will indicate a faulty injector.
If the change in CH on one cylinder is noticeably less than on the others, this indicates that the injector is probably not working as expected and needs to be cleaned or replaced.
If you suspect your injectors are dirty, the next step may be to clean the injectors on your car. If you have an injector cleaning bench, you can pull the injectors out, test them on the bench, and clean them to see if normal performance can be restored (if not, you'll have to replace the injectors).
According to some experts, the difference in flow rates between individual injectors in a multiport system can be no more than 7-10%, which can cause noticeable problems with engine performance.
Some cylinders will run too rich and others will run too lean. Ideally, all injectors should operate within 3-5% of each other.
If this does not happen, the computer compensates for the lack of fuel in the leanest injector, forcing all the others to become richer.
TO
category:
Car fuel equipment repair
P
publication:
Determining the technical condition of the engine power system when diagnosing a car
H
read more:
Basic work performed during maintenance of the power system
Determining the technical condition of the engine power system when diagnosing a car
The technical condition of the engine power supply system as a whole can be determined by the methods of running and bench tests. The condition of individual system elements is determined by in-depth or element-by-element diagnostics during bench tests.
During road tests, fuel consumption is determined for a vehicle moving at a constant speed on a measured section of road 1 km long. During testing, the engine is powered from a measuring tank connected to the pump and equipped with a flow meter scale.
Before the test run, the engine and all components are brought to normal thermal condition. Then the test begins: the car is accelerated to a constant speed of 40-60 km/h and passes a measuring section at this speed, determining fuel consumption. To ensure the required measurement accuracy, the runs are repeated 2-3 times and the average fuel consumption is calculated. By comparing the obtained flow rate with the passport value, a conclusion is drawn about the state of the power system.
Promotional offers based on your interests:
These road tests do not fully determine the state of the power system, since fuel consumption can be affected by road conditions at the time of testing, engine load, and deviations in the condition of other systems, assemblies and components of the vehicle. In addition, road tests are highly labor-intensive and cannot be used to test the power systems of a large number of vehicles.
It is preferable to determine the state of power systems of car engines on a stand with running drums. Such a stand is usually equipped with a brake, which allows it to absorb the energy supplied from the engine to the wheels of the car. This makes it possible to simulate vehicle driving conditions and check the operation of the power system in all modes.
The process of diagnosing the power system is an integral part of the general check of the technical condition of the vehicle. At the same time, it is possible to obtain accurate information about the condition of almost all vehicle systems, determine its traction properties and fuel consumption.
Using the stand, you can conduct in-depth diagnostics of individual elements of the power system. To do this, at the diagnostic station, in addition to the stand with running drums, additional instruments and equipment are placed: a speedometer with a counter for the distance traveled, operating from the stand drums; device type RT-71 or K-427 for measuring fuel consumption; pipelines with transparent insert; a vacuum gauge or mercury piezometer to measure the vacuum in the engine intake manifold; a device of the NIIAT-527B or K-436 type for checking the operation of the fuel pump on a car; a device for checking the fuel level in the carburetor float chamber (for carburetors that do not have level gauges); gas analyzer type Elkon S-105 or K-456 for assessing the content of carbon monoxide in engine exhaust gases; a set of oil densimeters for determining fuel density.
Work on diagnosing the power system is organized as follows. The car is placed on a stand and all measuring instruments and devices, as well as a hose for exhaust gases, are connected to it.
After this, the engine and transmission units of the car are warmed up for 20-30 minutes, using a dynamometer brake to create the necessary load on the running drums of the stand. During the warm-up process, the car's speedometer readings are compared with the stand's trip meter readings and a correction factor is found. Check the tightness of the fuel supply lines from the flow meter using a transparent insert. If air bubbles are found in the fuel stream, this indicates a leak in the airtightness, and this problem is corrected.
After this, check the operation of the fuel pump and the tightness of the carburetor needle valve (using the K-436 device), the fuel level in the float chamber, and the carbon monoxide content when the engine is idling (with a gas analyzer). If necessary, adjust the carburetor idle system at low crankshaft speed. The ignition setting is clarified (using the K-437 device) and proceed to the main tests for diagnosing the power system.
These tests are carried out in three modes: – the first mode allows you to check fuel consumption at full load and maximum opening of the throttle valves in the carburetor; – second – at medium load; - third - when the throttle valves are opened, corresponding to the start of the economizer operation. In each mode, the load value, the degree of opening of the throttle valves or the vacuum in the engine intake pipe, the speed and other indicators are set in accordance with the control values given in the diagnostic station instructions.
Comparison of the obtained fuel consumption values in all three test modes with control data allows us to assess the condition of the engine power system of the test vehicle.
Next, the final stages of diagnosing the technical condition of the vehicle are carried out: its traction and dynamic performance and the operation of the maximum rotation speed limiter (for trucks) of the crankshaft are checked.
If, when checking the operation of the vehicle at the diagnostic station, it turns out that the engine consumes fuel above normal or the dynamic properties do not meet the required indicators, an element-by-element check of the ignition system parts is carried out, the condition of the engine cylinder-piston group and the chassis of the entire vehicle is determined. This work is carried out partly at the stand, and partly in the workshops of the motor transport enterprise. Parts and components of the power system are subjected to element-by-element diagnostics and adjustment in a carburetor workshop or area equipped with special equipment and instruments.
Promotional offers:
Read more: Basic work performed during maintenance of the power system
TO
Category: — Repair of fuel equipment of cars
Home → Directory → Articles → Forum
When there is no error code
No-code problems are the ones that everyone hates, especially when the symptoms appear intermittently. In these situations, you should look at the symptom(s) and make some educated guesses about what to look at first.
As before, the approach to solving a non-code problem will depend on what you have in your diagnostic arsenal.
If you have an emissions analyzer, you can look at the exhaust gases first. If you have a multimeter or oscilloscope, you can check the sensor, injector, ignition, or even the fuel pump waveform.
Since most technicians today own some type of scanning tool, checking the system data is the same place to start even when there is no error code.
One of the first things you should check is the state of the loop. The fuel system cannot deliver the correct fuel mixture if the circuit is open.
If the engine cannot enter a closed loop after it has warmed up or been running, it may have a faulty coolant sensor or an open thermostat.
The next logical step would be to look at the coolant sensor output to see if it is working normally or if its resistance changes as the engine warms up. No change in resistance or readings that are out of range will tell you that the coolant sensor is bad.
To check the thermostat, you can use an infrared thermometer to measure the coolant temperature at the thermostat outlet after the engine has warmed up. If the temperature reading is low, the thermostat may be open, missing, or not at the correct engine temperature rating.
You can also look at the short and long term fuel trim to see if the engine is running rich or lean.
If the system enters a closed loop, look at the TPS and MAP inputs to see if they change as the throttle position changes.
Troubleshooting the fuel system. Expert advice
Diagnostic approach to solve the problem when there is no startup:
- Check the spark to rule out ignition problems;
- Check the presence of fuel to rule out an empty tank, a broken fuel pump or a problem with the fuel line;
- Check compression to ensure there is no broken cam, timing chain or timing belt.
If all of the above are OK, remove and check the spark plug. If the insulation is wet, this will tell you that the engine is flooded due to too much fuel. The root cause could be a faulty coolant sensor or a leaking injector(s).
On many cars, it is impossible to start the engine if the oil pressure switch is bad. The oil pressure switch is connected to the fuel pump relay circuit to cut off voltage in the event of loss of oil pressure. This is to prevent fuel from splashing out from a ruptured fuel line in the event of an accident.
Some cars also have an inertial kill switch hidden somewhere in the body (look in the trunk, under the back seat, or in the rear seat side panels) to cut off the fuel in the event of an accident. The switch can be reset by pressing the reset button.
Poor starting in some older fuel injection systems can be caused by a faulty cold start injector. A timed relay energizes the injector when the engine starts to provide additional fuel.
Most problems here can be attributed to electrical faults in the control relay or wiring.
Use a test light to check the cold start injector when starting the engine. No voltage means the relay (or its fuse) is faulty.
Diagnostics of the technical condition of the power system
The technical condition of the power system can be determined by measuring fuel consumption and comparing it with the control flow rate, by the content of carbon monoxide in the exhaust gases, and by testing power system devices in special installations. The model K-456 device, intended for diagnosing the power system of a carburetor engine, consists of a gas analyzer and a tachometer. Exhaust gases are taken from the exhaust pipe of the muffler. When the engine is running at low crankshaft speed in idle mode, the carbon monoxide content should not exceed 1.5%.
A higher carbon monoxide content indicates a carburetor malfunction or inaccurate adjustment and is accompanied by increased fuel consumption. The device allows you to observe changes in the content of carbon monoxide during the process of adjusting the carburetor on a car. The tightness of connections of fuel lines, carburetor, fuel pump, fuel tank, muffler is checked by external inspection. When disassembling carburetors, it is recommended to be careful not to damage the gaskets and parts.
Jets, valves, needles and channels are washed in clean kerosene or unleaded gasoline at a post with air suction or in a fume hood. After washing, the jets and channels in the carburetor body are purged with compressed air. Do not use wire or any metal objects to clean jets, channels and holes. It is also not allowed to blow compressed air through the assembled carburetor through the fuel supply fitting and the balancing hole, as this will damage the float.
When assembling a carburetor, you cannot swap the jets, since, for example, the jets of the same name in the primary and secondary chambers are the same in design, but have different performance (different calibrated holes). The carburetor assembly is checked on a NIIAT device (model 577B) or on a non-motorized NIIAT-489A unit. If the fuel consumption of the carburetor being tested differs noticeably from the control one, it is necessary to disassemble the carburetor and check the condition of its parts.
To check carburetor jets for throughput, i.e., for the flow of liquid under a certain pressure through the jet per unit of time, special instruments are used.
“Car of category “B”, V.M. Klennikov, N.M. Ilyin, Yu.V. Buralev
Fuel injector seals
Wear at the injector bore and/or accumulated deposits can sometimes prevent the needle valve from seating inside the injector, allowing fuel to flow out of the injector.
Excess fuel begins to richen the mixture, which in turn can foul the spark plugs, increase emissions and cause a floating idle.
A carbon-fouled spark plug in one cylinder of a multiport EFI engine usually indicates a leaky injector. If cleaning does not eliminate the leak, the injector must be replaced.
Problems at idle
Idle problems can usually be related to an air or vacuum leak, or in some cases, a faulty backup idle control motor control system or a loose idle circuit. Leaks allow "unmetered" air into the engine, which enters the fuel mixture.
The computer compensates for this by richening the mixture and disabling the idle bypass circuit. Therefore, one sign of a vacuum leak is a completely closed backup system.
You can use your scan tool to check for vacuum leaks by looking at the fuel trim values.
If the engine has a vacuum leak, the fuel system trim values will typically be higher than normal (positive) when the engine is idling, but will decrease to normal as the engine speed increases.
This is because vacuum leaks have less effect on the fuel mixture at higher engine speeds than at idle.
Engine power system diagnostics
Parameters of the technical condition of the engine power supply system
Power, fuel consumption, starting performance, stability of operation at low idle speeds, vehicle dynamics, and exhaust gas toxicity depend on the condition of the power system devices During engine diagnostics, the operation of the power system must be checked.
The correct dosage of fuel and air, the cleanliness of the air entering the engine, and the quality of fuel atomization also affect the wear of parts of the crank mechanism and engine power system devices, especially fuel pumps and diesel injectors.
Normal engine operation is ensured by the good condition of fuel and air filters, precision pairs of high-pressure pumps, valves, injectors, carburetor adjustment, cleanliness of the intake pipeline, and the tightness of the entire power system, which also guarantees the fire-proof condition of the car. In practice, the engine often does not start or operates intermittently due to improper adjustment or clogging of one of the elements of the power system. Sometimes engines are sent for major repairs for reasons, allegedly, deterioration in dynamics, excessive fuel consumption, which in fact (after diagnosis) depended on the condition of the fuel system , and not on the wear of the cylinder-piston group or gas distribution mechanism. In particular, the content of carbon monoxide in the engine exhaust gases depends on the composition of the working mixture prepared by the carburetor: carbon monoxide increases when it is enriched, especially when operating at low speeds. Carburetor adjustment at low speeds should be performed for each engine individually. It is impossible to reduce the content of carbon monoxide in the exhaust gases by turning out the “quality” screw by the same amount for different engines of the same brand with the same carburetors. In this case, adjusting the carburetor to idle speed should be carried out after adjusting or checking the ignition system and valves of the gas distribution mechanism, on warm engine. The range of regulation of the mixture composition with the “quality” screw is quite wide: from an over-lean mixture, which causes unstable engine operation, to an over-rich mixture, in which the content of carbon monoxide in the exhaust gases can reach 9% or more,
Emerging malfunctions of power system devices ( Table 5) cause failures in engine operation.
Clogged fuel filter
A clogged filter can restrict fuel flow and cause the engine to stall, resulting in loss of power at high speed, a lean fuel mixture, or stalling (no starting) if severe blockage occurs.
The easiest way to check the filter is to remove it and try to blow air through it.
If the filter is clogged with rust or sediment, it is recommended to drain and clean the fuel tank to prevent further failure. If the tank is severely corroded inside, it is recommended to replace the fuel tank.
A restrictive filter sock on the fuel pump sensor can also cause similar symptoms. So, if the filter is fine or replacing it doesn't solve the problem, you may need to remove the tank, remove the pump, and inspect, clean, or replace the filter sock.
