Causes of oil waste
Well, in general, this is the second question. First you need to find out where the oil goes from the engine if the leak is not visible from the outside? The debate about the natural waste of oil has been going on for many years. There is only one conclusion - if you don’t want the engine to “eat up” the oil, don’t fill it at all! The point is this. The service life of the engine is ensured by good lubrication, and even more so by the lubrication of the piston rings and, as a consequence, the surface of the cylinders in the form of an oil film. So much for natural insanity.
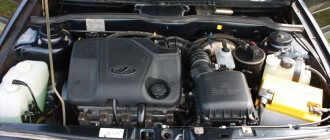
When designing a modern engine, oil loss due to waste is initially 0.1-0.3% of the volume of fuel used . In addition, with different types of operation (river transport, cars, generators), oil burn readings vary significantly! Well, since the engine of the VAZ 21213 is frankly “weak” and, due to the specifics of the vehicle’s operation, operates under increased loads, the passport parameter for oil waste does not last long, after which oil consumption begins to increase significantly. Why? In addition to the mentioned natural burnout, there are several other reasons:
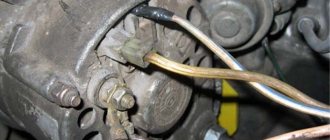
- Oil release through the internal combustion engine ventilation system. The wear of the CPG (cylinder-piston group) directly depends on the pressure of the crankcase gases, whose speeds increase, which contributes to a greater extraction of oil into the atmosphere (in modern cars for “afterburning”);
- A trivial leak in places where engine components do not fit tightly.
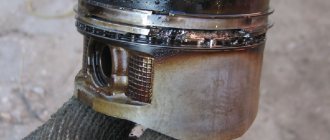
Attention: In general, if you see all of the above defects in your car. If you are convinced that the CPG is worn out (by measuring the compression - at least 8 kgf), then replacing the piston rings of the VAZ 21213 is the most economical option for you. In case of such wear of the internal combustion engine, a good owner will, among other things, check the wear of the cylinders, connecting rod liners and, if necessary, replace not only them, but also the entire piston group with valve stem seals. Everything here is limited only by the price of the repair issue.
How to remove the engine from Niva 21213
1200 rub. for the photo report
We pay for photo reports on car repairs. Earnings from 10,000 rubles/month.
Write:
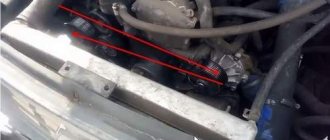
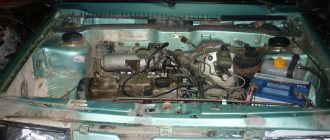
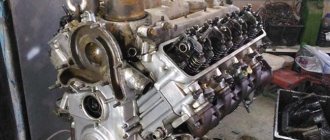
To remove the engine on a Niva (VAZ 2121), the first thing you need to do is remove the hood, pour in antifreeze, and remove the radiator. Then the head is removed and the engine is spun. Next, it is jacked up and the car engine is removed using slings (ropes).
Don’t expect details of removal and unscrewing of each bolt; if you decide to remove the engine, then you have some experience, but to make it easier to cope with the task, the sequence of dismantling the parts is described and the process of how to remove the engine from the Niva is clearly visible. Watch the video for more details.
Checking parts and assembling the VAZ-21213, VAZ-21214 engine
We discussed engine disassembly in the article “Engine Disassembly”.
After disassembly, thoroughly wash the parts with kerosene, blow and dry them with compressed air (especially the oil channels of the parts).
Inspect the block, especially carefully the crankshaft supports.
Cracks in any place in the block are not allowed.
If there is a suspicion of cracks in the block (coolant has entered the crankcase or oil has entered the coolant), check the tightness of the block on a special stand.
Carry out the check in repair shops that have the appropriate equipment.
Inspect the cylinders on both sides.
Scratches, nicks and cracks are not allowed.
When inspecting cylinders, we recommend illuminating the cylinder mirrors with a portable lamp - in this case, defects are visible much better.
1. To determine the wear of the cylinders with a bore gauge, we measure the diameter of the cylinder in four zones and two planes (parallel and perpendicular to the axis of the crankshaft).
Removal and installation of the Chevrolet Niva engine (Chevrolet Niva)
All work on removing the power unit should be carried out only by experienced specialists. The process requires a hydraulic lift with sufficiently high power, available in specialized car services.
Removing and installing the Chevrolet Niva door is a process that has its own characteristics and a certain order of execution. In this case, it is necessary to decide what exactly will be used - removal for repair or removal for analogue replacement.
What actions can lead to engine replacement?
Of course, comprehensive engine diagnostics are also necessary, aimed at finding faults using high-precision computer equipment. Only based on its results the need for this process is determined.
Avoid common mistakes, for example, removing the engine without disconnecting the coupling - this mistake can lead to serious problems, including replacing the entire Chevrolet Niva engine. You will be helped by contacting a specialized high-quality car service - Running Motors.
Our specialists thoroughly check the engine, clean the engine surfaces and engine compartment, and remove old fasteners. Depending on the configuration of the Chevrolet Niva car (Chevrolet Niva), the electrical wiring may be located differently, therefore, all disconnected electrical connectors, tubes and hose connections are marked.
The drive is also disconnected in any Chevrolet Niva car - front-wheel drive or rear-wheel drive. On front-wheel drive cars, the engine is removed downwards from the engine compartment, and after disconnecting the engine, a certain amount of work is performed, which has its own characteristics.
Services for replacement and re-installation of the Chevrolet Niva engine (Chevrolet Niva)
Removal and installation of the Chevrolet Niva engine oil pump may be required for any car after a certain mileage, as well as for major vehicle repairs. On most domestic cars, removal and installation of the engine is possible simultaneously with dismantling the gearbox, which is carefully inspected. In many cases, this requires replacing the oil seal.
After removing the gearbox, the clutches and release bearings are inspected. The engine, combined with the gearbox and clutch, and making up a single unit, has attachments to the body, which is typical for Chevrolet Niva cars. We remind you that professional removal and installation of the engine assembly is a process on which a lot depends and it is necessary to correctly follow the sequence of work.
Installing a VAZ 2107i engine on a VAZ 2121
Installing a VAZ 2107i engine on a VAZ 2121
Post by ozu_RAMX » Jan 29, 2013, 11:52 am
Re: Installing a VAZ 2107i engine on a VAZ 2121
Post by Vovchik » Jan 29, 2013, 01:20 pm
Re: Installing a VAZ 2107i engine on a VAZ 2121
Post by Pavel555 » Jan 29, 2013, 8:04 pm
Re: Installing a VAZ 2107i engine on a VAZ 2121
Post by yosak » Dec 24, 2021 8:44 pm
Re: Installing a VAZ 2107i engine on a VAZ 2121
Post by Egor44 » 14 Aug 2021, 20:51
Re: Installing a VAZ 2107i engine on a VAZ 2121
Post by kuzovok78 » 15 Aug 2021, 15:37
Re: Installing a VAZ 2107i engine on a VAZ 2121
Post by Egor44 » 15 Aug 2021, 21:57
Re: Installing a VAZ 2107i engine on a VAZ 2121
Post by Spiteful critic » Aug 15, 2021, 10:15 pm
Re: Installing a VAZ 2107i engine on a VAZ 2121
Post by Operator » Aug 15, 2021, 10:45 p.m.
Re: Installing a VAZ 2107i engine on a VAZ 2121
Post by Nosmoking » Aug 15, 2021 10:48 pm
Damn, Slavs, for sure! At 18 times the speed drops! And this is if the front end is disabled! But if you turn it on.
Re: Installing a VAZ 2107i engine on a VAZ 2121
Post by Operator » Aug 15, 2021, 10:50 p.m.
Re: Installing a VAZ 2107i engine on a VAZ 2121
Post by Nosmoking » 16 Aug 2021, 08:11
Exactly! Now they are installing a gearbox from Duster! They are more powerful and durable!
Re: Installing a VAZ 2107i engine on a VAZ 2121
Post by ustav » Aug 16, 2021, 10:08 am
Replacing the pan gasket VAZ 21214
The internal volume of the engine must be sealed. The oil pan is a removable part located at the bottom of the power plant. In fact, this is a consumable container for motor oil. If this element leaks, the amount of oil will decrease and the lubrication system will be disrupted. The consequences can be very sad - expensive repairs of a worn out or even jammed engine.
Reasons for oil leakage from the pan:
The VAZ 2121 is regularly used off-road, and it is possible that the bottom of the engine touches the ground. This is an extreme situation that can lead to a hole. Also, when the pallet hits the ground, the landing plane can be deformed. Due to such damage, the gasket that ensures tightness often breaks. Crankcase deformation due to overheating. If the size of the damage exceeds the thickness of the gasket, oil begins to leak out of the engine. Excessive tightening of the mounting bolts leads to destruction of the gasket. The other side of the coin is insufficient tightening torque. If a leak is detected, tighten the fastening bolts. Banal damage from old age or poor quality of the factory part. If broaching does not help, a simple replacement process awaits.
How to change the pan gasket yourself
The only condition is the presence of a hole in the garage, or an overpass. Despite the high ground clearance, replacement at ground level is not possible. Drain the used oil. To do this, the machine warms up, then you need to wait up to 10 minutes until the liquid collects at the bottom of the pan.
Important! Take precautions against hot liquids coming into contact with your body. After unscrewing the drain plug, a strong stream sprays oil in all directions. To change the gasket, you will have to raise the power unit by 15-30 centimeters. Loosen the fastenings of both rubber engine mounts and unscrew the gearbox from the fastenings of the front axle and engine.
Replacement video manual 2121, 21214, 21213, 2131
Washing and removing the Chevrolet Niva (VAZ 2123) engine with your own hands in a garage
Do-it-yourself Chevrolet Niva (VAZ 2123) engine washing
A long time ago, when the neighbors were capitalizing on their engine, they suggested how to wash the engine in a garage. Here is a clear example of how you can wash the engine with your own hands and in a garage.
You will need a concentrate to clean the engine. There are different concentrations. Some are diluted 1/20, others 1/50. I use 1/20 undiluted. The one that should be diluted 1/50 is 1/1. The concentrate must be liquid. It seemed somehow gel-like. According to the seller, it was thermonuclear, but in reality it turned out to be so-so. I’ll post one that is sold in our store. Dilution 1/20. I don’t dilute it, I just pour it into a spray bottle.
1:1981
You will need a compressor with a spray can and a blower. To wash the engine and all parts, 1.5 liters is enough. WORK ONLY IN THE OPEN AIR, WITH GLASSES, RESPIRATOR, RUBBER GLOVES. Very caustic liquid. Spray the parts and wait a couple of minutes. During these couple of minutes, you can rub the carbon deposits with a paint brush; cleaning will be more effective. After a couple of minutes, rinse with water using a compressor and spray bottle. We look at what has been wiped off and where and continue the procedure.