What fuel pumps were equipped with classic VAZ models?
Classic VAZs include all models of the Zhiguli family, produced from 1970 to 2012 and their modifications:
- VAZ 2101;
- VAZ 2102;
- VAZ 2103;
- VAZ 2104;
- VAZ 2105;
- VAZ 2106;
- VAZ 2107.
Depending on the year of manufacture, the engines of these vehicles were equipped with different fuel systems. In all the first Zhiguli models, the fuel mixture was injected into the cylinders using a carburetor, and the fuel was supplied by a mechanical fuel pump. The latest modifications of the VAZ 2104, 2105 and 2107 had an injection system and an electric fuel pump.
Carburetor cars of the Zhiguli family were equipped from the factory with mechanical fuel pumps of the diaphragm type DAAZ 2101 (catalog number 1106010) produced by the Dimitrovgrad Automotive Unit Plant. Thanks to their simple design, reliability and maintainability, they have proven themselves well not only on the “classics”, but also on cars of the Sputnik and Samara families, which were equipped with their modified versions.
Carburetor VAZ 2101–2107 were equipped with DAAZ mechanical fuel pumps
Injection Zhiguli models were equipped with domestically produced electric fuel pumps. They were produced by the Pekar and Utes enterprises under catalog number 21073–1139009. The latest modifications of the Zhiguli were equipped with products (catalog number 2112–1139009). The same devices were installed on all models of the Samara and Lada families.
Injection models of classic VAZs were equipped with electric fuel pumps “Pekar”, “Utes”, “Bosch”
Car won't start after replacing fuel pump
A common occurrence after replacing a fuel pump is that the car will not start. Let's start with the fact that the car should not start right away, since the pump must first pump up the pressure in the system, which was previously released.
To create pressure in the fuel system, turn on the ignition for a few seconds (the lights on the dashboard are on, but the key does not turn to the “start” position). After this, you can turn the engine with the starter for 5-10 seconds. If the attempt is unsuccessful, you should wait about 30 seconds. and then repeat the procedure.
If the engine cannot be started after repeated cranking with the starter, then this indicates that:
- errors were made when assembling and connecting the fuel pump;
- the new fuel pump is faulty;
- there was a planned blockage or failure in the car’s security system;
In such situations, you need to determine the nature of the breakdown: mechanical or electrical. It’s easiest to figure out the power supply to the pump, since it’s either there or it’s not. As for a car alarm or immobilizer, the anti-theft system can block the car from starting by cutting off the power to the fuel pump. We should also not forget that the fuel filter may simply become clogged. When the valves on the pump stick, the device may hum and work, but idle.
If such problems occur, gasoline does not flow into the fuel rail and the engine does not start. To accurately determine the cause, you must first make sure that there really is no gasoline in the fuel rail. Then you will need to re-remove and connect the fuel pump directly from the battery or dimensions. This method of connecting the fuel pump directly is optimal for quickly checking the fuel pump yourself if the fuel pump does not pump.
Where is the fuel pump located on 2106, 2107 and other models
The location of the fuel pump on carburetor and injection classic VAZs is different. In the first, it is installed on the left (as viewed from the passenger compartment) on the engine cylinder block on a special boss, and is attached to it using studs through a heat-dissipating ebonite spacer. The mechanical fuel pump is driven from the engine intermediate shaft through an eccentric and a pusher (rod).
The mechanical fuel pump on the classic is mounted on a special boss on the engine cylinder block
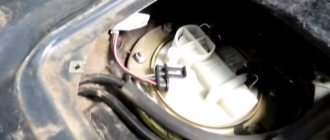
In injection Zhiguli cars, the pump is included in the design of the fuel module. It is located inside the gas tank. The design of an electric pump consists of a DC electric motor and a specially shaped impeller mounted on its shaft. The electric motor is powered from the vehicle's on-board network. The electrical circuit of the device is protected by a separate fuse and relay.
The electric fuel pump on injection classic models is installed in the gas tank
Diagnostics and replacement of the electric fuel pump on cars of the Zhiguli family
In injection engines of classic VAZs, the fuel pump may lose its functionality both due to problems with the power supply to it and due to a malfunction of its electric motor. In the first case, the situation can be corrected by diagnosing and repairing the electrical circuit of the device. But if the electric motor of the pump fails, only replacing it will help.
Checking the protection devices for the electrical circuit of the fuel pump on injection VAZs of the Zhiguli family
If there is a problem with the electrical equipment of the fuel pump circuit, it usually does not turn on at all. Turn on the car's ignition without starting the engine and listen. First, you should hear a click from the relay, and then a characteristic “squeal” emitted by the pump’s electric motor. If you don’t hear anything like this, start diagnosing with the electrical circuit of the device.
The pump circuit is connected to the on-board network via a separate relay, and its protection is provided by a fuse. Both of these devices are located in the vehicle's optional mounting block. You will find it under the glove box. It contains 3 relays and 3 fuses. The fuel pump relay (indicated R2 in the diagram) is located in the middle, and the fuse (F3) is to the left of it. We pull the fuse out of its seat and check it by “ringing” it with a tester. If a malfunction is detected, we replace it, not forgetting to comply with the rating (15 A).
You can check the functionality of the relay by installing a known working device in its place. Instead, replace it with the relay located to the right of the one being diagnosed, which is responsible for the radiator fan circuit. If this option does not suit you, turn on the ignition and measure the voltage between the pink wire going to the relay and the vehicle ground. The device should show 12 V. This means that the device is powered. After this, you need to connect the pink wire with the gray one at the relay terminals. So we will connect the fuel pump directly to the battery. If it works (that same “squealing” sound will be heard), simply replace the relay.
The fuel pump relay is located in the middle (R2), and the fuse is located to the left of it (F3)
Checking the fuel pressure in the system
The main indicator of the operation of a fuel pump is the pressure it creates in the system. If the device turns on, pumps fuel, but the engine runs intermittently, take the time to check the pressure. To do this, you will need a pressure gauge with a measuring range of 5–7, equipped with a gas-resistant hose and a threaded fitting (if there is no special one, you can use a regular tire pressure gauge). The sequence of actions is as follows:
- On the fuel rail we find a fitting closed with a plastic cap. Unscrew the cap and connect the pressure gauge hose to the fitting. If your device is not equipped with a special threaded fitting, the hose can be secured to the “nipple” using a small clamp.
Pressure connection - We start the engine and look at the instrument readings at idle. The pressure in the system should be between 2.8–3.2 atmospheres. Otherwise, the fuel pump is faulty.
The pressure in the ramp should be 2.8–3.2 atmospheres - Just in case, let's check the pressure regulator (also located on the ramp).
Without disconnecting the pressure gauge, disconnect the vacuum hose from it. The pressure should rise by 0.2–0.7 atmospheres. The pressure has not increased - we are replacing the pressure regulator. When removing the vacuum hose from the regulator, the pressure should drop by 0.2–0.7 atmospheres
Popular breakdowns
Problems with the fuel pump can occur for several reasons. Therefore, your first priority is to determine the source of the problem. These may be:
- Fuel pump fuse;
- Fuel pump relay;
- Pump weight;
- Motor;
- Contacts;
- The pump itself.
If one of these elements fails, it can stop the normal functionality of the entire module.
Let us consider the situations with each of the specified elements of the fuel module in more detail.
Pressure
What exactly is a fuel pump? This is an element of the fuel system that allows fuel to pass through due to pressure. Therefore, if you take pressure measurements, you can get answers to many questions.
Let's give an example of normal pressure readings when checking in certain modes.
| Check mode | Normal indicator |
| At idle | 2.5 atm |
| When ignited | from 3 atm |
| Without pressure regulator tube | 3.3 atm |
| When the drain is pinched | 7 atm |
| When you press the gas pedal | 3-2.5 atm |
We recommend measuring with a small range of atmospheres on a pressure gauge (up to 7 atm). This will reduce errors to a minimum. Having a pressure gauge at hand will allow you to significantly save on professional diagnostics.
Contacts
The fuel pump includes three wiring:
- Plus (positive);
- Minus (negative);
- Fuel level indicator.
So, failure of the pump may occur due to a simple violation of the integrity of the wires. So if the pressure check shows normal, then we definitely examine the condition of the wiring.
To check, you will need a 12V lamp, which is attached to the external connectors of the pump with positive and negative contacts. Turn the ignition key. If the lamp blinks, contact is present. In this case, you will have to check the condition of the internal contacts.
Checking contacts
Motor
If the pressure and wiring are normal, let's try to check the serviceability of the motor. It is this element that is responsible for moving fuel through the system.
- To check it, you will need the same 12V lamp;
- Attach it to any motor terminal;
- Turn the ignition key;
- If the lamp blinks, you will have to get rid of the motor and buy a new one.
Motor
Don't jump to conclusions. Before checking, look at the condition of the terminals and motor wiring.
Fuel pump weight
The contacts are fine, but the fuel level sensor may provide incorrect information. In this case, you definitely need to check the weight of the pump responsible for dispersing the fuel.
It often turns out that after prolonged use or driving on difficult road sections, the mass simply loses its fastening strength. Accordingly, if the mass falls off, the pump will not be able to work.
The mass is attached to the pump under the dashboard in the area of the hand brake. Therefore, when the driver turns on the handbrake, there is a possibility of hitting the ground contact, which is why it will fall off.
Putting the mass back in place is not that difficult. The problem is caused by the path to it. You'll have to:
- Get to the bottom through the interior;
- Remove the plastic under the handbrake;
- Remove the floor covering;
- Remove the grounding contacts;
- Clean;
- Secure it to the fuel pump as firmly as possible.
Weight
Relay
The fuel pump relay is located exactly where the ground is. Therefore, there should be no problems with the search.
With an ideally working fuel supply system, when the ignition is turned on, the relay instantly creates pressure inside the system, and then turns off.
If this process is disrupted, you will have to:
- Lift the front facing panel, which covers the contacts of the audio system and air conditioning;
- Take a look from the front passenger side;
- Find three relays;
- The lowest one is our desired pump relay;
- Turn the ignition key;
- If you hear a characteristic click from the relay, it is working properly;
- If there is no click, check the contacts. The reason is either them or a failed relay.
Fuse
All that remains is to check the condition of the fuse. This stage will make sure who the real culprit of the problems is - the pump itself or its fuse.
Fuse location
- Getting to the fuse is as easy as getting to the relay - through the hood or from the inside. The first option is preferable.
- Raise the hood and look in the area near the windshield.
- There is a dark-colored box located directly on the electronic engine control unit.
- Open the box and look inside for the topmost fuse.
- It has a current strength of 15A, as well as an inscription in English - Fuel Pump, that is, a fuel pump.
- Examine its external condition by removing it from the box.
- If the contacts are intact, then everything with the fuse is normal.
- If burnt contacts are clearly visible, consider purchasing a new device. Its price is affordable, so finding and replacing should not be a problem.
