No. 21421 2B020 — Hyundai Elantra HD(J4 ) crankshaft oil seal on the front cover
No. 25124 2B000 — Pump gasket Hyundai Elantra 4 (water pump gasket)
No. 21142 2B000 — Oil channel rings Elantra HD 1.6
It seems that everything is done, we bought spare parts, now we are preparing the tools!
What tools are needed to replace the timing chain?
I will list the minimum set of tools you will need:
- Jack + balloon;
Set of heads for 10, 12, 14, 15, 17, 19, 22;
Now you can start replacing!
Replacing the timing chain on a Hyundai Elantra HD
I will describe the replacement of the chain step by step, from memory, there are also photographs, so don’t judge strictly! I changed the chain on a cold engine and I advise you to also change it on a cold one, since you will need to drain the oil and coolant!
- First of all, you need to remove the nuts on the right front wheel;
- We put wheel chocks under the rear wheels (safety comes first), jack up the car and remove the front right wheel (on the front passenger side);
- We unscrew the drain plug at the bottom of the engine cooling radiator and pour the antifreeze into the prepared container, I built this design;
- Disconnect the negative terminal from the battery;
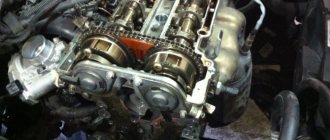
- In the meantime, the antifreeze is draining, you can start removing the valve cover, I already wrote this in the article about replacing the valve cover gasket, I will not repeat it. After removing the valve cover, I advise you to cover the camshafts with some kind of cloth to prevent debris from getting in;
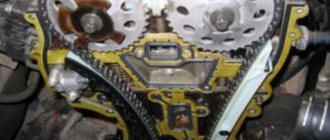
- We turn the engine by the bolt securing the pulley to the crankshaft and set the top dead center so that the marks on the camshafts look “at each other” (photo with the cover already removed to make it clearer);
- We remove the drive belt and unscrew the roller (generator - pump - air conditioning compressor) - I wrote about this in the post of replacing the belt;
- Drain the engine oil into a container and screw the drain plug into place with a new ring;
- We unscrew the charging wire from the generator, disconnect the chip from it, remove the generator itself;
- We place a stop under the engine sump, I used a jack with a plank, and slightly lift the engine, literally 1-2 cm;
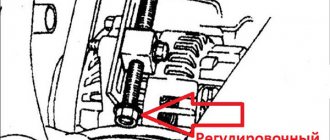
- Next, unscrew the engine mount, I advise you to unscrew it entirely, like this;
- Unscrew the support mounting bracket;
- We unscrew the 4 bolts of the pump flange (I held it with my hand) and unscrew the pump itself;
- Remove the plastic protection (unscrew the three bolts using a 10mm setting). Take a 22mm socket, more extensions, lock the crankshaft pulley and unscrew the bolt (counterclockwise) and remove the pulley;
- Now you can unscrew the timing cover! You've removed the bolts but the cover won't come off? Then we take a piece of wood and tap it and it should “move away” from the engine! It is held in place by sealant.
- After removing the timing cover, first remove the tensioner shoe, and then the tensioner shoe, then the chain tensioner itself and the timing chain;
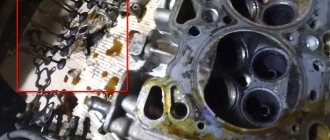
- We clean everything from old sealant on the engine and on the timing cover, do not lose the rubber rings on the “input and output” of the oil pump;
- If necessary, change the crankshaft oil seal in the cover;
- We apply new sealant to the cover and while it dries, we go to install a new timing chain;
- We fasten the damper shoe, tensioner shoe;
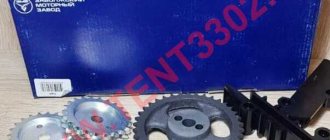
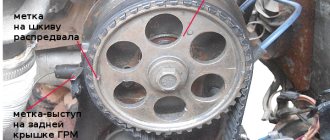
- We put on the chain. The new chain will have copper-colored marks (most likely the same composition), which must be aligned with the marks on the camshafts and crankshaft. The key (more precisely, the pin) on the crankshaft should “look” upward, towards the camshafts, and the crankshaft mark will be somewhere at “17 o’clock”;
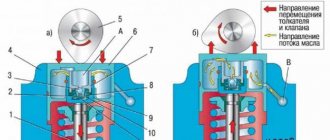
- We install a new tensioner with a “pin” in place;
- We carefully check the marks, lightly tighten the chain by hand and remove the pin, ready, the new timing chain is installed! Here's another video of the installed chain.
- Next, let's start assembling! The sealant will dry out a little at this time...
- Carefully place the cover on the engine and fasten it with bolts;
- Install the pump (water pump);
- Crankshaft pulley;
- Engine mount bracket (it also attracts the timing cover);
- Pump flange (4 bolts);
- We put the engine support in place and you can remove the support from under the pan;
- Then the generator, the drive belt roller and install the belt itself;
- We tighten the valve cover, install the ignition coils and connect them and the entire braid;
- We put the wheel in place and lower the car onto the wheels;
- Pour new (or drained) engine oil into the engine;
- Fill with antifreeze;
- We pray and start the engine for the first time after changing the timing chain!
That's all, enjoy the quiet operation of the engine!