Adjusting valves VAZ 2107
Tapping, metallic knocking, burning power - what are these signs?
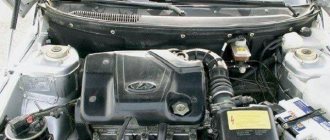
Many will say and they will be right - these are problems with valve adjustment. Let's look at adjusting the valves on a VAZ 2107, this is not the most difficult task (replacement), but for those who are just starting to do car repairs, it is worthwhile to first get good instruction from specialists. And so, carburetor or injector, there is no need to understand here, because there is not much difference in the operating process. The only differences are in removing the cylinder head cover and setting the pistons to the dead center (top).
We will need thirteen and seventeen open-end wrenches, as well as a feeler gauge of zero fifteen (0.15) millimeters in thickness.
Please note that the valves can be adjusted only after the engine temperature does not exceed twenty degrees.
First we will remove the valve cover. . Now we need to rotate the crankshaft so that it coincides with the mark on the camshaft and the protrusion on the body itself. By doing this we will achieve the piston alignment of the fourth cylinder.
In order to be able to adjust valve numbers eight and six, we need to insert a feeler gauge. We need to achieve a narrow passage for the probe. If you feel that there is looseness between the lever and the valve knuckle, then try to loosen the control nut using a seventeen wrench (17)
The probe should pass very tightly, without any cracks or free spaces.
Now we have achieved the required clearance, we can remove the dipstick and tighten the control nut.
We turn the camshaft ninety degrees to be able to do this; at this time we turn the crankshaft one hundred and eighty degrees. Then we move on to the fourth and seventh valves. We turn the crank to one hundred and eighty, the distributor to
Next, we adjust the first and third.
We turn the crankshaft again to one hundred and eighty, and the camshaft to ninety. and Next we adjust the fifth and second valves.
Now you need to check the gaps and put everything back together.
We check the operation of the engine. Let's warm it up to the desired temperature.
How to adjust the valves of a VAZ 2107 carburetor.
We remove the cover, but this cannot be done unless we first remove the housing from the air filter and disconnect all the fuel hoses. Disconnect the air damper drive cable and the longitudinal link. Well, then, unscrew the bolts. 8 pieces.
To adjust, we will need an eighteen (18) key, and then the instructions provided above will help you.
We adjust the VAZ 2107 injector.
Remove the cover and pull out the dipstick (oil). Disconnect the three hoses near the filter. We disconnect the bolts and take out the cover. Turn it a little until the screwdriver blade rests between the teeth of the crankshaft ring. Adjust according to the instructions above.
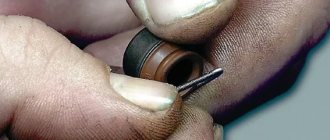
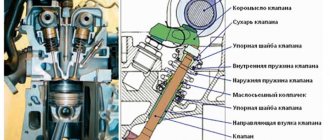
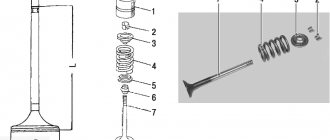
Replacing valve stem seals
Everything else is simple. We bring the piston of the cylinder where we are changing the oil seals to top dead center. We engage fifth gear so that when pressed the piston does not go down. We insert our rod into the spark plug hole so that it goes under the valve.
If this is not done, there will not be enough spring travel to pull out the crackers.
We compress the spring and take out the crackers, remove the springs with the plate.
Compress the spring.
Remove the old oil seal.
Remove the valve seal.
We put on a new one.
Be sure to rotate the seal when we put it on the valve.
We put on a new oil seal.
We hammer it into place.
An extended 12mm head works well as a mandrel.
We install our mandrel and fill the oil seal with light blows of a hammer.
As soon as the sound of the blows changes from dull to ringing, the seal falls into place.
Mandrel.
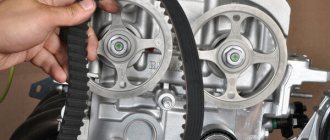
We visually check that everything is level, put the springs in place and, squeezing the spring, put the crackers in place. We repeat this procedure seven more times. Reinstall the camshaft and timing belt. The whole thing took about two hours including disassembly and assembly.