Design features and purpose
The gas distribution mechanism controls the supply of fuel to the cylinders.
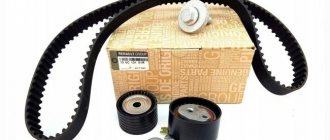
Its operation is impossible without a drive. Modern manufacturers produce systems with chain and belt drives. Many cars have a belt. This product is a closed rubber belt with special teeth on the inside. It passes through several pulleys, but its main purpose is to synchronize the rotation of the camshaft and crankshaft. The use of rubber makes the operation of such a belt almost silent. The high elasticity of rubber can lead to its most unpleasant consequences. If you find the slightest defect, you should urgently change the timing belt.
How to get rid of belt whistling with your own hands, step-by-step instructions, possible options
In order to completely get rid of the cause of the unpleasant sound from the belt, you should diagnose the cause of its occurrence, only after which you can begin to eliminate it.
- If you notice a suspicious whistle coming from the engine compartment of a car, you should first turn off the car engine ignition and open the engine compartment itself.
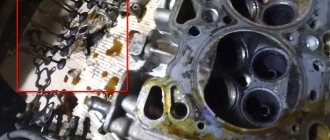
- Conduct a visual inspection of the belt without disturbing its position and degree of tension. The belt should be inspected for any contamination (oil, moisture, dirt, dust, other liquids), physical damage (tears, protruding threads, etc.).
- Both sides of the belt must be completely intact and without visible damage or other traces of dirt, dust, oil, coolant, etc. It is also necessary to inspect the generator and crankshaft pulleys.
- Very often the cause of belt whistling is the degree of its tension. The weakened tension significantly reduces its contact between the belt and the pulley, which in turn entails slippage and the appearance of a whistle.
- If a problem is detected in a loose belt, it is necessary to adjust the degree of its tension.
- If the above methods could not eliminate the whistling noise, then you should carefully inspect the alignment of the generator pulley and the crankshaft. One of the obvious signs of poor alignment can be the tracks in the V-ribbed belt skipping.
- If upon inspection it is discovered that at least one of the pulleys moves in a figure eight, this may indicate its failure. In this case, it must be replaced with a new one.
- After the above methods, if the whistle cannot be dealt with, then the belt must be removed from the pulleys and a more thorough inspection should be carried out for possible damage and contamination on the inside of the belt. If there is no visible damage to the belt, then it is necessary to clean it using special means. If there is any damage to the belt, then it should be replaced with a new one.
- Do not forget that you should thoroughly clean the surface of the pulleys using special means. In any case, moisture and dust from the road will get on them while the car is moving.
- Now you can install the clean belt on the cleaned pulleys. Next, you should adjust the degree of tension and start the car. This should save the car owner from the unpleasant whistle from under the hood of the car.
- If the cause of the whistle has not been eliminated, then the reason may be either the quality of the belt itself, or the drives of the generator pulley and crankshaft. The problem may lie in the generator itself, tension rollers, power steering compressor and air conditioning. It often happens that the lubricant in the bearings thickens and a number of other more serious reasons.
- If you cannot find the cause of the whistling on your own, you need to go to a car service station and put the car in the reliable hands of specialists. Auto mechanics will examine the car in detail for possible defects and make a verdict on the need for repair work.
Why is a broken belt dangerous?
It would seem like an ordinary piece of rubber, what serious thing could happen if it breaks? But we must not forget that this element ensures the coordinated operation of the camshaft and crankshaft. During a break, the crankshaft continues to rotate, but the torque is no longer transmitted to the camshaft. This causes the cylinders to hit the valves.
What are the consequences? Starting from bent cylinders and ending with the complete destruction of a group of valves. Such repairs will cost you a large sum, and all because of that very “piece of rubber”. Therefore, replacing the timing belt is a mandatory step that will prevent waste in the future.
The main causes of breakage: how to avoid it
One of the frequently asked questions regarding the timing belt is why it breaks. This includes:
- wear and tear directly due to long-term use or poor quality of the product;
- the pump or rollers are jammed;
- a breakdown occurred and the camshaft “caught” a wedge;
- The crankshaft is jammed.
The best way to solve a problem is not to create a problem for yourself, so we recommend that you familiarize yourself with the basic rules that will help you avoid such a breakdown:
- The belt must be replaced on time (every 40-50 thousand kilometers);
- regularly check the seals for leaks;
- if you are replacing timing components, use only high-quality parts;
- check the belt tension. Its slippage can also cause damage to valves and cylinders;
- check the integrity of the water pump and rollers.
These tips will help you avoid the problems described above.
Mitsubishi Lancer FAQ
So the car's mileage is close to 90,000 km. And this, in turn, indicates the desirability of replacing the timing belt.
Required parts:
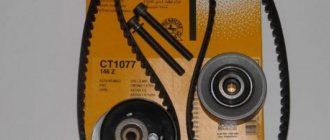
- The timing belt is definitely original (MD 326059)
- The balancing shaft belt is definitely original (MR 984778 or MD 182295)
- Timing belt tensioner - original (MR 984375)
- Timing belt tensioner roller - can be original (MD 182537), or can be made by NTN (JPU60-011B-1)
- Balance shaft tensioner roller - can be original (MD 352473), or can be made by NTN (JPU55-002B-1)
- The timing belt deflector roller can be original (MD 156604), or it can be from Koyo (PU276033RR1D).
The rollers in points 4 and 5 (see above) are installed from the NTN factory, and the roller indicated in point 6 is Koyo. So, when buying the above “original” rollers, you pay half the price for a package with the inscription “Mitsubishi” and find NTN and Koyo rollers in this package.
The report on replacing the timing belt on the Mitsubishi Lancer IX 1.6 is here.
Let's start removing the timing belt
1. Remove the engine protection (3 nuts/bolts at the front of the car and 2 nuts/bolts closer to the middle. Naturally, all this is under the car)
2. Loosen the nuts securing the right front wheel, jack up the right front part of the car and remove the right front wheel.
3. Take out the plastic clips securing the plastic casings and unscrew the bolt securing the fender liner (indicated by red arrows):
4. Bend the inner part of the fender liner and unscrew another bolt securing the casing:
5. Then remove the front casing:
and the crankshaft pulley protection casing (let’s call it that):
6. Get to your feet and unscrew the 4 bolts securing the camshaft cover:
pull the cover towards the car interior:
and finally pull it out:
7. We hang the engine so that the left engine mount (the one next to the camshafts) is not deformed, otherwise we will not remove it in the future:
8. Under the hood again - unscrew the fastening of the power steering hose from the engine mount:
9. Unscrew the cushion itself (3 nuts on the cushion closer to the engine and 3 bolts closer to the wing):
from another angle it looks like this:
When removing the pillow, I unscrewed it from the bracket, this did not have to be done:
10. Slightly loosen (but do not unscrew!!!) the 4 bolts securing the pump pulley (as long as the hanging belt is tensioned, this is not difficult to do):
11. On your knees again:
12. Using an adjustable wrench and a wrench, turn the suspension belt tensioner counterclockwise (it will take quite a bit of force), align the 2 holes at the bottom of the tensioner and use a Phillips screwdriver to fix the tensioner in the bent state:
13. Let's get up. The hanging belt is loose, unscrew the 4 bolts securing the pump pulley completely and remove the pulley itself:
14. Unscrew the 4 bolts securing the decorative engine cover (red arrows) and remove it. We also take out 2 chips that go to the ignition coils (modules) (indicated by green arrows):
15. Take the head at “22” (or at “21” - I don’t remember) and place it on the crankshaft bolt, to the head there is a powerful crank, which we press against the bottom of the wheel drive:
16. Get behind the wheel, turn on the ignition and crank the starter for half a second. The crankshaft bolt is loose.
17. Unscrew the crankshaft bolt, as well as 4 bolts of the crankshaft pulley:
18. Remove the crankshaft pulley:
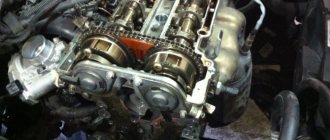
19. And again under the hood. We set (either by turning the crankshaft or camshafts clockwise) the marks on the engine cover and the marks on the camshaft gears (indicated by green arrows). We firmly connect the camshaft gears to each other (blue and red curve), preventing the camshafts from turning relative to each other in the future. We fix one of the shafts using a bolt securing the camshaft pulley (indicated by black arrows) with a wrench (for example, by wrapping the wrench with wire to the strut spacer), preventing the camshafts from turning.
20. On your knees. Unscrew the drive belt idler roller, unscrew the bolts securing the lower timing belt guard:
21. Remove the drive shaft deflection roller and the lower timing belt protection. Here's what we'll see if we stand up:
22. Now it’s convenient to crawl up to the timing belt tensioner pulley from below. Here we unscrew it:
Remove the timing belt.
23. Next, unscrew and remove the timing belt tensioner itself:
24. Remove the timing belt gear from the crankshaft:
25. Next we see the following picture:
We unscrew the 2 bolts securing the crankshaft position sensor, move it to the side and remove the iron plate, marking the inner and outer sides on it so as not to confuse it when installing it back.
26. Unscrew the balancing shaft tensioner roller:
27. Remove the balancing shaft tensioner roller and balancing belt:
28. It remains to unscrew the timing belt idler pulley. But you can’t just get close to him. In order to unscrew it you need to: - unscrew 6 bolts, indicated by green arrows and numbers (1-6).
Bolts numbered 1-5 are not difficult to tighten, but bolt number 6 covers the power steering pump pulley. Tear off the designers' hands!!! We take the next step - go to the power steering pump, unscrew the upper bolt No. 1 and the lower bolt No. 2 through the holes in the power steering pump pulley. We simply loosen bolt No. 3.
We pull the power steering pump itself towards the front bumper and gain access to the 6th bolt:
— unscrew it and remove the interesting structure to which the timing belt deflector pulley is screwed:
29. Unscrew this video.
The timing belt removal procedure is completed.
We begin installing a new timing belt.
1. Change the idler roller (Koyo) of the timing belt:
and screw the iron crap (to which the above-mentioned roller is screwed) into place:
2. Return the power steering pump to its place and tighten the 3 bolts securing it:
3. We fasten the tensioner roller of the balancing shaft (but do not tighten it), align the marks of the balancing shaft, the marks of the crankshaft gear with the marks on the engine (green arrows). We put on the balance shaft belt. We turn the balancing belt tensioner roller clockwise with our hands, thereby forcing the balancing belt to tighten. Tighten the tensioner pulley bolt. The ideal position of the tensioner roller will be when, when you press the belt with your hand from above (in the direction of the thick red arrow), the belt bends no more than 5-7 mm.
4. With the marks of the balance shaft gear and crankshaft gear set, put on the iron plate. Here it is important not to confuse its outer and inner sides, and also take into account that there is also a mark on the plate itself, which should be combined with the protruding mark on the engine. We screw back the crankshaft position sensor.
5. We put the timing belt gear on top of the iron plate.
6. Fasten the timing belt tensioner. DO NOT PULL the pin out of the tensioner!!!!!!
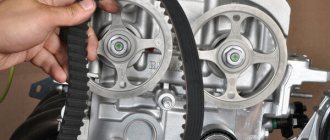
7. Turning the camshaft gear bolts with a wrench (1 and 2 in the figure), we combine the marks on the camshaft gears with the marks on the engine (green arrows). We put the timing belt on the camshaft gears and fix it on the gears with paper clips.
8. We set the oil pump gear. The mark on it should be combined with the mark on the engine, but there is a very important nuance here!!!! To correctly align this gear you need: under the exhaust manifold on the engine there is a rectangular platform, on which a bolt (plug) is screwed into the engine. We unscrew this bolt and insert a screwdriver/wire/bolt or the like into the hole formed. with a diameter of at least 0.5 cm and a length of at least 5 cm. If it is inserted without problems at 4-5 cm and the mark on the oil pump gear is aligned with the mark on the engine, then everything is fine. But if it is inserted less than 4-5 cm and rests against something, then you need to turn the oil pump gear 1 turn and so on until the screwdriver/wire/bolt or the like. will not fit freely by 4-5 cm, while the mark on the oil pump gears should coincide with the mark on the engine. If this is not done, then an imbalance occurs between the balancing shaft and the oil pump shaft - the engine will wobble and roar. Do not remove the screwdriver/wire/bolt until you have completed installing the timing belt!!!
9. Screw on, but do not tighten, the timing belt tensioner pulley. We check that all marks on all gears are set correctly. We put the timing belt on the crankshaft gear and the oil pump gear. We turn the timing belt tensioner roller counterclockwise by hand, achieving the initial tension of the timing belt. Tighten the bolt securing the timing belt tensioner pulley. We try to carefully pull the pin out of the timing belt tensioner. If you don’t have to make any special efforts and the pin comes out more or less freely, then the timing belt tensioner roller is set correctly, otherwise we leave the pin in the tensioner and again adjust the belt tension with the roller. I managed to position the video correctly the 3rd time.
10. After we have pulled the pin out of the tensioner, we once again check that all the marks are set correctly. We take out the screwdriver/wire/bolt from the engine under the exhaust manifold, screw the bolt/plug back in. We screw the crankshaft bolt into place and use a wrench to turn the crankshaft clockwise until the marks on the camshaft gears match the marks on the engine.
11. We put on the lower timing belt guard and screw it on. We fasten the drive shaft idler roller:
12. We put on the crankshaft pulley, fasten 4 small bolts and 1 large:
13. We put 2 chips on the ignition coils, return them to their place and screw on the decorative engine cover:
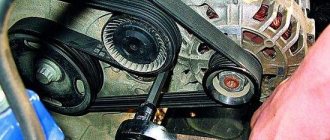
14. Throw on the drive (hinged) belt:
15. We put on the pump pulley, tighten the 4 bolts securing it. We throw the drive (hinged) belt through it:
16. Take the engine mount and bracket:
17. Screw on the engine mount:
18. Screw the bracket to the engine and to the pillow:
19. Screw the power steering hose mount to the cushion:
20. Check that the drive (hinged) belt passes through all the rollers and pulleys and return the drive belt tensioner to its place:
We check once again that the drive belt passes through all the rollers and pulleys smoothly:
21. Put the upper timing belt protection in place:
and screw it on:
22. We put on and screw on the crankshaft pulley cover:
23. Screw on the front casing:
We return all the clips to their place, fasten the wheel, pull out the stops from under the engine, and put on the engine crankcase protection. We lower the car to the ground with a jack and try to start it.
The report used materials from the author “Grundic”, for which many thanks to him!
Generator belt
Along with the timing belt is such an important component as the alternator belt on the Mitsubishi Lancer. This part is a closed rubber ring, but slightly smaller and thinner in comparison with the timing belt. The main task is to rotate the generator shaft and charge the battery.
Breaking this belt is not such a critical problem. When you drive, your battery will stop charging. With the remaining charge, you can always take it to a garage or auto repair shop, and then simply make a replacement.
How to choose an alternator belt for Mitsubishi Lancer 9 and 10? There is only one piece of advice here - don’t save money, but order a quality product. A cheap belt will stretch and break very quickly. As a result, you will still have to buy a new belt, but this time it will be a good one. When purchasing, pay attention to the inscriptions and markings. If they are printed crookedly or blurry, then most likely you are looking at a fake.
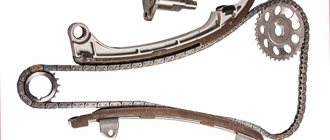
Replacement frequency
The manufacturer recommends changing the chain on a Mitsubishi Lancer x after a mileage of 250 thousand kilometers. According to reviews from car owners, replacement is usually required at 190-230 thousand km on the odometer. With careful driving, the chain runs up to 300 thousand km.
The need for earlier replacement is indicated by specific extraneous noise when the engine is running. If the chain rattles, this indicates that it is excessively worn.
Teeth jumping over a chain link also indicates the need to replace timing elements. In this case, there is an extraneous sound and a decrease in the dynamic characteristics of the car. A displacement of one tooth may not be accompanied by a compression deviation from the norm. If the chain has jumped several teeth, there is a risk of bending the valves.
Replacing the timing belt on Mitsubishi Lancer 9 and 10
So, if you were unable to avoid the belt breaking, you should replace it. But don’t rush to contact the service center. This procedure will not cause any difficulties. To do this you will need a couple of wrenches and screwdrivers.
To remove the timing belt, follow these steps:
- Remove the right front wheel. Also, do not forget to place boards under the spar.
- Loosen the bolts on the compressor and generator, then remove the belts.
- Remove the right engine mount.
- Remove the protective cover in the wheel arch.
- Unscrew the crankshaft pulley.
- Remove the upper timing belt guard. It is secured with three bolts. Use the key to 10.
- Remove the pulley from the pump. It is secured with four bolts. Use a 10mm socket.
- Remove the lower timing belt guard.
- Next you need to set the tags. To do this, put the gearbox in fifth gear, and then rotate the wheel clockwise. The mark on the wheel must match the special mark on the engine. Similar marks on the crankshaft should also match.
- Using pliers, beat off the tensioner spring, and then remove the roller itself.
- Now you can remove the timing belt.
Attention! After dismantling, do not rotate the camshaft or crankshaft! After this, you can replace the tension roller and install a new belt and spring. After tightening the central bolt of the roller, it is necessary to reassemble in the reverse order.
This instruction will save you several thousand rubles on repairs. All your expenses will be reduced only to the purchase of a new belt. The whole process takes from half an hour to several hours.
High-quality repair of the Mitsubishi generator: replacement of the Lancer 10 belt and rollers at a service station
To confirm this assumption, you can drive through a puddle - the sound should only intensify as the belt stretches even more.
Damage should be taken seriously. A belt break or slippage leads to negative consequences and damage to the engine block. There are numerous similar cases.
ADVICE. You should not change drive belts or rollers yourself, as there is a high probability of harm due to unprofessionalism. Incorrect installation leads to belt slipping and damage soon after “quality installation”. In order to minimize possible negative risks, it is strongly recommended to entrust the matter to real service station professionals.
Our services when you need to replace the Lancer 10 alternator belt
The service center provides repair services for passenger vehicles, including Japanese-made Mitsubishi. The most frequent requests from owners are related to drive replacement, namely:
- Belt diagnostics, checking the degree of stretch using an indicator on the tensioner roller;
- Replacement of the Lancer 10 generator belt, “parasitic” (bypass) rollers, main tensioner;
- Prevention of roller bearings.
In addition to current work, craftsmen carry out orders for major repairs of the power unit, transmission, chassis, steering system, and brake system.
The presence of special equipment facilitates the acceptance of applications for painting, priming, applying varnish, and treating the bottom with a special anti-corrosion mastic.
Using computer equipment, we reflash the electronic engine control unit, read system errors, eliminate them or delete them.
Accepted applications are carried out efficiently and promptly thanks to the many years of experience and skills of the working staff. Equipping a service station with modernized equipment helps speed up the inspection procedure, reduce the waiting line, increase the rating and quality of service. People speak positively about our work, we are recommended, and people come to us with complex breakdowns.
Reliable replacement of the Lancer 10 belt only after diagnostics: full inspection and dismantling
The inspection process is carried out under the bottom of the car and in the engine compartment.
At the initial stage, the technician needs to visually check the condition of the mechanism as a whole, the presence of a belt, tensioner rollers, and the integrity of the electrical wiring that is connected to the generator.