Design
Where the starter is installed on the VAZ-2114, there are several more elements - an air filter, a thermostat, etc. Therefore, in order to gain free access to all components of the launch system, you will have to remove some parts. The starter design consists of the following components:
- Back cover.
- Bronze bushings.
- Copper-graphite brushes.
- Armature with winding (rotor).
- Stator with windings.
- Bendix - overrunning clutch, fork and gear.
- Gear starters have a planetary mechanism.
- Front cover.
- Solenoid relay.
Next, we proceed to describe the operation of the mechanism.
This is interesting: 4 mistakes when transporting cargo on the roof of a car that can lead to serious damage
Preparing to replace the bendix: removing the starter on a VAZ-2114
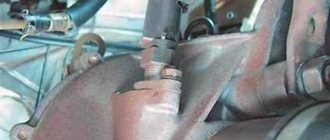
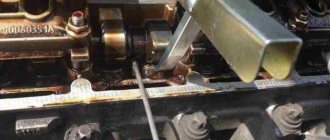
The starter can be accessed from above or from underneath. Let's consider the second option: roll the car into the pit and use the handbrake. Next, use a 10mm wrench to unscrew two screws from the bottom (photo 1) and two screws on the side members.
Finally, the screws on the cross member are unscrewed (photo 3) to remove the engine splash guard.
Disconnect the negative terminal from the battery - you will need a 10mm key.
On a VAZ-2114, you can replace the bendix in one way - remove the starter.
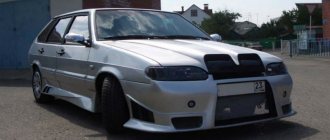
The location of the starter under the hood is marked with a red arrow.
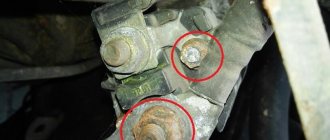
- Unscrew the nut securing the power wire to the starter (photo 1). Remove the terminal and also disconnect the block with the control wire (photo 2);
Price issue
Before you buy a new starter because the old one isn't working, make sure it actually does.
If the test shows that the device, although it clicks, still does not turn, you will have to buy a new one. Estimated prices for a starter now range from 2.8 to 4.5 thousand rubles. Plus, you will additionally have to spend up to 1000 rubles on the services of specialists from a car service center. Unless, of course, you want to do everything yourself.
SIGNS AND CAUSES OF MALFUNCTION
Like any other part that is in constant use, over time the starter wears out and fails. Let's look at the main signs that can help identify a device malfunction:
- When the ignition is turned on, the engine does not start or clicks are heard, but the engine does not turn over;
- After turning on the engine, the starter continues to spin (the bendix and flywheel are not disconnected);
- Smoke begins to come out from under the hood with the smell of burnt windings;
- When the ignition is turned on, the starter begins to buzz, and the engine starts only after repeated attempts.
To determine the reason why the unit failed, it is necessary to remove the VAZ 2114 starter.
It is worth noting that this device has good maintainability, so a complete replacement of the starter is not always required - in most cases it can be cured by changing only some components.
Let us highlight the main reasons for starter failure:
- It doesn’t turn: the winding is shorted or the armature on the solenoid relay is stuck, the contacts of the positive terminal on the battery may have oxidized;
- It turns, but at an insufficient speed: the armature or stator winding has broken or shorted, the brushes have worn out;
- It turns, but does not transmit speed to the crankshaft: idling - typical signs of a Bendix malfunction;
- Does not turn off after turning on the engine: the traction relay is stuck or the spring on the freewheel is broken.
What is Bendix, and in what cases is it required to be replaced?
Bendix is a clutch used to engage the starting electric motor and flywheel when starting the engine. Externally, the element is an oblique gear and is located on the starter shaft. At the moment it is triggered, it moves forward with the help of a solenoid and connects to the flywheel.
When the power supply stops, the gear returns to its place, disconnecting from the flywheel. The amplitude of movement of the clutch is about 10 cm. The bendix is protected from excessive displacement by locking rings.
What is Bendix and how does it work?
Signs of a malfunctioning clutch are clearly visible, so the question of how to check the starter bendix usually does not arise. The “symptoms” of a malfunction include:
- a grinding noise in the flywheel area when trying to start the engine;
- the starter rotates idle, without transmitting torque to the flywheel;
- a characteristic knocking sound at the moment the solenoid relay is activated, after which the shaft does not rotate.
A faulty gear is usually not repaired, but replaced. Repairing the element is possible, but such actions are not justified in terms of financial and time costs. Therefore, if the coupling breaks, it must be replaced. If you still want to repair it, a detailed video will be at the end of the article.
This method is not a repair method, but it allows you to start the engine and get to your home or auto repair shop.
Starter relay design
For VAZ-2114, the starter relay consists of:
- housings;
- anchors;
- two windings (pull-in and retainer);
- return spring;
- contacts (“nickels”).
On different modifications of the VAZ-2114, different starter circuit breakers can be installed. Some of them are collapsible, others are not. The former, if they malfunction, can be attempted to be repaired, while the latter can only be replaced.
This is interesting: Tires for a crossover - the subtleties of choosing summer and winter tires
Tips that may be useful when replacing a starter
- Before removing the starter, you need to make sure it is faulty. First of all, you need to check the reliability of the terminals on the battery. Oxidized terminals should be cleaned of deposits and re-secured. The reason for the failure may also be poor weight of the engine and the body. You should also check whether the solenoid relay wire has come loose from the connector and whether the positive terminal nut on the starter is tightly tightened;
- When removing a part, you can disconnect the positive wire of the terminal last. In this version, it is more convenient to unscrew the nut of the positive wire. By pulling the starter closer to you, it will be easier to get to the desired nut;
- You need to install the solenoid relay wire in place until it stops. The connector must be fixed, and in this case the wire will not fly off during movement due to shaking;
- Do not forget to first remove the terminals from the battery and turn off the ignition - this will save you from additional problems.
That’s basically all that can be said about how to change the starter on a VAZ 2114.
Typical breakdowns
If the starter on a VAZ-2114 does not turn, then the following faults may be present:
- The brushes are worn out.
- The battery is low.
- Broken armature or stator winding.
- Failure of the solenoid relay means destruction of the windings.
Please note that if the bendix and overrunning clutch break down, the starter will continue to turn, but there will be no engagement with the ring.
Often the reason that the starter turns weakly is a bad mass or low battery charge. In this case, you will need to replace the bronze bushings and the wire that connects the gearbox and the negative terminal of the battery. Please note that the starter winding power circuit is not protected by a fuse. Therefore, it is extremely important to timely replace brushes and clean the slats. This will avoid the occurrence of a short circuit, which will lead to inevitable breakdown of the starter.
Possible faults
The design itself is quite reliable; on modern machines it rarely fails. But nevertheless it happens.
If, when starting the engine, the motorist hears characteristic sounds reminiscent of a ratchet, but the engine itself does not start, the reason is most likely in the Bendix. Clicking sounds mean that the starter is trying to turn the engine flywheel, but it doesn't have enough effort.
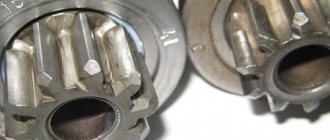
Bendix Bosch. 1 — overrunning clutch casing; 2 — driven cage with gear; 3 - ring; 4 — washer; 5 - roller; 6 — pressure spring; 7 — driving clip; 8 — buffer spring; 9 and 11 — support cups; 10 — drive fork ring; 12 — retaining ring.
Most often, the teeth of the drive gear fail. It is the gear and rollers that bear the main load during startup. The teeth are destroyed, ground down, and lack a working surface for engagement.
The rollers also wear out and lose their shape, as a result the gear begins to rotate idle and cannot transmit torque. An accompanying failure is often the destruction of the cage in the area where the rollers operate.
Sometimes a breakdown is caused by wear on the starter shaft guides. In this case, the engagement with the flywheel becomes incorrect.
In those models where there are springs, they are also the cause of failure. Over time, the springs stretch, burst, and are lost.
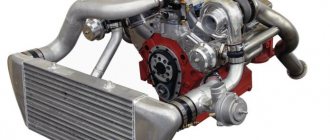
Design features
If we talk about the design, the starter is an electric motor with direct current. Its elements are:
- Stator (a stationary element that consists of windings);
- Anchor (aka a shaft with a commutator and a winding in its grooves);
- Overrunning clutch (gear with a mechanical device);
- Solenoid relay (located on the side of the starter).
How to remove bendix
First you need to dismantle the starting device itself, having first disconnected the positive terminal from the battery, and from the starter - the wire going to the solenoid relay. Removing the starting device (most often it is fixed with three bolts) is possible from the top or bottom (you will need an inspection hole) - it all depends on the make of the car. At the same time, inspect the flywheel teeth: if they are very worn, you will have to replace the ring gear or the entire flywheel. After the starter is on the workbench, dismantle (if necessary, here everything again depends on the model of the machine) the solenoid relay. Next comes the removal of the bendix:
- Unscrew the nuts securing the vertical studs (usually there are three of them) and, lightly tapping with a rubber mallet, separate the starter housing. Take this opportunity to visually assess the condition of the brushes and windings.
- Hook the bendix by the “ears” with a flat-head screwdriver and pull it out of the fork.
- Take a hammer and an open-end wrench that fits the diameter of the overrunning clutch shaft and remove the first retaining ring; the second can be moved with a flat-head screwdriver.
- Now we remove the starter bendix itself.
Catalog number and cost of analogues
Finding a branded VAZ 2114 starter is not always easy. At the same time, the quality of the original components is very poor, which is further complemented by a high level of defects among the products sold. Therefore, experienced car owners recommend purchasing analogues from third-party manufacturers. The best alternative options for the original VAZ 2114 starter are presented in the table below.
Table - Good analogues of the original VAZ 2114 starter
| Manufacturer | vendor code | Approximate cost, ruble |
| As-pl | S9008 | 1750-2300 |
| HC Parts | CS332 | 2650-3500 |
| Startvolt | LST0115 | 3400-3800 |
| Bosch | 986014950 | 7300-8900 |
| WPS | 30714N | 2880-3500 |
Required Tools
In order to carry out repairs yourself and replace a faulty starter, you need the tools that are listed in the table below. Table - Tools required to replace the front strut
| Name | Note |
| open-end wrench | "at 8", "at 13" |
| Spanner | "at 13", "at 14", "at 15" |
| Ratchet | With extension |
| Head | "at 13", "at 14", "at 15" |
| Pliers | Can be replaced with pliers |
| Penetrating lubricant | For example, WD-40 |
| Screwdriver | With flat cross blade |
| Wire brush and rags | For cleaning contaminated surfaces |
Replacing the bendix on the starter
It is quite difficult for a car enthusiast who does not have sufficient practical experience to determine the moment when the need arises to replace the Bendix. Therefore, let us specify the “symptoms” indicating a malfunction of this element:
- A sharp loss of starter efficiency, which is expressed in the absence of a stable start of the vehicle’s power plant.
Attention! A weak battery charge initiates a similar situation, so before starting work on replacing the Bendix, make sure that charging the battery provides the voltage necessary for the operation of the elements of the electrical supply system.
- The appearance of extraneous sounds (grinding, crackling) and a feeling of “jamming” of the starter during engine starting.
Before starting repair work on the starter, be sure to study the manufacturer’s recommendations for eliminating this problem, set out in the vehicle’s operating instructions. In addition, follow two basic rules, the observance of which will ensure high quality of the final result:
- Caution. As noted above, the starter is a rather complex electrical device and requires careful and careful handling. Violations of this rule are fraught with damage to its internal elements (drive gear, shunt coil, commutator, contact plate, etc.) and complete failure of the unit.
- Attention. One of the main activities for disassembling (assembling) a starter is monitoring the condition of the internal components of the unit - gears, bearings, brushes, etc.
Logistics for the replacement process includes purchasing a new Bendix and preparing the necessary tools:
- set of spanners;
- several screwdrivers of various sizes and configurations;
- set of heads;
- insulating tape.
What needs to be changed?
In order to carry out repairs, you need to purchase a set of spare parts. In particular, you will need the following components:
- Brushes.
- Bushings.
- Bendix.
As a rule, these elements most often fail. If there is a breakdown of the windings or part of the housing, then it will be much easier (and more efficient) to install a new starter or a used one, but working.
How to repair?
You can rewind the rotor or starter yourself, but this is problematic. In addition, the lamellas on the rotor may be worn out - even installing new brushes will not help. The procedure for repairing a VAZ-2114 starter:
- Remove the solenoid relay by unscrewing 2 or 3 bolts using a screwdriver.
- Remove the back cover by unscrewing two bolts.
- Then unscrew the two nuts with a 10mm wrench to disconnect the three parts of the housing.
- Remove the brushes and disconnect them from the windings.
- Remove the retaining ring from the back of the rotor and remove the cover.
- The retaining ring must also be removed from the front of the rotor. Only after this can the anchor be completely removed.
All elements of the starter have been dismantled, all that remains is to carry out troubleshooting. All faulty parts must be replaced with new ones. Pay attention to the lamellas - if they are worn out, then it is useless to restore them. It will be easier to purchase a new rotor. After repair, all parts must be reassembled in reverse order.
Quick repair of Bendix starter 5712.3708
If the starter has been removed, remove the solenoid relay from it by unscrewing the two screws on the housing. Then the four pins are unscrewed and the cover can be moved forward. Everything here looks simpler than in starters of “early” models.
The goal is to dismantle the drive with gearbox
Remove the plastic stop. Then we remove the drive assembly - here it consists of a bendix and a gearbox.
On starters of the “new” model installed on the VAZ-2114, the bendix must be replaced strictly according to the instructions: first remove the gearbox cover, then the three gears, and only then can you knock off the retaining ring.
Removing the gears from the gearbox...
The three axes of the gearbox must be located on a flat surface. Then, taking a hammer and a mandrel, carefully knock down the upper retaining ring.
Dismantling “extra” elements
Both the top and bottom rings will need to be removed from the shaft. Everything here differs little from the starters of the first models.
Finally, you need to remove the plug. The side fastening tab is bent with a screwdriver. This operation is difficult to perform - there is a risk of breaking the plastic.
Starter replacement process
In order to remove the faulty unit and replace it with a working one, you will need to follow the step-by-step instructions below.
- Use the handbrake to brake the rear wheels, securing the vehicle.
- Open the hood.
- Remove the negative terminal from the battery.
- Disconnect the terminal block of the mass air flow sensor.
- Using a screwdriver, unscrew the clamp that secures the air duct pipe, as shown in the photo below.
- Disconnect the air duct from the air filter housing.
- Remove the air filter. This action will allow you to gain access to the place where the starter is located.
- Disconnect the red wire that goes to the starter relay. Using a wrench, you need to unscrew the terminal nut, the wire from which goes to the battery.
- Remove the terminal.
- Unscrew the two nuts that hold the starter on top.
- Unscrew the lower fastening.
- Release the starter completely.
- Dismantle the unit.
- Install the new starter into place.
- Reassemble everything in the reverse order of disassembly.
- Check the functionality of the mounted starter by test starting the VAZ 2114 engine.
Save on repairs: how to remove the VAZ 2115 starter
It is hardly possible to imagine a less pleasant activity than repairing - and especially car repairs, but you definitely cannot do without it.
The only thing you can console yourself with is that you can carry out most of the maintenance operations on your car yourself.
This will require very little financial investment (especially in comparison with service at a car service station), and a little more time and skill. However, the latter, as you know, is a profitable business.
Repair of most car components can be carried out in two ways: either a targeted search and elimination of the fault, or a complete replacement of the unit in which the fault is detected. The second option is a little more expensive, but will reduce the skill level requirements.
Starter failure for VAZ cars, and, in fact, for any other car, is an unpleasant situation to say the least. It’s good if the car starts with a push, but what if it doesn’t? Then you will have to look for towing and drag the vehicle, which has become useless, all the way to the house or garage. But replacing a VAZ 2115 starter is a fairly simple operation, and even a novice car enthusiast can do it.
Tools required to remove and replace the VAZ 2115 starter:
- key to 8;
- key to 13;
- ratchet and extension with sockets for 13, 14 and/or 15.
The last point depends on what year your car was produced.
Work on removing the VAZ 2115 starter takes place in several stages:
- The starter can be removed in several ways, and we choose the simplest one - without removing the protection. First of all, you need to protect yourself by turning off the electricity. To do this, you need to remove the “-” terminal from the battery.
- Next comes the removal of the air filter, held in place by two bolts.
To work, you will need an 8 key, and if you haven’t looked into this sector for a long time, then perhaps a little WD-40. - Next, remove the protective corrugation from the MAF. To do this you need to loosen the clamp. Disconnecting the mass air flow sensor connector, removing the rubber clamp of the air filter from the socket and dismantling it. Don’t forget to remove the air duct first: the metal corrugation should be removed very carefully so as not to damage it.
- There is not much left to access the starter. Using a 13 key, remove the positive wire from the solenoid relay - this will allow us to remove the socket with the red wire. Now you can unscrew the starter itself. It is most convenient to unscrew the VAZ 2115 starter using a wrench with an extension. This will make it easier to unscrew the lower and upper nuts.
- Next is replacing the starter, or disassembling and repairing it (for more advanced motorists).
Assembly is carried out according to the same principle as dismantling, in reverse order. When carrying out assembly work, special attention should be paid to the ground wire, or more precisely, to the mount that holds it to the engine. You may need to strip it or tighten the nut holding it. After all, it is this contact that determines how well the starter will work and how long it will “live.”
Do-it-yourself disassembly and repair
When you remove the starter, you need to disassemble it, otherwise you cannot repair it. To do this you need to follow this algorithm:
- Using a key set to “13”, unscrew the nut and release the solenoid relay from the wire.
- Using a Phillips or flathead screwdriver, unscrew the bolts that secure the relay.
- Use a screwdriver to unscrew the bolts from the back cover.
- Using a flathead screwdriver, remove the retaining ring. It is located on the rotor, on its back.
- Unscrew the two nuts from the studs with a “10” wrench.
- Unscrew the bolts that secure the wires coming from the windings to the brush holder.
- Remove the entire starter brush assembly of VAZ 2112, 2114, etc.
- Using a drift, remove the pin that secures the Bendix fork.
- Remove the rotor, now it and the stator are separate.
- There is a retaining ring on the rotor; after removing it, you can replace the bendix.
Please note that the length of the new brushes is about 10 mm.
If in your starter their length is less than 3.5 mm, then they definitely need to be changed. Perform the following manipulations:
- Remove the bushing from the brush holder and press a new one in its place.
- Clean the rotor lamellas. To do this, you can use a thin knife or screwdriver.
- Replace the bendix and fork if necessary.
- Inspect the solenoid relay and, if necessary, replace it with a new one.
- Use an ohmmeter to test all the windings on the rotor, stator, and retractor. If there is a short circuit, replace the defective part.
- Remove the brushes from the brush holder. After installing the new ones, check how easily they move. There should be no jamming, as in this case the contact may be lost.
However, that’s all that can be said about the renovation. If you are planning a major overhaul of the VAZ 2114 starter, then follow the instructions above. There is nothing complicated, everything is doable, but you have to be careful.
But you need to calculate whether the game is worth the candle. If the price of a new starter is approximately 3,000 rubles, and you need, for example, to change the stator or rotor (expensive elements), and along with them a bunch of parts, then wouldn’t it be easier to replace it entirely? Save your time. But if you have a lot of it, then you can easily do the repairs yourself, a pretty penny will remain with you.
VAZ 2115 starter repair
Today I will try to tell you in detail about repairing the VAZ 2115 starter with my own hands. The article will be accompanied by a detailed description and photographs.
Signs of a starter malfunction: - Significant reduction in power; rotation of the starter does not provide the power required by the engine. The starter will need to be repaired, the relay may need to be replaced. - Voltage interruptions. - The starter rotates idle, that is, without engine rotation.
The retractor starter will need repairs. - Delays in turning off the starter. - Failure to operate the starter after turning the ignition key. The bendix has been damaged, so to resume operation you will need to replace the starter bendix. - The starter turns, but does not start the engine.
- Tools:
- — Direct hands (preferably) and free time.
- DIY VAZ 2115 starter repair
— Socket wrenches “10#8243; and “13#8243;.- Phillips and flathead screwdrivers.
1. First of all, remove the negative terminal from the battery (rechargeable battery).
2. Using a wrench set to “13”, unscrew the two upper mounting screws that secure it to the clutch housing. As a rule, there is no third bolt, but if you have one, you will need an inspection hole to unscrew it.
3. Remove wiring No. 1 from the connector on the solenoid relay. moving the starter forward.
5. Visually assess the condition of the flywheel teeth.
6. Using a Phillips screwdriver, remove the two mounting screws in the starter cover.
7. Unscrew the nut securing the starter winding output to the solenoid relay; to do this, use a key “13#8243;”.
8. Remove the washer-bracket.
9. Using a 10mm wrench, unscrew the two long tension bolts, then remove them.
10. Check the condition of the bushings.
11. To separate the starter housing, apply several light blows to the lower part of the housing with a rubber or wooden hammer. Assess the condition of the brushes.
12. Using a screwdriver, remove the Bendix ears from the fork.
13. Position the key and knock down the locking ring with hammer blows.
14. Pry out the second retaining element with a screwdriver.
15. Remove the bendix.
Now the actual replacement of the bendix itself: take the new bendix (overrunning clutch) and install it in place. Reassembly is carried out in the reverse order; before doing this, do not forget to thoroughly clean and lubricate everything (where necessary). Do-it-yourself repair of the VAZ 2115 starter can be considered complete; install the starter in place, connect the battery and start the engine.
Let me remind you that the previous article was about do-it-yourself sound insulation of the VAZ 2115.
How to replace the starter solenoid relay on a VAZ 2107 One of the main causes of starter failure on a VAZ 2107 is the failure of the solenoid relay. The first symptoms of a malfunction are when you hear clicks when you turn the ignition key, but the starter never starts to turn. Today we will look at
Replacing a VAZ 2110 starter We publish up-to-date information about replacing the starter on a VAZ 2110 yourself. Experienced drivers probably already know the whole course of action, but for beginners this information will be very useful.
VAZ 2101
VAZ 2102
VAZ 2106
Niva
VAZ 2114 starter does not turn, possible malfunctions, removal and installation
Welcome, friends, to the DIY car repair website. Sooner or later, the time comes when your vehicle requires maintenance or repair, and a part such as a VAZ 2114, VAZ 2115 or some other starter is no exception.
- Starter VAZ 2114
- Starter malfunctions occur quite often, either the solenoid relay malfunctions, or the bushings are broken, and it also happens that the VAZ 2114 starter does not turn at all.
- Of course, there are different malfunctions and you can turn to specialists at a service station for help, but you can also do a small repair of the VAZ 2114 starter yourself, especially in some cases it is not difficult and you will even save a certain amount of money.
VAZ 2114 starter does not turn, causes and malfunctions
Of course, before removing the starter, you need to find out whether the problem is not in it at all, but for this you need to know at least a little what malfunctions it has.
Main faults of the VAZ 2114 starter
- The bendix (overrunning clutch) is faulty.
- The stator or armature winding has short-circuited.
- Solenoid relay is faulty.
- Worn or stuck brushes.
- Bushing wear.
- All these malfunctions relate to the starter, but there are other reasons for which the starter does not turn: oxidation or poor contact at the battery terminals or its complete discharge, a break in the power wires that go to the starter, and perhaps the ignition switch or its contact group is faulty .
- Causes such as oxidation of the battery terminals can easily be eliminated on your own; to do this, you just need to clean them and lubricate them with technical petroleum jelly or lithol, which you have available, and charge the discharged battery, of course.
- If the reason arose in the contact group, you can try to clean the contacts, but if this does not help, then most likely it will need to be replaced, and you may have to completely replace the ignition switch.
- It will be impossible to eliminate faults that are directly related to the starter without removing it, so consider this point in more detail.
How to remove the VAZ 2114 starter, detailed instructions
In fact, removing the starter is a completely simple procedure and you don’t even need a hole or overpass, everything will be done in the engine compartment.
Open the hood and disconnect the negative terminal from the battery. We unscrew the air duct clamp that fits the air filter housing.
We also unscrew the filter housing itself; it is attached at the front with two bolts, and at the bottom with a rubber connection, and then pull it out. Now you can easily get to the starter itself.
- Next, what you need to do is unscrew the power wire that fits to the solenoid relay with a thirteen key, and also pull out the connector, it is located nearby.
- Now you can unscrew the starter of the VAZ 2114, VAZ 215, depending on your model, it is attached to three studs, to do this, unscrew the nuts and now you can safely pull it out for further repairs.
After replacing the defective part, install it in the reverse order. We will provide more detailed instructions for replacing brushes, bendix and other parts in the following articles. Have a good trip and no breakdowns.
VAZ 2115 starter relay: breakdown and replacement method
VAZ 2115 is one of the most worthy creations of the Volga automobile industry. In common parlance, this car is called a tag; it is truly considered one of the most popular and inexpensive cars on the domestic market, produced since 1997.
The car earned its popularity quite honestly, since operation and repair do not pose any particular problems to the car owner. However, there are breakdowns that everyone who owns this wonderful car should know about. We will talk about the starter relay.
its breakdowns and ways to repair it.
Starter relay location
What do you need to know about the starter relay for the VAZ 2115?
The starter itself is a four-pole DC motor that is powered by electricity from the battery. A technical inspection of the starter must be done every 100,000 km.
Based on the principle of its operation, the starter consumes quite a powerful current, so even minor fluctuations in resistance can significantly reduce its performance and lead to complete breakdown. In order to make sure that the failure is in the relay, it is necessary to do a check.