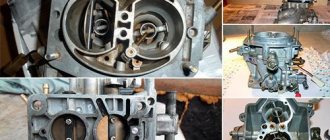
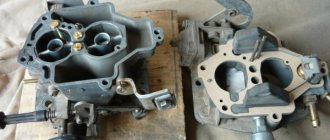
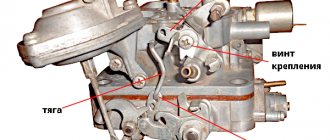
Symptoms of a VAZ 2108 carburetor malfunction
Diagnosing a carburetor malfunction is quite simple. In most cases, the engine can be started with a faulty power supply. The engine's performance will be far from ideal, but it will show signs of life.
The main symptoms of carburetor failure look like this:
- insufficient speed and the engine tries to stall;
- the engine stops working as soon as the driver stops pressing the gas pedal;
- increased fuel consumption: more than 12 liters per 100 km in winter and from 9 liters in summer;
- the appearance of failures in engine operation after a sharp press on the accelerator.
The list of faults indicates that the VAZ 2108 carburetor needs to be repaired. Perhaps there is an air leak, the jets or fuel filter are clogged. Springs and levers could break. Most rarely, the accelerator pump diaphragm fails.
Necessary tool
Repairing and adjusting the VAZ 2108 carburetor will require a little training from the owner. Depending on the time of year, troubleshooting can be done in the garage or outdoors. You should buy an aerosol carb cleaner and acetone in advance. It will not be superfluous to purchase a carburetor repair kit; you may need to replace some elements.
The tools you will definitely need are:
- screwdrivers: slotted and Phillips;
- Open-end wrenches with jaw: 7, 8, 10, 13, 14 mm;
- pliers;
- medical syringe.
To purge the channels and jets of the carb, compressed air is required. Its source can be: a compressor, a compressed air cylinder or a car pump.
Here is a complete list of tools with photographs and descriptions: what tools are needed to repair, tune, and adjust the carburetor
What to do with increased consumption
Before you tightly grasp the carburetor, be sure to make sure that the other systems are in good working order - the spark plugs are in working order, the high-voltage wires do not break through to ground, and there is compression in the engine cylinders (the minimum value for the VAZ 2108 is 11 Bar). Unscrew the spark plugs and check the condition of the electrodes.
Important. The color of the electrodes reflects the picture of the operation of the power unit. A black coating indicates that the mixture is over-rich, the proportion of gasoline in it is too high. White color indicates a lean mixture, the norm is a light brown tint.
Light brown is the correct color for the electrodes on the spark plugs
The most unpleasant problem is an increase in fuel consumption, which occurs for the following reasons:
- the economizer diaphragm is worn out;
- the main air jet or channels inside the unit are clogged;
- the needle valve, which limits the flow of fuel into the float chamber, does not hold;
- jets of unknown origin from a repair kit were installed.
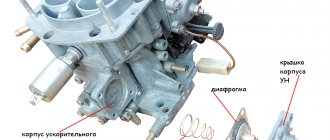
Location of the economizer cover
Note. Listed here are problems that you can solve on your own. If the recommended measures do not have an effect, then the malfunction is more complex and you will have to contact a carburetor repair specialist to fix it.
To check the diaphragm, remove the air filter housing (the cover is secured with 3 10 mm nuts, the housing with 4 8 mm nuts). On the left wall of the carburetor in the direction of travel of the car, find a triangular economizer cap screwed with 3 screws, unscrew them with a Phillips screwdriver. Underneath there is a spring-loaded membrane that needs to be checked and replaced if necessary.
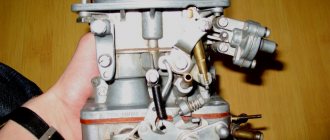
Removing the filter on the figure eight
You can read more about adjusting the carburetors of OKA cars here:
To eliminate other causes, you will have to remove the top cover of the Solex by disconnecting the starter cable and unscrewing the 5 fastening screws with a Phillips screwdriver. Then follow the instructions:
- Unscrew the air jets, remembering where each one should be. Fuel jets are hidden under them in the wells; unscrew them with a thin screwdriver and pull them out with a toothpick. Blow through the calibrated holes thoroughly.
- Using a blower, suck the gasoline out of the float chamber along with the dirt. Fill all channels and diffusers with the product from an aerosol can, wait for the time indicated on it and carefully blow out the carburetor without removing it from the car.
- Take the removed cover of the unit, turn it with the floats up and try to blow into the fuel supply pipe, plugging the pressure release fitting with your finger. If air passes through, replace the needle valve as it will also allow gasoline to pass through unhindered.
- If you replaced all the jets before increasing the flow rate, feel free to unscrew them and throw them away, and return the standard ones to their place.
- Before assembly, make sure that the floats do not touch the walls of the chamber; if necessary, carefully bend them.
- Reassemble the Solex in reverse order and begin adjusting.
To remove the top cover of the Solex you need to unscrew 5 screws
Reference. Oddly enough, with a lean mixture, gasoline consumption also increases. Since the car “does not pull” due to lack of fuel, you solve the problem by pressing the gas too hard, or even pulling the “choke”, half closing the air with the damper. Naturally, fuel is consumed beyond the norm.
Carburetor repair
Among the main reasons for carburetor failure is low-quality fuel: with a high content of metal additives or resins. Gradually the jets become clogged. If the engine loses idle speed, then in 90% of cases the problem was caused by dirt or gradual sediment. The presence of dips also indicates contamination of a component such as the accelerator pump. The VAZ 2108 carburetor systems need to be cleaned and then adjusted, which is what most car owners do with their own hands.
Cleaning
If the tool and accompanying means are prepared, you can proceed to action:
- you need to remove the air filter housing by disconnecting the gas outlet hose and unscrewing the four nuts on the studs;
- start the engine;
- spray the aerosol cleaner in all visible places, applying gas with the damper lever in the process;
- then you need to pull out the choke so that the needle on the tachometer is from 2500 to 3000 rpm;
- then the solenoid valve is unscrewed. It is necessary to spray a cleaner into its seat, with periodic gassing. It is also necessary to treat the hole with compressed air;
- then you should turn off the engine and install the valve in place;
- be sure to remove the carburetor cover by unscrewing the four screws with a slotted screwdriver;
- use a medical syringe to remove gasoline from the float chambers;
- instead of gasoline, pour a little acetone and leave for half an hour;
- then unscrew the jets, marking their placement locations;
- jets also need to be soaked in a separate container with acetone;
- after 30 minutes, remove the acetone from the float chambers and wipe off the soggy dirt;
- take out the jets, blow them out with compressed air, wipe them and screw them back in;
- disconnect the gasoline supply hose, remove the fitting and remove the fuel strainer;
- replace it with a new one and put the hose back;
- put the carb cap in place.
Pour gasoline into the float chamber and start the engine. After such cleaning, the engine is allowed to idle with minor interruptions, which will be eliminated later. If there are dips when you sharply press the gas, it means the accelerator pump is not performing its functions.
You need to do the following:
- remove the carburetor cover;
- remove the accelerator pump injector;
- soak it in acetone;
- unscrew the accelerator pump cover;
- spray carb cleaner into the opened channel;
- then blow out the hole with compressed air;
- replace the membrane;
- remove the soaked UN nozzle and blow it with compressed air;
- put everything back together.
Start the engine and press the accelerator lever. According to the instructions, the dips will most likely disappear.
Adjusting the carburetor VAZ 2108
Let's proceed to the second stage of work. To ensure the car has good dynamics, the carburetor of the VAZ 2108 should be adjusted. It will not be superfluous to check the spark plugs and high-voltage wires for defects, as they can make the setup process unclear.
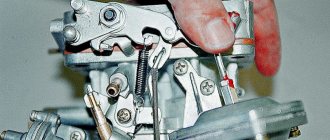
The first thing to do is to establish the correct position of the choke and gas cables. To fix the first one, you should push the damper handle in the cabin all the way, and then tighten the cable into the mount on the carb lever. The throttle cable must be secured to the accelerator lever, possibly following the remaining traces. After we managed to adjust the cables, we proceed to the VAZ 2108 carburetor itself.
2 screws will help you adjust the fuel supply correctly:
- the first of them has a plastic handle for rotation with your fingers and a groove for a slotted screwdriver. It regulates the amount of fuel;
- the second is located in the sole of the carburetor at the end. It regulates the quality of the mixture, providing the necessary amount of air and gasoline for idling.
For reference! Both of these screws have almost no effect on the performance of the engine when driving, since 90% of the working mixture enters the intake manifold through diffusers, bypassing the idle system. Almost all VAZ 2108-09 have carburetors with this type of device. An exception could be the export versions of Samara.
The VAZ 2108 carburetor is adjusted after the engine has warmed up. Therefore, the engine must be started and allowed to run until operating temperature. Even if it’s intermittently. If the engine stalls all the time and refuses to work, then try turning the fuel quantity screw slightly. This should help.
| Carburetor models | ||||||
| OPTIONS | 2108 Cameras 1/2 | 21083 Cameras 1/2 | ||||
| Diffuser diameter | 21/23 | 21 23 | ||||
| Mixing chamber diameter | 32/32 | 32/32 | ||||
| Main fuel jet performance | 97,5/97,5 | 95/97.5 | ||||
| Main air jet performance | 165/125 | 165/125 | ||||
| The performance of the idle fuel jet and the transition system 2 chambers respectively | 39-44; 50 | 39-44; 50 | ||||
| The performance of the idle air jets and the transition system 2 chambers, respectively | 170/120 | 170/120 | ||||
| Produces fuel jet econostat 1 chamber and economiser 2 chambers | 60/40 | 60/40 | ||||
| Performance of the actuator jet of the main dosing system of chamber 1 | No | No | ||||
| Diameter of spray accelerator pump mm/100 | 35/40 | 35/40 | ||||
| Fuel supply by accelerator pump. cm3/10 strokes | 11,5 | 11,5 | ||||
| Starting gaps of air and throttle valves | 3,0/1,0 | 3,5/1,1 | ||||
Next, you can start setting up the carb, which should be done in the following sequence:
- Using a slotted screwdriver, gradually unscrew the quality screw until the engine speed begins to increase. After that, screw it back half a turn;
- then you should reduce the engine speed to 1000 by rotating the speed screw with a plastic handle counterclockwise;
- Next, you should return to the mixture quality screw and tighten it until the needle on the tachometer reaches 800-900 rpm. Ideal 850.
In the event that minor work was carried out on the VAZ 2108 power unit and some characteristics were lost on the Solex carburetor, then the mixture quality screw should not be touched. It is enough to adjust the engine speed to normal using the quantity screw.
For reference! Adjusting the VAZ 2108 carburetor with your own hands can become more professional and effective. To do this, it is possible to use a special device - a portable gas analyzer. It is often used in auto repair shops. It is enough to take exhaust gas readings during tuning. Normal: 1.5% CO at idle and 2% CO at 2,000 rpm.
Setting up the launcher
- open-end wrench 7;
- open-end wrench 8;
- flat screwdriver;
- electronic tachometer or multimeter with its function.
1. Remove the air filter from the carburetor. Pull the “suction” towards you as far as it will go. Next, you will need an assistant to start the engine. At this time, you are watching the starter flap, which should open slightly after starting.
2. If this does not happen, it means that the starter is not adjusted.
3. We begin the adjustment. Warm up the engine, turn it off and connect the tachometer as follows.
4. Pull out the choke and start the engine. The suction valve must be completely closed.
5. Next, use a screwdriver to press on the edge of the damper, opening it 30 0 .
8. In this position, holding the bolt with a screwdriver, tighten the locknut.
The adjustment process can be seen in this video
Performance test
It is possible to check the quality of the carb setup using several small tests. The following needs to be done:
- let the engine run and observe the idle stability;
- unscrew the spark plugs and check if there is carbon deposits on the electrodes (white or gray deposits indicate operation on a lean mixture, black deposits on a rich mixture);
- check the dynamics of the car in motion, changing speed modes.
Having adjusted the carburetor according to the instructions, the engine should idle properly and without interruption. If such defects occur, it means there are problems in other systems. If you have insufficient experience, it is better to contact a specialist for diagnosis.
In case of successful repair and adjustment of the carburetor, it will not be superfluous to determine the fuel consumption. To do this, you should pour a small amount of gasoline into the empty tank and record the mileage on the odometer. Acceptable consumption should be 1 liter per 12 km in the city, and within 14 km on the highway.
After short trips, you should unscrew the spark plugs again and check the carbon deposits on the electrodes. If there is black carbon deposits and more gasoline has been consumed, then you need to reduce the quality of the mixture by tightening the screw 1 - 1.5 turns. At the same time, adjust the idle speed using the quantity screw. After this operation, you should recheck the fuel consumption while driving.
For reference! If the color of the carbon deposits on the electrodes of the spark plugs is white or gray and a measured driving style suits you, then the carb does not need to be reconfigured. In this case, the car will save about 1 liter of gasoline per 100 km. If you need dynamics, then unscrew the quality screw 1 turn and adjust the idle speed with the mixture quantity screw.
How does a G8 carburetor work?
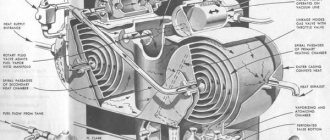
Gasoline is supplied through a valve and filter to the float device (into a chamber with two sections). The required fuel level in this two-section device is maintained by the mentioned valve (it has a needle shape). From the described chamber, gasoline is directed through the carburetor fuel jets into the emulsion wells. In them, fuel is combined with air supplied through the corresponding jets. The resulting composition is then sent to diffusers.
When starting a cold engine, the fuel mixture must be enriched.
This is made possible thanks to the trigger mechanism. The driver controls it with the “choke” handle. When he pulls it all the way, the air damper rotates along the axis and closes it. In this case, the camera opens slightly (by one millimeter). After starting the engine, there is an increase in the amount of vacuum in the intake manifold, which is directed into the cavity of the trigger mechanism.
Its diaphragm, due to the resulting vacuum, slightly opens the air damper to the level of the starting gap (about 3.5 millimeters). When the driver retracts the “choke” handle, a decrease in starting gaps is noted. If you press the gas pedal with the handle extended, the flap of the second chamber closes, and the first one opens. Due to this scheme, driving on a cold engine becomes more comfortable (as there are no dips or jerks of the car).
The selection of fuel from the emulsion compartment (the so-called well) is carried out by the idle mechanism (idle speed). Gasoline is supplied through XX jets and is combined with air. This composition goes through a special hole under the throttle valve. Using two screws, the throttle opening at idle is controlled:
- when the damper of the second chamber is opened (partially), a mixture of fuel and air is sent into it through the hole;
- if the damper of the first chamber is opened, the flammable composition passes through the vertical gap.
