Purpose and design
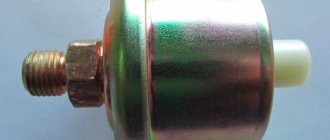
The main function of the oil pressure sensor in Kalina is to inform the driver about the presence of oil pressure in the engine. The sensor is a valve that opens its contacts at a certain pressure.
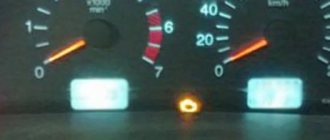
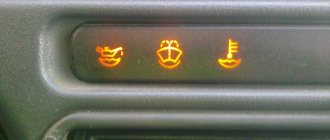
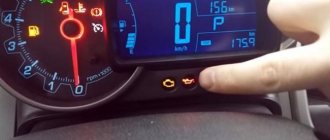
When you turn on the ignition, you can see a red oil can on the car’s dashboard; it indicates that there is now no oil pressure in the engine, and this is correct, because the internal combustion engine is not running. Once the starter starts rotating and the engine starts, the light should go out within a few seconds. If this does not happen, then there is no oil pressure in the internal combustion engine, which can lead to engine damage.
Checking the electric oil pressure sensor with a multimeter and a light bulb
Why is the oil pressure light on?
causes and possible malfunctions The method is suitable for all modern Lada cars, in particular VAZ 2114, and foreign cars. Where there is only an emergency warning about low oil pressure.
In such cars, a sensor is installed that works on the principle of opening a circuit. The pressure is normal - the circuit is open, not normal - it is closed, the light is on.
To check with a light bulb you will need:
- The control itself is 12 V.
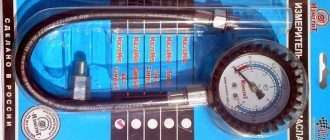
- An electric car pump or compressor, preferably with a pressure gauge. If they are not there, then use a regular foot pump.
- 12 Volt power supply. You can use a car battery or a computer power supply.
Connect the negative wire of the battery to the ground of the sensor, and the positive wire to a similar wire, but through the control. The light should light up. If not, then the sensor is faulty.
Start the pump or compressor and supply air to the sensor inlet. If the latter is working properly, then the light should go out.
https://youtube.com/watch?v=SpWE6h6vbjM
Adjust the pressure using the pressure gauge; it should not exceed 1.5 atmospheres, otherwise the membrane may be damaged. Optimal limits are from 0.5 to 1.5.
When checking with a multimeter you will need:
- The device itself is switched to the “dialing” mode.
- Electric pump or other air blower.
Connect the multimeter to the sensor, minus to the body, plus to the center wire. The circuit will close and a signal should appear.
Turn on the pump and apply pressurized air to the sensor inlet. Monitor the pressure on the pressure gauge.
The circuit should open and the sound coming from the multimeter should disappear.
Where is
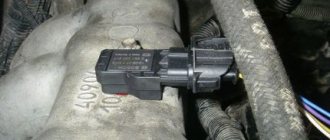
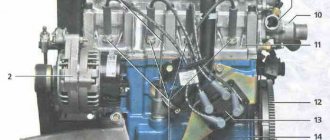
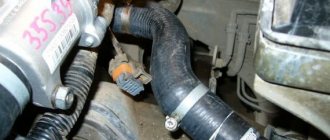
Many people wonder where the oil pressure sensor is on Kalina, but it’s really hard to notice right away. Also, the location of the sensor depends on the type of engine, namely on the number of valves.
- On the 16-valve model, the oil pressure sensor is located to the right of the oil filler neck and is screwed into a special drain.
- On an 8-valve engine, the oil pressure sensor is located on the left side of the engine near the timing case.
What to do if the viburnum check light comes on
If the driver sees a check on the panel of the Kalina car, it means that the engine ECU has received error information from one of the engine components. Using diagnostic equipment, it is necessary to check what kind of malfunction it is, find it and solve it by replacing or adjusting it.
Similar article Why the check light is on on a Priora
To prevent a check from appearing on a Kalina vehicle, the car owner must appear annually for preventive maintenance. Experienced mechanics will fix problems that the driver may not even be aware of.
What to do if the oil pressure indicator is on
It happens that the oil pressure indicator on the car lights up, and this indicates serious malfunctions in the engine. If you find such a warning light on your car, you need to stop and turn off the engine as soon as possible.
The reasons why the oil pressure light comes on may be:
- Low oil level;
- Sensor failure;
- Oil pump failure;
- Damage to wiring;
If your car's oil pressure light comes on, check the following after stopping:
- Check the presence of oil in the engine; if the oil level is low, the amount will not be enough to create the necessary pressure for proper operation of the internal combustion engine. Loss of oil can occur due to wear on the CPG, a sump failure, or other leaks in the engine.
- Check the condition of the sensor and its wiring; perhaps a chip (connector) has simply fallen off the sensor. The sensor wiring must be in good working order and must not have any traces of melting or insulation breaks.
- If a visual inspection shows that everything is in order with the car, but the oil pressure lamp is still on, it is necessary to tow the car to a service station for further diagnostics.
The oil pressure light comes on at idle when the Kalina engine is warm
- Registration
- Entrance
- To the beginning of the forum
- Forum Rules
- Old design
- FAQ
- Search
- Users
The oil pickup should be checked.
doesn't blink when cold
If this happened about 1000 km after changing the oil, then you bought a stick.
Well, apparently this rake has already been stepped on.
what a mess, and how it usually ended.
Freedom for parrots and c105!
Maybe my intake was clogged with sealant, I cleaned it recently, but when I closed the pan I put a gasket on the sealant.
But basically there are only 2 options. Either there is no pressure, or the sensor is lying - there is no other way! Therefore, I would either connect a pressure gauge - this will 100% give the correct answer, or change the pressure sensor and hope that the problem was there. The 2nd option is the cheapest - $1.5, but when you tighten the sensor, do not overdo it; it is wrapped in an aluminum block and the threads there are very easy to break. The key becomes very convenient and by leaning against the wing there you can turn the devil off.
Either there is no pressure, or the sensor is lying - there is no other way!
Freedom for parrots and c105!
starts blinking after 1-1.5 thousand km. mileage after oil change
Maybe you need to get oil at Lukoil gas stations, maybe it’s definitely not too pale there?
Freedom for parrots and c105!
The gas station can be rented from Lukoil by no one knows who. Why don’t you want to fill it with normal oil, even Shell?
And if they say Lukoil on the checks, is it real?
Help, the situation is this: the oil pressure light began to blink when the car warmed up, changed the sensor, it began to light constantly, I decided to check the pressure, they suggested that I can check it by eye. You unscrew the oil pressure sensor and start the engine, if oil starts splashing (or pouring out, I don’t know for sure) from the hole, then at least the oil reaches the end of the fuel line. I did so, there was oil. After wandering around the forums and hearing advice, I decided to change the oil filter without draining the oil, because... everything was changed 1500 km ago. So I removed the old filter, poured a little oil into the new one (as it should be) and screwed it into place, I started the engine and nothing flowed from the sensor hole. Could some kind of air lock form, or how else can this problem be solved?
VAZ 21102 8cl. 1.5l Lukoil oil semi-synthetic 5w40
Help, the situation is this: the oil pressure light began to blink when the car warmed up, changed the sensor, it began to light constantly, I decided to check the pressure, they suggested that I can check it by eye. You unscrew the oil pressure sensor and start the engine, if oil starts splashing (or pouring out, I don’t know for sure) from the hole, then at least the oil reaches the end of the fuel line. I did so, there was oil.
Information on icons and features
You can not
start topics You
cannot
reply to messages You
cannot
edit your messages You
cannot
delete your messages You
cannot
vote in polls You
can
attach files You
can
download files
Source
Replacement
You can replace the sensor yourself without much effort. To do this, it is enough to prepare a 21mm key.
You can unscrew the sensor calmly, without fear that oil will escape from there.
- Remove the connector from the oil pressure sensor;
- Unscrew the sensor counterclockwise using a 21mm open-end wrench;
- We take out the sensor and wipe the seat from dirt;
- We install the new sensor in the reverse order, not forgetting to install the O-ring;
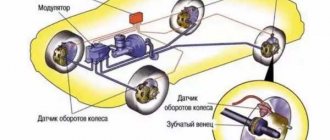
How to independently replace the crankshaft sensor on a VAZ 2112 car
There are 3 ways to check for a faulty crankshaft sensor:
- measurement using an ohmmeter;
- checking the inductance value;
- using an oscilloscope.
Checking the crankshaft position sensor using an ohmmeter:
- For this test you need to purchase a multimeter.
- It must be placed in the resistance measurement position.
- Then measure the resistance level of the inductor: use the probes of the device to touch the coil terminals.
- Acceptable value is 500-700 Ohm.
- If the measurement results are within the specified range of values, then the crankshaft is normal.
Checking the crankshaft sensor using an inductance measurement:
- You need to get a megohmmeter and a network-type transformer. You also need to purchase an inductance meter and a voltmeter.
- Using a multimeter, measure the inductance.
- Normal values are 200-400 mH.
- Using a megohmmeter, measure the insulation resistance between the coil wires.
- The obtained data should not be lower than 0.5 Mohm.
- The coil is demagnetized using a network transformer.
- A deviation from the norm indicates that the crankshaft sensor needs to be replaced.
- Connect the probes to the wires that lead to the coil.
- Open the software for working with the oscilloscope.
- Pass a metal object in front of the DPKV.
- All data will be reflected on the screen.
To do this, you can use several methods. We will not consider all of them, but will devote time to only two, the most basic and most accurate methods. In any case, to perform diagnostics you need to dismantle the element to check its functionality. When dismantling the crank pulley position regulator, you should visually inspect it - perhaps the malfunctions will speak for themselves.
Often, a visual inspection makes it possible to identify certain damage to the element body, as well as the condition of the block itself and the contacts themselves. If the regulator is too dirty, it must be washed with alcohol, since its contacts must always be clean. If this diagnostic method does not help detect a breakdown, then you should check the sensor more carefully.
First way
Voltmeter for diagnostics
But before you start diagnosing the pulley position regulator, check the manual for your machine for the exact range of indicators for DPKV. The manufacturer indicates this nuance most accurately and you will need to navigate according to it. If the results obtained differ from those indicated in the instructions, then the DPKV must be replaced because it is faulty.
Second way
This method will allow you to more accurately determine the state of the component. To test your device you will need:
- digital voltmeter;
- megohmmeter;
- inductance measuring device;
- network transformer.
Megaohmmeter for device diagnostics
Required materials and tools:
- key to “10”;
- head, knob;
- rags;
- additional lighting as needed;
- new DPKV;
- flat head screwdriver.
Regulations:
- We place the car on the inspection channel, secure the wheels with wheel chocks, and squeeze the parking brake;
- from the end of the engine, in the area where the oil pump is located, use a screwdriver to pry up the block with terminals, remove it, and move it to the side;
- Unscrew the screw (to “10”) - the clamp from the sensor;
- remove the controller;
- We carry out troubleshooting of the seat, wipe it, clean it from residual dust and dirt;
- insert a new controller;
- screw it in and assemble the structure in reverse order.
DIY replacement completed.