Blog about UAZ
The UMZ-4216 engine lubrication system is combined: under pressure and splashing. Oil is sucked through the oil receiver by the oil pump and fed into the oil line through a full-flow oil filter.
UMZ-4216 engine lubrication system, composition, design, maintenance, oil pressure in the lubrication system, part numbers.
A pressure reducing valve is installed on the oil pump, which bypasses the oil into the line bypassing the filter element in case of high resistance (clogging, cold engine start). The bypass valve opens when the pressure difference at the inlet and outlet of the filter is 58-73 kPa (0.60-0.75 kgf/cm2). When the ambient temperature is above plus 5 degrees, it is necessary to open the oil radiator tap. The faucet is open when its lever is directed along the hose.
A limit valve is installed in front of the oil radiator tap, allowing oil to enter the radiator only at a pressure of more than 70-90 kPa (0.7-0.9 kgf/cm2). All lubrication system valves are adjusted at the factory and should not be adjusted during operation.
The oil filter is installed on the cylinder block on the right side of the engine. The filter is removed by rotating it counterclockwise. When installing a new filter on the engine, you need to make sure that the sealing rubber gasket is in good condition, lubricate it with engine oil and screw the filter in by hand until the gasket touches the plane on the cylinder block, then tighten the filter 3/4 of a turn.
After installing the filter and filling the engine with engine oil, start the engine for 30-40 seconds and stop. Make sure there is no oil leakage from under the gasket and check the oil level.
Oil cooler for the UMZ-4216 engine lubrication system.
The oil cooler of the UMZ-4216 engine lubrication system is a coil made of an aluminum tube and serves for additional cooling of the oil. The oil cooler is fixed by means of brackets on the radiator trim panel and connected to the engine oil line with a rubber hose through a shut-off valve and a safety valve. The oil from the radiator is drained through a hose into the oil sump.
Replacing the oil cooler of the UMZ-4216 engine lubrication system.
If the oil cooler leaks, it must be removed from the vehicle and replaced with a new one. The oil cooler must be replaced in the following sequence.
— Disconnect the radiator mounting bracket from the top panel of the radiator trim. Disconnect and remove the bumper. — Disconnect and remove the upper panel of the radiator trim, having previously disconnected the pin blocks of the audio signal wires, the air filter intake and the hood lock actuator. — Disconnect and remove the radiator trim panel assembled with the oil cooler, having first disconnected the hoses from the oil cooler. — Disconnect the oil cooler assembly with the upper and lower brackets from the radiator trim panel. — Replace the oil cooler with a new one.
Installation of the oil cooler must be performed in the reverse order of removal, taking into account the following.
— The tightening torque of the nuts securing the upper and lower brackets of the oil cooler should be 1.7-2.3 Nm (0.17-0.23 kgcm). — The tightening torque of the nuts securing the oil cooler to the radiator trim panel is 12-18 Nm (1.2-1.8 kgcm).
Replacement and installation of an oil cooler for the UMZ-4216 engine lubrication system on Gazelle and Sobol cars.
Catalog numbers of components and parts of the UMZ-4216 engine lubrication system, oil sump, oil receiver and oil pump, oil pump drive, oil filter, oil pressure sensors.
Pressure in the UMZ-4216 engine lubrication system.
The pressure in the UMZ-4216 engine lubrication system at an oil temperature of plus 80 degrees with the oil cooler turned off should not be less than 125 kPa (1.3 kgf/cm2) at a crankshaft speed of 700 rpm and 245 kPa (2.5 kgf/cm2) cm2) at 2000 rpm. While operating the vehicle, you need to monitor the operation of the oil pressure sensors. The emergency oil pressure sensor is triggered at a pressure of 39-78 kPa (0.4-0.8 kgf/cm2).
It is prohibited to operate the vehicle with the oil pressure warning light on. On a warm UMZ-4216 engine with a working lubrication system in idle mode and during sudden braking, the warning light may light up, but should immediately go out when the crankshaft rotation speed increases.
Pressure indicators of GAZ car engines
Pressure in the lubrication system is necessary for the movement of oil and its supply to consumers. The practical performance of a serviceable motor is influenced by the following factors:
- oil viscosity,
- engine temperature,
- ambient temperature,
- crankshaft rotation speed,
- load,
- presence of an oil cooler.
Cars produced by the Gorky plant are equipped with different engines. The permissible pressure values in the engine lubrication system are given in the table.
The construction of the Nizhny Novgorod Automobile Plant (NAZ) was included in the number of priority construction projects of the first five-year plan and, although not without serious problems, was completed in just 18 months.
Alexander Klimnov
Table: pressure indicators of GAZ car engines
| Engine | Automobile | Pressure value (kgf/cm 2) | Conditions |
| ZMZ-406 | "Volga" "Gazelle" | 2–4 | driving 50 km/h |
| 4,5 | cold engine | ||
| 1,5 | heat | ||
| 1 | fault criterion | ||
| ZMZ-402 | "Volga" "Gazelle" | 2–4 | driving 50 km/h |
| 4,5 | cold engine | ||
| 1,5 | heat | ||
| 1 | malfunction criterion at medium speeds in motion | ||
| 0,5 | idle speed fault criterion | ||
| ZMZ-405 | "Gazelle" | 4,6 | filter bypass valve activation |
| 6 | maximum permissible | ||
| 0,4–0,8 | activation of the alarm system | ||
| GAZ-560 | "Volga" "Gazelle" | >1 | idling 850 rpm, 80–85 °C |
| 5–7 | 3800 rpm, normal | ||
| 4 | 3800 rpm, short-term permissible | ||
| UMZ-421 | "Gazelle" | >1,3 | 80 °C, 700 rpm, oil cooler off |
| >3,5 | 80 °C, 2000 rpm, oil cooler off | ||
| >0,8 | 80 °C, 700 rpm, oil cooler on | ||
| >2,5 | 80 °C, 2000 rpm, oil cooler on |
Oil pressure values in UAZ cars
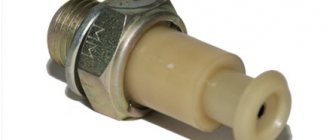
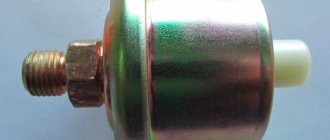
The power plants of UAZ vehicles are equipped with two pressure sensors: a control one that controls a dial or digital indicator, and an emergency one. The latter gives a light signal (turns on the light on the panel) if the lubricant pressure decreases to 0.4–0.8 kgf/cm 2 .
Even if the motor is fully operational, the pressure value depends on the operating conditions:
- on the degree of viscosity of the oil;
- on engine temperature;
- on ambient temperature;
- on the crankshaft rotation speed (rpm);
- from load;
- from using an oil cooler.
The oil pressure indicator readings are usually in the range of 1–5 kgf/cm2 and differ slightly for different models of UAZ power plants.
In 2021, the legendary Russian manufacturer of all-terrain vehicles, the Ulyanovsk Automobile Plant, turned 75 years old.
UAZ
https://www.uaz.ru/company/75
Table: oil pressure value in various engines
- idling,
- 2 thousand rpm,
- 80 °C.
- idling,
- 600 rpm,
- 80 °C.
- Euro 3,
- idling,
- 850 rpm
- Euro 4,
- idling,
- 850 rpm
- idling,
- low speed.
- idling,
- average speed.
- idling,
- 700–800 rpm.
- 80 °C.
- idling,
- 2 thousand rpm,
- 80 °C.
Checking the functionality of the sensors
DDMs provide very important information about the condition of the engine. A responsible driver treats them with great care, and rightly so. You can’t drive “without pressure,” but you also shouldn’t disassemble the engine every time the warning light turns on.
Although pressure sensors - both emergency and control - are reliable devices, they, like all car parts, may well break. Their common “diseases” are shown in the table.
Table: malfunctions of oil pressure sensors
| Type of oil pressure sensor | Malfunction | Manifestation |
| Emergency | break or increase in contact resistance | The warning light does not light up |
| sticking of contact electrodes | The warning light is constantly on | |
| violation of the integrity of the diaphragm | low sensitivity of the sensor, the warning light goes out only at high speeds | |
| sensor leakage | oil leakage from the sensor | |
| Control | rheostat break | no pressure indicator readings |
| increase in moving contact resistance | low blood pressure readings | |
| violation of the integrity of the diaphragm | no readings or low blood pressure readings | |
| sensor leakage | oil leakage from the sensor |
The most reliable way to check sensor readings is to measure pressure using an external test pressure gauge. It is connected in a convenient place to replace any (control or emergency) standard meter.
The most reliable way to check sensor readings is to measure pressure using an external control pressure gauge
Video: checking oil pressure with a pressure gauge
GAZ-3302 became the first domestic car designed using the world-leading method of end-to-end computer technology for production design using CAD-CAM technology, analytical calculations of dies and molds using the CATIA computer program and many others.
Oleg Filimonov
Using a mechanical pressure gauge as a reference device eliminates doubts about the serviceability of the bearings, crankshaft and rings. But you can evaluate DDM without it.
GAZ car engines use one or two DDMs. The alarm gives a signal (turns on the lamp) when the pressure value drops below the permissible value. The control controls the readings of the pressure indicator installed on the dashboard, which indicates the current value of the parameter.
Diagnostics of emergency DDM
The emergency sensor has two “troubles”: a break and a short circuit. In the event of a break, the pressure lamp on the dashboard does not light up. In the event of a short circuit, it lights up constantly.
If the ignition is on, the engine is not running, but the light is not on, disconnect the wire from the sensor and touch the body, clearing the contact area of any dirt.
Did the light come on? This means that the pressure sensor needs to be changed; it is faulty. If the alarm still does not turn on, the problem may be a broken wiring or a faulty lamp.
If the wire from the sensor is disconnected, but the oil light still lights up when the ignition is turned on, the wiring is most likely shorted to the housing.
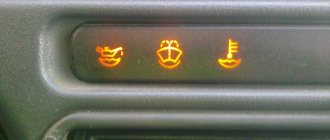
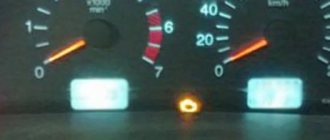
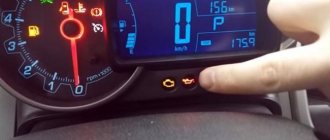
Why is the oil pressure light on?
Burning pressure indicator on the dashboard
There may be several reasons for the problem:
- The most common is a lack of engine fluid in the sump. If your vehicle is used constantly, you should periodically spend time monitoring the lubricant level in the system. In addition, the engine should be checked for the absence of oil stains, because if the lubricant leaves, then the leaks should be eliminated.
- Operation of a low-quality oil filter. In practice, oil starvation of the engine and loss of oil into the crankcase is most often observed in vehicles that have a low-quality filter element installed.
- Damage to the pressure sensor or broken wiring. If there is a break in the wires in the wiring system or a short circuit, this may cause the lamp itself to operate for no reason. If the sensor itself fails, the lamp will fire when there is a re-gas and a change in pressure in the system.
- Reducing valve failure. When the pressure level in the system is reduced, the valve is in the closed position, but if this element is jammed, in the open position the pressure will be insufficient. This may cause the pressure sensor to turn on.
- If the oil pump screen is clogged, the sensor will also inform the driver of a malfunction. Most often, the mesh becomes clogged as a result of dirt, dust and other clogging particles getting on it. You can get rid of this only by replacing the mesh, as well as flushing the engine and adding new engine fluid.
- Oil pump failure. If this element fails, the regulator contacts may close. If the regulator itself is working, then it is necessary to diagnose the oil pump and then replace it if necessary.
When replacing consumables, several requirements must be taken into account. Firstly, the quality of the lubricant must meet the requirements of the engine into which it is poured. If any characteristics do not meet, subsequent operational problems may arise. In addition, the lubricant must be inexpensive and preferably of high quality to ensure reliable operation of the unit. Before filling, it is necessary to flush the internal combustion engine to remove all deposits and dirt from it.
Self-replacement of DDM of GAZ cars
Replacing sensors usually does not cause problems. For ease of operation and access to the device, you may need to first remove some parts. Both sensors - control and emergency - are dismantled using the same method.
Be careful not to install a sensor other than the standard one without making sure that the parameters match. High or low internal resistance distorts the indicator readings on the instrument panel.
To work, you will need the tools included with the car.
- Before work, disconnect the on-board power supply by turning off the ignition and disconnecting the battery.
- If necessary, remove individual parts to gain access.
- Disconnect the wires from the sensor.
- Unscrew the old sensor.
- Install the correct one. When twisting, do not apply much force.
- Restore the wiring.
- Start the engine and check the operation of the engine.
- After a few minutes of operation, inspect the sensor. If oil oozes, tighten the connection with a wrench. Do not overdo it, otherwise the sensor may “stick” next time.
