Engine self-diagnosis
When operating Toyota cars in Russia in difficult climatic conditions, various engine problems often arise. These could be either serious breakdowns, which will be quite difficult to fix and it will be easier to install a contract engine, or failure of any sensors. If your “Check Engine” light comes on, don’t rush to get upset right away. First you need to carry out a simple self-diagnosis of the Toyota engine. This procedure will not take much time and will help you identify problems in the engine.
Why perform engine self-diagnosis?
When buying a used car you need to be very careful.
Often, unscrupulous sellers hide from you problems in the engine, which will later have to be fixed, sometimes spending a lot of money on it. An excellent solution when inspecting such a car would be to diagnose the engine yourself, so as not to buy a “pig in a poke.” Self-diagnosis must also be carried out for vehicle prevention. With some errors, the Check Engine light may not light up, although the fault will be present. This may result in increased gas mileage or other problems.
What needs to be done before diagnosis
Before performing an engine self-diagnosis, you must ensure that all indicators on the instrument panel are working correctly. The light bulbs may not light up or be powered by others, which creates the appearance of their operation. To save yourself from unnecessary steps and not have to disassemble anything, you can perform a visual inspection.
Fasten your seat belt, close the doors (to avoid unnecessary lights), insert the key into the lock and turn on the ignition (DO NOT start the engine). The “Check Engine”, “ABS”, “AirBag”, “battery charge”, “oil pressure”, “O/D Off” indicators will light up (If the button on the automatic transmission selector is depressed).
- The “ABS” lamp lights up when the ignition is turned on and should go out after 3 seconds;
- The “AirBag” lamp lights up when the ignition is turned on and goes out after self-diagnosis of the security system, after about 5 seconds.
Important: if you turn the ignition off and on without removing the key from the lock, the “AirBag” lamp will not light up again! Re-diagnosis of the system will occur only if the key is removed and reinserted.
- if the “O/D Off” lamp does not light up, press the button on the automatic transmission selector, the indicator should light up. And vice versa.
Next, start the engine:
- The “Check Engine” lamp should be constantly on when the ignition is turned on and go out immediately after starting the engine;
- The battery charge lamp behaves similarly;
- The oil pressure lamp lights up when the ignition is turned on and goes out 1-2 seconds after the engine starts.
If all of the indicated indicators behave as described above, then the instrument panel is in perfect order and you can perform engine self-diagnosis. Otherwise, you will need to fix any problems with the indicators first.
How to perform a self-test
To carry out simple self-diagnosis of a Toyota engine, you only need an ordinary paper clip to bridge the necessary contacts.
Location of diagnostic connector DLC1 in the car.
Location of the DLC3 diagnostic connector in the vehicle.
How to read error codes
After closing the indicated contacts, get into the car and turn on the ignition (you DO NOT need to start the engine). Error codes can be read by counting the number of times the Check Engine light flashes.
If there are no errors in the memory, the indicator will blink at intervals of 0.25 seconds. If there are any problems with the engine, the light will blink differently.
- Every 0.5 seconds the indicator will first display tens, then, after a pause of 1.5 seconds, units after 0.5 seconds.
- If the memory contains more than one error, then the pause between them will be 2.5 seconds.
- After the system displays all errors, they will begin repeating after 4.5 seconds.
Legend:
0 - blinking light;
1 — pause 1.5 seconds;
2 — pause 2.5 seconds;
3 - pause 4.5 seconds.
Code issued by the system:
0 0 1 0 0 0 0 2 0 0 0 0 0 1 0 0 3 0 0 1 0 0 0 0 2 0 0 0 0 0 1 0 0 3
Decoding the code:
Self-diagnosis produces error codes 24 and error 52.
What's the result?
You can decipher the received error codes using the table of Toyota engine fault codes. Once you find out which sensors are faulty, you can make a further decision: either eliminate the cause of the breakdown yourself, or contact a specialized car service.
Purpose of the self-diagnosis function
Of course, it will be impossible to determine critical failures of the engine, automatic transmission or various attachments using such self-diagnosis. But it is still possible to identify burnt-out light bulbs, a dead battery, or identify other simple faults, without the need to take the car to a service center and pay several thousand rubles for such work.
This self-diagnosis feature will be useful not only to car owners, but also to potential buyers of cars on the secondary market. Using this self-diagnosis function, you can determine a problem with the airbags, the activation of ABS sensors, or the appearance of a CheckEngine alarm. It will be impossible to hide such problems from the self-diagnosis system.
Using this function, you can find out the condition of the brake pads, which often wear out during operation and require replacement. Also, when buying a car on the secondary market, you can, by activating the vehicle check, determine whether all airbags are in place. If it is possible to clarify that individual airbags have been fired and replaced with new ones, then it is recommended to refuse to purchase such a machine.
It is not uncommon for various warning lights on the dashboard to burn out. In this case, even if there are certain breakdowns in the car, the car owner will not know about the existing problems on his car. The self-diagnosis function starts checking all such warning alarms and if any lights do not light up, then you can clearly identify the existing breakdowns and repair the car.
Toyota diesel self-diagnosis codes
Fault codes for gasoline and diesel engines (Toyota) Self-diagnosis codes Self-diagnosis codes for TOYOTA. Let's consider a diagnostic system used in cars. These vehicles have diagnostic connectors called "DLC 1" and "DLC 2" (Data Link Connector). The first of them is a plastic rectangular box, usually located on the left side of the car, with “DIAGNOSTIC” written on it. Engine self-diagnosis is displayed through the “CHECK” light on the instrument panel. But on some cars, instead of a “CHECK” light, there is a light with a picture of an engine, this is in general.
Deciphering error codes on Toyota cars. Technical defects appear sooner or later in cars of all manufacturers, including Japanese ones. The driver can decipher Toyota error codes independently, and it is possible to determine system malfunctions without the use of scanners. For self-diagnosis, the driver needs to work with the DLC 1 and DLC 2 connectors. This abbreviation stands for Data Link Connector, which in English means a connector for connecting data. DLC 1 looks like a plastic box with a lid on top. When writing down codes for diesel cars, you can see the following symbols. Code. Decoding.
Engine self-diagnosis. When operating Toyota cars in Russia in difficult climatic conditions, various engine problems often arise. These could be either serious breakdowns, which will be quite difficult to fix and it will be easier to install a contract engine, or failure of any sensors. If your “Check Engine” light comes on, don’t rush to get upset right away. First you need to carry out a simple self-diagnosis of the Toyota engine. This procedure will not take much time and will help you identify problems in the engine. Why do self-diagnosis?
Toyota self-diagnosis error codes
List of OBDII errors for Toyota vehicles:
DLC1 is made in the form of a rectangle located on the left side of the engine compartment in most cars of this brand. The plastic cover of this connector is marked Diagnostic.
If a malfunction is detected in the engine, the Check Engine indicator on the instrument panel will light up. The SRS light indicates a malfunction in the passive safety system, airbags, seat belt pretensioners.
The ABS indicator lights up if there are errors in the operation of the anti-lock braking system.
If the traction control system fails, the TRC lamp on the instrument panel will light up. The DLC2 diagnostic connector in almost all cars of this manufacturer is located under the dashboard on the driver's side.
Outwardly it differs from the first one. It is easy to find by the inscription Diagnostic. Diagnostic signature on the connector In older models, the diagnostic connector is made in the shape of a yellow circle and is located near the battery. Fault codes for older car models: Toyota ipsum fault codes for the Crown of the Year, Karina of the Year, Toyota Mark are read only by flashing the indicators.
What needs to be done before diagnosis
Before performing an engine self-diagnosis, you must ensure that all indicators on the instrument panel are working correctly. The light bulbs may not light up or be powered by others, which creates the appearance of their operation. To save yourself from unnecessary steps and not have to disassemble anything, you can perform a visual inspection.
Read also: Axial loads on an axle
Fasten your seat belt, close the doors (to avoid unnecessary lights), insert the key into the lock and turn on the ignition (DO NOT start the engine). The “Check Engine”, “ABS”, “AirBag”, “battery charge”, “oil pressure”, “O/D Off” indicators will light up (If the button on the automatic transmission selector is depressed).
- The “ABS” lamp lights up when the ignition is turned on and should go out after 3 seconds;
- The “AirBag” lamp lights up when the ignition is turned on and goes out after self-diagnosis of the security system, after about 5 seconds.
Important: if you turn the ignition off and on without removing the key from the lock, the “AirBag” lamp will not light up again! Re-diagnosis of the system will occur only if the key is removed and reinserted.
- if the “O/D Off” lamp does not light up, press the button on the automatic transmission selector, the indicator should light up. And vice versa.
Next, start the engine:
- The “Check Engine” lamp should be constantly on when the ignition is turned on and go out immediately after starting the engine;
- The battery charge lamp behaves similarly;
- The oil pressure lamp lights up when the ignition is turned on and goes out 1-2 seconds after the engine starts.
If all of the indicated indicators behave as described above, then the instrument panel is in perfect order and you can perform engine self-diagnosis. Otherwise, you will need to fix any problems with the indicators first.
Toyota Error Codes
Toyota error codes are encrypted information about existing malfunctions in the operation of the engine and its systems or automatic transmission. Modern models are equipped with electronic control modules with self-diagnosis systems. They are designed to optimize the operation of equipment, reducing fuel consumption and minimizing the toxicity of exhaust gases.
You can read and decipher Toyota errors at the specialized Toyota Dubrovka car service center. Our diagnosticians have been certified by the manufacturer and work according to its regulations; they will carry out the appropriate measures and provide all the necessary information to the car owner in a printout.
Toyota error codes: how are they read?
In order for the Toyota electronic control module to be able to receive the necessary data from the systems it controls, they are all equipped with sensors. If deviations from the norm established by the manufacturer in the sensor readings are detected, an emergency mode is launched, accompanied by a corresponding indication on the dashboard. If the normal operating parameters of the sensor are restored (after repair, replacement or independently), the standard operating mode and the engine or automatic transmission return. At the same time, data that malfunctions have been identified are recorded in the database in the form of Toyota codes and remain there.
Toyota malfunctions can manifest themselves in different ways: it happens that the engine stalls, attracting the attention of the driver who seeks auto repair help, and it also happens that the engine at first glance works well and its failures are not visible, although the corresponding warning light is lit on the dashboard indication. The latter often causes serious breakdowns, the elimination of the consequences of which requires significant investment. In this regard, Toyota's OBD2 error code system is very convenient. It detects even random failures in the operation of units and provides information about them during diagnostics. Thanks to this, the owner has the opportunity to take measures to prevent serious malfunctions or breakdowns of the car on the road.
Connectors for reading OBD2 Toyota errors
The connector for reading Toyota errors is hidden in a plastic case with the inscription “Diagnostic”, located on the left side of the car. Self-diagnosis is displayed through the “Check Engine” indicator on the dashboard. If the car is equipped with a diesel engine, then the glow plug control indicator is used during the self-diagnosis process.
Automatic transmission self-diagnosis can be displayed through the “O/D”, “Power” “A/T Check” indication, active or passive safety systems - through the “ABS”, “SRS” indication.
In the case of Japanese brand cars, two types of Toyota fault codes are used:
| Toyota code type | Number of characters | Pulse Width (sec.) | Pause between pulses (sec.) | Pause between codes (sec.) |
| 09 | Two-digit | 0,5 | 0,5 | 2,5 |
| 10 | Unambiguous | 0,5 | 0,5 | 2,5 |
Advantages of contacting Toyota Dubrovka
By contacting us, you can count on:
- Reading Toyota fault codes according to manufacturer's regulations;
- Providing the most accurate and complete information;
- Providing a wide range of services, the ability to eliminate identified OBD2 Toyota errors;
- Use of modern equipment and licensed software with the latest updates;
- The optimal combination of price and quality.
Order reading and decoding of Toyota fault codes at Toyota Dubrovka!
Toyota Rav4 Error Codes
Every car, regardless of the country of manufacture, has problems from time to time. You can often diagnose and fix the error yourself without turning to professionals. This topic is especially popular among car owners, because it is not always convenient to contact a car service center and repairs can be expensive.
How to diagnose the error?
Now almost every car has many electronic sensors that transmit information about an existing malfunction to the engine control unit. Based on this, a specific error code is generated, which is needed for diagnosing and eliminating the malfunction.
There are several indicators that indicate different problems:
- If a malfunction is detected in the engine, the Check Engine light appears on the dashboard of your Toyota vehicle.
- The OD OFF indicator alerts the driver that something is wrong with the automatic transmission.
- If a problem is detected in the passive safety system, the SRS will light up.
- The ABS indicator indicates that the anti-lock braking system is faulty.
- If there is a breakdown in the traction control system, the driver will see a glowing TRC light.
How to carry out self-diagnosis of a car?
Toyota cars usually have 3 blocks of dynamic connectors: DLC 1, DLC 2 and DLC 3. These blocks can be either under the hood or inside the cabin. It all depends on the year of manufacture of the car. Without a special scanner, you can carry out self-diagnosis of the car. This will require wire. It should be bent like the letter P.
To carry out diagnostics, first of all, you need to turn off the ignition in the car. Next you need to do the following:
- You need to open the hood of Rav 4 and remove the cover from the DLC 1 unit. Diagnostic will be written on the cover.
- There is a list of connectors on this cover.
- The pre-prepared wire must be inserted into the sockets, which are labeled on the cover as TE1 and E1. If the car has a DLC3 connector, then you need TC and CG sockets.
- Close the wire.
Next you need to start the car and check the CHECK indicator. Based on this, the error number can be determined.
It is not difficult to determine the error code. You need to count how many times the indicator flashes at intervals of half a second or less. If the light stops blinking for about 1.5-2.5 seconds, then the next blinking will indicate the second digit. For example, the indicator may blink 2 times with an interval of half a second, then pause for 1.5-2.5 seconds and blink 3 times again. This means error code 23.
There may be a situation when several problems are detected at once. Then there will be more than one code. A pause between flashes of 2.5-4.5 seconds means a transition to the next code.
If the indicator blinks more than 11 times without pauses, then there are no problems with the transmission or engine.
It will be easier for the driver to determine the essence of the problem if there is a special auto scanner for diagnostics. It can be used to configure and diagnose the on-board computer. Without a scanner, you need to decipher error codes yourself using a table.
There are errors mainly related to malfunctions:
- transmissions;
- sensors;
- body components;
- engine;
- electricians.
On Toyota Rav 4, the error code usually consists of five characters, but there are also two-digit ones.
Common mistakes on Toyota Rav 4
| Error code | Decoding |
| c1298 | Detection of this fault code means that the pressure control solenoid device is not functioning properly. It is necessary to check whether the mechanism is intact. If yes, then you need to check the wiring and then the all-wheel drive control module |
| S1201 | This error code is recorded when the engine speed is below the set limit. It is necessary to check the idle speed sensor and diagnose the shafts. It is necessary to check the power unit. |
| P1047 | Code P1047 may appear when a problem is detected in the Valvematic module settings. It is possible that power supply circuit B1 is damaged. |
| P2646 | The detected fault code makes it clear that the VTEC sensor does not receive information about the presence of pressure, and the valve opens |
| P1750 | Code P1750 appears when there is a problem with the brake system control unit. |
| P0138 | Combination P0138 is a sign that the oxygen output level in the first tank has been exceeded. |
| P2757 | When P2757 is detected, you should check the operation of the DSU sensor on the transmission. |
| P1604 | Code P1604 may appear on cars produced in 1992, 1997, 1993, when there was an unsuccessful attempt to start the engine. This can happen for several reasons: |
How can I reset the error?
After diagnostics, you need to erase the fault code. This can be done by following the following step-by-step algorithm:
- Turn on the ignition system.
- Close the contacts called TC and E1. After this, the control unit memory will be reset to zero.
- The driver needs to quickly press the brake pedal for 3 seconds (at least 8 times).
- Next you need to check the indicator. It should flash every 0.5 seconds
- Turn off the ignition system, then disconnect the jumpers from the pins. To ensure that the trouble code is cleared correctly, you need to check that the anti-lock braking system indicator on the dashboard is not illuminated. If it doesn't light up, then everything is correct.
You can also reset error codes using technical means. For example, a laptop can help with this. This will require a special program designed for these purposes.
This article describes the most common error codes. If there is an error that is not in the material, we recommend contacting the service.
We do self-diagnosis of Toyota Mark 2 100 (Toyota Mark II)
Japanese cars have held the lead in world car markets for many years. They are distinguished by high quality and reliability. For some time now, they, like most other foreign cars, can be diagnosed through fault codes.
This is a rather convenient function that can significantly save time when repairing a car.
Model description
Toyota Mark 2 is a business class car produced by a Japanese company. The number 2 in the model name emphasizes the difference between the new device and the Toyota Crown. The first model was released in 1968 and has undergone many changes over the past 40 years. A number of sedans produced by Toyota were created on its basis.
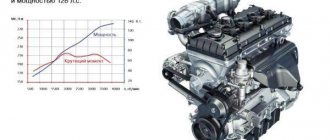
Starting from the 7th generation, the Mark 2 in its new modification began to be equipped with a turbocharged 2.5 liter engine capable of producing 280 horsepower.
Troubleshooting procedure
The first thing you need to do is lift the hood and find the diagnostic connector labeled DIAGNOSIS next to the injector. After opening, contacts TE1-E1 should be closed. At the same time, we should not forget that the battery voltage must exceed 11 volts, and all vehicle equipment should be turned off. Then we head to the salon after we turn on the ignition, it will be possible to determine the fault codes from the indicators.
The indicators on the instrument panel will flash. CheckEngine indicates engine errors, OD/OFF indicates automatic transmission errors.
Self-diagnosis Toyota Mark 2 100
through
fault codes
is performed as follows. The code itself consists of two digits. The first can be determined by the number of flashes at a certain interval of half a second, and the second after one and a half seconds, also at this interval.
After a short pause of 2.5 seconds, another error code is determined, etc. The computer will give you information about the presence of errors in ascending order, sequentially. When all codes have been transmitted, after a time interval of 4.5 seconds, the listing of codes will begin again.
If there are no errors in the block’s memory, the blinking will be constant, with an interval of half a second.
Toyota gasoline engine fault codes for all Mark 2 models will differ from the codes for models equipped with diesel engines, but automatic transmission fault codes will be the same for the entire model line. All fault codes can be provided to you at the car dealership where you go to get your car diagnosed.
Source: https://mymirtoyota.ru/delaem-samodiagnostiku-tojota-mark-2-100-toyota.html