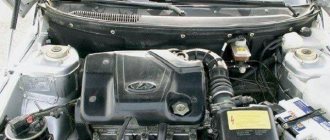
Cooling system diagram
Detailed diagram:
All the main elements are described below.
1 – heater radiator; 2 – steam removal hose of the heater radiator; 3 – outlet hose; 4 – supply hose; 5 – coolant temperature sensor (in the block head); 6 – pump supply pipe hose; 7 – thermostat; 8 – filling hose; 9 – expansion tank plug; 10 – coolant level indicator sensor; 11 – expansion tank; 12 – exhaust pipe; 13 – liquid chamber of the carburetor starting device; 14 – radiator outlet hose; 15 – radiator supply hose; 16 – radiator steam outlet hose; 17 – left radiator tank; 18 – sensor for turning on the electric fan; 19 – fan electric motor; 20 – electric fan impeller; 21 – right radiator tank; 22 – drain plug; 23 – electric fan casing; 24 – timing belt; 25 – coolant pump impeller; 26 – supply pipe of the coolant pump; 27 – coolant supply hose to the throttle pipe; 28 – coolant drain hose from the throttle pipe; 29 – coolant temperature sensor in the outlet pipe; 30 – radiator tubes; 31 – radiator core.
Cooling system components
Now that you know the entire diagram of the VAZ-2112 cooling system, you should learn about all its main details in more detail:
Cooling radiator
Copper cooling radiator
The radiator is designed to cool the fluid in the system as it passes through it in the so-called “great circle” . It is made of aluminum, has a tubular-plate, two-pass design, and is equipped with plastic tanks, one of which has a special partition designed to allow coolant to pass through. The liquid to pass through the “large circle” flows through the upper pipe and exits through the lower one.
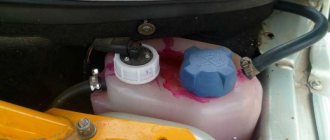
Expansion tank
This tank is quite reliable, but its connections sometimes have to be checked for leaks.
The expansion tank, made of translucent polyethylene, is designed to fill and control coolant. When the fluid in the system is completely filled, it should be in the tank between o and “MAX”. Two pipes for removing steam are built into the tank, one from the heater radiator, the other from the cooling radiator.
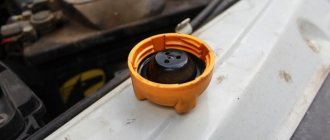
Expansion tank cap
Two types of expansion tank caps.
The tightness of the cooling system is ensured by the expansion tank cap, or rather by its inlet and outlet valves. The exhaust valve maintains increased pressure on a hot engine compared to atmospheric pressure, due to which the boiling point becomes higher, reducing the loss of steam.
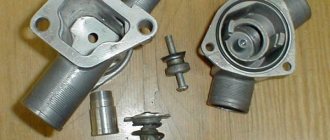
Thermostat
The thermostat is designed to distribute coolant flows, controlling its temperature. On a cold engine, the coolant circulates only in a small circle, passing through the heater radiator and the throttle assembly heating unit. When the temperature rises to 87°C, the thermostat valve begins to open, and reaches full open at 102°C, releasing fluid in a “big circle”. The thermostat for the VAZ-2112 has an improved resistance of the throttle opening, due to which the fluid flow increases.
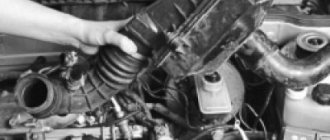
water pump
The more blades the pump has, the better.
The pump is designed to circulate coolant in the system. A pump is a pump. It is bladed and driven from the crankshaft by a timing belt. If the pump “jams”, the timing belt will break, so watch and check its condition. The pump body is made of aluminum, with a toothed pulley pressed onto the front end and an impeller at the other. If it fails, the timing belt will break; on the 124 engine the valves will not bend, but on the 21120 it will bend. Therefore, follow the pump replacement regulations and choose good pumps.
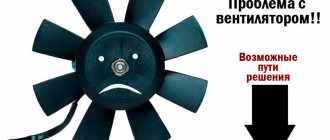
Electric fan
The engine operating mode is maintained by a thermostat and a fan. The latter is made of plastic and has four impellers that are mounted on the electric motor shaft. The engine turns on at the command of the sensor through a relay based on a signal from the ECU when the coolant temperature reaches 99°C, and turns off at a temperature of 94°C.
Coolant sensor
The sensor should be checked and replaced if necessary.
To monitor the coolant temperature, the system has a special sensor. It is mounted in the cylinder head and connected to an indicator on the instrument panel.
Heater radiator
You can’t do without this element in cold winter.
The heater radiator is designed to heat the air entering the cabin. It is connected directly to the cooling system, and antifreeze constantly circulates through it. In order to heat the air in the cabin, the air is directed to the radiator, and when this is not required, the air bypasses it and enters the cabin.
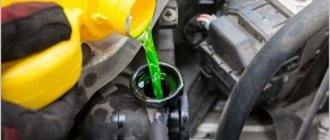
Coolant
Most often, antifreeze is poured as a coolant.
TOSOL is most often used as a coolant on the VAZ-2112; in total there are about 6 liters of it in the system.
It is highly recommended not to use water, as it causes active corrosion of the aluminum radiator.
Possible problems
In fact, ruptures of plastic containers do not occur so often, so you should not be alarmed in advance when purchasing a used VAZ 2110.
Much more often, owners of this domestic car are faced with a breakdown of the valve cover of the tank. It is responsible for relieving excess pressure when the power unit overheats.
It is this lid that can jam, causing pressure to build up inside the container, which can ultimately lead to rupture of the plastic.
If such a problem catches you on the road, do not turn off the engine under any circumstances. You need to stop and wait for the cooling fan to turn on.
Preventive measures
As you understand, the expansion tank is directly connected to the radiator and fan, therefore maintaining the tank in working condition is the direct responsibility of every car owner.
Prevention includes the following activities:
- Periodically inspect the condition of the plastic container and its individual elements;
- If you find that the coolant level in the tank is too low, add the missing amount;
- If it soon becomes noticeably smaller again, check the tank for leaks. Most likely, liquid is leaking somewhere;
- Observe the condition of the tank neck. If there are traces of drips on it, that's good. This phenomenon indicates that the valve cover is triggered and relieves excess pressure. Hence the traces of coolant.
Cylinder block and connecting rod-piston group ShPG
This is the main part of the engine in which the energy of burned fuel is converted into mechanical energy. It consists of a cylinder block, pistons, connecting rods, connecting pins of support bearings, a crankshaft and half rings that limit the displacement of the latter relative to its axis.
The VAZ 21124 engine with 16 valves is equipped with a “high” block 11193, which received its nickname due to its size. It is cast from cast iron, and then it is machined to accommodate the cylinders. Its height is 197 millimeters (from the axis of rotation of the crankshaft to the top edge). It is 2.2 mm higher than the cylinder block used in the 21120 engine. This increase allowed the displacement to be increased to 1.6 liters without increasing the cylinder diameter. The block is also distinguished by a reduced size of the holes for the cylinder head mounting bolts.
You may be interested in: History and description of the Opel logo. How has the company logo changed over time?
The crankshaft (catalog number - 11183 -1005016), like the block, is cast from cast iron. The journals (points of contact with other parts) are polished and holes are drilled in them to lubricate the support and connecting rod bearings. To reduce vibration from rotation, 8 counterweights are installed on the shaft, shaped like half a disk.
The connecting rods are forged from steel and consist of two heads - upper and lower. At the top there is a bushing made of steel-bronze alloy for attaching the piston. Liners (sliding bearings) are pressed into the lower one. The connecting rod is attached to the crankshaft using a cover and 2 bolts.
The pistons installed in the VAZ 21124 16 valve engine were developed specifically for it. They are cast from aluminum, and at their end there are 3 grooves for installing 2 compression rings and one oil scraper ring. There are 4 recesses 5.5 millimeters deep on the piston bottom (the side in contact with the valves)
This measure adds another important property to the engine - the safety of the valves in the event of a timing belt break or improper installation. For this modification, the owners call the motor “plugless”
The pistons are cooled using oil nozzles installed in the main bearing supports.
Severe wear of this part of the engine leads to a severe deterioration in the performance of the VAZ 21124 engine, up to the impossibility of starting.
Self-replacement of the expansion tank on Lada Kalina
Our website already has a similar guide, in which I talked about how to replace the expansion tank on a VAZ 2115. Today’s work is not much different and will be carried out according to the same principle.
The expansion tank is most often replaced due to a malfunction of the expansion tank, in cases where cracks appear on the tank body or its seal is compromised. An antifreeze leak is a dangerous thing, firstly, the antifreeze itself is harmful to rubber parts, plus its contact with body parts is not anything good. In addition, there is a danger of engine overheating if the antifreeze leaks out completely and the engine runs dry. The cause of the crack could be increased pressure or poor quality of the tank.
To work you need to have:
- New RB for Lada Kalina (11180-1311010-10);
- Standard set of wrenches + ratchet and extension;
- Syringe and hose, empty container for draining coolant;
- Double-sided tape (optional).
Replacing the coolant expansion tank Lada Kalina
- Open the hood and wait until the engine cools down.
- Then unscrew two nuts and one bolt with a key “8” and “10”. You will need an extension for the second nut.
- Loosen the clamps and remove the two tubes.
- We drain the coolant into an empty container; if it is clean, it can be reused. For convenience, you can use a syringe and a piece of hose. There is another option to quickly and efficiently drain the liquid from the old RB. To do this, disconnect the upper thin hose and lower it into the drain container. Then, instead of this hose, another hose is connected, into which it is necessary to blow in order for the liquid to flow.
- The ABS unit and battery did not allow removing the old cracked tank, if your Granta without ABS there should be no problems. For convenience, you need to unscrew the battery holder from the RB side, and then try to remove the old tank. I’ll say right away that it turns out very badly, so get ready.
- Before installing a new expansion tank , it was decided to tape the contact points between the tank and the body with double-sided tape.
- Installing a new expansion tank is done in the reverse order. After installation, connect the hoses and fill in antifreeze. The coolant level should be between o and “MAX”.
If you have not changed the antifreeze for a long time (it is recommended to replace the coolant every 75 thousand km or once every three years, whichever comes first), then when replacing the tank you can combine these two operations. By the way, I talked about how to replace antifreeze in the articles: Replacing antifreeze: which antifreeze to choose, what to pay attention to?, Do-it-yourself replacement of VAZ 2108 coolant.
That's all I have to do, all I have to do is start the engine and check the coolant level again. If an air lock has formed in the cooling system, read: “How to remove an air lock correctly?”
Photos from this page are used in this article.
Installation of a 16 valve engine on a VAZ 2109. More power my lord
Which VAZ engines bend valves. 3, when the timing belt breaks, does the engine bend the valves or not?
- Installation of the whole unit;
- Replacing the cylinder head.
- First, the old motor is dismantled, here everything happens according to the usual scheme;
- We are preparing the new engine for installation. To do this, you need to replace all consumables. Usually they change seals, gaskets, belts;
- The power unit is put in place and attached to the pillows;
- They installed a tank from 2112. It fits perfectly. The difference is in the design of the fuel pump and the presence of sensors. If you don’t have such a tank at hand, you can leave your original one. But you will have to install an external fuel pump from the Volga;
- The next step is to install the fuel line. It is best to use copper tubing. It's more flexible. If you decide to install steel, then heat it on fire before fitting. This will allow you to bend it as needed without any problems;
- Wiring is being installed. On cars younger than 2002, no modifications will have to be made. There is already a hole for the wires coming from the injector, as well as other elements necessary for fastening. If the car is older, you will have to cut the hole yourself. Studs are placed under the bottom for attaching the absorber and gasoline filter;
- The wiring will have to be redone. Some sensors have short wires. In this case, we lengthen them;
- To install the generator you will have to buy new mountings, otherwise you will not be able to install it;
- The box won't fit a little. You need to try it on and grind off the extra corners with a grinder. It's a matter of a couple of minutes;
- The starter installed on 2109 has 11 teeth, it will not converge with the flywheel. Therefore, replace the bendix, take one with 9 teeth;
- The exhaust system will also have to be overhauled and adjusted.
- First, the engine is removed from the car and disassembled. To do this, remove the cylinder head, pan, dismantle the pistons;
- New pistons from 2112 are installed. They have more reinforced connecting rods, and they also have recesses for the valves;
- Replace the fuel pump;
- Shorten the cylinder head mounting bolts. 12 holes are drilled in the new cylinder head;
- A hole of 8 is drilled in the block and a thread is cut for the knock sensor;
- They install a pump from 2112, at the same time install a thermostat from “Samara”;
- Change the breather;
- All that remains is to assemble the entire body kit for the engine, install the wiring and configure the unit.
AutoFlit.ru
Causes of failure of VAZ 2110-2115 tanks
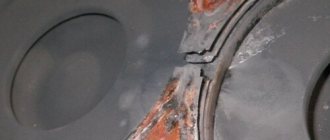
The service life of this element is not limited by regulations. This means that the container should be changed as needed, and this occurs quite often. The most common reason for replacement is damage to the integrity of the plastic case during operation. The tank simply bursts and here's why:
- Clogged or damaged lid valve. The steam coming from the radiators increases the pressure inside the tank because it cannot escape through the plug. As a result, the wall of the container is destroyed.
Damage to the plastic wall occurs due to excess pressure in the cooling system
On low-quality products, cracks may appear 3-6 months after the start of use.
To avoid destruction of the expansion tank, it is recommended to check the functionality of the plug valve before each long trip. Practice shows that problems with the tank most often arise on the road, when it is hot outside, that is, in the summer. A sign of a malfunction is a sharp increase in coolant temperature and a puddle under the engine compartment on the driver’s side.
Experienced drivers advise replacing the standard tank cap with the cap from previous VAZ 2109-099 models. They are much more reliable in operation and fit the thread. Just keep one thing in mind: in some car configurations the plug is equipped with an antifreeze level sensor. After such a replacement, you will not be able to control it, although this will not affect the performance of the cooling circuit.
How to flush the cooling system of a VAZ 2110
To extend the life of the cooling system, it must be cleaned periodically. This is achieved by the washing method. The frequency of the process directly depends on the operating conditions, the state of the power unit, and the components of the cooling system.
To flush the system, use either distilled water, soda and vinegar, or specialized cleaning agents.
Using water, the system is cleaned as follows:
- the coolant is drained;
- distilled water is poured in (the full volume of the VAZ 2110 cooling system is 7.8 l);
- the engine starts and runs for 10–15 minutes, without load, at idle speed;
- the engine is turned off, the water is drained;
- If necessary, the procedure is repeated until clean water is drained.
The method is simple to implement, but ineffective. Water is unable to remove heavy deposits of dirt and scale.
Cleaning the system with soda, lactic acid and vinegar is more effective, but presents certain difficulties. The mixture must be prepared in a certain proportion and poured into the system. The engine should stand with it for about 7-8 hours, and the engine needs to be started several times for short periods of time. Next, drain the solution and rinse the system with distilled water as described above.
Flushing the system using specialized products is the most effective way, but also the most costly in terms of finances. There are many different flush fluids on the car market, and the principle of the process boils down to a similar method using distilled water.
What does he look like?
Externally, the expansion tank is a plastic container. Liquid is poured inside this container, which is directly involved in cooling the engine.
The design of the element includes hoses closed in a circuit, a float sensor built into the lid or plug of the tank. Whichever is more convenient for you. It is this sensor that transmits information about the current coolant temperature. When the permissible values increase, the corresponding warning light lights up on the dashboard.
Complete structure
Where is he located?
To replace a damaged container, you first need to determine where it is located.
The location of the expansion tank is the engine compartment on the driver's side, right behind the pillar glass.
Such an arrangement in the VAZ 2110 certainly cannot be called successful, since there are metal elements on all sides of the plastic tank. Because of this, problems arise with the expansion of the plastic, sometimes the tank simply bursts.
Depressurization of the tank occurs especially often in the summer, when there is intense heat outside. The manufacturer, represented by AvtoVAZ, took this problem into account when developing new models. And the owners of the “ten” have to put up with this arrangement of the tank.
Container location
Why are hydraulic compensators knocking and what to do?
Engine Nissan YD25DDTi
How to determine which hydraulic compensator is knocking?
- To check the hydraulic compensator, you need to press it with a soft metal drift or a screwdriver (with the camshaft cam facing the pusher with the back of its head). In normal condition, the hydraulic pusher should be pressed with considerable force. If the force is small, the hydraulic pusher must be replaced.
- Install the camshaft cams one at a time with the protrusions facing up and check for clearance between the pushers and the cams. When pressing (for example, with a wooden wedge) the hydraulic pusher being tested, compare the speed of its movement with the others. If there is a gap or an increased speed of movement, disassemble the hydraulic compensator and clean its parts from dirt or replace the hydraulic compensator.
Why are hydraulic compensators knocking?
| Cause of malfunction | Remedy |
| Oil leakage from part of the hydraulic compensators during long-term parking | Noise that disappears a few seconds after starting the engine is not a sign of a malfunction, since some of the hydraulic compensators that were under the load of the valve springs of the open valves (the oil supply channels remained open) leaked oil, the deficiency of which is replenished at the beginning of engine operation |
| Damage or wear of the check valve ball Contamination of the hydraulic compensator mechanism with wear products due to untimely oil changes or poor quality | Replace the hydraulic compensator. Clean the mechanism parts from dirt. Use the oil recommended in the owner's manual |
| Oil flows through the gaps between the plunger and the hydraulic compensator sleeve, which have increased due to wear | Replace the worn hydraulic compensator assembly |
| Foaming when there is excess oil (above the top mark on the dipstick) in the oil sump due to its agitation by the crankshaft. The entry of an air-foam oil mixture into the hydraulic compensators disrupts their operation. Air is sucked into the oil pump when the oil level in the oil sump is excessively low. Damage to the oil receiver due to deformation of the oil sump when hitting a road obstacle. | Bring the oil level in the oil sump to normal Bring the oil level in the oil sump to normal Repair or replace defective parts |
| The appearance of a gap between the pusher and the camshaft cam due to damage or contamination of the hydraulic compensator parts | Remove the cylinder head cover, install the camshaft cams one at a time with the protrusions facing up and check for clearance between the tappets and the cams. When pressing (for example, with a wooden wedge) the hydraulic pusher being tested, compare the speed of its movement with the others. If there is a gap or an increased speed of movement, disassemble the hydraulic compensator and clean its parts from dirt or replace the hydraulic compensator |
xn--2111-43da1a8c.xn--p1ai
Model selection
For the VAZ 2110 you can choose either aluminum or copper radiators. To a large extent, the choice depends on what result you need: saving money or durability and reliability.
Their disadvantages and advantages:
- Aluminum. Lightweight, relatively cheap, the price depends on the manufacturer: - Luzar (2110-8101060) - about 1000 rubles; - Pramo (2110-1301012) - retail approximately 1600 rubles. But its thermal conductivity interferes, and it cools the engine worse. In addition, it is subject to fairly rapid corrosion; it takes less time for it to flow; Aluminum radiator cooling
- Copper. It is heavier, significantly more efficient in its cooling characteristics, and lasts longer, since the copper body is less susceptible to corrosion. For it to flow, mechanical action (impact, etc.) is most often required. The disadvantage is that its price is higher, about 5,000 rubles, for a two-row one, with an increased efficiency of 40%. Copper cooling radiator with 40% increased efficiency
Valve performance check
Until the antifreeze heats up, the ball inside the lid closes the bottom hole, while the top one remains open. This is necessary for the flow of air from the atmosphere and rapid heating of the coolant. I would like to note that it is periodically necessary to check the functionality of the lid. After all, it often happens that it gets wedged in one of the positions. Because of this, the engine either takes a long time to warm up or does not hold pressure.
Checking the cap of the expansion tank of the VAZ-2110 is extremely simple. To do this, just unscrew it and shake it. If you can hear the ball dangling inside the housing, then the system is working and it is not jammed. Excessive pressure in the engine cooling system, as noted above, can lead to fatal consequences. Therefore, on modern cars the cover has two valves: inlet and outlet. Nowadays you can find lids on sale that operate at a certain pressure. But it is strongly recommended not to change the parameters set by the manufacturer.
Malfunctions, their causes and elimination
Engine Toyota 2NZ-FE
Since the first modification has been discontinued, only motor 21128, produced after 2014, is considered. The main “diseases” of the power drive are:
| Shaft does not rotate when starting | 1) damage to the flywheel ring 2) faulty starter 3) failure of the ignition switch 4) starter relay failure | 1) repair or replacement of a part 2) replacement/repair 3) installation of a new lock 4)relay replacement |
| Problems starting the engine | 1) cold 2) warmed up | 1) repair of the control system, checking the tightness of the injectors, coolant temperature sensor, power system 2) replacing the air filter cartridge, tightening the battery terminals, repairing the power system |
| Noises in the starter | 1) loose fastening 2) worn out flywheel teeth | 1) tightening fasteners 2) replacing the crown |
| Engine overheating | 1)fan failure 2)thermostat failure 3) radiator clogged 4) low coolant level | 1) unit repair 2) part replacement 3)flushing channels 4) adding antifreeze to the level |
After modification, the 21128 engine consumes less oil, but its level should be constantly monitored.
Overhaul of the block
Replacement or repair?
Is it even possible to repair the tank? If he was torn to pieces, then no.
This element is subject to repair only in the event of failure of components - a float or a cover.
If the seal is lost, regardless of the reasons, repair is impossible. Theoretically, you can glue the plastic together and make patches, but such savings will not lead to anything good.
To replace the cover, use a spare part from the VAZ 2199 model. Although this model is older than the “ten”, the elements are interchangeable. Plus, the quality of the cover from the nine turned out to be better, and the thread matches perfectly.
Simply unscrew the broken cap and screw a new one in its place. That's the whole point of the replacement.
Where to buy?
There are several options for where to purchase an auto radiator:
- Car market.
- Online store.
- Parsing point.
- A store that sells auto parts.
It's better to buy a new spare part. It can be purchased at a specialty store. A used part is cheaper, but its quality is lower and its service life is shorter. An old radiator for a VAZ 2112 is sold at the car market, at a disassembly point.
The VAZ-2112 entered mass production in 1999. This five-door hatchback continued the line of cars based on the base “tenth” model of the Volzhsky Automobile Plant.
Along with the positive innovations inherent in the entire range of these models, the VAZ-2112 received from its progenitor “family” disadvantages, which left their mark on the range of spare parts that are in demand among drivers of this car. In early versions of the 16-valve 1.5-liter engine installed in the early years of production, problems with valve bending were observed. This design defect was corrected on a 1.6-liter engine, but early car models often require a rebuild and major engine overhaul.
The VAZ-2112, like all models in this series, is equipped with an on-board computer that works as an advanced diagnostician. A significant number of sensors cover the main vehicle systems and provide operational information about their performance, however, the reliability of such sensors is quite low, which also requires their frequent replacement.
LiveInternetLiveInternet
—Categories
- Psychology (1)
- children (748)
- men (28)
- socks (141)
- ANIMATION (74)
- astrology, calendars (28)
- Pregnant (29)
- beads (47)
- our little brothers (21)
- bouquet of sweets (95)
- felting (14)
- everything made of paper (172)
- everything from traffic jams (7)
- KNITTING (412)
- Fortune Telling (19)
- getting ready for the holiday (207)
- AQUAGRIME (7)
- Design ideas. (67)
- interesting and beautiful (15)
- carving (15)
- computer, useful programs (83)
- suits (49)
- beauty and health (383)
- kitchen (71)
- LifeHack (14)
- Master Class (85)
- DIY FURNITURE (117)
- music (12)
- Soap making (25)
- soft toy (90)
- NEW LIFE TO OLD THINGS (90)
- tutorials (142)
- diary design (3)
- very good skillful hands (182)
- gifts (84)
- CUSHIONS (65)
- help (10)
- Parables, aphorisms (2)
- hairstyles (92)
- REPAIR WITH YOUR HANDS (23)
- RECIPES (468)
- Baking (79)
- winter preparations (95)
- salads, canapés, sandwiches (131)
- draw (81)
- HANDCRAFTS (206)
- garden design and just a summer house (243)
- wedding (23)
- Tips for housewives (156)
- cakes (147)
- Stencils (60)
- patterns (37)
- photoshop (45)
- cold porcelain, modeling (134)
- flowers (49)
- SEWING (230)
- curtains (17)
- humor (11)
-Music
—Search by diary
—Subscription by e-mail
-Statistics
Maintenance
Maintenance of VAZ 21124 engines generally comes down to periodic replacement of consumables - engine oil and coolant.
The main requirement that must be fulfilled is to inspect the engine for leaks. As a rule, replacement of technical fluids is carried out after eliminating detected leaks within the time limits specified in the maintenance regulations:
- engine oil - after 15,000 km;
- The coolant is changed if it has radically changed its original color. Typically, the coolant acquires a rust color after 25-40 thousand km. Before replacing, it is advisable to flush the cooling system.
What is the pressure in the engine cooling system?
During operation, the internal combustion engine heats up to a high temperature. The engine cooling system must cope with the heat removal function. This is necessary for the efficient operation of the power unit. If there is no coolant circulation, the internal combustion engine will very quickly overheat with all the ensuing consequences. Let's talk about what the pressure in the cooling system should be and how to fix typical problems on your own.
Ignition system
The VAZ 21124 16-valve engine is equipped with an ignition system consisting of NGK BCPR6ES or AU17DVRM spark plugs, a knock sensor and individual ignition coils. The latter are the third innovation in the design of the motor and improve its dynamic characteristics.
Engine control unit and its sensors.
This part is the “brain” of the power unit. It provides all the technical characteristics of the VAZ 21124 engine declared by the manufacturer. The block is designed to coordinate and synchronize the work of all subsystems. It receives information about the current state of the motor using sensors:
- Crankshaft position and speed.
- Mass air flow (MAF).
- Coolant temperature.
- Camshaft positions.
- Detonations.
- Throttle valve positions.
- Double lambda probe, which determines the amount of oxygen in the exhaust gases, installed before and after the converter.
- Rough road sensor.
The described engine is equipped with an ECU 21124 with a BOSCH M 7.9.7 controller, ensuring compliance with Euro 2 and 3 environmental standards.
Procedure for replacing the container
It is advisable to perform the disassembly procedure on a cooled engine, since hot antifreeze will inevitably get on your hands and cause burns. Special equipment and no special conditions are required, including an inspection ditch. For work, choose a lighted, flat area or a warm room if the replacement is being done in the middle of winter.
From tools and additional materials you need to prepare:
- Phillips screwdriver;
- pliers;
- set of open-end wrenches;
- manual or foot pump with a pointed nozzle on an air hose;
- antifreeze basin;
- rags.
To work, you will need a simple set of tools available in every garage.
It is also recommended to stock up on new clamps to match the size of the pipes; it is better not to use old ones.
Instructions for disassembling and installing a new part
To change the container, you need to empty it of antifreeze. There is no need to completely empty the system; no more than 2 liters of liquid should be drained. This can be done in two ways:
- Unscrew the protective boot under the radiator, place a basin and unscrew the lower plug of the main radiator a few turns. When the antifreeze leaves the reservoir, screw the cap back on.
The plug with a thumb for manual unscrewing is located at the bottom of the radiator
- Disconnect the upper tube coming from the stove from the reservoir and put it on the fitting of the new element. Attach the pump nozzle to the free pipe of the old tank and, by pumping, squeeze out the coolant, which will flow into the new tank.
In the first case, you need to remove the expansion vessel plug in advance, and in the second, it must remain closed.
Then work in the following order:
- Remove the 2 small tubes from the container by loosening the clamps with a screwdriver. Take them aside.
The hoses are easily removed from the fittings after loosening the clamps
- Repeat the operation with the large lower hose, but after removing it, secure it higher or break it and tie the end with wire.
- Unfasten the rubber retainer and remove the old tank from its socket.
To remove the element, simply unfasten the rubber retainer
- Insert a new one in its place, secure it with a clamp and connect all the pipes in the reverse order, using new clamps.
The new part is inserted into the niche in place of the old one and secured with a clamp
On VAZ 2110 and 2114 cars, disassembly and installation of a new part are carried out in the same way. The only difference is the location of the tank.
To add antifreeze to a level between the Min and Max marks on the tank wall without creating an air lock in the system, disconnect the tube from the throttle valve heating unit (this is the highest point of the cooling circuit). Pour liquid into the tank until it runs out of the removed tube, then put it on the fitting and secure it with a clamp. Add antifreeze to the required level.
Before pouring antifreeze into the system, you need to remove one of the pipes connected to the throttle valve block
During the replacement process, you should pay attention to the condition of the hoses leading to the container. If their ends have become soggy and increased in diameter, and cracks have formed on the walls, it is better to change such pipes.
Installation of an expansion tank from Priora
The capacity of the engine cooling system of the VAZ 2170 is distinguished by thicker walls, thanks to which Priora has forever gotten rid of the “childhood disease” of a bursting tank inherent in the VAZ 2110. There is another reason: in the standard tank of the “tens”, a stream of antifreeze from the radiator pipe hits from the inside directly into the lid , which is why the latter leaks. On the “Prior” part, the fittings are at an angle to the neck, so liquid does not get there.
The tank fittings from the VAZ 2170 are directed away from the filler neck
Since the part from the VAZ 2170 is wider than the standard element, its installation is associated with some difficulties: the tank will not simply fit into the narrow space between the glass and the partition. What should be done:
- Remove the windshield wipers by unscrewing the mounting nuts.
- Remove the upper body panel.
- Unscrew the partition trim from the engine compartment side.
- Try on the new tank by inserting it into the opening. Then cut the sound insulation to size and assemble the assembly in reverse order.
In order for the wide element from Priora to fit into a narrow opening, you will have to remove the partition trim
Expansion tanks for Priora come in two types - with 2 and 3 fittings (the first are installed on a car with air conditioning). You need a second type of part to connect three hoses.
Installation of pipes and filling of coolant is carried out using the technology described in the previous section. As for modifications of the VAZ 2114-15, where the expansion vessel is located in a wide niche in front of the pillar glass, such a replacement will not cause any difficulties.
The work of replacing the expansion tank on machines of the “tenth” family should be done independently if you want to save personal time and money. A trip to a car service center will take longer and cost more. At the end of the procedure, do not forget to check the operation of the cooling system by warming up the engine to operating temperature and turning on the electric fan.
Device: general diagram
The design of the VAZ 21124 engine is a combination of several subsystems:
- cylinder head.
- Cylinder block and connecting rod-piston group.
- Lubricants.
- Cooling.
- Ignition.
- Food.
- Exhaust.
These components interact with each other using the gas distribution mechanism drive (GRM) and the electronic engine control unit (ECM).
In the diagram: a section of a VAZ 21124 engine.
Serious consequences
We have already discussed that pressure is created in the engine cooling system. It's quite normal. Another thing is that very often there is a malfunction that is extremely difficult to determine. For example, the antifreeze goes away, but there is no visible leak. In this case, it is quite possible for coolant to enter the engine crankcase. It is recommended to check the oil level regularly. If the coolant actually goes into the engine, the level will increase. Most likely, this indicates a broken cylinder head gasket, changing which is tantamount to rebuilding the power unit.
Any part has its own specific resource, upon reaching which there is no guarantee that it will continue to work properly. There are often cases when even a new expansion tank cap turns out to be inoperative. And now we are not talking about Chinese spare parts, but about original ones. Unfortunately, there is no escape from this.
Changing the VAZ 2110 cooling radiator with your own hands
Even for people who are quite far from technology, the purpose of a cooling radiator is clear - it removes excess heat from the engine, thereby preventing it from overheating and failing.
However, some time passes, the most important part of the cooling system may fail, or simply leak. Then there is a need to replace the cooling radiator of the VAZ 2110, which can be done not only at a service station, but also with your own hands.
New engine cooling radiator
Recommendations for selection
For VAZ 2110-12 models, you can find 2 types of expansion tanks on sale:
- old model with two necks: the coolant level sensor is screwed into the first, and the second is closed with a plug with a release valve;
On old-style products, a second neck was made for installing an antifreeze level sensor
- a new model with one neck (without sensor) and a body convex on the sides.
The new sample container does not have a level sensor
If your car has a sensor in an expansion tank, then you need to select an old-style product. Accordingly, versions without a sensor will require a new reservoir design.
For VAZ 2114-15 models, tanks of the same shape are offered with 3 fittings: two of them are located at one end, and the third is located at the opposite end. Products for the VAZ 2110 and 2114 are not interchangeable with each other, although if you really want to, attaching a part from another model is quite possible. Another thing is that there is no need for this - both varieties are available for free sale and practically do not differ in price.
The reservoir for models 2114-15 has a wider shape and a versatile arrangement of fittings
When purchasing an expansion tank for any series of cars of the “tenth” family, pay attention to the following points:
- the plastic of a quality product should be light and half transparent;
- cracks in the corners or near the fittings are unacceptable;
- the plastic should not be “oaky” or have dark impurities visible to the naked eye;
- look on the body for an imprint of the manufacturer's trademark and catalog number (21083–1311014 for VAZ 2114).
For all modifications “ten”, “fourteen” and “fifteen” a small tuning is available - installation of an expansion tank from the cooling system of a Lada Priora car. Why and how this is implemented will be discussed below.
The reservoir of the Priora cooling system has a rectangular shape and 3 fittings on the front wall