Where is the Renault Logan thermostat valve located?
It is worth noting that the thermostat for Renault Logan with engines with 8 and 16 valves is located in different places.
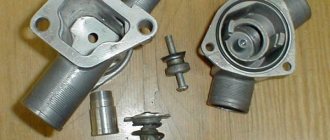
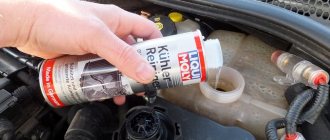
Eight valve units with a volume of 1.4/1.6 liters are more convenient than sixteen valve units in terms of thermostat replacement and maintenance, because they have a cooling system element that is visible in the front of the car right behind the radiator next to the power steering reservoir.
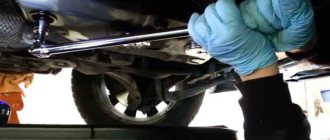
On a 16-valve 1.6-liter engine, the thermostat is located at the bottom right of the engine, it is more difficult to get to it, and unscrewing the bolts securing its cover will also not be easy.
Since the thermostat on Renault Logan 1.4, 1.6 8 and 16 valves is the same and in the same place, its replacement, repair and maintenance are no different.
How to change the thermostat on Renault Logan
Replacing a thermostat on a car is not a difficult task. If, at an engine temperature of 95 degrees, the lower tube going to the radiator does not heat up, it means that the liquid does not pass in a large circle. In such a situation, it is rational to replace the thermostat, but first you need to make sure that it is not working. We will describe how to do this on a Renault Logan with a 1.6 engine.
Required Tools
To replace the thermostat, you will need the following tools and materials:
- Flat screwdriver.
- Cut plastic bottle for collecting coolant.
- X10 wrench or ratchet with head.
- Clamp remover.
- 2 liters of antifreeze to add in case of losses.
With the right approach, the duration of the procedure is about 20 minutes. The average cost of a service at professional service stations is 850–950 rubles.
Procedure
To replace the thermostat for Renault Logan 1.6, follow these steps:
- Open the tank lid.
- Slowly unscrew the bolt at the bottom using an X10 wrench, after placing a container to collect the liquid. Then loosen the other bolts, but not to the extreme extent.
- Use a screwdriver to widen the gap between the cover and the main part of the housing to allow antifreeze to flow out. When the coolant leaks out, remove the container.
- Unscrew the 3 bolts and move the cover back.
- Remove the thermocouple.
- Inspect the O-ring. If it is damaged, replace it.
- The new thermostat is installed on Renault Logan 1.6 by matching the protrusion of the part with the corresponding protrusion of the housing. At the same time, make sure that the long part (with the spring) of the product is turned inward. If you insert it incorrectly, you will not be able to fix the cover, since the device will rest against the inner wall.
- Secure the bolts so that the cover does not become distorted.
- Fill the tank with coolant. You need to make sure that there are no leaks at the joints.
- There is an expansion valve on the hose coming from the stove. Slowly open the plug and allow the air to escape. When liquid appears from under the bolt, fix the valve.
- Warm up the coolant at medium speed for 5 minutes. Then turn off the engine, check the antifreeze level in the expansion tank and add to the maximum level.
- The final stage of replacing the thermostat is the release of small air bubbles by opening the bolt of the heater hose.
Important tips for replacing the thermostat in a Renault Logan car model with a 1.6 liter engine:
- Coolant can only be added to the reservoir when the engine is cold. You need to be careful - antifreeze is toxic.
- It will be easier to collect coolant in a plastic bottle if the size of the container matches the volume of the lower part of the case.
- There is no need to use sealant, since the new rubber seal fits perfectly in place of the old one and does not allow antifreeze to pass through.
Thus, the entire sequence of actions, when performed professionally, takes 20–30 minutes and is not difficult.
The main “sores” of the Renault Logan thermostat
The operating principle of the thermostat on Renault Logan is no different from similar devices installed on other cars, therefore its malfunctions are completely typical:
- The valve does not close or open completely;
- Opening delayed or vice versa ahead of time;
- Wear of the rubber seal;
- The valve is fully seated in the closed or open position.
But the Renault Logan thermostat is characterized by another problem, which is rarely found on other cars; we are talking about ill-conceived design solutions introduced into the product, which lead to frequent leaks of coolant.
The fact is that the Renault Logan thermostat housing is made of glass-filled plastic, the ears have holes for bolts and the distances between them are large.
This leads to the fact that, despite the fact that the body of the product itself is firmly screwed to a solid aluminum plate, it bends under the influence of high temperatures (bends the ears). As a result, instead of a solid plane, a hole forms on the Renault Logan thermostat housing.
As a result, the tightness of the connection between the cover and the seat is broken and this leads to a leak of coolant. And even the sealing rubber that fits the valve itself does not save the situation.
Also, there have been cases when, as a result of the weakening of the valve spring, which occurs over time, the valve opens earlier, when the antifreeze temperature is lower than necessary, as a result, coolant that has not yet been warmed up begins to circulate in a large circle.
Therefore, replacement can be carried out as an entire element assembly, or only its valve, body (which was damaged by high temperatures), or only the rubber seal.
But you can do without replacing the housing; for this you will need a sealant, provided that the bend on it is not strong. But more on that later.
Replacing the thermostat for Renault Logan, Sandero, Largus with your own hands
Share on social media St. Petersburg, auto mechanic, higher technical education MADI, 16 years of experience in the field of car maintenance and repair, I have experience working with different brands of cars. Warm up the coolant at medium speed for 5 minutes.
Then turn off the engine, check the level of the thermostat in the expansion tank and top up to the maximum mark.
The final stage of replacing the thermostat is the release of small air bubbles by opening the bolt of the heater hose. Important tips for replacing the thermostat in a car model Renault Logan Logan thermostat replacement with engine 1. Coolant can only be added to the reservoir when the engine is cold. You need a Renault Logan thermostat replacement, be careful - antifreeze is toxic. This malfunction is quite common and if the defect is not corrected in time, it can lead to serious consequences for the Renault Logan engine.
When the temperature is unstable, there is a need for minor urgent car repairs to remove and then replace the failed thermostat.
Photo of the Renault Logan thermostat assembly Let's start the replacement by checking; first of all, we need to find out that the thermostat valve really isn't working. To do this, start the engine cold and immediately touch the lower radiator outlet pipe with your hand; it should be cold.
If this does not happen, remove the cover and replace the thermostat valve. Having replaced the failed parts and thermostat, we proceed to install the unit in place. Before installation, be sure to clean the seat from aluminum oxides and scale.
To do this, use a utility knife, a file and fine-grained sandpaper. Take heat-resistant sealant and use a syringe to apply a thin layer of it into the groove of the thermostat housing; Also, apply a thin layer of sealant to the seat on the engine; Completing the first two points will solve the problem of slight bending of the body surface; Wait 15 - 20 minutes for the sealant to dry; Install the valve into the housing with the heating element facing the motor.
There is a protective rib that will allow you to make a mistake; At this stage you need to prepare the bolts. Many people lubricate them so that they can be easily unscrewed later, but the fact is that the thermostat is located on the engine and constantly vibrates, and as a result, over time the tightening becomes loose, thermostat replacement Renault Logan leads to antifreeze leakage.
We recommend using a thread locker, which will keep the tightening in place for a long time, especially since you are tightening plastic to metal and there is no need for excessive force. Thermostat replacement Renault Logan retainer with a thin layer on one side of the bolt; when tightened, it will spread over the entire surface. We install the product in place and tighten the bolts without much effort, remember about plastic; If the pipes were removed, then before installing them, lubricate their inner surface with grease so that they fit well and fit the pipes tightly; Fill with antifreeze.
Remember that Renault Logan has a special valve for releasing air, use it.
Replacing the thermostat if it is faulty
Connect one end of the hose to the valve, and lower the other into the expansion tank. Start the car for 5 minutes.
Remove the air plugs by unscrewing the valve plug on the hose-stove and wait until liquid starts flowing from it, then screw the plug all the way. At this point, replacing the thermostat can be considered complete.
Renault Logan thermostat and its replacement
From left to right: Tama, will return, the original standard one. I decided to reinstall the standard one. The removed thermostat looked pretty good.
If it weren’t for his fatigue and earlier discovery, he would still be walking and walking!
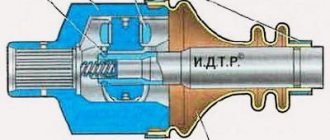
What function does a thermostat perform?
The only function of this unit is to mechanically regulate the flow of antifreeze. It automatically maintains engine operating temperature by directing coolant through small or large circuits.
In the first case, antifreeze circulates only through the “jacket”, i.e. inside the engine housing. This happens when the engine warms up and at low ambient temperatures. A closed valve allows the liquid to quickly warm up to normal temperature, and in the cold season it does not allow it to cool below the specified parameters.
This happens until the antifreeze warms up to 88 - 91°C. When this temperature is reached, the valve spring weakens, it rises and part of the coolant is sent to the radiator for cooling. The higher the temperature, the more liquid enters the radiator.
While driving, the operating mode of the engine is constantly changing, it is influenced by the speed of movement, terrain, well-cooling headwind, changing ambient temperature, vehicle loading and similar factors. Because of this, the coolant temperature constantly tends to change. The thermostat stabilizes it by directing the fluid flow along the required circuit and keeps the engine temperature in an acceptable range.
What problems could there be with the thermostat and what signs might indicate this?
Despite the fact that practice has shown the reliability and durability of Renault Logan cooling systems, they still cannot be called trouble-free units. In addition, motorists often add problems to themselves by pouring low-quality antifreeze. Which “eats” the engine housing, is deposited by alkali on the rod and corrodes the rubber seals. Because of this, as well as natural wear and tear, problems arise with the thermostat or its housing. Sometimes both parts fail at the same time.
The main faults are:
- Valve jamming on the stem. The valve remains in one of three positions - closed, open or intermediate. The regulator ceases to perform its intended functions and must be replaced.
- Wear of the valve sealing rubber. Leads to constant leakage of liquid into the radiator. The engine temperature does not reach the optimal temperature. Therefore, fuel consumption increases, and in winter cold air blows from the stove.
- Case problems. This may be a curvature of the flange, the appearance of shells on the seat and, in rare cases, through holes. In any of these cases, a coolant leak is visually visible.
The following signs will indicate the occurrence of any of the malfunctions:
- The engine temperature does not reach the optimal temperature even when driving for a long time, at high speed and in traffic jams. This means the valve is stuck in the open position or the rubber seal is damaged. The coolant constantly circulates in a “large circle”, i.e. through the radiator and cannot heat up. You can check it on a barely warmed up engine. To do this, you need to touch the pipe to the radiator. If it is warm, it means the valve is jammed and the antifreeze is constantly flowing along a large circuit.
- The engine constantly overheats. This is a sign that the valve is stuck in the closed or half-open position. The liquid circulates only in a “small circle”, i.e. exclusively in the “jacket” of the engine. As a result, the antifreeze and the engine overheat. The check is the same as in the first case. Only now, on a warm engine, the pipe from the thermostat to the radiator will be constantly cold.
- A constant decrease in the level and the need to add coolant. The cause may be leaks in various units of the cooling system. In particular, antifreeze leakage between the thermostat and engine housings. In rare cases, through holes occur in the housing.
Important! Any of these signs should attract your attention. All problems with the cooling system must be resolved immediately to avoid engine damage.
What will you need?
- Directly the new thermostat itself.
- Open-end wrench 10.
- Screwdrivers.
- Plastic bottle with a volume of at least 5 liters.
- Knife.
This is interesting: Renault Logan replacement of the middle part of the muffler: useful to know
What tool will you need?
To replace the thermostat with its housing in a 1.6-liter engine on a Renault Logan model, you should acquire the following list of tools and accessories:
- large container for draining refrigerant;
- a tool designed to loosen and remove clamps from the cooling circuit pipes;
- a set of screwdrivers with figured and flat profiles;
- heads with ratchet and spanners;
- devices for clamping rubber cooling pipes;
- heat-resistant sealant.
Having a designated list of tools in your arsenal, you can easily complete the planned activity. On 1.6 liter Renault Logan, this procedure is not labor-intensive, so no special skills of a car mechanic are required.
How to choose?
In order to decide on purchasing a suitable thermostat for Renault Logan, you should adhere to specific criteria. The automotive market today provides a very wide range of these spare parts from various manufacturers offering products of dubious quality at tempting prices.
Based on extensive experience, we do not recommend purchasing spare parts, including the thermostat housing, from manufacturers in this segment, since the risk of reoccurrence of the problem we are considering is very high, and the gasket is also purchased. If after replacement the thermostat leaks, then most likely you are faced with a fake. It is recommended to take a closer look at the original Renault brand products, which will allow you to avoid troubles after replacing the thermostat and ensure the service life of the unit installed on the car. And the thermostat housing will last a long time.
For 1.6-liter units, the thermostat housing is supplied separately, unlike version 1.4. It is better to purchase a thermostat housing as a set, since the housing material has a limited service life. We also recommend purchasing a new gasket as it is not included in the kit and is sold separately.
Renault Duster 2021 latest news
Renault Duster on-board computer
Renault Duster PTF
Renault Logan thermostat malfunction
Oddly enough, Renault K4M and K7M engines have their own relationship to the thermostat. We understand that the motors are not new, the thermostats are of the simplest design, but childhood illnesses have not yet gone away. This is all the more strange since these engines are installed on a good dozen Renault, Nissan and even VAZ models (in particular, Lada Vesta and Largus). Be that as it may, here is a list of the main malfunctions of the thermostat of Renault Logan engines:
- leaking from under the thermostat housing. It can be treated either by replacing the gasket, using a sealant, or planning the mating planes of the body (if the body is metal).
- is stuck . Everything is clear here, it is useless to treat, the thermostat needs to be replaced.
- Warping of the metal thermostat housing.
- Wear of the rubber seal.
- Inconsistency with the nominal valve opening temperature.
Some of these malfunctions lead to leaks, some to incorrect operation of the heater (the heater does not warm up the interior, it blows cold), it can also overheat or, conversely, the engine may not warm up.
Renault Logan thermostat housing
Judging by the amount of sealant, the thermostat is leaking quite a bit.
The base housing of the Logan and Sandero thermostat is made of plastic, which also often leads to its deformation, especially in the area of the mounting eyes. The lugs become deformed and antifreeze naturally begins to leak. Many owners solve this problem by installing a metal cast housing, but this option is often not very effective - after a mileage of 50-70 thousand, the housing may become deformed and we again encounter a leak. The good thing is that in the case of a metal body it is always possible to plan the plane on a large emery wheel, then the geometry is restored and the leak can be overcome.
How to fix a leak in the Renault Logan thermostat housing
To forget forever about antifreeze leakage at the junction of the thermostat cover and the metal case, two methods are used:
- replacing the plastic flange with a metal analogue;
- selection of a rubber gasket for the Renault Logan thermostat of the required thickness.
The first option is preferable, although more expensive - the cost of a duralumin body is 850 - 1000 rubles. The difficulty arises in the fact that it is not always possible to find such a detail. In general, if you were unable to buy a metal flange, or you want to save money, you can always resort to the second method.
Instead of the standard rubber ring, you can use similar, thicker sealing elements from cars of other brands. After going through several dozen options, we found a gasket of the required thickness, which, even with severe deformation of the case, ensures a reliable connection. To save you from exhausting searches, we’ll tell you a secret - one of the best analogues is considered to be the thermostat housing gasket for Toyota engines manufactured by MASUMA (TAMA), which can be found by number P102.
Removing the thermostat is a fairly simple procedure that even a beginner can do. The first thing to do is remove the cap of the expansion tank and place a container under the temperature regulator housing. Then you need to partially unscrew the bolts and use a screwdriver to carefully move the flange away from the bottom of the device. After the coolant has been drained, the bolts are unscrewed and the thermostat cover is moved to the side - now the thermostat can be removed from the Renault Logan thermostat housing.
Replacing the gasket on the thermostat is easy - just remove the old ring and carefully insert the thermostat plate into the slot of the new seal - after which the device can be returned to its place. Even a quick glance at the photo taken is enough to see that, unlike the standard one, the selected gasket rises above the mating plane of the thermostat cover by more than 2 mm.
Still, you should not rush to install the repaired unit back. To make the design truly reliable, at the same time as replacing the gasket, experts recommend installing a new plastic case - fortunately, its price is a penny by today's standards. The fact is that even the best thermoplastic is subject to aging over time. In addition, the situation is further aggravated by constant temperature changes - in winter, the temperature difference can exceed 120 degrees Celsius. As a result, microcracks appear on the surface of the plastic part, through which antifreeze leaks. This manifests itself as "fogging" on the bottom of the thermostat housing, which can be detected by running your hand along the flange.
Do not forget that a thicker gasket will be used. When the plastic flange is pulled to the thermostat body, the fastening bosses (ears) on its surface will bend slightly, so it is better to immediately take care of replacing the “tired” part, the life of which is coming to an end.
Finding a new cover is not difficult - it can be found under article number 8200561420. For example, a high-quality thermostat housing for Renault Logan from the French manufacturer SASIK 4000378. A plastic product is several times cheaper than a metal flange - depending on the region, it can be bought for a price of 150 rubles (a good analogue ) up to 400 rubles for an original spare part. Replacing the rubber ring with a thicker seal and using a new flange will solve the problem of antifreeze leaking from under the thermostat housing once and for all.
Something else useful for you:
Video: Why does EVEN the NEW thermostat gasket leak on Logan?
How to check the Renault Logan thermostat, signs of malfunction
There is no need to remind you that the task of any thermostat, regardless of its design and characteristics, is to direct coolant through a small circle, bypassing the cooling radiator, for quick warm-up, and after the engine warms up to operating temperature, pass antifreeze through a large circuit, including the radiator. Since the characteristics of thermostats may be different, the opening time of the thermostat valve is also different.
Analogue of the Gates factory thermostat
The Renault Logan factory thermostat works (should work) at a temperature of 89 degrees, which for some regions is not enough to fully warm up the engine. In this case, it is recommended to install a “hotter” thermostat, which opens at a temperature of 95-97 degrees, ensuring more complete warming up of the engine. However, in hot summers such a thermal valve can cause the engine to overheat. As a rule, our winters are quite mild, so there is no need to install “hot” thermostats; the original one can handle it.
The thermostat does not work on Logan, symptoms
There are not many signs of a thermostat malfunction, but each of them will eloquently tell about the problems of the cooling system:
- The engine takes a long time to warm up in cold weather, the heater is cold and blows cold air. In this case, the thermostat valve could be stuck in the open position and constantly circulate antifreeze in a large circle. It is clear that in cold weather and with a radiator, the liquid will take a very long time to warm up, which is undesirable. This is bad not only because it is cold in the cabin, but also because the oil does not warm up to operating temperature and does not do its job as expected. As a result, we have increased wear of the piston, liners, camshaft and, in general, reduce engine life.
- Engine overheating. If the engine begins to overheat without heavy loads, the thermostat is most likely to blame. Of course, you can find a thousand other reasons for overheating - a clogged radiator, poor circulation, failure of the temperature sensor, late activation of the radiator cooling fan, a drop in the antifreeze level, a tired pump. But all this can be easily checked without any dismantling. But to check the thermostat you will have to remove it.
- The thermostat valve works intermittently and is unstable - it either sticks or opens normally. The worst situation is when there are no stable signs of a malfunction. This also includes those cases when the valve is stuck in an intermediate position.
Checking the Renault Logan thermostat
To check the operation of the Logan thermostat, you can follow two paths - remove it from the engine, or not remove it. Most often they prefer the second option as the fastest, but not the most accurate. The first option involves dismantling the thermostat, visual inspection, heating the element in a kettle or pan of water with constant temperature measurement. This is how you can accurately determine at what temperature the valve opens.
Replacing the thermostat if it is faulty
Hello dear readers of the blog AAuhadullin.ru.
Today I want to talk to you about the fact that it is necessary to replace the thermostat on a Renault Logan in the event of a malfunction, since when it fails, the expensive engine of the car experiences thermal stress. This malfunction is quite common and if the defect is not corrected in time, it can lead to serious consequences for the Renault Logan engine. When the temperature is unstable, there is a need for minor urgent car repairs to remove and then replace the failed thermostat. Operating the machine with this malfunction is fraught with serious consequences; the most dangerous is overheating of the expensive Logan engine when the thermostat valve remains in the closed position.
Photo of Renault Logan thermostat assembly
Let's start the replacement by checking; first of all, we need to find out that it is really the thermostat valve that is not working. To do this, start the engine cold and immediately touch the lower radiator outlet pipe with your hand; it should be cold.
After the engine temperature rises to +95 degrees, the thermostat valve will operate, and the lower radiator pipe discharging antifreeze will begin to heat up, which indicates the start of coolant circulation in a large circle of the engine cooling system, according to the serviceability of the valve. If this does not happen, remove the cover and replace the thermostat valve.
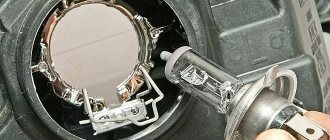
Renault Logan thermostat cover
Before starting the replacement, you need to visit an auto parts store and purchase the necessary spare parts for the job. Also, for replacement you will need a minimum set of tools. This is an X10 key, a screwdriver, and a plastic container that we cut off, fitting it to the joint of the thermoelement cover housing fastening.
Let's get started with the replacement:
- 1. Unscrew the expansion tank plug
- 2. Substituting a cut-off plastic container under the joint of the thermocouple cover housing with an X10 open-end wrench, first loosen the bottom bolt securing the cover, then all the other bolts, but do not completely unscrew them
- 3. Then, inserting the tip of a flat-head screwdriver between the body and the cover, press the body a little. This is quite enough for antifreeze to flow into the formed gap.
- 4. As soon as the antifreeze stops leaking, remove our container with coolant
- 5. Having unscrewed the three bolts, we completely release the thermostat cover, slightly rocking the cover from side to side, and move it back. The thermoelement itself will be located in the lid body at this time.
- 6. We take out the thermoelement and visually compare it for warranty with a new one purchased in advance for replacement at a spare parts store
- 7. If both elements are the same, then install the purchased new one in its seat in the lid
In this case, you need to pay attention to the fact that the element being replaced has a large protrusion on one side. The long side where the spring is located should be facing inside the thermostat housing mounted on the engine. If you turn the element the other way around, then it will rest against the inner part of the cover body attached to the radiator pipes and expansion tank and it will be impossible to install it in its place with three bolts.
- 8. Install the thermocouple with the correct side, checking the previously removed rubber o-ring from the body for suitability for further use. Replace a heavily compressed or stiffened, or perhaps torn rubber ring with a new one.
- 9. We tighten the bolts in several passes so that there are no distortions
- 10. Having finally tightened the bolts, pour coolant into the expansion tank, while checking that there are no drips at the fastening joints
- 11. We remove the air plugs by unscrewing the valve plug located on the stove hose, wait for the air to come out and the liquid to appear, then screw the expansion tank plug in completely.
- 12. Start the engine and warm up the coolant at medium speed until the fan turns on. Next, turn off the engine with the ignition key, once again check the level of coolant in the expansion tank, if necessary, then add it to the maximum “MAX” mark. IMPORTANT, during further operation of the car, do not let the level drop below the “MIN” mark.
- 13. Once again, slightly open the valve plug located on the stove hose, wait for the bubbles to come out and the liquid to appear, as soon as it appears, screw it back all the way
Air lock release valve plug
This completes the replacement of the faulty thermostat. As you can see in the video, it’s an absolutely simple job to repair a car; you just need to be able to hold the key in your hand and improvise the process. YouTube video:
Replacing the thermostat for Renault Logan 1.4/1.6 8 valves
To diagnose a product, you must first remove it, and only then draw conclusions whether it needs to be replaced or not.
If the thermostat is leaking, only the housing or rubber seal may need to be replaced.
To complete the work you will need:
- Socket wrench 8 or 10 (depending on the year of manufacture of the car);
- Flat screwdriver;
- One 5 liter plastic bottle, cut in half with a tab for fixation;
- One 2-liter bottle with an oval hole cut near its bottom into which antifreeze will flow, and it will flow out through the neck (you can do without it);
- Rags;
- Gauze (if the antifreeze is still normal, then you should not change it, but filter it through gauze and pour it back into the cooling system).
Since the entire assembly is located opposite the middle part of the engine, when removing it there is no need to drain all the coolant; it will be enough to place a cut-off 5-liter plastic container under the product or build a small structure using a 2-liter bottle.
But if you want to replace the antifreeze at the same time as replacing the valve, you will have to drain it completely. How to do this is described below.
Work must be performed on a cold or, in extreme cases, a warm engine.
Coolant drain
When replacing the thermostat, the coolant can be drained completely or partially.
Partially drain:
- Remove the air duct pipe. It is easily dismantled.
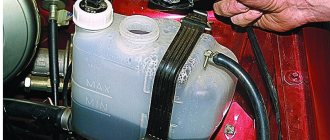
- Unscrew and move the power steering barrels aside;
- Unscrew the cap of the expansion tank (if the engine is still hot, do this carefully with gloves so as not to get scalded);
- Place a cut-off bottle with a tongue under the thermostat to secure it. If it gets in the way, then secure it to the left near the engine, and instead use a 2 liter one with an oval hole cut out near the bottom. Place the neck of the two-liter bottle over a 5-liter container;
- Lubricate the bolts to prevent stripping the head. You can use WD 40;
- Slightly loosen all three thermostat cover bolts (carefully remove them from their place);
- You need to start unscrewing from the bottom bolt, since the main flow of coolant will go through it;
- To ensure that the fluid flows in the desired direction, immediately unscrew the bottom bolt by 3 turns, the top (closer to the radiator) by 2, and the rear by 1 turn;
- When about 1.5 liters of antifreeze leaks out, each bolt is further unscrewed two turns and, using a flat screwdriver, trying not to damage the rubber gasket, we remove the valve itself, thereby allowing the remaining antifreeze to flow freely into the container.
- If you do not change the antifreeze, then strain it through cheesecloth into another clean container.
Draining completely is one of the ways.
If you have a compressor or pool pump, you don't need to unscrew the bolts first.
- Relieve the pressure by unscrewing the expansion tank cap until it clicks and screwing it back on;
- Remove the upper hose of the expansion tank and insert it into a 5 liter container;
- Insert the hose coming from the compressor into the hole in the expansion tank and supply air under pressure there.
- Antifreeze will begin to flow into the container through the expansion tank hose; you need to drain it until the liquid flows in a smooth stream;
- Next, place the container and unscrew the bolts according to the instructions above. We add the leaked antifreeze residues to the main ones and, provided that a replacement is made, we prepare fresh coolant for filling. Otherwise, filter the old coolant through gauze for later use.
Removing and checking the thermostat
When the coolant stops draining, unscrew all the bolts completely and move the thermostat housing to the right of the seat. The valve itself is easy to remove, remember its position.
We inspect it for the presence of a rubber gasket and in what position it is in closed or open.
When the engine has cooled down, it should be completely closed; if it has a gap of 1-2 mm or more, then the product needs to be changed.
If antifreeze is leaking through the valve, then in addition to the gasket, the housing may be to blame.
Look how strongly it is bent; for this it is not necessary to remove it completely; if the bend is large, then change it; if it is small, then prepare a sealant.
Having replaced, if necessary, the failed parts, we proceed to install the unit in place.
IMPORTANT: Before installation, be sure to clean the seat from aluminum oxides and scale. To do this, use a utility knife, a file and fine-grained sandpaper.
Installation:
- Take heat-resistant sealant and use a syringe to apply a thin layer of it into the groove of the thermostat housing;
- Also, apply a thin layer of sealant to the seat on the engine;
- Completing the first two points will solve the problem of slight bending of the body surface;
- Wait 15 - 20 minutes for the sealant to dry;
- Install the valve into the housing with the heating element facing the motor. There is a protective edge that will not allow you to make a mistake;
- At this stage you need to prepare the bolts. Many people lubricate them so that they can be easily unscrewed, but the fact is that the thermostat is located on the engine and constantly vibrates, and as a result, over time, the tightening becomes loose, which leads to antifreeze leakage. We recommend using a thread locker, which will keep the tightening in place for a long time, especially since you are tightening plastic to metal and there is no need for excessive force. Apply a thin layer of fastener on one side of the bolt; when tightened, it will spread over the entire surface.
- We install the product in place and tighten the bolts without much force (remember about plastic);
- If the pipes were removed, then before installing them, lubricate their inner surface with grease so that they fit well into place and fit the pipes tightly;
- Fill with antifreeze. Remember that Renault Logan has a special valve for releasing air, use it.
Connect one end of the hose to the valve, and lower the other into the expansion tank. Start the car for 5 minutes. Return everything to its original position. - Warm up the car. Check for leaks, make sure all components and assemblies are properly heated;
- If everything is normal, replacing the thermostat is completed.
How to change the Renault Logan thermostat in various modifications
To replace, you will need the spare part itself or just the housing, heat-resistant automotive sealant, thread locker and a minimum number of tools. All you need is a slotted and Phillips screwdriver, a 10-mm open-end or socket wrench, a transparent tube with a diameter of 10 mm for bleeding air, a cut-off 5-liter plastic container and a rag. The size of the container must be adjusted so that it can be placed under the place where the thermostat housing is attached to the engine.
Attention! After stopping the engine, you must wait for the coolant to cool to 30 - 40 °C and only then start working.
The step-by-step replacement is described for Renault Logan models with an 8-valve engine and is carried out as follows:
- Place a pre-cut container under the place where the thermostat housing is attached to the engine.
- Unclip the clips and remove the air duct.
- Unscrew the expansion tank cap.
- Using a 10mm wrench, loosen the bottom bolt of the thermostat housing, then the rest. Do not unscrew completely, otherwise the liquid will flow past the substituted container!
- Using a slotted screwdriver, carefully press the housing away from the engine. This will be enough for some of the antifreeze to leak out of the engine and radiator.
- The thermostat is located at the middle level of the engine, so there is no need to drain the remaining fluid. As soon as it stops leaking, you can remove the container.
- Completely unscrew all the bolts and, slightly shaking, separate the housing from the seat on the engine.
- It is necessary to remove the pipes from the housing only if liquid leakage is detected from under it. On a pipe with a smaller diameter, you need to squeeze the clamp levers and tighten the tube. On the larger pipe, unscrew the clamp clamp screw and also carefully pull the tube off the housing pipe. If there were no leaks, then this operation is not necessary; the thermostat can be easily removed from its housing.
- Remove the thermostat and compare it with the newly purchased one. If the type and dimensions match, then you can safely make a replacement. Attention! Do not mix up and insert the thermostat into the housing correctly. The part with the spring should be on the outside. Otherwise, you will not be able to insert and screw the housing to the engine.
- Clean the mounting surfaces on the motor and housing.
- Install the thermostat with the correct side into the housing.
- Lubricate the seat on the engine and the housing groove with a thin layer of heat-resistant sealant. Wait 10 - 15 minutes until the sealant dries (see instructions on the package).
- Apply thread locker to the bolts.
- Place the housing with the new thermostat in place and bolt it in several passes, avoiding distortion.
- Finally tighten the bolts.
- Open the valve plug on the rubber pipe of the stove and put a transparent tube on it, lower the other end of the tube into the expansion tank.
- Pour coolant into the expansion tank.
- Check for leaks on the pipes from under the rubber tubes and at the junction of the housing and the seat on the engine.
- Start the engine and let it run for five minutes. During this time, the air should leave the cooling system. Stop the engine, remove the pipe and tighten the valve plug.
- Check for leaks.
- Start and warm up the engine until the radiator fan turns on.
- Stop the engine and check for leaks and the fluid level in the reservoir. If topping up is necessary, be sure to wait until the engine cools down and only then open the expansion tank cap.
Read also: Ford Transit 115 t 430
Replacing 16 valve Renault Logan engines is not too different from the procedure already described. Difficulties arise only when unscrewing the bottom bolt. Due to the fact that the thermostat is located in a different place. You can unscrew the bottom bolt only by removing the engine protection and first driving onto a pit or overpass. Or using a head with a flexible liner. The remaining operations are also performed in the same sequence.
Temostat replacement report
Before replacing the thermostat on Renault Logan, drain the coolant. To do this, release the pressure by unscrewing the cap of the car's expansion tank.
Then remove the upper hose of the expansion tank by tightening the clamp.
Then pour the coolant into a previously prepared container. This can be done much faster if air from the compressor is supplied to the expansion tank through the hole from which we removed the top tube. It is better to drain the coolant when the engine is cold.
After the liquid has been drained (about 3 liters), remove the air duct. It can be easily removed, you just need to snap it (clips).
Then unscrew the three thermostat mounting bolts. They are unscrewed with a head on, depending on the motor.
After this, remove the thermostat from the housing.
You can determine that the thermostat has “outlived its usefulness” by carefully examining it. The rubber seals on it are frayed, with defects, the valve is not completely closed (open). This thermostat definitely needs to be replaced.
Installing a new thermostat begins with preparing the installation site and cleaning it thoroughly. Check the thermostat housing itself for leaks, cracks, etc. If defects are found, it is better to replace it.
We install a new thermostat. It should sit tightly in place, and there should be no defects on the seals.
Installation occurs in the reverse order of removal. We fasten three bolts and install the air duct pipe. The clamp for the upper pipe of the expansion tank can be reused (if it was removed without damage).
Something else useful for you:
Then fill in antifreeze. Experienced car enthusiasts recommend that before reusing antifreeze, strain it to remove any impurities that might have gotten there during draining.
Together with the filler plug, you need to remove the air bleed plug so that when filling antifreeze you do not air out the cooling system.
Coolant is filled to the maximum level marked on the expansion tank. In this case, the liquid should begin to flow out a little from the air bleed hole. In this case, antifreeze must be poured in portions, with short breaks, to allow air to escape through a small hole for bleeding.
To stop the leakage of antifreeze, you need to close the filler neck of the expansion tank with your hand and put a cap on the hole to bleed air.
You need to add fluid to the expansion tank to a level between the upper and lower marks. After the engine warms up, the antifreeze will expand and the level will reach the upper mark.
Tighten the plugs tightly, turn on the headlights and warm up the engine. You need to turn on the headlights to increase the load on the generator and the engine, and this will make it warm up faster. After the engine has warmed up, check the antifreeze level in the expansion tank. If it does not correspond to the top mark, add more.
Video: Replacing the thermostat on Renault Logan
To completely bleed the remaining air from the system, close the filler neck of the expansion tank with your hand and open the air bleed plug.
Check the antifreeze level again and top up if necessary. It is advisable to warm up the engine before turning on the cooling fan; if at this moment the antifreeze level corresponds to the upper mark, then we have filled it in the right amount. At this point, the replacement of the Renault Logan thermostat can be considered complete.
How to change the thermostat on Renault Logan
The car's thermostat allows the engine to warm up faster by shutting off a large cooling water circle. And after the engine warms up, the thermostat opens and circulates coolant in a large circle, helping the engine maintain the optimal temperature and not overheat.
But almost every car part fails at some point, and the thermostat is no exception. Therefore, it sometimes has to be changed, and we will tell you how to do it yourself using the example of replacing a thermostat on an eight-valve Renault Logan engine.
Temostat replacement report
Before replacing the thermostat on Renault Logan, drain the coolant. To do this, release the pressure by unscrewing the cap of the car's expansion tank.
Then remove the upper hose of the expansion tank by tightening the clamp.
Then pour the coolant into a previously prepared container. This can be done much faster if air from the compressor is supplied to the expansion tank through the hole from which we removed the top tube. It is better to drain the coolant when the engine is cold.
After the liquid has been drained (about 3 liters), remove the air duct. It can be easily removed, you just need to snap it (clips).
Then unscrew the three thermostat mounting bolts. They are unscrewed with a 8 or 10 head, depending on the motor.
After this, remove the thermostat from the housing.
You can determine that the thermostat has “outlived its usefulness” by carefully examining it. The rubber seals on it are frayed, with defects, the valve is not completely closed (open). This thermostat definitely needs to be replaced.
Installing a new thermostat begins with preparing the installation site and cleaning it thoroughly. Check the thermostat housing itself for leaks, cracks, etc. If defects are found, it is better to replace it.
We install a new thermostat. It should sit tightly in place, and there should be no defects on the seals.
Installation occurs in the reverse order of removal. We fasten three bolts and install the air duct pipe. The clamp for the upper pipe of the expansion tank can be reused (if it was removed without damage).
Something else useful for you:
Then fill in antifreeze. Experienced car enthusiasts recommend that before reusing antifreeze, strain it to remove any impurities that might have gotten there during draining.
Together with the filler plug, you need to remove the air bleed plug so that when filling antifreeze you do not air out the cooling system.
Coolant is filled to the maximum level marked on the expansion tank. In this case, the liquid should begin to flow out a little from the air bleed hole. In this case, antifreeze must be poured in portions, with short breaks, to allow air to escape through a small hole for bleeding.
To stop the leakage of antifreeze, you need to close the filler neck of the expansion tank with your hand and put a cap on the hole to bleed air.
You need to add fluid to the expansion tank to a level between the upper and lower marks. After the engine warms up, the antifreeze will expand and the level will reach the upper mark.
Tighten the plugs tightly, turn on the headlights and warm up the engine. You need to turn on the headlights to increase the load on the generator and the engine, and this will make it warm up faster. After the engine has warmed up, check the antifreeze level in the expansion tank. If it does not correspond to the top mark, add more.
Video: Replacing the thermostat on Renault Logan
To completely bleed the remaining air from the system, close the filler neck of the expansion tank with your hand and open the air bleed plug.
Check the antifreeze level again and top up if necessary. It is advisable to warm up the engine before turning on the cooling fan; if at this moment the antifreeze level corresponds to the upper mark, then we have filled it in the right amount. At this point, the replacement of the Renault Logan thermostat can be considered complete.
Features of replacement for Renault Logan 1.6 16 valves
There are no particular differences in replacing the thermostat on 8 and 16 valve Renault Logan engines, the only difficulty is that it is difficult to get to the bottom bolt, because this unit is located in a slightly different place on the 16 valve engine.
There are two ways to solve the problem:
- Remove the engine protection and unscrew the bolt from below;
- Use a special wrench with a flexible connection.
You will also have to dismantle some engine parts.
The rest of the algorithm remains unchanged.
Replacing the thermostat Renault Logan 1.6 16 valves
This article will propose a consideration of replacing the thermostat on a VAZ-2112 car. All issues of interest will be discussed in detail in this work. What is a thermostat? What is it for? How to replace it? Small circle and large circle, differences? All these and other questions will be directly addressed and described in detail in this article.
Video about replacing the thermostat on a VAZ-2112 with your own hands:
The video shows the process of replacing a thermostat, choosing a thermostat and tips for carrying out work to remove it.
The process of replacing a thermostat on a 16 valve valve
First, you need the thermostat itself for your car model, a screwdriver and a “5” hexagon.
Of course, the first thing you need to do is remove the no longer working thermostat:
- We drain the coolant, since otherwise it will not be possible to disconnect the thermostat (there will be liquid in the system).
If you don't drain the coolant, you can "crash the engine compartment"
Removing the air filter cover
Loosen these clamps on the thermostat.
Unscrew the bolts on the thermostat
New thermostat rubber
What is a thermostat?
The thermostat itself is an important part in the engine cooling system. It is designed to ensure that the engine is cooled according to its needs.
For example, you started the engine “cold”, then at degrees from 80 to 90 a large circle opens and liquid enters the radiator and begins to cool the engine more intensively than in a small circle.
The thermostat itself consists of:
- Frame.
- Internal compartment.
- 2 pipes with valves.
- "Core". Thermoelement (copper powders, a mixture of granulated wax, graphite and aluminum in a special proportion).
- Valves.
How to identify a breakdown?
The engine begins to overheat or does not reach operating temperature - these are the main two criteria for a faulty thermostat.
But there are also auxiliary signs: there is no heat in the cabin when it gets cold, a decrease in dynamic performance (power, speed), increased fuel consumption (about the passport consumption standards here).
Recommendations for valve and gasket selection
There are a lot of manufacturers of thermostats for Renault Logan, housings, and gaskets for them, including both Chinese and European companies.
As for the rubber gaskets that come with new products, try not to use them; it is better to purchase original ones separately.
Gaskets with a square rather than a round shape have proven themselves to be good, both original and non-original.
But if the old gasket turned out to be in good condition when replacing the thermostat, and it is original, then it is better to leave it.
Try to buy housings, valves and gaskets from European manufacturers; the German company FEBI, the Italian FACET, and the FENOX company (factories in Russia, Belarus, Germany) have proven themselves well.
Products from the German company BEHR-HELLA have proven themselves to be quite good, for example the model TX10089D.
There are more than 30 other European companies producing non-original spare parts for Renault Logan, it is difficult to say which of them are better and which are worse, here you need to focus on the price (exclude very cheap ones right away) and reviews on the forums.
If you want to save money, pay attention to thermostats from LADA Largus, they are also suitable.
If you want to take a risk, then products for Renault Logan from Luzar and NPA are also on the market at a very good price.
Let's sum it up
Based on practice, it can be seen that servicing the cooling system on 1.6 liter Renault Logan cars is not difficult. Therefore, replacing the thermostat is done by yourself, saving money and without contacting service. This material can be an excellent assistant for Renault Logan enthusiasts in carrying out repair work on the cooling system.
Sources
- https://AutoTopik.ru/renault/1360-zamena-termostata-logan.html
- https://rulikoleso.ru/remont-renault/zamena-termostata-renault-logan
- https://razborov.net/renault/reno-logan-zamena-termostata-bez-sliva-ohlazhdayuschey-zhidkosti.html
- https://i-love-mycar.com/zamena-termostata-reno-logan/
- https://ZamenaRenault.ru/logan/dvigatel-logan/termostat.html
[collapse]