What is practical shooting?
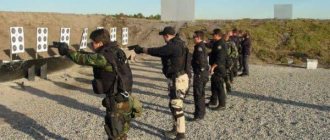
Practical shooting is a new and exciting shooting style. Classes in this sport simulate situations of real use of weapons (military and police operations). Therefore, during training, much attention is paid not only to accuracy, but also to speed of movement.
In practical shooting there is no fixed set of exercises. All exercises are created on site based on the general IPSC requirements. Exercises usually include moving, shooting on the move and from the least comfortable positions, using cover, quickly reloading weapons, etc. Also, usually there are no requirements for the order of performing the exercise - the shooters are given a task, and how they will perform it - everyone decides for themselves, based on their own capabilities. The shooter is forced to make his own decisions and develop his own tactics for performing each exercise. The goal is to completely hit all targets in the shortest possible time and perform the required actions for this exercise (for example, mandatory reloading of a weapon).
Great attention is paid to safety measures and discipline. All practical shooting training and competitions are built on this.
There are 4 basic IPSC rules:
- always treat the weapon as if it were loaded;
- always check what is in front of and behind the target;
- never touch the trigger before the weapon is pointed at the target;
- never point a weapon where the shooter does not intend to shoot.
And this approach to ensuring safety gives a good result - over the past decades, no accidents related to weapons have been recorded at IPSC events.
Start off right
This is a simulated shooting exercise that you can do at home. First, completely unload the weapon. Double check and then check again. And only then begin to practice drawing the weapon from your regular holster, aiming the line of sight at the target and pulling the trigger without moving the sight. Then, practice removing the magazine and become familiar with the weapon as a whole. It may sound simple, but the best shooters often spend 20 minutes several times a week on this exact exercise.
In our club
Practical shooting training (IPSC) classes using airsoft weapons (Action Air) are conducted for everyone in the “Pistol” and “Carbine” disciplines. Classes are conducted by a certified Instructor of the Russian Practical Shooting Federation.
Classes last 2 hours and are held on Tuesdays and Thursdays in the afternoon and evening.
Classes are conducted by a certified Instructor of the Russian Practical Shooting Federation.
Classes are conducted using an air pistol or carbine (without mixing groups by type of weapon)
Classes are conducted with the athletes’ personal equipment, or rented from the Delta club.
There are adult and children's groups. Age from 12 years.
Minimum number of people in a group is 2.
The maximum number of people in a group is 5.
Primary requirements:
- Having your own weapon
- 2 magazines + balls + greengas/co2,
- Belt
- Pistol holster
- Pouches for stores
- Comfortable clothes
- Good mood.
(all this will be required starting from the 1st workout)
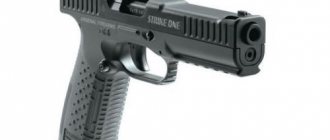
Weapon requirements:
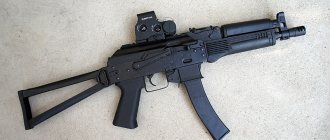
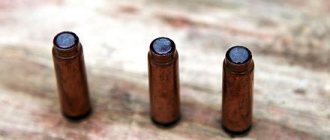
- “pistol” - airsoft pistols (soft pneumatics) with a blowback system (simulated recoil) of 6mm caliber, firing plastic bullets of 6mm caliber and weighing 0.2-0.45 grams, running on CO2 gas or (Gringaz or equivalent).
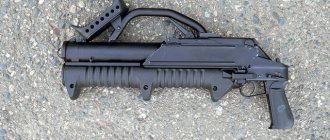
- “carbine” - an AK/AR airsoft drive with an exhaust speed of no more than 120 m/s. ) 6mm caliber, firing plastic bullets 6mm caliber and weighing 0.2-0.45 grams.
Prices
Shoot from a weak hand
During some matches, shooters will have to shoot from both their strong and weak hands. The strong hand is the one from which the holster hangs. The second hand is weak. The weapon should be held and fired using only the designated hand. Few amateur shooters practice this drill and it affects their performance during competition.
Set up two IDPA/USPSA targets 2 meters apart and shoot them at 6 to 9 meters. To practice shooting from a weak hand, start the exercise with the weapon lowered. For a strong hand - with a weapon in a holster. At the signal, fire two shots in the torso area and one in the head area of the target, then transfer fire to the second target and do the same. This drill will force you to deal with both horizontal and vertical firing and is great for practicing one-handed shooting.
Recharge quickly
The ability to reload quickly is a critical skill that requires practice. Set up a single target at 6.5 meters and load all of your existing magazines, but only with two rounds each. With them and the belt holster in their normal positions, fire two quick shots at the target, remove the empty magazine, let it fall to the ground, and reload the weapon. Repeat the exercise, reloading magazines as necessary, until you have fired about 20 shots.
This basic drill will help you prepare for matches, but you will also learn from the match itself. Try to get into a team with Master and Expert class shooters. But don't be intimidated by their skills. Learn from them - most will be happy to share their knowledge. This knowledge can be just as valuable as that gained at an expensive shooting academy - but will cost you much less.
Previous articleAll articlesNext article
Methods of teaching machine gun shooting techniques
Previous26Next
(AKMS; AKSU)
Training in shooting techniques and rules is carried out in the following sequence:
- the technique is shown as a whole, and then in parts (by elements) with an explanation. Further development of the skill should take place in three main stages:
1. Dividing the technique into parts and learning to perform each action separately.
2. The second stage is a set of leading exercises and simple actions sequentially combined into groups. Next, simple actions are combined into one complex action.
3. At the third stage, “automation” of motor skills occurs through repeated repetition of simple and complex actions. As the number of repetitions increases, the skill is further transformed into a skill.
It is advisable to study shooting techniques in the following sequence:
— loading the magazine with cartridges and removing cartridges from it;
- loading and unloading weapons;
— replacement of the store;
— ready for shooting;
- carrying out and stopping shooting while standing, kneeling, lying down, as well as from behind various covers and in other conditions.
Firing positions (AKMS; AKSU)
Preparing for shooting - includes taking the position for shooting, loading the machine gun and bringing it into a state of combat readiness.
A machine gun can be fired from various positions. When firing from a standing position, the machine gunner assumes shooting positions: standing, kneeling and lying down, depending on terrain conditions and enemy fire
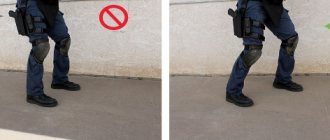
Position: standing
To assume the position, you need to take a step forward with your left foot (for left-handed people, your right foot), and distribute your body weight on both legs. At the same time, moving your right hand slightly upward along the belt, remove the machine gun from your shoulder and, grabbing it by the fore-end with your left hand, point the weapon towards the target with an energetic forward movement. Then, with a “towards you” movement, place the butt into your shoulder.
· the butt of the machine gun must be pressed tightly to the shoulder
· when applying the head, avoid tilting the head forward, to the right or left
· body weight must be distributed evenly on both legs. It is also possible to shift the center of gravity to the front leg in a ratio of 70% to 30%.
· left (right) hand tightly holds the machine gun
| A) | b) | V) |
Figure 39 shows options for the position of the left hand:
A) The hand rests on the forend (barrel lining).
B) The hand rests on the place where the magazine is attached.
B) The hand is on the store.
The position of the left hand is determined individually depending on the anthropometric data of the shooter and the assigned tactical task.
Kneeling position
To assume a kneeling position, you need to take a step forward with your left foot (for left-handed people, your right foot). At the same time, moving your right hand slightly upward along the belt, remove the machine gun from your shoulder and, grabbing it by the fore-end with your left hand, point the weapon towards the target with an energetic forward movement. Then, with a “towards you” movement, place the butt into your shoulder. Get down on your left knee and sit on your heel. In this case, the feet of the left and right legs, as well as the knee of the right leg, create a projection of an isosceles triangle. The elbow of the left hand is placed on the left knee and closes the biomechanical chain in order to create a stable position of the shooter-weapon system. When taking a kneeling position, you must pay attention to the correct execution of the following elements:
· the butt of the machine gun must be pressed tightly to the shoulder
· when applying the head, avoid tilting the head forward, to the right or left
· to secure the shooter-weapon system, it is necessary to place the left hand on the left knee, not with the elbow joint, but with the trigeminal muscle of the shoulder.
· left hand tightly holds the machine gun
Rice. 40.Kneeling position.
Position: lying down
To take the prone position, you need to move your right hand along the belt slightly upward and, removing the machine gun from your shoulder, grab it with your left hand by the barrel lining and the forend with the muzzle part forward. At the same time, take a full step with your right foot forward and to the right. Lean forward, kneel on your left knee and place your left hand on the ground in front of you. Then, leaning sequentially on the thigh of your left leg and the forearms of your left hand, lie on your left side and quickly turn onto your stomach, spreading your legs to the sides with your toes outward (Fig. 41). When taking a prone position, you must pay attention to the correct execution of the following elements:
· the butt of the machine gun must be pressed tightly to the shoulder
· when applying the head, avoid tilting the head forward, to the right or left
· legs spread apart, heels pressed
· left hand tightly holds the machine gun
| A) | b) |
Rice. 41. Prone shooting position. a – front view. b – top view
Previous26Next
Date added: 2016-05-31; views: 2107; ORDER A WORK WRITING
Similar articles:
How the lesson is structured
Unlike sports shooting, which requires high skill and psychological stability, practical shooting lessons can become a kind of entertainment or hobby that will help relieve stress after a hard day at work.
Lessons can be individual with an instructor or group. The latter involve classes with a trainer in groups of an average of 4 people. This is reflected in the cost of the course. Individual lessons are more expensive.
Any shooting training course for beginners begins with training in weapon safety. Then the trainer helps the student master the technique of gripping (holding) the weapon and teaches the correct stance and breathing while shooting.
This will help prevent the gun from swinging in your hand and keep your body balanced during recoil.
It is necessary to take a stable posture. Feet should be shoulder-width apart, knees slightly bent.
Your arms should be extended forward, your elbows slightly bent. You can't hold a weapon in front of your face. This will help avoid injury during kickback.
The second stage of training is to familiarize the student with the basic commands that can be given by the coach during the shooting process. Not only the determination of the action algorithm and the result of shooting, but also the safety of the shooter himself depends on this.
Only after the student has mastered basic skills does the instructor begin practical exercises and accuracy training.
First of all, you need to determine your dominant eye. This is necessary to master aiming skills.
Most people have the same dominant eye as their dominant hand, but this is not always the case. To correctly identify it, you need to connect your thumb and index finger. The resulting ring should be slowly brought closer to the eyes.
Both eyes should be open. You can't look at the ring. The gaze should be directed through it to a distant object. The hand itself will intuitively approach the dominant eye.
- When aiming, the front sight should be in the center of the rear sight (slot).
- The upper part of the front sight is located on the same level as the rear sight.
- The target appears a little blurry, but should not be overlooked. Attention should be focused on the front and rear sights.
- The top line of the front sight should coincide with the horizontal line of the target.