Replacing the UAZ Patriot air filter
Fuel efficiency, lack of loss of power and engine response directly depend not only on the correct options for the entire power plant. The technical properties of a car vary depending on consumable parts, such as filters. Patriot air filter has a working life of about 10,000 km, but it is sharply reduced when the vehicle is operated under harsh conditions. Replacement of such consumable parts can be completely carried out without the help of others, because the event itself is not that complicated, does not require specialized tools and does not take much time.
Replacing the UAZ Patriot air filter
Fuel efficiency, lack of loss of power and engine response directly depend not only on the correct settings of the entire power plant. The technical characteristics of the car vary depending on consumable items such as filters. The air filter of the UAZ Patriot 409 engine has a working life of about 10,000 km, and it is sharply reduced when the vehicle is operated in harsh conditions. Replacing such consumables can easily be done independently, because the event itself is not so complicated, does not require specialized tools and does not take much time.
Replacing the UAZ Patriot air filter with your own hands
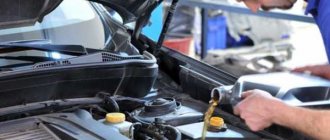
The jeep's air filter element is located in the engine compartment near the radiator in a special protective iron case (a collapsible cylinder). This body is fixed to the body with a massive clamp, which is placed at the bottom. Before changing the air filter on the UAZ Patriot, you will have to carefully dismantle and disassemble this housing. When reassembling, you must not forget that loose threads, i.e. poor fixation will inevitably lead to loosening of the fastener due to vibration. Which will cause not only an unpleasant hum in the engine compartment, but also mechanical damage to the filter element itself.
Changing the UAZ Patriot fuel filter is often timed to coincide with such a mileage, because this is half of its longest service life. The timing is also identical for replacing the cabin filter of the UAZ Patriot .
When the vehicle is actively used off-road, in heavy rainfall or in very dusty areas, it is advisable to replace the filter element during off-season preparation, i.e. in spring and autumn.
Replacing the UAZ Patriot air filter itself is no more difficult than replacing and repairing a wheel:
- Before dismantling the filter housing, be sure to unscrew and disconnect all connecting clamps and pipes.
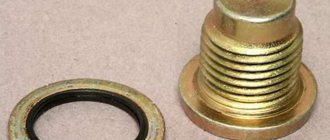
- The filter housing must be removed from the engine compartment. Disassembly of the housing is carried out by unscrewing one central nut, which is screwed onto the central tightening pin. It is she who is responsible for the noise under the hood when weakened. When unscrewing the body, you must not lose the sealing element, which very easily jumps off the edge of the “sleeve”.
- Before installing a new filter, be sure to remove all promotional packaging from it. It is worth noting that to increase the working life of the filter element, cleanliness is important, so the entire housing is cleaned, and only then a new filter is installed in it. Do not allow foreign objects or debris to get inside the filter housing.
- The filter housing is installed in place in the engine compartment, but the retaining clamp is not tightened. First, the UAZ Patriot air filter bellows are attached, and only then the housing clamp is tightened.
To replace or clean the filter you will need the following tool:
- key to "12"
- preferably a head or socket,
- wrench to “17”,
- flat screwdriver.
There is an opinion that it is promising to carry out modernization by replacing the metal body with a polymer one, but in practice such an undertaking turns out to be impractical, because It is not only necessary to select a filter based on throughput, but the polymer housing turns out to be less practical.
Removing and installing the air filter UAZ Patriot 3163
- Repair manuals
- Repair manual for UAZ 3163 (Patriot) 2005+.
- Removing and installing the air filter
The air filter is removed when it is damaged and to gain access to other units in the engine compartment.
You will need: a 12mm wrench (a socket wrench is more convenient), a flat-blade screwdriver.
1. Disconnect the wire from the negative terminal of the battery.
| 2. Loosen the clamp securing the air supply hose... | 3. ...and, having disconnected the sleeve from the air filter pipe, move it to the side. |
| 4. Loosen the clamp securing the air filter housing to the bracket on the mudguard in the engine compartment. | 5. Loosen the clamp securing the air intake hose, disconnect the hose from the air filter housing pipe... |
6. ...and remove the air filter from the car.
7. Install the air filter and all removed parts in the reverse order of removal.
↓ Comments ↓
1. Car structure
1.0 Vehicle structure 1.1 General information about the vehicle 1.2 Passport data 1.3 Keys 1.4. Controls and instruments 1.5 Heating and ventilation 1.6. Seat belts 1.7. Seats 1.8. Doors 1.9 Mirrors
2. Recommendations for use
2.0 Recommendations for use 2.1. Safety rules and recommendations 2.2. What you need to have in your car 2.3 Operating the car during the warranty period 2.4 Running the car in 2.5 Preparing the car for departure 2.6 Features of driving a car in various road, meteorological and climatic conditions 2.7 Filling the car with gasoline 2.8 Using a jack 2.9 Towing the car
3. Problems along the way
3.0 Malfunctions along the way 3.1. The engine does not start 3.2 Malfunctions of the fuel injection system 3.3 No idle speed 3.4 Interruptions in engine operation 3.5 Diagnosis of the engine condition by the appearance of the spark plugs 3.6. The car moves jerkily 3.7 The car accelerates poorly 3.8 The engine stalled while driving 3.9. Oil pressure dropped 3.10. Engine overheating 3.11. Extraneous knocking noises appeared 3.12. Problems with brakes 3.13. Wheel puncture
4. Maintenance
4.0 Maintenance 4.1. General provisions 4.2. Daily Maintenance (EO) 4.3. Maintenance (TO-1) 4.4. Maintenance (TO-2)
5. Engine
5.0 Engine 5.1 Design features 5.2 Possible engine malfunctions, their causes and solutions 5.3 Helpful tips 5.4 Checking compression in the cylinders 5.5 Removing and installing engine mudguards 5.6. Replacing the suspension supports of the power unit 5.7 Replacing the generator and water pump drive belt 5.8 Installing the piston of the first cylinder to the TDC position of the compression stroke 5.9 Replacing chains and gears of the gas distribution mechanism 5.10. Hydraulic chain tensioners 5.12. Replacing engine seal parts 5.13. Engine cylinder head 5.15. Engine repair 5.16. Engine lubrication system 5.17. Engine cooling system 5.18. Exhaust gas system 5.19. Power supply system 5.20. Fuel vapor recovery system 5.21. Throttle Actuator
6. Transmission
6.0 Transmission 6.1. Clutch 6.2. Gearbox 6.3. Transfer case 6.4. Cardan transmission 6.5. Front axle 6.6. Rear axle
7. Chassis
7.0 Chassis 7.1. Front suspension 7.2. Rear suspension
8. Steering
8.0 Steering 8.1 Design features 8.2 Possible steering malfunctions, their causes and solutions 8.3. Steering column 8.4. Steering linkage 8.5. Steering gear
9. Brake system
9.0 Brake system 9.1 Design features 9.2 Possible malfunctions of the brake system, their causes and solutions 9.3 Bleeding the brake system hydraulic drive 9.4 Checking and adjusting the brake pedal 9.5. Main brake cylinder 9.6 Replacing the vacuum brake booster 9.7. Replacement of hoses and pipelines of the hydraulic brake drive 9.8. Front wheel brakes 9.9. Brake mechanisms of the rear wheels 9.10. Parking brake
10. Electrical equipment
10.0 Electrical equipment 10.1 Design features 10.2. Battery 10.3. Mounting blocks 10.4. Generator 10.5. Starter 10.6. Ignition switch (lock) 10.7. Electronic engine management system (fuel injection system) 10.8. Ignition system 10.9. Lighting, light and sound signaling 10.10. Windshield cleaner 10.11. Windshield and tailgate washer reservoir 10.12. Tailgate glass cleaner 10.13. Electric motor of the heating and ventilation system fan 10.14. Cigarette lighter 10.15. Instrument cluster 10.16. Immobilizer 10.17. Replacing sensors and switches 10.19. Car audio system
11. Body
11.0 Body 11.1 Design features 11.2 Possible body malfunctions, their causes and solutions 11.3 Removing and installing the radiator trim 11.4. Removing and installing bumpers 11.5. Removing and installing moldings 11.6. Removing and installing fender liners 11.7 Removing and installing front fenders 11.8. Hood 11.9. Side doors 11.10. Tailgate 11.11. Seats 11.12. Seat belts 11.13. Rear view mirrors 11.14. Interior fittings 11.15. Instrument panel 11.16. Heater 11.17. Windshield wiper 11.21. Body care
12. Applications
12.0 Appendices 12.1 Appendix 1. Tightening torques for threaded connections 12.2 Appendix 2. Temperature range of application of motor oils 12.3 Appendix 3. Fuels and lubricants and operating fluids 12.4 Appendix 4. Lamps used on vehicles 12.5 Appendix 5. Special tools and accessories
13. Electrical diagrams
13.0 Electrical diagrams 13.1 Diagram 1. Connections of the engine control system mod. ZMZ-409 (Euro-2) 13.2 Diagram 2. Electrical equipment of UAZ Patriot cars produced before 2007. 13.3 Diagram 3. Electrical equipment of UAZ Patriot cars produced since 2007. 13.4 Diagram 4. Connection diagram of the mounting block
Replacing the internal filter filling
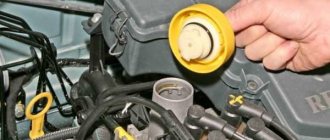
To replace the filter element itself, remove the cover from the housing by unscrewing the nut on its top. To do this you will need a key “17”. Together with the lid, remove the element from the “barrel”.
The filter element is also secured with a nut and washer. Unscrew it and remove the cover. It is put on the new inner element. and the filter is assembled in reverse order.
Be sure to clean the housing before installing a new filter element. However, doing this with oil, gasoline or any other liquid is unacceptable. The best way is a jet of compressed air.
Thus, replacing the filter cannot be called difficult, and even an inexperienced motorist, checking the diagram, will be able to complete this job.
UAZ Patriot Sivuch › Logbook › Replacing the air filter
The air filter, judging by the service book, needs to be changed at the second or even third service, but our city is dirty, one of the ten dirtiest cities in the world, and confidently leads among Russian cities, so I decided to change it now.
Of course, with my own hands, since I remember well that on Subarika the whole procedure took about fifteen minutes. Of course, I tried to google how to change the air filter on a UAZ. Most of the instructions were of the form: “remove the filter, remove the filter element, install a new filter element, install the filter.” And I was most interested in how the filter barrel itself opens, since my friends, looking at it, just shrugged their shoulders with the word “rolled.” In the only video instruction that I was able to download, this point was completely omitted. It was shown how the barrel was taken out, and in the next frame the filter element had already been removed. I tried to watch another video instruction lasting 14 minutes, but our local slow Internet was enough for a minute and a half. Well, I spat on my palms and started working blindly.
The air filter is a black barrel in the right front part of the engine compartment (I will try to make the most detailed description at the TsPSh level in case the text is read by people like me who don’t know which side to approach the car from. Otherwise Sometimes you read the instructions, but it’s as if it’s in a different language). The right side is if you look in the direction of travel of the car. And if you look at it from the front, it appears on the left.
First of all, using a flat screwdriver, loosen the clamps on the pipes that approach the filter from above and from the side, and remove the pipes. The corrugated plastic pipe is quite difficult to remove; I had to pump the filter back and forth.
Then, using a 12mm wrench, loosen the clamp holding the filter itself. The screw is positioned extremely poorly; the washer reservoir makes it difficult to unscrew it.
Remove the filter and open it. To do this, use a 17mm wrench to unscrew the nut at the bottom of the filter. For some reason I tried to remove the bottom cover first. Scratched and dented it in the process. You actually need to remove the top cover. For the first time it is very difficult to remove. At first glance, it even seems that it cannot be removed at all.
Inside the barrel is a cylindrical filter element and a curved plastic plate that is said to distribute air flow more evenly across the filter. I heard that this plate can fall off, which leads to rattling when the gas pedal is pressed hard. I have just such a rattling noise on my company car, I need to check whether it is related to this plate. The filter element was not at all as dirty as I expected.
The filter element is attached to the top cover with another 17 nut. Unscrew this nut and install a new one instead of the old filter.
It turned out to be a little different for me - without a metal mesh and in size a little narrower and a little higher, but neal-nsk assured that if it fits, then you can install it.
In order for the barrel to close well, the nut on the filter element had to be tightened quite tightly. Apparently, because of the millimeters by which it is longer than the old filter. If this nut is not tightened properly, the keg will not close tightly enough. We assemble it carefully, making sure that the rubber gasket is positioned correctly.
After this, we install the filter in place, use a 12mm wrench to tighten the clamp securing the barrel, and use a flat screwdriver to tighten the clamps on the pipes.
Replacement instructions
Replacing the air filter is a simple operation that does not require special skills or special knowledge, so anyone, even a novice car enthusiast, can perform it.
Sorry, there are no surveys available at this time.
How to change?
To replace the filter element, you should prepare the following tools:
- 12mm wrench (socket or socket);
- key to 17;
- screwdriver (minus; flat).
- The first step is to turn off the power to the engine. To do this, remove the battery terminal.
- Using a pre-prepared key, remove the clamp that holds the steel housing of the filter element.
- Then the bolt that holds the clamp is unscrewed. The pipe, which is attached to the steel body, is moved to the side.
- The air filter housing is removed from the engine compartment.
The procedure for removing the filter element from the housing:
- Using a 17mm wrench, unscrew the cover securing nut.
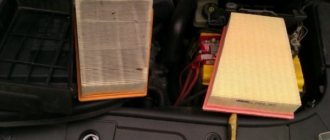
- The cover is removed together with the filter element. The internal space of the case and consumables are carefully analyzed. Perhaps it is not very dirty and can still be used. If it is sufficiently dirty, it should be changed at shorter intervals of kilometers traveled.
- If replacement is required, the nut securing the cover together with the filter element is unscrewed.
- The old consumable is replaced with a new one. You must first clean the interior of the case from contamination. To do this, take a rag and wipe it dry;
- The procedure for replacing consumables should be carried out in reverse order.
When to change?
The filter on an SUV needs to be changed every 10-15 thousand kilometers. If within one year the owner has not crossed the recommended mileage mark, it is advisable to change it once a year.
If you neglect this rule, the power unit will heat up, lose power, produce unpleasant noises and increase fuel consumption.
How to change?
To replace the filter element, you should prepare the following tools:
- 12mm wrench (socket or socket);
- key to 17;
- screwdriver (minus; flat).
Replacement procedure:
- The first step is to turn off the power to the engine. To do this, remove the battery terminal.
- Using a pre-prepared key, remove the clamp that holds the steel housing of the filter element.
- Then the bolt that holds the clamp is unscrewed. The pipe, which is attached to the steel body, is moved to the side.
- The air filter housing is removed from the engine compartment.
The procedure for removing the filter element from the housing:
- Using a 17mm wrench, unscrew the cover securing nut.
- The cover is removed together with the filter element. The internal space of the case and consumables are carefully analyzed. Perhaps it is not very dirty and can still be used. If it is sufficiently dirty, it should be changed at shorter intervals of kilometers traveled.
- If replacement is required, the nut securing the cover together with the filter element is unscrewed.
- The old consumable is replaced with a new one. You must first clean the interior of the case from contamination. To do this, take a rag and wipe it dry;
- The procedure for replacing consumables should be carried out in reverse order.
Removing and installing the UAZ Patriot air filter
The air filter is removed when it is damaged and to gain access to other units in the engine compartment.
We prepare the car for the job.
You will need: a 13mm wrench (a socket wrench is more convenient), a flat-blade screwdriver.
Disconnect the wire from the negative terminal of the battery.
Loosen the clamp on the air supply hose.
Having disconnected the sleeve from the air filter pipe, move it to the side.
Loosen the clamp securing the air filter housing to the bracket on the mudguard in the engine compartment.
Loosen the clamp securing the air intake hose and disconnect the hose from the air filter housing pipe.
Install the air filter and all removed parts in the reverse order of removal.
Replacing the air filter element
Unscrew the nut securing the air filter cover to its housing.
Remove the filter element together with the front cover from the filter housing.
Unscrew the nut securing the filter element to the filter cover.
Install the filter element and all previously removed parts in the reverse order of removal.
Stages
On modern UAZ Patriots, an old or new dashboard can be installed, depending on which the filter changes differently. The sequence of steps for cars with an old panel is as follows:
- First you need to open the glove compartment.
- Then you need to remove the casing, which is located in the niche of the glove box.
- Next you need to unscrew the screws.
- Now you can remove the housing part.
Location of the body part The cleaning element is closed on both sides by a plate, unscrew the screws and remove the plate.
Unscrew the screws and remove the retaining plate
- Now we take out the dirty air purifier and clean the place where it was located.
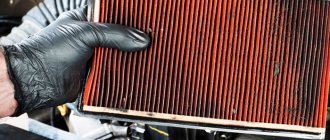
- Having pulled out the filter , you should evaluate its condition. If it is not very dirty, it can be cleaned and replaced. A heavily contaminated consumable should be replaced with a new one.
- After installing a clean filter, the retaining plate must be screwed into place.
When installing, pay attention that the air flow on the filter element must coincide in direction with the air flow of the ventilation system.
Installed new air purifying material
If the UAZ Patriot has a new instrument panel installed, then no tools are needed to change the air cleaner. The plug is held in place by special latches that need to be bent. You should act carefully, as the latches can be broken off if you are careless. After installing a new cabin air purifier, the plug must be returned to its original place.
Replacing the UAZ Patriot air filter.
How to change the air filter on a Patriot
First you need to remove the UAZ Patriot air filter housing - a bulky black “bucket”. To dismantle it, you will need to unscrew the bolt (with a 12mm head) of the housing mounting bracket, and then loosen the clamps on the air pipes using a flat-head screwdriver. After disconnecting the pipes, you can remove the housing.
The air filter is hidden in the housing like an onion , to get to it you will need to remove a couple of layers of protection by unscrewing the bolt at the bottom with a 17 key. After this, you can remove the old air filter and replace it with a new one.
This instruction in video format shows in more detail how to replace the air filter on a Patriot.
The air filter, judging by the service book, needs to be changed at the second or even third service, but our city is dirty, one of the ten dirtiest cities in the world, and confidently leads among Russian cities, so I decided to change it now. Of course, with my own hands, since I remember well that on Subarika the whole procedure took about fifteen minutes.
Of course, I tried to google how to change the air filter on a UAZ. Most of the instructions were of the form: “remove the filter, remove the filter element, install a new filter element, install the filter.” And I was most interested in how the filter barrel itself opens, since my friends, looking at it, just shrugged their shoulders with the word “rolled.” In the only video instruction that I was able to download, this point was completely omitted. It was shown how the barrel was taken out, and in the next frame the filter element had already been removed. I tried to watch another video instruction lasting 14 minutes, but our local slow Internet was enough for a minute and a half. Well, I spat on my palms and started working blindly.
Read also: Which cars have cheap spare parts?
The air filter is a black barrel in the right front part of the engine compartment (I will try to make the most detailed description at the TsPSh level in case the text is read by people like me who don’t know which side to approach the car from. Otherwise Sometimes you read the instructions, but it’s as if it’s in a different language). The right side is if you look in the direction of travel of the car. And if you look at it from the front, it appears on the left.
First of all, using a flat screwdriver, loosen the clamps on the pipes that approach the filter from above and from the side, and remove the pipes. The corrugated plastic pipe is quite difficult to remove; I had to pump the filter back and forth.
Then, using a 12mm wrench, loosen the clamp holding the filter itself. The screw is positioned extremely poorly; the washer reservoir makes it difficult to unscrew it.
Remove the filter and open it. To do this, use a 17mm wrench to unscrew the nut at the bottom of the filter. For some reason I tried to remove the bottom cover first. Scratched and dented it in the process. You actually need to remove the top cover. For the first time it is very difficult to remove. At first glance, it even seems that it cannot be removed at all.
Inside the barrel is a cylindrical filter element and a curved plastic plate that is said to distribute air flow more evenly across the filter. I heard that this plate can fall off, which leads to rattling when the gas pedal is pressed hard. I have just such a rattling noise on my company car, I need to check whether it is related to this plate. The filter element was not at all as dirty as I expected.
The filter element is attached to the top cover with another 17 nut. Unscrew this nut and install a new one instead of the old filter.
Read also: Starting a car with a Starline key fob
It turned out to be a little different for me - without a metal mesh and in size a little narrower and a little higher, but neal-nsk assured that if it fits, then you can install it.
In order for the barrel to close well, the nut on the filter element had to be tightened quite tightly. Apparently, because of the millimeters by which it is longer than the old filter. If this nut is not tightened properly, the keg will not close tightly enough. We assemble it carefully, making sure that the rubber gasket is positioned correctly.
After this, we install the filter in place, use a 12mm wrench to tighten the clamp securing the barrel, and use a flat screwdriver to tighten the clamps on the pipes.
It took me a crazy hour and a half to do all the work - I fumbled for a long time, opening the barrel and trying to pull off the bottom lid.
Total
Tools: 12mm wrench, 17mm wrench, large flat screwdriver; Time: an hour and a half, but generally thirty minutes should be enough; Money: 507 rubles 30 k for a filter element; How much would I charge for this work if I were a master: 500 rubles.
An air filter is a device that cleans the air flow entering the engine. If contaminated air enters the engine, it will interfere with its normal functioning, causing various malfunctions. To prevent and rid the ZMZ-409 engine of the UAZ Patriot SUV from polluted air, a filter is installed. This material will tell you about the filter, its parameters and the replacement process.
Site about off-road vehicles, SUVs, off-road vehicles
On UAZ Patriot and UAZ Hunter vehicles with a ZMZ-409 engine, the air filter assembly has catalog numbers - 3160-1109010-10 or 3160-1109010-11. Catalog numbers of replacement filter elements are 3160-1109080-10, 3160-1109080-11 or 3160-1109080-12.
Modification of the UAZ Patriot and UAZ Hunter air filter housing cover to install a low filter element.
For GAZelle and Sobol cars with ZMZ-405 and ZMZ-406 engines, air filter filter elements are produced that at first glance are similar and suitable for UAZ Patriot and UAZ Hunter. However, when you try to install such a filter element to replace the old one, it turns out that it does not fit normally into the UAZ air filter housing.
This happens because of its height, which, compared to the original filter element on the UAZ Patriot and UAZ Hunter, is two or three centimeters or so less. To avoid confusion, since both of these filter elements can be produced under the same catalog numbers, for example 3105-1109013 or 3110-1109013, and also to somehow distinguish them from each other, sellers usually add the words “low” to their name and "high", respectively.
READ Replacing rear brake discs Prado 150
Well, in order not to bother yourself with searching for the right “high” filter element on the UAZ, and to be able to install the more common “low” filter element into the air filter housing, you need to make a small modification to the fastening on the cover of the air filter housing.
The modification is very simple, does not take much time and does not make any significant changes to the design of the UAZ air filter. It consists in the fact that the L-shaped fastening of the lid is shortened by 3-4 centimeters, and the old pin is replaced with a new longer one.
Air filter for UAZ Patriot: characteristics, replacement
An air filter is a device that cleans the air flow entering the engine. If contaminated air enters the engine, it will interfere with its normal functioning, causing various malfunctions. To prevent and rid the ZMZ-409 engine of the UAZ Patriot SUV from polluted air, a filter is installed. This material will tell you about the filter, its parameters and the replacement process.
Tools
To carry out the replacement you do not need any special tools, just prepare:
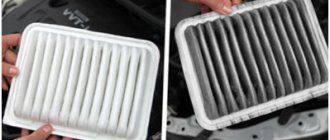
If a new instrument panel is installed, then a screwdriver is not needed. The air purification element consists of a large number of layers of latex material, folded like an accordion, which increases the filtering surface. If it is coated with activated carbon, then the air entering the cabin is additionally purified from unpleasant odors.
New filter consumables
Essence and purpose
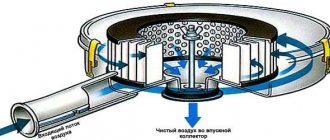
The filter cleans the air flow from dirt using thick paper or synthetic filler. The pore size is smaller than dust particles, which allows impurities to be separated from the flow. Inside the housing there is a metal deflector that provides turbulence of the air mass and increases the efficiency of the filter.
Replacement steps
Sequence of actions when servicing the filter on the ZMZ-409 Euro motor:
- Place the car in a garage or on a site, turn off the power unit and open the hood.
- Wipe the surfaces of the hoses and air filter housing from dirt.
- Disconnect the cable from the negative terminal of the battery. A similar requirement is prescribed by the car manufacturer, but many owners do not disconnect the power source from the on-board network.
- Unscrew the screws of the clamps holding the hoses on the cover and side of the housing, and then pull off the hoses. The parts are connected tightly; to open it, it is recommended to rock the body relative to the lines.
- Remove the 12mm bolt holding the housing to the mudguard bracket. Access to the screw head is partially blocked by the expansion tank of the cooling system; some owners use an extension with a head and a universal joint.
- Remove the housing from the engine compartment, and then unscrew the lower nut by 17 mm.
- Pull off the top cover, which is tightly installed on the cylindrical casing. Excessive force should not be used due to the risk of deformation of parts.
- Wipe the internal cavity of the housing with a rag moistened with gasoline or kerosene.
- Unscrew the 17 mm nut and remove the filter from the cover.
- Install a new element and reassemble the unit in the reverse order.
- Connect the battery and start the engine. Extraneous noise (for example, whistling) indicating air leaks through the gaps between the pipelines and the housing is not allowed.
On some Patriot cars there is a filter modified by the owners. Instead of the bottom bolt, 3 rivet fasteners are used to hold the cover. The central bolt is trimmed, and the hole in the housing is closed with a rubber plug (with an additional screw fastening). To service or inspect the cartridge, you must disconnect the outlet sleeve, unfasten the locks and remove the cover with the filter from the housing. When retrofitting the fasteners yourself, you should consider the mounting points of the fasteners; the rivets should not come into contact with the filter.
Operating principle
When the pistons move inside the cylinder, a reduced pressure is created, and air with dust particles enters the cavity through the open inlet valve. A filter filled with special paper installed in a separate housing separates foreign impurities. Dirt particles are retained in the element, gradually reducing throughput.
To ensure normal operation, the replacement cartridge has end edges made of elastic rubber, which seals the joint and does not allow dusty air to enter the cylinders of the power unit.
Air filter for UAZ Patriot: characteristics, replacement
An air filter is a device that cleans the air flow entering the engine. If contaminated air enters the engine, it will interfere with its normal functioning, causing various malfunctions. To prevent and rid the ZMZ-409 engine of the UAZ Patriot SUV from polluted air, a filter is installed. This material will tell you about the filter, its parameters and the replacement process.
Selection criteria for UAZ Patriot
The plant uses a cylindrical cartridge with dimensions:
- outer diameter - 180 mm;
- internal channel diameter - 85 mm;
- height (excluding sealing rings) - 242 mm.
By default, UAZ Patriot vehicles use “high” air purification filters with catalog numbers 3160-1109080-10, 3160-1109080-11 or 3160-1109080-12 (parts differ in the place of production and design solutions). The elements are suitable for both gasoline power plants and diesel engines ZMZ-514 and Andoria. The standard allows a deviation in the dimensions of parts by 1-2 mm, depending on the manufacturer and batch.
READ Renault Sandero Windshield Washer Doesn't Work
Original spare parts are supplied in packaging marked by the UAZ factory.
The owner of an SUV can choose parts from alternative suppliers, based on the filter size and purpose (information is indicated on the box or plastic bag). For example, BigFilter GB-76, TSN 9.1R.270, GoodwillAG 915 or FiltronAM 411/1 products are suitable for machines.
For light-duty GAZ trucks (GAZelle and Sobol generations) with ZMZ-405 or 406 engines, a cartridge with a reduced height (unofficially called “low”) is produced, the outer and inner diameters correspond to parts from UAZ Patriot. It is impossible to install the element into a standard housing due to the elongated guide section on the cover. Since “low” type cartridges are found on sale more often than standard “high” ones, many owners of Patriot SUVs are upgrading the filter housing.
To modify it, you need to disassemble the casing and trim the metal bracket by 30-40 mm.
An extended pin must be welded to the end part of the guide element. Since the standard M10x1.25 nut has a fine thread pitch, owners install the fastener with the common M10x1.5 nut. Welds must be cleaned and coated with a layer of paint to protect against corrosion.
Required Tools
- wrenches size 12 and 17 mm;
- flat blade screwdriver;
- clean rags for wiping;
- new filter element.
Replacing the UAZ Patriot air filter with your own hands
The air filter element of an SUV is located in the engine compartment near the radiator in a special protective metal case (a collapsible cylinder). This body is fixed to the body with a powerful clamp, which is located below. Before changing the air filter on a UAZ Patriot , you will have to carefully dismantle and disassemble this housing. When reassembling, you must not forget that loose threads, i.e. poor fixation will inevitably lead to loosening of the fastener due to vibration. Which will cause not only an unpleasant ringing in the engine compartment, but also mechanical damage to the filter element itself.
When choosing consumables and spare parts in the UAZ Patriot online store, it is recommended to pay attention to the catalog numbers (articles). The UAZ Patriot air filter is marked 3160-1109080-12 and has overall dimensions : A (width) - 182 mm, B (outer diameter) - 86.5 mm, C (inner diameter) - 10.5 mm, H (height) - 248.5 mm. This is an important point in choosing the right filter, because... the throughput of the element depends on it.
The cost of a filter, even from well-known manufacturers, is incomparably small with excessive fuel consumption and loss of dynamic characteristics of the car, so replacement is carried out no more than every 10,000 km.
Replacing the UAZ Patriot fuel filter is often timed to coincide with such a mileage , because this is half of its maximum service life. The timing is also similar for replacing the filter in the interior of the UAZ Patriot .
When the vehicle is actively used off-road, in heavy rainfall or in very dusty areas, it is advisable to replace the filter element during off-season preparation, i.e. in spring and autumn.
Replacing the UAZ Patriot air filter itself is no more difficult than replacing and repairing a wheel:
- Before dismantling the filter housing, be sure to unscrew and disconnect all connecting clamps and pipes.
- The filter housing must be removed from the engine compartment. Disassembly of the housing is carried out by unscrewing one central nut, which is screwed onto the central tightening pin. It is she who is responsible for the noise under the hood when weakened. When unscrewing the body, you must not lose the sealing element, which very easily jumps off the edge of the “sleeve”.
- Before installing a new filter, be sure to remove all promotional packaging from it. It is worth noting that to increase the working life of the filter element, cleanliness is important, so the entire housing is cleaned, and only then a new filter is installed in it. Do not allow foreign objects or debris to get inside the filter housing.
- The filter housing is installed in place in the engine compartment, but the retaining clamp is not tightened. First, the UAZ Patriot air filter bellows , and only then the housing fastening clamp is tightened.
To replace or clean the filter you will need the following tool:
- key to "12"
- preferably a head or socket,
- wrench to “17”,
- flat screwdriver.
There is an opinion that it is promising to carry out modernization by replacing the metal body with a polymer one, but in practice such an undertaking turns out to be impractical, because It is not only necessary to select a filter based on throughput, but the polymer housing turns out to be less practical.
Characteristics
The air filter of the UAZ Patriot SUV is located in the engine compartment in the radiator area. It is closed by a metal case. The main fastening is one or two clamps (depending on the installed engine in the UAZ Patriot).
The UAZ 3163 SUV with the ZMZ-409 power unit is equipped with Livny consumables. The dimensions of the device are as similar as possible to the original filter.
How to change?
To replace the filter element, you should prepare the following tools:
- 12mm wrench (socket or socket);
- key to 17;
- screwdriver (minus; flat).
- The first step is to turn off the power to the engine. To do this, remove the battery terminal.
- Using a pre-prepared key, remove the clamp that holds the steel housing of the filter element.
- Then the bolt that holds the clamp is unscrewed. The pipe, which is attached to the steel body, is moved to the side.
- The air filter housing is removed from the engine compartment.
The procedure for removing the filter element from the housing:
- Using a 17mm wrench, unscrew the cover securing nut.
- The cover is removed together with the filter element. The internal space of the case and consumables are carefully analyzed. Perhaps it is not very dirty and can still be used. If it is sufficiently dirty, it should be changed at shorter intervals of kilometers traveled.
- If replacement , the nut securing the cover together with the filter element is unscrewed.
- The old consumable is replaced with a new one. You must first clean the interior of the case from contamination. To do this, take a rag and wipe it dry;
- The procedure for replacing consumables should be carried out in reverse order.
When is it time to change?
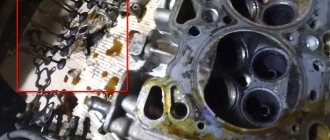
To operate the fuel system, a large amount of air is required, which is taken from the environment. But the incoming air in highly dusty cities is very polluted with dust, various chemical impurities, dirt particles, pollen, etc. These contaminants negatively affect the quality of the air-fuel mixture. Sand is especially dangerous, as it has strong abrasive properties, which accelerates engine wear.
Air filters are used to purify the air from various contaminants.
There are the following types for cars:
- iterative;
- iterative oil;
- paper;
- with zero resistance.
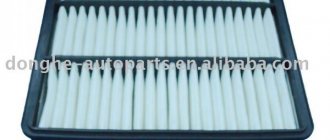
The most popular are paper ones. They can be of different shapes: in the form of a ring, a cylinder and a panel (rectangular). The UAZ Patriot uses a cylindrical water filter with a frame structure. The filter layer is porous paper, which is laid in the form of an accordion. The large area of the filter element in cylindrical air filters significantly increases their throughput.
Filter element design
During operation, the filter material becomes dirty and must be changed periodically. The service book of the UAZ Patriot does not indicate the frequency of replacement; drivers recommend replacing it after 10-15 thousand kilometers. The frequency of replacement is affected by the conditions in which the vehicle is operated. For example, in a polluted metropolis or in rural areas where there is a lot of dust, the consumables have to be changed twice as often. It is advisable to change the filter material before the winter and summer seasons.
Replacing air filters on UAZ 409, Hunter and other models
Replacing air filters on UAZ of other models has a number of features. Several of them will be discussed below.
Replacing the air filter on a UAZ 409 is carried out according to the following principle:
- Preparation stage. The necessary tool is prepared, the vehicle is de-energized, and then the clamps are loosened with a key. They serve directly to hold the body.
- Replacement stage. The housing fastenings are unscrewed using a 17 key. Removed from the engine compartment and the entire structure is inspected. The old filter is replaced with a new one (if necessary).
- All elements are assembled in reverse order.
Replacing the air filter on a UAZ Hunter is done as follows:
- First you need to turn off the car engine. To do this, disconnect the terminal from the battery;
- An air-conducting sleeve is attached to the filter element housing. It is attached to a clamp. Its bolt must be loosened and the sleeve disconnected from the air filter pipe;
- then you will need to remove the housing itself. To do this, loosen the clamps and remove the air filter from the vehicle;
- The air is installed , and then all the elements are assembled in the reverse order.
The replacement instructions for other UAZ models are similar. The only difference is the location of the filter element due to the location of the power unit.
Sources:
https://sarterminal.ru/diagnostika-i-obsluzhivanie/zamena-vozdushnogo-filtra-uaz-patriot.html https://darcars.ru/vaz/uaz-patriot-zamena-vozdushnogo-filtra.html https:// myuazpatriot.ru/svoimi-rukami/instruktsiya-po-zamene-vozdushnogo-filtra-na-uaz-patriot https://fix-my-car.ru/texnicheskoe-obsluzhivanie/zamena-vozdushnogo-filtra/zamena-vozdushnogo-filtra -na-uaz-patriot.html
Replacing the cabin filter of UAZ Patriot
UAZ Patriot is operated in completely different terrain conditions, these can be both public roads and country roads. In the case of the latter, while driving behind a passing car, clouds of dust mixed with dirt and sand may burst out from under its wheels. To prevent the driver, as well as all other people inside the car, from inhaling such a mixture, they came up with cabin filters for the UAZ Patriot.