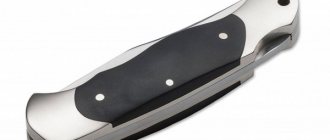
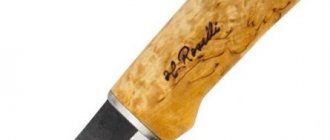
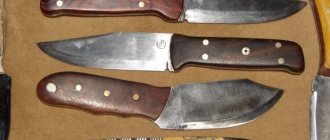
Main types of knives
Before sharpening the blade, you need to understand what material the knife is made of. The product can be of several types:
- Carbon steel. The cheapest copy, which is made from an alloy of carbon and iron. It is very easy to sharpen and retains its sharpness for a long time. There is also a drawback - oxidation of the knife upon contact with food or any acidic environment. The knife rusts, and the products that were cut with it acquire a characteristic metallic taste. After some time, after plaque has formed on the blade, the oxidation process stops completely.
- Made from low carbon stainless steel. Made from an alloy of carbon, iron and chromium. Sometimes molybdenum or nickel is used. A stainless steel blade is softer than carbon steel, which is why the knife dulls quickly and requires constant sharpening. But there is an undeniable advantage - the product’s resistance to corrosion.
- Made from high carbon stainless steel. It represents a higher class of products, which contains a lot of carbon and the addition of vanadium or cobalt. A high-quality alloy allows you to sharpen the blade quite rarely. In addition, it is resistant to rust.
- Made from Damascus steel. These blades are mainly used as bladed weapons, but there are also kitchen options. The blade of such a knife is multi-layered and consists of various high-quality alloys. The main disadvantage is the very high price.
- Made of ceramics. Very popular in modern kitchens due to the sharpness of the blade and long life without sharpening. In addition to advantages, such products have disadvantages. These include fragility and poor stability. The blade may simply break if dropped or broken.
Mechanical knife sharpener
Mechanical knife sharpeners are a device with a handle, in the working part of which two sharpening stones or a pair of carbide plates, sometimes ceramic, are fixed at an angle opposite each other.
The design of a mechanical sharpener provides two recesses: one for preliminary sharpening of the knife blade, the other for grinding and finishing.
To use this tool, you need to firmly grasp the handle, and immersing the knife blade in the recess for sharpening, with a sharp movement, move it the required number of times in the direction “base - tip of the blade.” Step-by-step sharpening of knives on a mechanical sharpener returns the blade to its original sharpness and smooth surface.
In the case of a sharpener, in which the knife is fixed in a clamp, the sharpening process occurs exactly the opposite.
pros
• The price of a mechanical sharpener is lower than other types of tools for sharpening kitchen knives.
• This sharpener is easy to use - no skills or special training is required.
Minuses
• The tool is only suitable for sharpening knives at one angle.
• A mechanical sharpener does not correct damaged blades, bends or other mechanical damage to them.
• The surface of the sharpening elements is small, so the service life of this tool is several times less than that of others.
Sharpening tools
Sharpeners come in a wide variety. They all differ in quality, appearance, design and functionality. To choose the ideal sharpener for yourself, you need to analyze information about each type of sharpening tool:
- Touchstone (bar). Sharpening stones are distinguished by their abrasiveness. For rough processing and final polishing, completely different stones are needed. Products from foreign manufacturers provide information on the number of abrasive grains per 1 mm2. indicated on the label. Domestic donkeys, as a rule, are selected exclusively “by eye” or according to the seller’s recommendations. Sharpening on water stones is very popular. This is the same block, but during processing, water is also used to wet the stone. This way you can sharpen any knife: shoe, kitchen, stationery, butterfly, etc.
- Mechanical sharpening devices. These devices are mainly used for sharpening kitchen knife blades. This process, although fast, is not entirely high quality. It is still better not to sharpen hunting, utility and sports knives in this way.
- Electric sharpeners. Modern electric knife sharpening devices allow you to get high-quality results by automatically determining the correct angle at which the blade is positioned. This device is perfect for use in public catering. The models are different and they are presented in a wide range. The price varies depending on the availability of additional functions of the device. Of course, it is better to buy more modern and expensive models. It is not recommended to process serrated bread knives with electric sharpeners.
- Musat. This device maintains the edge of the knife in working condition. Its shape is very similar to a file with a round shaft and a comfortable handle. Often, expensive knife sets come with sharpeners, but you shouldn’t count on this tool as a full-fledged sharpener. Musat can only maintain the sharpness of the blade, but it will not sharpen a very dull knife.
- Sharpener called "Lansky". This tool is used for small and medium knives. It is possible to choose the sharpening angle yourself. The knife consists of a removable bar and two corners that are connected to each other. The corners act as a vice and adjust the angle of the blade. The set includes bars with different abrasiveness.
- Machine tools. They are used in production for ultra-precise sharpening of blades using rotating shafts (wheels). In addition to such machines, there are also various electrically driven abrasive wheels. Sharpening on such devices can only be done by an experienced craftsman, since any awkward movement can damage the blade irrevocably, and there is also a risk of injury. Planers, gear systems, and large knives are processed in this way.
I received for testing a diamond block from the Venevsky Diamond Tools Plant, on a modified bond, combined, grain size 3\2 and 1\0 microns, concentration 100%. The block had already been tested, but was not leveled and had some grease. Accordingly, I decided to prepare it for work first. To begin with, I tried to remove the grime from the removed metal using an eraser - this works on many abrasives, and it partially worked here:
But only partially, since the surface has grooves, the bottom of which cannot be reached by the eraser:
Checking the block for flatness using a test square showed that along the long side in the center, the block is almost flat, however, checking along the diagonals and across the block showed a noticeable convexity. This is much better than concavity, but it does not make it possible to sharpen a tool with a straight cutting edge, not to mention the backs of chisels or the flat sides of craft knives, so the decision was made to grind. The 3/2 side had a smaller deviation from flatness, and using a couple of portions of F600 silicon carbide powder on a granite lapping with water, I brought most of the bar to the same denominator. I did not draw out the entire surface, but only the area sufficient for me to work on, leaving a margin for further trimming. When leveling, I applied a grid with a pencil and after the first portion of powder, the block began to look like this:
With a side of 1\0 microns. I had to tinker a little longer - after a couple of portions of F600 powder, the surface did not have time to be evened out much:
Therefore, I took the F320 powder and started leveling on it. A couple of portions were enough, then again F600 and I brought the part of the block area I needed for work to flatness. Why didn’t I immediately start rubbing it in with a coarse powder - not knowing the behavior of the bond, I didn’t want to immediately take the coarse one, I was afraid to remove too much. It was decided not to grind thinner F600 yet, since the surface had already turned out to be much smoother and more uniform than the original one. Even before leveling, I took a microphoto of the surfaces of the bar, and for scale, I also took a micrometer object (division value = 10 µm), under the same conditions. I give his photo below, first three pictures of different sections of the 3\2 side, then 1\0 - 1 mm everywhere horizontally: It was somewhat surprising that the 3\2 side is denser and more uniform - often due to precisely this difference in the density of the ligament, a bar with a larger grain can work thinner or comparable than a smaller one, but on a less dense bond. This is how it happened, as you will see below. I was also a little confused by the “cavities” on the 1/0 side, in which, when leveling, free grain from the lap could easily get stuck, so after grinding, I carefully walked along the 1/0 side with a small brush with a good amount of soapy water - inspection through a microscope showed that everything seems to be clean. Also, in the microphoto, it is noticeable that the bunch has, as it were, “granules”, very curious, and in places I noticed crystals, quite dark, clearly larger in size than the grain that should be in the bar. As far as I understand, the block on the free grain has not been ground before me, so I cannot explain this point by caricature, I can only assume that these could probably be crumpled particles of the removed metal from previous samples of the block, and/or grain agglomerates , or larger grains getting into the block. Moreover, in the 1\0 side the particles are larger. After I ground the block in, inspection under a microscope no longer revealed them, so it was decided to start sharpening tests. As a test blade, we took a knife from cpm s90v, prepared for testing on an ICM whetstone (silicon carbide on a bakelite bond) with M14 grit - on such steels it works very finely, and good performance is expected from a diamond whetstone + I was going to slightly increase the angle , i.e. I consider this grain size to be completely normal. I worked a little on the 3/2 micron side, with water. The movement of the blade on the stone is quite pleasant, smooth, the clogging of the block is moderate, part of the removed metal remains floating in the coolant, and most of the removed metal that has settled in the roughness of the block can be expelled from there by simply rubbing the surface with a fingertip. However, the block manages to become noticeably smoother from the work:
However, he manages to make a micro-chamfer and work it out very carefully, moreover, it is noticeable that some smoothing is also happening. It may seem that he even “covers up” the mark, however, given that the removed metal on the block is noticeable in quantities, “scraping” of the metal squeezed out from the grain by the grain also occurs. Microphoto result - I made two crops - 1.5mm. horizontally and 1mm. horizontally:
As you can see, the uniformity of the chamfer processing and the cutting edge line are excellent, I am pleased with the result - in my opinion, very good. Next, I move to the 1/0 µm side. The ride on it is also quite soft, although it seems slightly rougher - apparently due to less density. It’s surprising that I don’t see any removed metal at all, although the whitish suspension from the bond is slightly noticeable on the chamfer:
The result is unexpected - also two crops, 1.5 mm. and 1mm. horizontally:
As you can see, the work of the 1\0 side is much rougher and less uniform than the work of the 3\2 side. And moreover, it is completely different in nature - outright scratches, and the scratch is irregular - as if the grains in the surface of the bar are located in groups, there are even scratches on the edge, reaching a width of about 10 microns. At the same time, the structure of the steel is exposed, although, as some suggest, diamonds should “grind” carbides. They can do this, but on such fractions, this requires a much higher concentration of grain and sufficient “rigidity” of the binder - but I have not yet seen such bars; in fact, this can be obtained reproducibly only on laps, controlling their roughness and grain concentration. Why did this result happen? I believe there are two reasons here - the first is the irregularity of the bond - large “spots” in it are more or, on the contrary, less dense, behave differently, as a result of which the grain in them works differently in terms of the depth of cutting into the steel, and even if we assume, Because the grain is very evenly distributed in the bundle as a whole, it cannot work equally over the entire working surface. The second reason is that, apparently, the grinding on this side is not thin enough, and the fact that it also manages to be smoothed out in one cycle of work does not save the situation. Therefore, I decide to refresh the test blade and make the surface of the bar thinner. I refresh the blade on an ISM block, this time taking a thinner one - M10, slightly smoothed, and work very carefully - this is the surface and edge - 1.5 mm horizontally:
The chamfer surface is neater than the result after 1/0 µm, which can be attributed in part to the fact that the area of the contact patch is larger, which always reduces the aggressiveness of the abrasive, but the edge is more uniform and has a relief comparable to the result after 1/0 µm diamond. which, of course, is amazing. I ground the block a little more with F600 silicon carbide powder to remove the smoothness, and then ground both sides with F800 powder. And again I start testing with 3/2 microns. This time I worked on it longer, the surface is still smoothed out, and the removal is weaker. At the end of the work, I moved from the ironed area to a fresher one and the result was not long in coming - the microphoto shows this difference, here it is 1.5 mm. horizontally:
I would say that the 3/2 side should not have been polished thinner than the F600 - smoothing has not gone away, the result is comparable, and the work speed is noticeably lower. Next, I took 1/0 microns. side - also 1.5mm. horizontally:
The roughness of the processing has not disappeared, the roughness is at the same level, the only thing is that the edge turned out without scoring and the processing as a whole was smoother. Again it is noticeable that the risk is quite rare and appears to be in “groups”. Those. again, as if groups of grains are located in separate, more densely sprinkled “heaps”. I decided to try it on a different steel. I took the pro-master tramontina and made corrections along the previously created microchamfer, on the 3/2 µm side. And here I was unpleasantly surprised - everything in general was not bad, the processing speed, by the way, as for me, was not higher, but the nature of the processing was the same, but it turned out that a foreign inclusion was exposed in the surface of the bar, as if something metal, and having an oval shape and a size of up to 170-180 microns. in diameter - horizontally 1mm:
To the naked eye it is noticeable (of course, given its size!) as a shiny, rather large dot. Why did I begin to closely examine the block - because I felt as if something was clicking when passing along the block, and on the blade I discovered several very identical burrs - 1 mm horizontally:
They are smaller than the caliber of the inclusion, but in the microphoto above, you can see that the upper part of the inclusion protrudes more above the surface of the block - the ligament had time to wear out a little, and it came out. I took a 4-sided hard sharp awl and tried to pick out the inclusion - to my relief, I managed to do this without seriously damaging the surface of the block - it turned out to be not particularly large in depth. I examined the rest of the surface through a microscope - I found another one twice as small and I picked that out too. I cleaned the block with a dressing stone made of silicon carbide F600 and everything seemed to be fine, no new inclusions were exposed. I hope there won't be any more of them. The main thing is that it was possible to find out that the 3/2 side as a whole demonstrates the repeatability of the nature of the work even on fairly soft steel. Next, I decided to try the 1\0 side again and compare it in more detail with something that has a similar grain size. I also refreshed its training with stone, and prepared a test blade - I took a joint from CTS-BD1, preparing it on Suehiro G8 - 8000JIS, i.e. +- 2\1µm. It turned out quickly, the removal is active as always, it’s noticeable, it worked for 30 seconds on a timer (preparing the blade for the use of this abrasive - ISM m5):
Having taken a microphoto of the result, I moved on to the 1\0 diamond - I worked for the same half a minute on the timer - there were no traces of the removed metal, only the water remaining on the chamfer became slightly cloudy and turned whitish:
Yes, at 1\0 I managed to make several passes along the previously processed chamfer, but not feeling a response from the stone, I slightly increased the emphasis on the grain and changed the direction of movements - I barely increased the angle, there were some fractions of a degree. Now let's compare microphotos of the results - 1mm everywhere. horizontally - first silicon carbide, then diamond:
As you can see, again the situation is such that 1/0 scratches a rather rare scratch, the finely machined surface of the entire chamfer, one might say, “did not take it at all,” and only then a narrow micro-chamfer. The only thing that has changed is that the surface between the marks, on the microchamfer, has become more smoothed compared to the samples on cpm s90v, although the marks, subjectively, have become less neat than in the second test on s90v. We are not talking about the fineness of work higher than the larger abrasive that worked previously, as well as work at the same level, as well as productivity and uniformity of work. The edge, of course, didn’t turn out the worst, and probably, if you work for about 10 minutes, you can get a more or less acceptable result, and maybe even without making a microburr, but in comparison with the productivity and finesse of the work, both 3/2 sides and an alternative abrasive , it looks completely uninteresting and does not make you want to use this side of the bar. To summarize briefly: I quite liked the 3/2 side, it satisfies the basic requirements - the fineness of processing expected from the abrasive fraction, the uniformity of processing is quite decent, the performance is not outstanding, but at the level, while there is no critical parasitic risk, lapping does not greatly affect the uniformity of processing and it is not necessary to make it particularly thin, since ironing still happens quickly and needs to be refreshed often. The gritiness is moderate, clean with an eraser or Scotchbrite with soapy water. refreshing the surface is possible, by the way, simply by dressing it with silicon carbide stone F600, type B600VJ from INF-Abraziv. In general, it’s a very good working option, much better, it can’t even be compared with a regular, unmodified 3\2. The block was clearly a success. The main thing is that there are no more foreign inclusions. The 1\0 side demonstrates low processing uniformity, its fineness does not correspond to the fraction, grinding options have little effect on the result, and productivity is extremely weak. It would be a stretch to say that one of the advantages is that there is no salting due to the lack of clear removal. Of course, one could argue that there is 1\0 microns on the grain. it is difficult to expect effective removal, but it is lower than that of “classmates” in terms of grain size from other abrasives, not to mention grindings with diamond grain, but the quality of processing is at the level of the weakest other abrasives of similar grain size that I have tried - it is very reminiscent of the work of some water workers with a similar grain size, for mechanized sharpening - there is a low concentration of abrasive and looseness of the binder, which allows you to obtain a satisfactory result due to other operating modes, but this is not suitable for manual processing. In my opinion, it would be interesting to make the 1\0 side on the same bond as the 3\2 side, and increase the grain concentration - I believe that, for example, 150% such a dense and fairly hard bond should hold satisfactorily.
Self-processing
Each sharpening tool has its own sharpening method. To get a good result, you must follow the instructions for use and some recommendations.
By sharpening a blade with a whetstone, you can get the highest quality result, but only if the procedure was carried out by a master.
To properly sharpen a knife at home using a hand sharpener, you need to do the following:
- Place the block on a flat surface so that it does not move. If it is small, you can use a vice to fix it. A low abrasive stone is used here.
- Hold the knife at a 45-degree angle. The movement of the knife should be with the cutting edge forward.
- Move the knife along the whetstone so that the blade always touches the whetstone along its entire length.
- During the entire procedure, it is necessary to ensure that the angle of the tip is maintained.
- It should be passed along the block 2-3 times, after which the blade should be turned to the other side and processed as well.
- The process must be repeated until a cutting edge is formed.
- Next, take a fine abrasive whetstone, which is used for grinding, and process the edge until the burr disappears.
- After processing, check the sharpness of the blade by cutting a sheet of paper.
When a Lansky sharpener is used for sharpening, we are most likely talking about hunting knives, the blade of which is hard.
Therefore, for the initial sharpening procedure, you will need a stone with a low abrasive grain content.
Step-by-step instructions for properly sharpening knives at home:
- Clamp the blade in the vice of the device.
- Place a whetstone on the rod.
- Choose the correct tilt angle (20-30 degrees).
- Insert the rod into the hole provided for it.
- Lubricate the block with oil (it is included in the sharpener kit).
- Make movements from the base of the blade to its tip, over the entire surface of the whetstone.
- After grooving one side, turn the block and process the other side.
- As soon as the edge appears, change the whetstone to a grinding one and process the blade.
- At the final stage, it is recommended to polish the tip with felt.
Reasons for a dull blade
There are two main reasons why kitchen knives lose their original sharpness:
- gradual abrasion of the metal;
- using warm running water to clean them.
Erasing steel is a gradual process and is invisible to the human eye. When grinding the blade, small particles break off from it under the influence of friction. Products are not cut at right angles. As a result of the deflection, one side of the knife experiences a greater load than the other, which is why the bend occurs. This process is much faster if the quality of the metal is low.
Running water contains a large amount of salts. They negatively affect the performance of the knife, as they gradually dissolve the metal. Even if the tool is made of high-quality material, over time its blade will become dull. This circumstance greatly complicates the cooking process.
It is important to remember that using a dull knife is dangerous because it can slip and cause a serious cut. To prevent such a situation from arising, you can use the simplest devices with which the blade is restored to its former sharpness. Sharpening knives yourself is also possible at home. A special tool is used for this. It should also be remembered that the process requires periodic repetition.
Low quality steel
Using a knife for other purposes
Slicing on glass, ceramic, stone cutting boards
Available means
While away from home, you may need to sharpen your knife. This can be done without a special tool. For example, there are the following options:
- Stone. Even an ordinary cobblestone can help bring the knife into working condition. You can use absolutely any stone that you can find. The principle of sharpening will be similar to using a whetstone. You just need to run the blade over the surface of the stone several times, maintaining the correct angle of inclination. The blade will not be as sharp as a razor, but it will be quite functional.
- Another knife. It is not at all difficult to sharpen two knives at once without any additional equipment. A knife is taken in each hand and one blade is sharpened against the other. After 5-10 minutes you can see that both knives have become much sharper.
- Glass objects. You can sharpen knives with your own hands on the rough edge of a ceramic or glass object. This could be the edge of a tile or the bottom of a glass. The main condition is a rough surface.
- Leather belt. This item is best suited for finishing a knife and giving it sharpness. They will not be able to do rough sharpening. If you have nothing else at hand, it's worth a try. You need to tighten the belt and move the blade along its surface. Of course, you won’t be able to sharpen the knife well, but it will be polished to a dazzling shine.
- Emery. Coarse sandpaper can serve as a good sharpener. The principle of sharpening is the same as that of a whetstone.
Once you have acquired the knowledge and skills of how to sharpen knives correctly, you can easily do it at home. It is very important to choose the right device for yourself, which will be convenient to use and effective. Learning how to sharpen a blade correctly, as it turns out, is not at all difficult.
Price: what it consists of
The cost of sharpening blades directly depends on the complexity of the work. The following nuances are taken into account:
- Material.
- Design features.
- Purpose of the item.
- Wear level.
It is important to choose the correct grain size of the sharpening tool, method, and sharpening angle. Expensive, very “shabby” knives require a multi-stage professional approach. Often simple sharpening is not enough. It is necessary to remove chips and roughness, straighten the line, and bring the cut to perfection by polishing.
Special equipment is designed for sharpening different knives . If the classic steel options for the kitchen require a hand-held device with a lock, then for processing ceramics you cannot do without an abrasive of different grain sizes. It is better to sharpen Japanese cutting surfaces using special stones. The equipment used and operating technology also affect the price of the service.
