Hello fishermen and hunters, I present to your attention a strong, beautiful, high-quality knife that you can make with your own hands.
This knife will be an excellent friend for you when hiking, hunting, fishing and other similar activities. Despite the fact that the knife looks very high quality, it is not so difficult to make it yourself. You will need a minimum set of tools for this; grinding and polishing will be the hardest thing to do if you do not have a grinder, a sharpening machine, and so on. But in order for the knife to be strong and of high quality, you need to choose good steel for it. Unfortunately, the author did not indicate what grade of steel he used. But these days you can buy a blank for a knife of any steel grade. The most important thing is that the steel contains a sufficient amount of carbon for hardening. By the way, good steel is used in old Soviet files, various cutters and other tools. So, let's take a closer look at how to make such a wonderful knife! Materials and tools used
List of materials:
— carbon steel for the blade; - wood for linings; — sheet brass for the handle; - brass or steel pins; - epoxy adhesive.
List of tools:
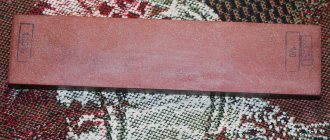
— belt grinder; — orbital sander; — grinder with cutting and grinding discs; - grinder; - drill or drilling machine; - drill; - hammer; - sandpaper; - Japanese water stone or other sharpening tool; - forge furnace and hardening oil.
Knife making process:
Step one. Cut out the main rough profile
To begin, prepare the source material and apply a template to it.
You can find a ready-made template on the Internet; for example, there are quite a few of them on Pinterest. We scale the drawing properly and print it on a printer, then cut it out. You can cut a template out of cardboard, it will last for a long time, and you can also hold such a template in your hands and figure out what the future knife will look like. Next we transfer the template to the workpiece.
For convenience, the author painted the “body” of the knife green. If the template is made of paper, you can simply glue it to the workpiece. Let's start cutting, for these purposes the author used an ordinary grinder. We securely fasten the workpiece with a clamp. There shouldn't be any problems with straight lines, but you'll have to try harder with curves. To cut out the bends, we make a series of transverse slits. After this, you can cut out the pieces of metal in sectors. Of course, there will be a lot of uncut metal left, but now it can be easily removed. Step two. Primary grinding
After cutting, we need to finalize the contour of the blade.
For these purposes, we take the knife to the sharpening machine and remove all excess. We also go over the contour using a belt sander. Bends can be easily processed using a drill with the appropriate attachment. A sandpaper attachment works best for this task. Step three.
Forming bevels This is a very important moment in blade processing. We need to form bevels, that is, the sharpening angle of the blade. First, we make markings; for this, the author uses a caliper. You also need to be sure to divide the future blade into two halves, so it will be very convenient for you to grind off the metal on both sides of equal thickness. This line is usually drawn with a drill of the same diameter as the thickness of the blade. To begin, take a file and apply the end of the bevel to the blade. Well, then we arm ourselves with a grinder with a grinding attachment and remove the excess metal. When everything is ready, we carry out finer processing on a belt sander. At the end, we go through the bevel with files, sand it with sandpaper and polish it if desired.
Step four. Drilling holes
We drill holes in the handle of the blade for the pins.
The wider the handle, the more pins need to be installed. The author decided to install 5 pins. We mark the locations and drill holes. If the hole diameter is large, use a small diameter drill first. If the steel is hardened, you may need a carbide-tipped drill bit to drill into it. It's easier to drill steel if you lubricate the drill bit. Step five.
Tempering the blade Now the blade can be hardened, for this you will need a forge furnace. In principle, you can simply blow up the coals with a household hairdryer, and the temperature can be more than sufficient. Typically, carbon steel glows yellowish, and with this glow it can be cooled in oil. But all brands are different, as are the hardening methods, you need to remember this. When the blade is hardened, the metal should not be taken with a file. After this, the metal is usually tempered, otherwise it will be very brittle. When the blade has cooled, we clean it of oil; usually they are washed under running water using detergents. Next, the author polished the blade with fine sandpaper until it was shiny.
Step six. Let's move on to making the handle
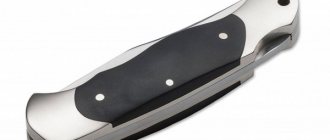
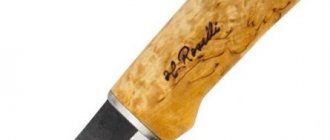
The author has a combined handle; it consists of brass and wooden linings.
First, let's start with the brass plates, for this we will need sheet brass, from which we cut out four parts for the front and back of the handle. Brass is cut perfectly with a grinder. Next, drill holes for the pins in the pads, and now you can install them on the handle. This will allow the products to be adjusted to the shape of the handle. You will need brass pins; eventually they will become one with the linings. The pins should be of such a diameter that they enter the material with little effort. After installing the pins, they need to be riveted. Next, you can proceed to the wooden overlays; to do this, find boards of suitable thickness. We cut the boards to the required length and drill holes for the pins. We install the pads themselves with epoxy glue, this is the key to their reliable fastening. As for the pins, the author decided to use steel pins for these purposes; ordinary nails are suitable for such purposes. There is no need to rivet these pins, since we have everything on glue. Tighten the pads with clamps and let the glue dry completely. Step seven.
Sanding the handle Once the glue has dried, the handle can be sanded. To do this, first cut the pins; this can be done with a hacksaw or file. Next, we go to the grinding machine and grind the planes, everything should be on the same level. You can also sand the handle to some extent along the contour. Now we will have those places where we could not get to with a grinder. To process them, the author uses a drill. A sandpaper attachment works well for this task.
Step eight. Finishing
Finally, we put a polishing attachment on the drill and polish the brass to a golden shine. Similarly, we pass this nozzle along the contour. If some areas cannot be polished, they still need to be finished by hand with very fine sandpaper. Well, then polish the wooden part or the entire knife with a polishing machine, if desired. When the pen is ready, apply oil to it. This will protect the wood from moisture and the brass will not oxidize.
Make a quality hunting knife. The material we use is 1080 steel. This is a fairly strong steel that can be hardened and processed well. The knife is made with simple common tools; the main work is carried out using a grinder with a good supply of wheels.
Materials and tools used - 1080 steel blank (); — grinder with grinding and cutting wheels; - different sandpaper; - drill with drills (); - rods for pins; - epoxy adhesive; - wood for finishing handles; - paper, pencil, etc. (for making a template); - marker; - sharpener; — heat source for hardening; - pliers, hammer, etc.; - household oven; - clamps or vices; — files for metal and wood; — preferably a belt sander ().
The process of making a knife with your own hands:
Step one. We make and transfer the template
First of all, you need to make a template.
We find a ready-made one on the Internet and print it out, or draw it ourselves. Next, you will need to cut it out, then attach it to the workpiece and outline it with a marker. By the way, if you cut out a template from cardboard, you can hold it in your hands to make sure that the future knife will be comfortable. Step two.
Rough work with the profile Next, we arm ourselves with a grinder and slowly cut out the rough shape of the profile, while always remembering that steel heats up quickly, and this is bad for it. When working with a grinder, be sure to cool the workpiece with water and slowly cut it out by hand.
Step three.
Finalizing the profile of the knife After rough cutting, there will be uncut areas on the profile, these are various roundings and so on. To cut out all these areas, the author used a sharpener. You can also use a grinder with grinding wheels. As for the case when there is no such tool, you can use files of various shapes and so on. In addition, when working with hand tools, there is again less chance of overheating the metal. You will also have to form bevels on the knife. Some people do this with a grinder, but it is best to use a belt sander. All cutting characteristics of the knife will depend on the bevels. The thinner the blade, the better the knife cuts and the easier it is to sharpen. First, mark the bevels on the knife and be sure to mark the center line on the future blade. It will allow you to make bevels at one angle. To split the blade into two halves, you can use a drill of the same diameter as your workpiece.
Step four. Drilling holes for the pins
If you plan to harden your knife, always complete all major metalworking work before hardening. Otherwise, it will be very difficult to work with metal, or you will not be able to complete some work at all. For example, it is extremely important to drill holes for the pins. At a minimum, there should be two of them, this is quite enough to securely fix the linings. They do more, but it’s more for beauty.
Step five.
Hardening involves two stages, first the steel is made as strong as possible, and then softened a little so that it is not brittle, this procedure is called tempering. For hardening you will need a stove or a good fire. The temperature needs to be quite high, the workpiece needs to be heated until it glows bright red, and then cooled in oil, motor oil or vegetable oil will do. To understand that you have definitely reached the desired temperature, bring a magnet to the workpiece; if it does not attract, the steel is ready for cooling.
After hardening, the metal will be very fragile, the knife will easily break into pieces if you drop it.
To make it more elastic, you need to temper the steel. Here a household oven will come to the rescue, heat it to a temperature of 200 degrees Celsius and put the knife on for an hour and a half. After this, the oven should cool down along with the knife; do not open it. That's all, the release has been completed, you have a very durable, high-quality metal in your hands. Before further work, sand the surface to a shine. Step six.
Cutting out the handle linings Now we need to make the handle linings. We select the right material, it can be wood, animal bones, antlers, plastic and much more. We cut rough blanks to size and drilled holes for the pins.
Step seven.
Gluing the overlays At this step you will need epoxy and a clamp, or a vice.
You should also prepare two pins. Pins can be made from brass, copper, and so on; if you don’t have anything at hand, you can even use ordinary nails. We dilute the resin with the hardener and glue the halves together. Then firmly clamp the handle with a clamp and leave until completely dry. Epoxy usually takes about 24 hours to dry. Step eight.
Processing the handle When the glue is completely dry, you can form the handle.
First, give it the desired profile; you can work with rasps. A grinder or sharpener will also work, but in this case, be careful and do not grind off too much. We slowly draw out the main profile, and then sand the handle with sandpaper. Gradually reduce the grit of the sandpaper to make the handle perfectly smooth. Step nine.
Completion Another important step is impregnation of the handle, since wood actively absorbs moisture, and for a hunting knife this is generally unacceptable. Wood that has been saturated with moisture may crack after drying; however, when wet, it expands quite a lot, which is also bad. The handle should be soaked in linseed oil, especially good if it is boiled (natural drying oil). After soaking, let the oil dry and then polish the handle until it shines. If you plan to store the knife for a long time, oil the metal as well.
Most hunters agree that, in addition to a gun, you must have a knife when hunting. Its purpose is very different: for cutting up a carcass and protecting it from an attack by an animal, for performing various household tasks - chopping firewood and branches, building a hut, cooking, making other tools and self-defense. Thus, taking into account the functions performed, it can be extremely difficult to purchase a universal knife in a store. But every hunter can build a hunting knife with his own hands, taking into account all individual requirements.
Hunting knife
Making a hunting knife is not accessible to everyone, because it is necessary to take into account a number of its features. A hunting dagger is a weapon with a short blade. The handle is separated from the blade by a limiter, which allows you to protect your hand during a strike. The weapon is designed to cut rather than pierce, so its blade is designed with a curved upward shape with a large bend in the cutting edge to make long cuts in one motion. The shank and blade are a single whole, with only the cutting edge remaining sharp, and the second part of the blade being blunt - this is the butt.
The blade is equipped with special grooves that give it rigidity and reduce its weight. Its length is usually 12-15 cm, and its width is 2.5-3 cm. Stainless carbon steel grade 65G is used to make the dagger; tool steel grade R6M5 is often also used. You can learn more about how to make a hunting knife with your own hands.
Tools
Selecting from the available equipment what is needed to make a knife is not so easy. Some tools will have to be purchased or rented additionally. However, a lot depends on the technology.
To make a knife by hand forging we will need the following:
- Large and small hammer;
- Bake;
- Coal;
- Blacksmith's tongs;
- File;
- Pliers;
- Sandpaper;
- Adjustable wrench;
- Grinding and grinding machine;
- Anvil;
- Bulgarian.
Metal selection
Before moving on to detailed instructions on how to properly make a knife, it is important to carefully select the material from which it will be made, taking into account all the necessary technical characteristics:
- Wear resistance (resistance to abrasion and deformation; depends directly on hardness);
- Ability to withstand high temperatures;
- Strength (maintaining integrity when a certain external load is applied);
- Viscosity (the ability to hold its shape without deformation or destruction during use);
- Hardness (the ability to resist the penetration of foreign materials into its own structure).
Blade making
The work technology will depend on what kind of workpiece is used for the knife. You can buy a sheet of metal (plate) of a certain thickness at a hardware store and cut a blank according to the sketch. Temper the metal in a furnace. Then process it with a file or on a grinding machine.
It will be much easier when the blank for the future knife is made from:
- Old braid;
- Lawn mower blade;
- Double-sided file;
- Drills of suitable diameter.
It is important that the workpiece is thicker than the final blade obtained after processing.
Sharpening a knife using special kits and pocket sharpeners
The knife sharpening kit includes several stones with multi-colored handles, special guides and oil. The sharpening technology with these devices is simple and does not require special skills. Each compartment has its own fastening angle. The color of the handles determines the grain size of the sharpening stones. When using this method, the blade is sharpened perfectly.
Pocket sharpeners, offered in specialized stores, are small stones of various shapes (round, square, oval) that fit in the palm of your hand. As a rule, they are made from quality materials. They are located in special recesses made in a plastic case at a certain angle. These sharpeners are convenient to take with you when hunting or fishing, as they are compact and easy to use.
Knife handle
What you can make a knife handle from is limited only by your own imagination.
Ancient craftsmen sought to make their blades a model of perfection, using all the available material at hand. Original ideas for knife handles using whatever is at hand change over time.
Currently, a knife handle can be made from the following materials:
- Plastic;
- Plexiglas;
- Tree;
- Ceramics;
- Ebonite;
- Quartz glass;
- Bronze;
- Silver;
- Ivory;
- Gold;
- Textolite;
- Antler.
Smooth or textured handle
If the task is to make an absolutely smooth surface of the handle, then at the final stage it should be tightly wrapped with durable polyethylene film or the irregularities should be sanded well and then polished. If, on the contrary, the final version should be embossed or rough, then grains of river sand or other abrasive must be applied to the surface impregnated with epoxy resin and the product must be left until completely dry. When the resin has completely hardened, any excess abrasive should be removed from the surface.
Read also: How to change knives on an electric planer
If the knife handle plate is much smaller in size than the intended handle, then it can be placed in a pre-prepared metal tube or hollow handle. The existing cavity can later be used to store various necessary small items, thus increasing the functionality of the product. For example, you can put threads and needles or matches there, but provided that the cavity is completely protected from moisture. It is impossible to know what situation you will find yourself in in the future.
File knife
Let's take a step-by-step look at the process of making a blade and handle from a simple material that can be found at hand. From a two-edged file.
- We preheat the metal in the furnace;
- We give the workpiece the desired shape according to the drawing. We use a blacksmith's hammer, then a sharpener. Ultimately, two clearly distinguishable zones should form - for the handle and the blade itself;
- We perform rough (rough) sharpening of the knife for a razor or blade type knife;
- We make handles from any material. Cut it to the size of your own hand.
- We bring it to the desired shape on a sharpening machine;
- We dock the handle with a metal blank (with rivets);
- We grind and polish the knife (with sandpaper or a grinding machine with the necessary attachments);
- We perform final sharpening of the blade;
- We use velvet cloth or polish to give the knife its final finished look.
Step-by-step instruction
Before you start making a knife for hunting and fishing with your own hands, prepare a drawing. The finished parts, handle and blade, will be connected using the mounting method and fixed with a rivet.
Crafting and Sharpening the Blade
The steel for the blade must have special hardness, ductility and anti-corrosion properties. Steel under the R6M5 brand has these properties. The material is commercially available and is often used to create pendulum saws.
Carbon steel grade 65 G has good resistance to corrosion. It holds an edge well due to its hardness. If such materials are not available, you can use a hacksaw or any other tool.
The blade is made like this:
Handle installation
Wood is the most suitable raw material used to make the handle. Apple, maple, ash and other dense varieties of trees make good workpieces. But the ideal raw material is birch bark. The material is placed in a container with water and boiled for 2 hours. After heat treatment it softens. It is thoroughly dried, then prepared.
Coniferous trees are not used for the handle. You can use a leg from an old chair or other furniture as a blank. The manufacturing and installation diagram is as follows:
Making a scabbard
After the knife is made, a sheath is made according to its dimensions or a cover is sewn together. For this, you can use various materials - plastic, leather, wood.
In the design of the sheath, it is necessary to provide for the outflow of moisture and guides for the blade, and the sheath itself must be made so that the blade can move in and out freely without jamming or any inconvenience.
Thus, making a knife is an entire art, to which in ancient times they devoted their entire lives, achieving the best quality blades and chopping properties. Such knives were successfully used both at the feast and on the battlefield, and each specimen was a model of perfection.
Katana care
A katana, like any other weapon, whether firearms or bladed weapons, needs care. The main stages of caring for this weapon are to clean the blade from dirt, and after that a thin layer of special oil is applied to it to prevent the blade from corrosion. And in order not to damage the blade itself, it is necessary to use rice paper to wipe the blade, oil and cotton cloth, which will be used to apply this oil to the blade, a bag of powder. So that all remaining contaminants are absorbed and at the end you need to use a special lubricating oil.
A bag of powder is a tampon, which consists of a small amount of powder wrapped in high-quality rice paper, and the whole thing is wrapped in silk or cotton cloth on top. When such a bag is patted on the blade of the blade, the powder is gradually poured onto the steel and covers it with a thin layer.
What are the requirements for knives?
Knives must meet a number of requirements that must be taken into account when planning to make a knife with your own hands. For example, it must be sharp and retain this property for a long time, even with active use.
Particular attention should be paid to such a process as making the handle. It can be anything - stone, wood, plastic - it doesn’t matter. The main thing is that it fits comfortably in your hand. After all, if the knife is not comfortable for the hand, it will be impossible to work with it - the hand will begin to get tired, and calluses will begin to appear on the palms.
If you want to make a knife with your own hands, you need to take care of its rigidity. For example, only such a blade can guarantee precise cuts, while the length completely covers the cutting area.
Sword Care
Before storing the sword, its parts are thoroughly cleaned of dirt and the blade is lubricated. Lanolin oil and leather care product are used to treat leather parts. If the weapon will not be used for some period, it must be properly wrapped in cloth. Each individual part of it is wrapped in a separate piece of fabric. A terry towel and felt are perfect for these purposes. If you take a fabric with a non-porous structure, this can lead to rust of metal parts. Special pockets are sewn from suitable fabric in which weapons are stored. Each weapon should have its own storage pocket.
Knife classification
When planning to make a knife yourself, you should understand for what purposes you will use it. The production of each of them has its own characteristics and nuances. So, knives are divided into:
- Those used for cooking: their shape is an elongated triangle. These differ from each other in blade length and size. The handles are made in the same style
- Lunch options: these are used for making sandwiches, slicing vegetables, cutting out seeds from various fruits
- Hunting and tourist: they are a universal option with which you can easily cut meat or fish. In addition, hunting knives make it easy to chop branches and even defend yourself when attacked by wild animals.
- Machete: a bladed weapon that is used to cut a passage in the forest - it is more powerful than hunting and tourist ones
- Martial: weapons designed for combat sports
- A separate category for stabbing: dirk, dagger, stiletto, etc.
Before you start making knives, you need to find out what options are allowed to create with your own hands. Indeed, there is even criminal liability for the production, storage and distribution of such special class items.
A little history
As you know, in ancient times a man was always a hunter. This is probably why today most modern men are interested in edged weapons. Some of them become collectors, others just like knives, sabers, swords, spears. And some people still hunt, so it is important for them that the knife is well sharpened and can strike clearly.
How to make a knife?
To make a knife with your own hands, you will need the following materials:
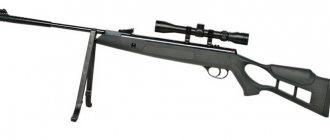
- steel sheet
- drill
- file
- sandpaper
- magnet
- vice
- drill
First decide on the design. If you are just trying your hand at making bladed weapons, you should opt for a simple version with a straight blade - these are much easier to process.
- Draw a template on the plate
- Next, drill several holes in a row along the contour
- Fix the sheet of steel and press your blade out of it. So, you were able to make a blade with your own hands. Of course, it's still raw, but still
- Next, take a file and start processing the surface of the blade.
- To make it easier to get rid of irregularities, outline the blade with a marker - it will highlight the defects for you. Afterwards, you need to treat the surface of the blade with sandpaper dipped in soapy water - this way the work will go smoother and there will be almost no dirt left.
- When finished, be sure to wipe your blade thoroughly, otherwise it may rust.
Caring for collectible weapons
But collectible weapons also need to be properly cared for, otherwise improper cleaning or lack of care will shorten the life of the collectible weapon or reduce the value of your cold weapon collection. Basically, two types of surfaces are cleaned – metal and leather. A common cause of weapon damage is oxidation of the metal from which the blade is made. This can be avoided if the metal part of the weapon is periodically polished.
To begin cleaning the weapon, it must be disassembled into its component parts: the weapon itself and the case in which it is stored. Next, remove dirt from the sheath and handle. The blade of a collectible weapon is wiped with a cloth soaked in special weapons oil. If the handle of a bladed weapon is decorated with stones, then you need to remove dust from it with a soft cloth. Do not forget that any weapon, be it a souvenir or a real one, should under no circumstances be placed in a room with high humidity.
If the blade of the weapon is made of nickel or cupronickel, then it is rubbed using wax. If the weapon contains small parts, they are placed in an industrial silver solution. Whereas gold-plated parts are simply wiped and that’s it, so as not to erase the gold plating.
A lot of attention is paid to the leather from which the handle, sheath and accessories are made. To care for them, lanolin oil and leather cream are used. This set will help restore the moisture content of the skin and prevent it from becoming rough and brittle.
How to make a handle?
An important process in making a knife is creating a suitable handle. If you prefer natural products, you can choose a handle made of wood or stone.
- In order to make, for example, a wooden handle, take a piece of wood and divide it into 2 bars
- Clamp the blade on both sides
- Drill holes in the future handle, then outline the outline
- The finished wooden handle must be attached to the blade, secured with epoxy resin and copper wire
- The pads should fit as tightly as possible to the metal
- If this does not happen, additionally sand the wooden handle with sandpaper.
Almost all knives are made using the same principle. Moreover, they can be canteens, hunting, machetes, and so on. The main thing is to strictly follow the instructions, and then you will get an excellent copy that will be useful both at home and on the go.
A knife is a thing that we use every day, and we notice that we cannot always please with the quality of purchased knives. We suggest making a knife with your own hands; this is not an easy task, but the result will delight us for many years. Your own knife is more than just a knife.
How to make a knife at home?
This is an activity for real men who like to spend a few hours of their time in the workshop and work with their hands. And first, let's choose the material from which we will make the knife blade. The choice fell on X12MF steel; we needed a small piece.
Let's start making our knife!
1.
On a prepared piece of steel we draw a model of the future knife. At this stage, you can not be very precise and draw everything by hand. After that, we take a grinder, put on protective equipment (glasses and earplugs) and begin cutting out the workpiece.
2.
From our piece of steel, we received two blanks:
3.
The next stage of processing is that we need to work on the contours using a sharpener.
4.
After the contours are ready, we grind a chamfer on the blade. Next we process the blade on the motor with sandpaper on the nozzle.
This is what we get as a result:
5.
Now the knife must be hardened. We send the blade into the oven, then into the oil, and then back into the oven. We must achieve a good result, and it is approximately 60 Rockwell units on a hardness tester. After these procedures, we return to the circle with sandpaper, remove the scale, and slightly trim the cutting edge. At this stage, you should cool the blade very often. We start with high-grit sandpaper and finish with 120-grit sandpaper. This is what we get:
6.
We refine the blade with finer and finer sandpaper, starting from 240 to 400.
Now the blade is ready for further manual processing!
7.
Let's take a cylindrical lap, and sandpaper of different sizes, and water.
8.
We clamp the blade in a vice and begin to process the surface, making movements across the direction of the previous processing. Water removes chips well and cools the blade.
We start grinding with 500 and finish with 2000. Here is our result.
9.
The next step will be polishing the blade. To do this, you will need diamond paste with a grain size of 3/2 microns, which we apply to the blade and then process it on a feta wheel.
10.
Then use 1/0 paste, use another wheel, and finally polishing paste on a muslin wheel.
11.
The wedge is ready. All that remains is to make a handle for it. First of all, take a brass strip and drill several holes in it.
12.
Using a file, we remove the jumpers and adjust the workpiece slot to the size.
13
. Lubricate the workpieces with cyanoacrylate glue and glue them to the tail of the knife, then we can clamp them in cleats.
14.
When the glue has dried, we can begin further work. Let's take a piece of wood from which we will make the handle. We drill a hole in it for the tail.
A hunting knife is essential for every hunter. First of all, it is used for finishing and butchering prey, but besides this, it remains a faithful assistant in a variety of hunting situations. Nowadays you can find a huge number of different models and modifications of blades on sale. But despite this, the need to make your own knife may arise. This usually happens due to the inability to buy the blade you need, either to replace a lost or broken one you love, or one you saw from friends and liked, or the knife you need is not on sale.
Step-by-step manufacturing instructions
You can make a hunting knife yourself in several stages.
Cutting the base profile
We prepare the material from which we will make the knife and apply a template to it. You can find the template online. After scaling the drawing, we print it out on a printer. We cut out the resulting image.
Advice! It is better to use cardboard as a material for the template. It is durable and will last more than once. In addition, cardboard is hard, you can hold it in your hands and get an idea of what a metal knife will look like.
Transfer the template to the material. We glue the paper stencil onto the workpiece. Next, cut the template around the edges. For this we use a grinder. During cutting, the workpiece must be securely secured using a clamp.
It's easy to cut along straight lines, but you'll have to tinker with curves. To cut out bends, we create transverse slits and remove metal in sectors.
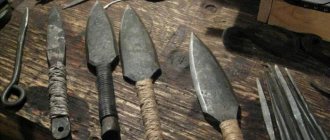
Below are several sketches for making your own hunting knife.
Throwing knife drawing
Drilling holes
At this stage you need to make a hole for the pins in the handle of the blade. Their number depends on the handle - the wider it is, the more pins are needed. On average, holes for 5–6 pieces are needed. For large hole diameters, first use a small diameter drill. For hardened steel we use a carbide drill. The job will be easier if you apply lubricant to the drill.
Blade hardening
To harden the blade, a forge is required. If it is not available, a household hairdryer will suffice to fan the coals.
Carbon steel gives a yellowish glow. As soon as the glow becomes just that, the steel is cooled in oil. However, it should be borne in mind that there are many grades of steel and the hardening methods for them differ significantly.
A sign of hardened metal is that it cannot be processed with a file. Next, we temper the metal so that it is not brittle.
Remove the oil from the cooled blade. We do this using detergents in running water. If desired, you can polish the blade with fine-grained sandpaper.
Making the handle
In this case, the handle will be combined - based on brass or wood. We start by creating brass trims. We need sheet brass, from which we will make 4 blanks: for the front and back of the handle.
We cut brass with a grinder. Then we drill holes for the pins in the linings. We install the lining on the handle. This is necessary to adjust the plates to the shape of the handle. In order not to create dissonance, we use brass pins. This way they will look like one with the overlays. We select the pins of such a diameter that they fit into the hole with some effort. We complete the installation of the pins by riveting them.
Let's move on to making wooden overlays. We use small boards of suitable thickness. We cut pieces of boards to the required length and drill holes for the pins in them. We attach the pads with epoxy glue.
We use steel pins for the boards. Instead of pins, you can use regular nails. There is no need for riveting as we previously used glue.
We tighten the linings with clamps. We wait a while until the glue completely sets.
Handle grinding
The dry handle needs to be sanded. First, cut off the pins with a hacksaw or file. Then we grind the planes with a grinder. We also grind the handle along the contour.
There will definitely be areas where the grinder cannot reach. A drill with a sandpaper attachment will come in handy here.
Finishing
We install a polishing attachment on the drill and process the surface until a golden shine appears on the brass. In the same way we polish the blade along the contour. Not all areas can be polished, so we additionally go over them with fine-grained sandpaper.
We also process wooden overlays with a polishing machine. We apply oil to the finished handle, it will prevent the destruction of the wood. The oil will also protect the blade, since brass is not affected by oxidative processes.
The last thing to do is sharpen the blade. To do this, you will need Japanese water stones with different grain sizes. Rocks are only useful if you water them. This removes dirt from the stone.
Features of the sharpening angle
Sharpening the cutting section of the blade requires a lot of time and a set of sharpening stones with different degrees of grit. It is important to maintain the correct angle. It is the angle of sharpening that determines the further direction of use of the knife.
For different types of problems the following angles are used:
- 30 degrees or more - heavy work;
- 16–20 degrees – moderate work;
- 10–15 degrees - fine work.
We begin sharpening with coarse-grained stones. We are gradually moving to smaller grains.
Making a knife from a 9HF saw
In this article we will not focus on the shape and design of the blade, the type and width of the sharpening, etc. We believe that we already have a finished project or sample and will focus on the production itself.
In order for a homemade hunting knife to meet the basic requirements for such blades, it is recommended to make it from high-carbon alloy steels. For example:
- 9ХФ
– tool alloy steel, used for the manufacture of frame, band and circular saws, punches, trimming dies and a number of other tools. Usually saw blades are used as blanks; - Р6М5
– high-speed alloy steel of high strength. It is used for the manufacture of many types of cutting tools, drills, saw wheels, the latter can be used to make a workpiece; - 65G
– spring steel, with high wear resistance, can be blued and blackened. They make springs, springs, gears, etc. In addition to sheets, rear springs of trucks are used for blanks. Considered one of the cheapest knife materials; - X12, R3M3F2 and a number of others are also suitable.
The material for the workpiece can be taken from the above products, although now on the Internet you can order a plate for the workpiece from almost any steel. As a recommendation, take a pendulum saw blade for metal, the usual dimensions are 400x30 mm, thickness 2 mm, rough surface, color black or gray. If you want to make a homemade knife at home, in addition to the material for the workpiece, we will need:
- Angle grinder (grinder)
- Wheels for it, cutting wheels for alloy steel, for example inox A54S BF, sharpening and grinding.
- Drill or drilling machine
- Vise
- Pobedite and other special drills
- Files and diamond file
- Emery machine (very desirable).
The knife making process will be as follows:
The handle of the knife can be wound using paracord or made of wood; in the latter case, we drill holes in the handle according to a template, according to a sample or drawing. Holes are drilled using special drills with accompanying cooling using oil. It is more convenient to do this on a drilling machine.
To simplify the process, holes are first drilled with small diameter drills and then gradually drilled out to the desired size.
Design features
To prevent the hunter’s hand from getting tired while working with a knife, the center of gravity of the tool is shifted closer to the handle. This reduces the load on the hand and increases cutting efficiency. The tool becomes easier to use. Features of hunting knives:
Since homemade hunting knives are used in any weather, when making them, they take into account the climate zone in which they will be used. A tool with a massive wooden handle is used in conditions of high humidity and severe frost. The handle, made of wooden material, does not freeze to the hand in frosty weather and does not slip out of the palm when wet. There are no patterns on the handle or finger grooves. Without them, the tool is more convenient to use.
To avoid losing or injuring yourself on the knife while carrying it, it is stored in a sheath. In addition, the case protects the instrument from harmful atmospheric influences. The scabbard comes in wood and leather with straps for attaching to the belt.
Purpose of the tool
Cutting is the main purpose of a knife, but depending on the circumstances, hunters use the tool for a variety of other functions.
Using a knife:
- They skin the caught prey.
- Cut the carcass into pieces.
- They finish off a wounded animal.
- Protect yourself from an attack by an angry beast.
- They are setting up a camp.
- They chop branches and open cans.
In rare cases, the instrument is used as a weapon.
Making your own knife
Sometimes the products sold in the store are of poor quality or are expensive. Therefore, you can make a hunting knife at home. To make a tool, you need special tools and skill in working with metal. The work consists of several stages:
You can make life-size drawings of hunting knives yourself or use ready-made diagrams. The tools you will need are an assembly table with a vice, a drill, files, diamond needle files, a current rectifier and other small tools.
Handle
Knives are decorated with different handles. The choice of material for their manufacture depends on the purposes for which the knife is intended, ease of use and personal preferences of the owner. Below are two ways to make a knife handle at home.
Wrapping the handle with paracord in a few minutes
Using a paracord cord as a knife handle is not only easier and faster, but also more practical. You will always have a couple of meters of cord with you, which can be used for a variety of purposes when surviving in extreme situations.
For the winding we need:
- cord, 2 – 2.5 m;
- thick adhesive tape or electrical tape;
- lighter or matches;
- scissors;
- gloves;
- screwdriver.
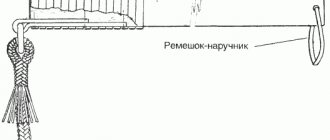
Before you start winding the cord, decide whether you need a lanyard loop and if so, where it will be, on the side of the blade near the stop or at the end of the handle. If it is available, in addition to the ability to hang the knife, in the first case you can insert your thumb into it to make it more convenient and secure to hold the knife, in the second, you can use it to remove the knife from the sheath, etc.
Paracord is wound in the following order:
- We wet the cord, and it stretches better, and when it dries, it will sit more solidly on the knife.
- We seal the knife blade with tape or tape to avoid accidental cuts or cutting the cord. It is better to perform all operations with gloves.
- We press one end of the cord on the head of the handle so that 10 cm remains free.
- We form a loop from the cord, laid along the handle so that the top of the loop protrudes a couple of centimeters beyond the cord winding area.
- Then, holding the knife in your left hand and pressing both ends of the loop with your thumb, with your right hand we begin to wind the cord around the handle, starting from its head. We make the winding tight, turn to turn, do not tighten it too much, keep in mind that the cord will still shrink after drying.
- Having brought the winding all the way to the blade, we thread the remaining end of the cord into the protruding part of the loop.
- We cut off the excess cord, leaving about 3–5 cm, and burn the end of the cord.
- After this, pulling the free end of the cord from the side of the handle head, we pull the loop under the winding until the end threaded into it is hidden under the winding. Avoid pulling the loop completely out, otherwise the entire winding will unravel.
Winding is complete. With this option of winding, we will not have a loop for a lanyard. If we want to form it, the winding is somewhat more complicated. Initially, two loops are placed on the handle on both sides of the knife.
To form a loop for a lanyard on the head of a knife, the end of the cord is pressed onto the head of the handle and one loop is pulled to the blade, then the cord is thrown over the head and a second loop is placed on the other side. The winding starts from the head of the knife. Having finished the winding, the remaining end is threaded through both loops near the blade and pulled under the winding by the loop in the headband, thereby forming it.
So that the loop is near the stop, we do the same thing, but on the contrary, we start laying and winding from the stop, and pull the loop there to tighten the clamped end under the winding.
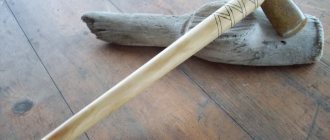
Making an overhead handle as an alternative to paracord
If you are a classicist and want to make a regular handle, use wood for this purpose. It is more accessible, easier to work with, the wooden handle is more pleasant to the touch, does not get cold, slips less in the hand, and if processed correctly, does not absorb moisture. The handle of a knife can be made of oak, beech, maple, birch, walnut or mahogany. In order not to waste time and effort on preparing and drying wood, there are two simple ways to get it. The first is parquet, you can buy it in a special store, where, by the way, expensive varieties are sold individually. The second is old furniture, in the attic, in the garage, at the dacha, with friends, you can always find unnecessary household rubbish and use it. For the handle you need two dies, if you have a standard size hand, then 10 - 15 mm thick, this includes a margin for processing so that the thickness of the future handle is about 20 mm. The length of the workpieces is 150 - 200 mm, so that there is room for fixing them during initial processing.
In addition to the tree, we will need:
- dowels made of aluminum, copper, brass, iron according to the number of holes and the corresponding diameter;
- drill with drills or drilling machine;
- drills according to the number of holes in the handle of the same diameter;
- a sharpening or grinding machine, it can be replaced by a wood file and a lot, a lot of time;
- jigsaw or hand jigsaw, or see previous paragraph;
- an engraving machine or a file with a needle file;
- sandpaper of different numbers down to the finest;
- epoxy based adhesive;
- linseed oil;
- thick adhesive tape or electrical tape;
- vice, clamp.
We make the handle as follows:
- Before starting work, wrap the knife blade with tape or tape to avoid accidental cuts.
- The first step is drilling. We place the knife blank on a wooden block, press it with a clamp or, at worst, wrap it with tape and drill holes. To make the hole neat, first drill with a thin drill, and then drill out to the desired diameter. After the first hole has been drilled, we insert a key or a drill of the same diameter into it, this is done to fix it so that the die does not move. Let's move on to the next hole.
- We drill the second die in the same way.
- After drilling, we assemble the dies on a knife, using keys or drills, to make sure that all the holes match.
- Then, attaching the dies one by one to the knife using dowels or drills and a clamp, we outline the contour of the handle along the contour of the knife. It is advisable to mark the handle with a slight indentation, 1 - 2 mm, for subsequent processing.
- After marking, we cut out the handle with a jigsaw or grind it on a grinding wheel; in extreme cases, the file is in your hands.
- Preparing the dowels. To make the homemade knife look aesthetically pleasing, we will not rivet the dowels, but glue them in. To do this, use an engraving machine or a file to make chaotic cuts on the keys, in which the glue will harden and set. At the ends of the keys we remove an inclined chamfer at 450.
- Since after gluing it will be inconvenient to process the cheeks of the stop, we finally process and polish them using sandpaper.
- We carefully sand the handle halves from the inside so that they fit tightly when gluing to the plane of the knife shank.
- Before gluing, we make a final test assembly.
- We carry out the gluing itself according to the instructions for the glue. The assembly procedure is as follows: lubricate the inside of one half, insert dowels coated with glue into it, put a knife on them, and then the lubricated second half. We clamp the assembled handle in a vice and remove the excess squeezed out glue. Leave the clamped handle for a day.
- After the glue has hardened, using files, emery, a grinding wheel, and so on, we finally shape, grind and sand the handle of the knife.
- When the handle is completely polished, it's time to soak. It is best to saturate wood with linseed oil. You can buy it in a store for artists, they use it to dilute oil paints. The handle is kept in oil for three days to a week. The process can be speeded up by boiling the handle in oil for a couple of hours, but you must strictly monitor the temperature, otherwise the glue may leak.
- Then the handle should dry at natural temperature for about a month, during which time the oil will polymerize and the wood will harden and become impervious to moisture.
- After drying, the handle is finally polished with a soft cloth.
Sharpening for beginners
Before we talk about sharpening a hunting knife, we need to remind you that homemade knives made from the metals recommended in the article are very difficult and take a long time to sharpen, since the alloy steels used have high hardness. This must be remembered when using a knife for purposes other than its intended purpose.
Now about the sharpening itself. At home, knives are sharpened on special sharpening stones. Such stones are ceramic (the cheapest and most common), diamond, natural and Japanese sea stones. The principle of sharpening on them is approximately the same, so in the future, by default, we will talk about the most common ceramic sharpening stone. In order to sharpen a knife efficiently, it is advisable to have either two sharpening stones of different grain sizes, or, what happens more often, a sharpening stone whose sides have different grain sizes. For ease of sharpening, the size, or rather the length, of the stone should be greater than the length of the knife blade.
It is advisable to sharpen a knife with both hands, so it is advisable to place the sharpening stone on a separate board, securing it either in a hole specially cut for this purpose, or using six nails driven into the sides. Sharpening the knife begins on the roughest stone. At this stage, the whetstone does not need to be wetted. We place the stone arbitrarily on the table, the main thing is that it is convenient for you to sharpen on it.
The entire sharpening process consists of giving the edge of the blade an acute angular shape. When doing this, you need to remember a few basic rules:
- you need to choose the optimal knife sharpening angle and stick to it throughout the entire process;
- The knife is driven across the stone with the blade forward, as if cutting off a thin layer from it;
- in one movement you need to sweep the entire edge of the blade for uniform sharpening;
- the edge of the blade should always be perpendicular to the direction of movement;
- each next time the blade must be turned over and held with the other side so as not to displace the center of the blade chamfer;
- movements should be smooth, without pressure;
- It is better to sharpen both sides with a unidirectional movement, either towards yourself or away from yourself, since moving the hand away from you is always worse and weaker than moving it towards yourself.
Now regarding the sharpening angle. It can be from 450 to 300, in the first case the knife will hold an edge longer, in the second it will be sharper. It is better to sharpen a hunting knife exactly at 300, this is not difficult to achieve, just when sharpening, move the knife as if you were cutting a thin slice of butter or cheese.
After you have turned the initial sharpness and brought out the angle of the blade edge, you can move on to a stone of lesser dispersion. It is advisable to periodically moisten it with water so that the edge of the blade glides better and metal dust does not clog the pores. You can finally sharpen the blade to a mirror shine and razor sharpness by sharpening it on an old leather belt with GOI paste. The main feature of straightening with GOI paste is that the knife is guided in the opposite direction to the blade, i.e. butt forward.
Dimensions
The last “helper” in the difficult choice of a hunting knife is its division according to the size-weight grid and form of manufacture:
A classic blade - the blade length of such knives reaches 135 mm, weight does not exceed 190 grams. The type of knife can be any, except for models with double-sided blade sharpening. The main functionality and application is mass cutting of caught game;
- Folding blades - can contain several blades in their insides. Ideal for cutting up prey during its detailed skinning. You need to pay close attention to the structure and strength of your folding mechanism. Weight and length are varied, not subject to specific criteria;
- The blades are gigantic - the length of such a weapon reaches 180 mm, the weight can be up to 300 grams. They are completely varied in shape and are designed for power work during hunting. It is simply impossible to perform any small precision work with such blades; most likely, they are intended for clearing an area of vegetation or cutting large pieces of carcasses of caught animals.
Such a detailed analysis of the classification of steel hunter's assistants will allow any hunter to accurately and correctly select a hunting knife for the personal needs of any hunter.
Making a sheath (case) from leather
One of the necessary accessories for a hunting knife is a sheath. They are needed to protect the blade from dulling, and everything around from cuts and damage to things.
You can make a homemade sheath yourself at home, from a small piece of leather about 3 mm thick.
For this, in addition to the skin, you will need:
- scissors;
- a sheet of thick paper for a template;
- pen;
- an awl (a sharpened nail or nails can replace it);
- small nails and a hammer;
- universal glue;
- fork;
- paraffin candle;
- fine sandpaper or grinder;
- nylon thread and one or two large needles;
- pliers;
- snap clasp;
- wax or cream.
The procedure for making the cover will be as follows:
- Making a template. Applying the knife blade to a sheet of paper, trace it along the contour. Then around this contour with a centimeter indent we draw another contour, it will be the main one. Cut out the template along the outer contour. Separately, we cut out a T-shaped part for the fastener, the width of the harness is about 20 mm, and we measure the length of the harness along the handle of the knife.
- Mark the details on the skin. Having attached the template to the leather, we outline the part for one side of the sheath, then, moving the template to the side by 5 - 8 mm, we outline only one side to get a part for half of the insert. Then, turning the template over, we repeat the steps, outlining the second side and the second half of the insert. We apply and outline the T-shaped part of the fastener.
- Take scissors and carefully cut out all the details from the leather.
- Applying it to the knife, we try on all the details to see if they match.
- We rub the ends of the insert on the clasp with paraffin candles, and then sand them using sandpaper.
- We apply the fastener to one half, and using an awl and nails we mark and punch holes for the thread, in two rows.
- We sew the fastener; the thread can be pre-lubricated with paraffin.
- For ease of subsequent stitching, we glue the parts together. We cut out a part from the template along the contour of the blade itself. We place this part on the half of the sheath and coat it with glue so that the glue does not come out beyond the inserts. Glue according to the instructions on the tube. Lubricate and glue the inserts.
- At the tip of the sheath, between the inserts, we cut a groove for ventilation.
- Glue the other half. We place the sheath under the press for a while for high-quality gluing.
- We check how the knife fits and sits.
- Use sandpaper to sand the edges of the sheath.
- Using a fork, running two prongs along the edge of the sheath, outline the outline for stitching. Use a fork to mark the holes for the thread.
- If you want, you can get fancy by cutting a thread groove into the face of the scabbard so that it is flush with the leather. In this case, it will then need to be polished with wax or cream in the same color as the scabbard.
- Punch holes for the thread with an awl.
- We sew the cover. You can sew with one thread, or with two threads, threading them through the holes one at a time.
- Attach the button clasp.
- We finally grind and polish the scabbard with wax or cream.
The scabbard is ready.
There are many different types of knives on the edged weapons market, but there are still people who want to make their own knife at home. And rightly so, because it will be exclusively their product, original and unlike others.
This article will help a beginner understand the business of making knives in the absence of special conditions and will tell you how to choose the right materials for making knives and will tell you in general terms what to do with them, so don’t judge too harshly