Is there any point in redoing it?
The carburetor engine has long been “morally obsolete”. Back in the second half of the 90s of the last century, VAZ cars were equipped with an injector. Nevertheless, carburetor engines still have a lot of “fans” who claim that the carburetor is not so bad. Before we begin converting the car, let’s look at it in detail, is everything so clear? Maybe it’s too early to consign the carburetor to the dustbin of history? Let's paraphrase Hamlet and ask ourselves: “Carburetor or injector, that is the question?” This is, of course, a joke. But is it really worth investing so much effort?
- To re-equip a VAZ-2109 you will need to invest at least $500. It is unlikely that the savings from using an injection engine will pay for such costs. Maybe only in the long term.
- The environmental performance of a car can be improved much more easily. Install a vortex aerodynamic device. It’s easy to buy such a unit, it’s inexpensive, and it installs quickly.
Why change the carburetor?
Let's start with the fact that no one has been installing carburetor engines throughout the civilized world for a long time. Entry into the countries of the European Union in such vehicles is prohibited for reasons of environmental safety. There are a number of other significant arguments:
- a significant drop in engine power at high speeds;
- problems arise when overtaking. Passing cars on the highway in a car with a carburetor engine is, in general, a complete nightmare (especially taking into account the modest capabilities of the VAZ-2109);
- significant fuel consumption compared to an injector;
- “minor” inconveniences, for example, manual control of the air damper, etc.
Of course, you can treat everything philosophically and find positive aspects even where there are none. For example, with the same manual damper control. Some drivers claim that in winter conditions this “function” is a plus, it allows you to “feel” the engine. But only an incorrigible optimist can agree with such a statement.
Injector advantages
Having considered the disadvantages of the carburetor, one cannot help but ignore the positive aspects of the injection engine. Among the obvious advantages are the following:
- fully complies with the requirements of environmental legislation on emissions into the atmosphere;
- engine power increases significantly (especially at high speeds);
- servicing the injector is much cheaper;
- fuel consumption is reduced (up to 6 liters per 100 km);
- It is possible to install gas cylinder equipment (GBO).
Comparative characteristics for VAZ-2109
| Specifications | Injection engine | Carburetor engine |
| Cylinder diameter (mm) | 83 | 76 |
| Motor power (kW) | 78 | 64 |
| Average fuel consumption (l/100 km): | ||
| around town | 9 | 10 |
| along the highway | 7 | 9 |
| Acceleration to 100 km/h (sec.) | 13 | 16 |
| Maximum speed (km/h) | 160 | 145 |
Perhaps there are also personal reasons to convert your VAZ-2109? For example, there was a desire to rummage through the car for my own pleasure. One way or another, if you firmly decide to change the carburetor to an injector, move on.
Difficulties in reworking
Since the work is quite labor-intensive and takes a lot of time, we recommend performing the steps in stages. The quality of components and their assembly play an important role during work. Beginners may have difficulty securing some elements, so it is better to call for help from a familiar car service specialist or a person who has replaced a carburetor with an injector before.
Replacing a carburetor with an injector will require you to be careful and careful. You will need to replace a lot of parts, and this is quite difficult for a beginner to do. But if you wish and strictly follow the instructions, you can perform a really serious modernization of your car and save a lot on car service costs.
This is interesting: Tire puncture at speed
Selection of necessary parts
Let's start the “remodeling” with the selection of a good injection system. Of the options on the market, the best one today is Bosch M 1.5.4. Acceptable both in price and quality. It is better to install the system without any additions. You can install an external fuel pump, but such an operation will require additional investment. You will need to buy additional parts, but they are quite expensive.
To install the injector, buy parts from serial car models. Such spare parts are well tested and, as they say, “tested by time.”
- air filter box;
- collector;
- gas tank;
- receiver;
- Consumables.
We start by removing the old generator, thermostat, pulley and all belts. We also remove the hoses and pipes of the cooling system.
The gas tank needs to be replaced. You can “borrow” from the VAZ injection model or buy a new one. Before installation, the unit is washed and dried. When installing an electric fuel pump, make sure that the arrow on it matches the similar marking on the gas tank. Check that the sensor float accurately detects the fuel level.
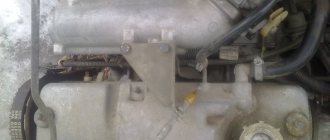
For the conversion you will need a tank from the injection version of the VAZ-2109
To install the ignition module and cylinder block sensor, we make two holes for installing the units under the bracket (20 and 16 mm, respectively). To carry out this operation, you need to drain the antifreeze and dismantle the radiator.
It is necessary to re-equip the cooling system to function in new conditions. To do this, we change the pipe and temperature sensor. Additionally, you will need to drain the oil and remove the pan. We install a new damping pulley instead of the standard one.
For an injection system that is demanding in terms of energy consumption, we install a more powerful generator. You can choose the right option in any specialized store.
What to prepare to change
The whole process will take you about a week, provided you work 3-4 hours a day. Therefore, prepare your garage in advance and buy everything you need. You can assemble the injector on different ECU controllers, but in the case of the VAZ-2109, the January 5.1.1-71 model is better than others. Available domestic spare parts can be used for it, and it does not use an adsorber and an oxygen sensor.
Advice: It is better to buy all components in a good store with experienced staff, as you may need help in choosing the right spare parts. If you have experience in repairs and want to save money, then shop at a disassembly store.
List of components required for replacement
| 1 | Oil pump (with mounting for PCV sensor) |
| 2 | bracket |
| 3 | V-belt |
| 4 | Wiring |
| 5 | Thermostat |
| 6 | Ignition system module |
| 7 | Upper and lower air filter housing |
| 8 | Fuel and air cell |
| 9 | Intake manifold |
| 10 | Two air filter supports |
| 11 | Throttle pipe |
| 12 | Receiver |
| 13 | Gasket for throttle pipe |
| 14 | Fuel pressure control |
| 15 | 4 nozzles |
| 16 | Injector ramp |
| 17 | Intake manifold gasket |
| 18 | Mounting kit for receiver and air filter |
| 19 | Ramp tube set |
| 20 | Throttle cable bracket |
| 21 | Throttle cable |
| 22 | Hose |
| 23 | Air flow sensor |
| 24 | Fuel hose kit |
| 25 | Electric fuel pump |
| 26 | Controller January 5.1.1-71 |
| 27 | Knock sensor |
| 28 | Crankshaft pulley |
| 29 | Crankshaft position sensor |
| 30 | Gas tank |
| 31 | Plug with gasket |
| 32 | temperature sensor |
| 33 | Fuel pump pressure ring |
| 34 | Generator with mountings |
Also pick up bolts, nuts and clamps from the store that you will need for the job.
Tools
The repair will consist not only of dismantling some components and mechanisms. In some cases, it will be necessary to make changes to the design of cylinders and other parts.
From the tool you will need:
- Set of wrenches.
- Flathead and Phillips screwdrivers.
- Good drill.
- Hammer and chisel.
- Rust remover.
We lay wires and connect devices
We carry out preparatory work in the following sequence:
- drain the fuel (lighten the tank);
- disconnect the terminals and remove the battery;
- dismantle the distributor with elements;
- remove the fuel pump;
- remove the carburetor;
- disconnect the ignition wires located under the hood;
- remove the fuel pipes;
- dismantle the gas tank and vacuum booster hose.
- We close the cables remaining from the fan relay together with the device switch-on sensor;
- we install fuses, relays and controller in their standard places;
- connect the fuel pump to the dashboard;
- install the collector.
How to remake: step-by-step instructions
Before starting work, wash the car thoroughly and remove dust and dirt from around the engine.
- In the rear of the car we remove the old carburetor fuel system.
- Pull out the gas tank and fuel pipes.
- We screw on the new bracket and use it to secure the new injection lines.
We install the bracket in its original place and secure the lines - We install the fuel filter along with hoses.
We fix the fuel filter with hoses - We attach the fuel pump to the injection gas tank.
- We go into the engine compartment and remove the ignition.
- We disconnect the wires that go from the sensors to the ignition braid.
- We pull out the old ignition tee and install an injection tee in its place. Before doing this, completely drain the antifreeze from the system.
We install the injection ignition tee in place of the carburetor - In place of the distributor, we make a plug with a seal and treat it with sealant.
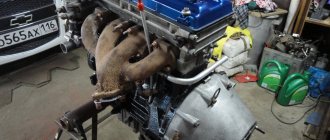
- Remove the carburetor along with the intake manifold.
We dismantle the old carburetor along with the manifold - We replace the gasket and install a new injection manifold.
We install the injection manifold in place of the carburetor - We install the injectors on the ramp and secure it to the manifold.
- We connect the hoses and install the receiver.
We install the injection receiver and connect the hoses to it - If your model has an oil pump without a casting, then it also needs to be replaced.
- The generator on the nine must be replaced, but the pulley itself is suitable for the new system and can be left.
- Instead of a carburetor ignition cable, we install an ECU wiring cable.
- We connect the wiring to the controller and the motor.
- In our case, the fuel sensor will remain the same; you just need to connect it to the new pump.
- Turn on the ignition and check the operation of the fuel pump. The entire fuel system must be sealed and leak-free.
- We replace the carburetor module with an injection one.
We remove the carburetor ignition module and install the injection module in its place - We install a new ignition system (spark plugs and module).
- We install the air filter.
- Drill a hole for the knock sensor (depth 16 mm).
- We start the engine and check its operation.
Conclusion
No matter how much debate there is about the “good old” reliability of the carburetor or the progressiveness and efficiency of the injector, in any case, of course, the choice is yours. In order to properly re-equip your machine, at all stages, follow the operating instructions and technical data sheet for each component and unit. Remember that a car is an object of increased danger and thoroughly check every action you take.
Perhaps you have experience converting a VAZ-2109 from a carburetor to an injector? Share your experience with our readers in the comments. Any information and, of course, your personal opinion will be very useful.
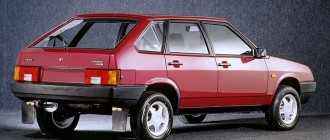
Carburetor engines have been obsolete for quite some time. But today on our roads it is not difficult to find cars equipped with this type of engine. The VAZ 2109 model is no exception.
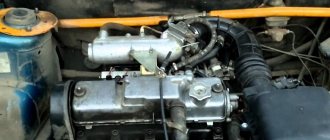
Nine engine
Having a nine carburetor at your disposal, you can even convert it into an injection car on your own.
Before you decide to take such a step, be sure to study the strengths and weaknesses of each engine type, and also determine in which mode you use your car most actively. Your final decision largely depends on this.
How else can you modify the VAZ-2109
Look at the interior of a domestic car from the outside - the interior and instrument panel leave much to be desired, which is where high-quality do-it-yourself tuning is really necessary. When updating the dashboard, remember that correct installation can correct the correct operation of the furnace device and heater components.
The seat upholstery of the VAZ-2109 also looks unimportant; moreover, it quickly deteriorates, wears out and gets dirty. It is better to choose the color and material of the new upholstery together with a specialist; immediately decide which product will easily clean the new fabric from dirt.
To securely fix the material, use regular textile adhesive or DoneDeal aerosol adhesive. It is possible to fix the plastic parts well using sealant. To achieve an even layer without creases or folds in the fabric, use a steam generator. This device gives a good tightening of the material. First, the carpet is fixed along the edges along the skin, and then the material is given the desired shape using a steam generator. Pasting of the entire canvas is carried out only after drying.
Be prepared for the fact that after several years the carpet will roll away, so experts recommend taking a closer look at other, more expensive and modern canvases. Instructions on how to independently improve the appearance of the VAZ-2109 interior ceiling consist of the following steps:
And finally, you can make the necessary holes within a day.
Source
Carburetor. Advantages and disadvantages
Let's start with the negative points. These include:
- Such engines have not been installed on production cars for a long time. In Europe, due to environmental requirements, carburetors are blacklisted. That is, they are prohibited because they heavily pollute the atmosphere;
- At high speeds, the engine's capabilities drop significantly. Torque does not reach the desired levels. But at low speeds it is effective and allows you to accelerate well from zero to hundreds;
- When overtaking, the carburetor is a pain. It is problematic to overtake cars normally and confidently. Especially considering the power of the carburetor nines;
- High fuel consumption when compared with injection engines. On average, a nine with a carburetor in normal mode consumes about 8.5-9 liters of fuel per 100 kilometers;
- The air damper is controlled manually. The exception is some versions of the latest samples, where automatic devices have been installed. Some motorists claim that manually controlling the throttle in winter has its advantages, as it allows you to feel the engine. But only experienced drivers can understand this.
Nine carburetor
But let's not just talk about the bad. The VAZ 2109 with a carburetor also has positive qualities:
- The cost of a carburetor is much cheaper than an injection engine;
- Engine maintenance costs less, and the work itself is easier to perform if you repair it yourself;
- Fans of carburetors claim that the absence of control units and microcontrollers is an undeniable advantage. Although one can argue with him;
- If the engine fails even 100 kilometers from the nearest settlement or service station, it is not a problem for experienced drivers, since repairs can be carried out even in the field. But this will require the availability of appropriate tools and passenger assistance.
Injector. Advantages and disadvantages
In short, all the advantages of the injector are the disadvantages of the carburetor, and all the disadvantages are the advantages of the carburetor.
Injection nine
The key features of injection engines include:
- Injectors are more environmentally friendly and meet the requirements for emissions of harmful substances;
- Although the torque is insufficient at low speeds, it makes overtaking easier at high speeds. The engine seems to get a second wind;
- Injector maintenance costs are higher;
- For normal operation of such an engine, clean fuel is needed. The carburetor “feeds” on everything;
- To check faults, it is necessary to perform diagnostics, which is time-consuming and expensive;
- The injector consumes less fuel. The average is 6-7 liters per 100 kilometers;
- Almost all systems function through computer control, therefore, when working correctly, the engine operates as efficiently and economically as possible;
- It is possible to install HBO on the injector. But with a carburetor, such a step is fraught with a number of difficulties.
Let's sum it up
As you can see, converting an injector into a carburetor and vice versa is a feasible task. The main thing is to have the necessary spare parts and certain skills. We also note that the return from the injector to the carburetor can be considered rather an exception.
Much more often, owners express a desire to replace the outdated carburetor system with a more economical and practical injector. It is also important to understand that the use of new parts for such a modification puts the feasibility of the whole idea in great doubt.
The main problem will be to find and buy an intake manifold, a receiver, a controller, a ramp with injectors, fuel lines, a gas tank with a gas pump, an air filter housing and other necessary elements at a reasonable price. In this case, the cost of installing the injector can actually pay off after some time.
What does water injection into an engine provide, the principle of operation, the main advantages and disadvantages. How to inject water into the engine yourself, available methods.
Adjusting idle speed on carburetor and injection engines. Features of adjusting the XX carburetor, adjusting the idle speed on the injector.
Design and operating diagram of the injector. Pros and cons of an injector compared to a carburetor. Malfunctions of injection power systems are common. Useful tips.
When you sharply press the gas pedal, the engine jerks, jerks and dips appear, the car does not pick up speed: the main causes of the malfunction and diagnostics.
Difficulty starting carburetor, injection and diesel engines when hot. Main malfunctions: overheating of the carburetor, sensors, injectors, fuel injection pump.
The main reasons that lead to a lean mixture. A lean mixture on carburetor and injection internal combustion engines, as well as on engines with gas equipment. Diagnostics, repair.
Power plants using fuel supply through a carburetor are morally and physically obsolete. However, you can often find cars on the roads equipped with a mono injection gasoline supply system. The Lada 2109 was equipped with an injection modification already in 1994; the unit is more economical and produces fewer harmful emissions into the atmosphere. Converting a VAZ 2109 from a carburetor to an injector will require many corresponding components.
Rework
To replace a carburetor with an injector yourself, be sure to arm yourself with the following components:
- Cylinder head from VAZ 2112 with receiver and manifolds;
- Knock sensor;
- Throttle pipe with throttle position sensor;
- Mass air flow sensor and a number of other elements.
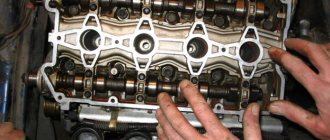
Replacement kit
When everything is ready, you can start working.
- Remove the old cylinder head. Plus, remove all attachments in the fuel assembly, gas tank and ignition system.
- Remove the alternator, thermostat, pulleys and belts.
- Install a new gas tank with a pump, borrowed from a donor - an injection VAZ.
- Remove the carburetor and ignition system components that need to be replaced.
- Disconnect the cooling system pipes and hoses. Here, install a completely new kit from the injector.
- Remove the pan.
- Install new pistons from an injection donor and connecting rods at 10. Standard carburetor components are not designed for an injection compression ratio. Plus there are special recesses for other valves.
- Install a new unit with an underflow on the cover for the DPKV, replacing the standard oil pump. If you can remove the cover, then only that will be replaced.
- After removing the old cooling system pipes, install new ones. The best solution is to replace the entire set. Buying it won't really impact your overall budget.
- Prepare everything necessary to mount the 16 valve head. The fasteners match, only the bolts from the old head are long and need to be shortened. Plus, don’t forget to make a size 12 hole in the new head.
- Install new fuel lines from the donor.
- Connect your new gas tank to the lines.
- Route the wiring from the control unit to the fuel pump. You can use old fuel level regulators from a carburetor car.
- Cut a hole in the wall of the engine compartment through which the wiring will be routed. This way you won't have to make the standard wires longer.
- Install the knock sensor by drilling a hole in the block and tapping a size 8 thread.
- Be sure to replace the water pump using a unit from donor 2112.
- Get a new crankcase breather and oil dipstick. Install them instead of the previous ones.
- Install a new cylinder head. Just don't forget to change the gasket, which corresponds to a different head.
- Install a thermostat borrowed from a VAZ 2112.
- Connect the coolant pipes.
- Remove the rear timing cover and rollers. The pulleys from 2112 are dismantled. The belt must be installed in accordance with the marks.
- Install the new generator along with the drive. For the new generator, the upper fasteners will remain intact, since they are not provided for by the design of the carburetor VAZ 2109. Therefore, fasten the pair of lower mounting bolts as securely as possible.
- Place all the sensors in their new places.
- Seal the valve covers with a good quality sealant.
- Assemble the ignition module, wires, spark plugs and other components.
- Install the air filter.
- Get your exhaust system back to normal. The muffler is often left stock, but the resonator and other components are taken from the donor.
- The wiring is connected to the dashboard and the lock.
- Fill in new oil, refuel the car with high-quality fuel.
- Start the engine and take it for a test drive.
What you can get
By converting the carburetor into an injection car, you can get improved technical and dynamic characteristics. We offer you a comparison of the parameters of the two motors.
Domestic cars do not have an ideal design, but they provide a lot of opportunities for successful modification of many components and endless tuning. That's why the VAZ-2109 is considered a good option for those who like to repair, modernize and make their dream car come true.
In skillful hands, the good old “nine” will sparkle with new colors, and all this can be done with your own hands in your own garage.
Transition from carburetor to injector on VAZ 21099
Owners of carburetor cars often dream of an injector. And for a certain amount of money this dream can become a reality. This article will describe the modification of the VAZ-2108 (VAZ-2109, VAZ-21099) power system with your own hands. Interestingly, some owners of injectors also dream of a carburetor, having suffered with the first one. But we will consider the transition to the injector as a more complex procedure. A list of required spare parts is given at the end of the article. Work should begin with choosing an injection system and selecting the necessary parts. In the article, as an example, we will take an injection system based on the Bosch M 1.5.4 controller, without a neutralizer and an oxygen sensor, but meeting Russian toxicity standards. In addition, the advantages of this controller include the large number of “Sport” firmware available on the network. I warn you right away that the alteration is carried out on the basis of factory parts, without changes in the design. For example, it was possible not to replace the fuel line and gas tank, but to install an external fuel pump and fuel hoses on clamps, like on foreign cars.
But I don’t know if we could save money by using non-domestic parts, because the same GM ones cost quite a lot. In general, you should initially find and buy elements that are almost trouble-free, that is, the intake manifold and receiver, fuel lines, gas tank, and others. The rest is consumable small things, which all car markets are littered with.
Before we get started, I suggest you wash the car and the engine compartment - it makes working much more pleasant. While everything is dry, you can install a new electric pump in the gas tank and align the arrows of the tank and pump, check the movement of the float and cover it all with anti-corrosion mastic.
Now let's move on to the main part of replacing the carburetor with an injector on the Lada Samara:
- We drain the antifreeze, remove the radiator, the queen and the bumper. We drill two holes and tap a thread in the cylinder block to mount the knock sensor and ignition module. First, inspect the block; these holes may already be ready, or there are special moldings for them. Drill without fanaticism so as not to make a hole through. The depth for the sensor is 16 mm, for the ignition module 20 mm. After that, screw in the sensor.
- We replace the antifreeze outlet pipe (by the way, you need to screw a temperature sensor into it). It is generally better to replace the thermostat with a more reliable one (for example, from Lada 110 or 21082). Here you will also need a new gasket, which will become unusable when the outlet pipe is unscrewed.
- We drain the oil, remove the pan, timing belt drive, toothed pulley and replace the oil pump (unlike the usual one, it has a place to mount the crankshaft sensor). Immediately install the generator damping pulley (with ring gear). This replacement leads to the installation of a more powerful generator and the transition to a V-belt. By the way, don’t try to save money on a generator. If you only change the pulley, you will soon have to throw out the entire generator. Better take my word for it. If the car is not old, leave the oil pump and pan gaskets as standard, since most new ones are of very poor quality.
- We pour out the gasoline and disassemble the standard ignition and power system.
- Let's start with the battery. We remove it, then the distributor, fuel pump, air filter housing (together with the filter), carburetor, manifold, gas cable (on the injector it will be a little longer), ignition system wires, coil, air damper cable, EPHH control unit, switch, fuel lines , gas tank, amplifier hose.
- We dismantle the dashboard.
- Now you need to make a pigtail of wires: + 12V from the fifteenth terminal of the ignition switch and the tachometer input. The indicator lamp requires a separate wiring. If you install an on-board computer, check two more at the same time: the signal from the speedometer and the fuel consumption sensor. We mount an eight-pin “female” connector and a four-pin “male” connector at the ends of the harness.
- We squeeze the ignition harness out of the engine compartment and fasten it in the passenger compartment as it was, and then connect it to our harness (item 7). We connect the injection wires (blue and blue-black) to the mounting block. Instead of the fan relay, install a jumper. We install the remaining parts, namely: the controller, fuses and relays in their original places.
- You can install an immobilizer unit by connecting the unit to the harness and the indication to the panel. Oh yes, a couple more wires from the dashboard to the fuel pump - remove the old one and lay a new harness with a connector.
- Let's return to the engine. We attach a plug to the cylinder head, onto which we secure the injection ground wires. We install the manifold, rail with injectors, throttle pipe and receiver. We replace the throttle cable with a long one.
- One of the longest operations can be considered laying the fuel line along the bottom of the hull. It is very difficult to push the return line under the steering. You can take an assistant.
- Screw the fuel filter onto the bottom.
- We install the gas tank and connect the fuel hoses.
- We check the injectors for leaks; if everything is normal, we lower them into the sockets and attach the ramp to the manifold.
- We install sensors, an ignition module, and high-voltage line wires. We carefully check the fastening of all ground points and hoses (no need to spare clamps).
- We install the air filter, connect the heating hoses for the throttle pipe and crankcase ventilation. That's almost all.
- We connect DST-2 and a gas analyzer. We reset the errors and adjust the composition of the power mixture at idle.
If all spare parts are in working order, and all connections are securely fastened, the engine on the injector will start immediately.
Well, that's all. Aesthetes can still do some design work, namely adding the letter i to the back door , )
Here is a list of the required parts. I think you should keep it to $400-450.
1 Oil pump 2112-1011052 2 Ignition module bracket 2111-3705410 3 Plug with gasket 2111-1003288 4 Crankshaft pulley 2110-1005058 5 Thermostat 21082 6 Upper generator mount 21082-3701635 7 Attached lower generator 21082-3701720 8 Generator 2112-3701010 9 Alternator V-belt 21082-3701720 10 Bosch upper air filter housing 2112-1109016 11 Bosch lower filter housing 21082-1109013 12 Air filter 2112-1109080 13 Fuel filter 2112-1117010 14 Pro throttle pipe masonry 21082-1148015 15 Air filter support 2112-1109249 — 2 pieces 16 Throttle pipe assembly 2112-1148010 17 Bosch receiver 2111-1008027 18 Intake manifold 2111-1008081 19 Fuel pressure regulator 2112-1160010 20 Bosch injector 2111-1132010 - 4 pieces 21 Gasket intake manifold 2110-1008055 22 Injector ramp 2111- 1144020
How does a carburetor differ from an injector?
Increasingly, on forums and blogs of car enthusiasts and VAZ-2109 owners, you can find discussions on how to equip a carburetor with an injector. A beginner is unlikely to know the difference between these vehicles, so experienced specialists provide explanations. Both devices “cook food” for the engine, “mixing” gasoline and air in the correct proportions. The carburetor has a special float chamber built into it, which “sucks out” the fuel and sprays it into droplets at a certain speed.
It would be hard to call a carburetor a simple mechanism. In this regard, certain difficulties arise in its work, which can also be called disadvantages:
- setup difficulties;
- not always optimal and effective composition of the mass;
- difficulty starting at sub-zero temperatures;
- the need for frequent cleaning, otherwise blockages will lead to breakdown of the unit.
The injector, in turn, is a valve whose opening duration is controlled electronically. As soon as the valve takes the open position, fuel is immediately sprayed under pressure.
The only nuance that can cause an injector malfunction is clogging of the channels through which gasoline is supplied.
Instructions for converting a carburetor to an injector VAZ-2109
Step-by-step instructions for converting a carburetor into an injector with your own hands, recommended by specialists and car enthusiasts, looks like this:
- Buy a new tank to hold the fuel. Before alteration, it must be thoroughly dried and an electric fuel pump installed. It is important to adjust the optimal values of the pump frame and tank, and also check how the fuel sensor changes.
- After the new tank is prepared, drain the antifreeze by placing a container of up to 5 liters under the coolant hose.
- Remove the radiator, removing all existing fasteners.
- In the place where the sensor responsible for detonation is mounted, use a drill to make a hole 16 mm deep. Prepare the installation of the modular ignition bracket in exactly the same way, but you need to deepen the hole more - up to 20 mm. What the VAZ-2109 driver should be wary of is through drilling.
- Now remove the engine pan and the timing belt. The new oil pump should be installed on the crankshaft. It is correct to replace the generator on the VAZ-2109 with a model with better power, which has a ring gear and a pulley with a damper. The belt associated with the generator also needs to be replaced.
- Remove the battery, then remove the fuel delivery compartment, wiring, pipes and other components.
- After disassembling the instrument panel, proceed to installing wires to the tachometer and the starter lock mechanism. This must be done by starting the motor unit and connecting it to the necessary detachable elements. The new ends of the wiring are fixed to the mounting unit, taking into account the polarity, which is determined based on the same shade of the edges.
- Connect the wires to the fuses. Fix to each other and adjust the correct operation of the fuel pump and fuel indicator.
Replacing a carburetor with an injector - sequence of work
So, all the components have been purchased, let’s check the list one last time. After the work begins, the car will be immobilized, and it will not be possible to go to the car market for the missing element.
Using the VAZ 2109 as an example, the following set is obtained:
We photograph all the carburetor elements as they were before the alteration. Many people are interested: is it possible to reverse replace the injector with a carburetor? Of course, yes, but you probably won’t want it. It is for exceptional cases that we record everything as it was.
Disconnect the battery and remove it from the engine compartment; We drain all technical fluids from the engine. Gasoline can be reduced to almost zero, and an unscheduled change of engine oil and antifreeze will not hurt; We dismantle the fuel system of the car, starting with the old gas tank. There is gasoline in the fuel lines and carburetor, so care should be taken to protect against fire; Carefully remove the old ignition system. There is no point in tearing off the wires - let everything remain as is; In place of the distributor we install a plug with a gasket; Let's disassemble the dashboard. If it has a “check engine” lamp, we route the control wire into the engine compartment. If not, install the indicator lamp yourself; We install the wiring harness for the ignition system. Each car has its own circuit, the basics are the same: power from the contact of the switched on key, signal from the tachometer; To connect the fuel level device, it is necessary to stretch the signal wires to the place where the fuel pump is installed in the tank. The old float no longer works, new level sensors will need to be calibrated; We change the oil pump, check the installation location of the crankshaft position sensor; We remove the old one and install a new intake manifold. We attach a fuel rail with injectors to it (in standard places); We install the gasoline pressure regulator in the rail, connect the fuel lines: direct, etc. "return". This is a new pipe, it was not in the carburetor system. “Excess” fuel is not removed through the injectors, but is returned back to the tank. This improves efficiency; We calculate the route for laying the fuel line under the bottom. We temporarily dismantle interfering elements
Important! Do not try to push the fuel line into any gap; it is better to unscrew and install the unit than to damage the high-pressure pipe; We prepare a new fuel tank (clean it, wash it if necessary). We install the fuel pump in accordance with the installation instructions (most containers have an arrow to orient the pipes and flanges)
We install the tank on the brackets; We check the fixation of all elements of the fuel line. Fittings should not rotate or play; We install new sensors: MAF, crankshaft position, temperature; We install the control module (ECU) so that it does not heat up from the power unit or exhaust system; We connect all the braids (harnesses), check the tightness of the shrinkage of the connectors. If the new contacts did not have special technical petroleum jelly (to prevent oxidation), apply it before connecting the connectors; We install the throttle valve and a new throttle cable. We check and adjust the tension; there should be free play from one extreme position to the other. If your kit includes a throttle position sensor, connect it to the ECU; We mount a new air filter housing, having previously tried it on the throttle assembly. There should be no distortions or tension fastening; We assemble a standard crankcase ventilation system; We install the generator and carefully center the new pulley.
Fill in new oil, antifreeze and fuel. We check for leaks and perform a test start of the engine. Adjust the idle speed.
You learned how to convert a carburetor to an injector using small means. The engine is not run in; the mechanics remain the same. For the first 100-200 km, you should measure gasoline consumption and regularly check for fuel leaks and the fastening of new components.
Source
How to install an updated system
To install the plug to the block system head, based on the injection mechanism, install the positive wire. Install the manifold and injectors located on the in-line rack, the receiver and the throttle component. The throttle cable is taken as an elongated sample.
The fuel structure in the new model is placed at the bottom of the body, after which pipes and purifiers are installed. Next, install a new tank and connect the product to the system. To check the operation of the nozzles and their condition in relation to leakage and damage to the integrity of the material, blow out the internal plane with a pump. Then install the ramp, sensors and all the equipment based on electrical and high-voltage activity, the starting module, to the collector.
When the installation of the air filter is completed and all operations go perfectly, the car is started. The modernization can be considered successful if the VAZ-2109 starts immediately, on the first try.
Advantages and disadvantages of the injector
To understand whether you are ready to invest effort into converting the carburetor into an injector on a VAZ-2019, you need to study the real capabilities of the car before and after modernization. Here are the advantages noted by the owners of domestic cars after the VAZ-2019 has already been converted:
- There are no problems starting the engine in any weather conditions.
- There is no need to adjust the ignition according to the quality of the air-fuel mass.
- Eliminates the risk of engine tripping.
- Requires less gasoline consumption.
- The VAZ-2109 moves better from the very beginning of the start until the end of the trip.
Now about the disadvantages of the alteration. Like any device, the injector is not immune to breakdown, then checking the condition of each part will require much more time. The good thing about an injector is that the engine starts easier than with a carburetor, it saves gas, it’s easier to drive the car, but servicing the mechanism really suffers and requires specific skills and knowledge, and the patience of the car enthusiast.
Some drivers express certain doubts whether it is worth spending so much money to convert the carburetor to an injector in the VAZ-2109. After all, fuel savings after modernization are no more than 3 liters, and the modification itself is estimated at 15,000 - 20,000 rubles. If one-time expenses are not so important to you, then do not neglect the conversion. Driving a modernized car will become more comfortable and, over a long period of use, more profitable.