The operation of a carburetor engine is accompanied by several problems (failures). After all, the carburetor needs to be adjusted periodically, the idle speed often fluctuates, and in severe frost there can be problems starting the engine. In addition, in order to prepare the fuel-air mixture (FA) with the correct ratio, you need to carefully adjust the position of the mixture quality and quantity screw. In addition, the level in the float chamber affects fuel consumption. In addition to these nuances, problems arise with ignition and the accuracy of its installation. Therefore, car owners remake carburetor engines and install an injector with their own hands.
Concept
The principle of operation of the injector
The word injector comes from the Latin. injicio, which means to throw away. In practice, an injector is a pump that releases liquid or gas under pressure.
The VAZ injector is an injector controlled by an electronic unit (ECU).
In order to supply the required amount of fuel assembly to the combustion chamber of each cylinder, it is necessary to know the mass of air and fuel. For this purpose, appropriate sensors are installed on the car, the signal from which comes to the ECU.
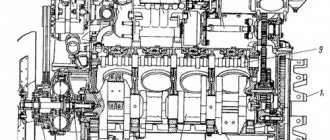
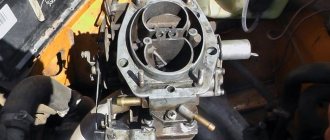
The device of a simple injector
The simplest car injector includes:
- Sensors;
- Electric fuel pump;
- Controller (ECU);
- Pressure regulator;
- The actual injector (nozzle).
Sensors are needed to measure parameters such as:
- Air mass;
- Throttle position;
- Air temperature;
- Fuel consumption;
- Crankshaft position.
The ECU is the brain of the fuel injection system. It controls the injectors according to a certain algorithm, processes signals from sensors, and makes the necessary calculations.
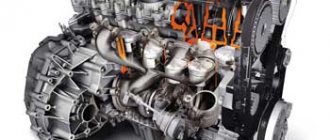
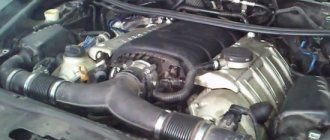
Injection engine
The electric fuel pump forces gasoline to the pressure regulator, which maintains constant pressure in the system.
The injector is a solenoid valve that is activated when control voltage is supplied from the ECU. The opening moment of the injector determines the amount of fuel and air supplied to the combustion chamber. The fuel assembly supply channel of the injector is designed in such a way as to ensure effective atomization and distribution of the mixture in the cylinder.
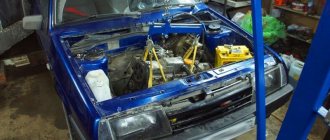
Replacing the carburetor with an injector
Now let's look at a more popular and frequent option for upgrading the engine power system, namely installing an injector on a carburetor power unit. In short, to solve the problem you need to replace the intake manifold, receiver, install an air filter housing, change the fuel line, install another gas tank with an electric fuel pump, mount an ECU, etc.
As an example, let's take the replacement for the VAZ model, which was produced in different configurations with a carburetor and injector (2108, 2109, etc.). As a rule, used spare parts are used for such alterations. At the heart of the electronic injection system, many use the Bosh M1.5.4 control unit.
This type of ECU is relatively easy to flash; there are many upgraded firmware versions available for it. The catalyst and lambda probe (oxygen sensor) are also excluded from the general scheme.
- So, work begins with replacing the fuel tank. If the tank is dirty, then it must be rinsed first. After this, the electric fuel pump is installed. Let us add that in some cases it is possible to insert the pump into the fuel line without replacing the tank itself.
- Next, you need to drill an additional mounting hole in the BC for the knock sensor (knock sensor). There are also holes for mounting the bracket. The bracket is needed to install the ignition module.
Note that on some motors the holes may already be drilled at the factory. If there are no such holes, then you need to look for special low tides on the BC. The hole depth for the knock sensor is 1.6 cm, for the bracket 2 cm. Drilling must be done carefully so as not to damage the block. Also, after drilling, it is necessary to cut the internal thread.
- To gain access to the unit, you will need to remove the front bumper, drain the antifreeze, remove the cooling radiator, etc. You also need to take into account that the coolant outlet pipe will need to be replaced with a similar one, but with a temperature sensor.
Some also change the thermostat using a tee from the VAZ 10th model, which allows you to connect the expansion tank. At the same time, you will need to replace the gasket, since the old one is usually destroyed or damaged after removing the outlet pipe.
- The next step will be to work with the internal combustion engine itself. First you need to drain the engine oil, remove the timing belt and toothed pulley, and remove the engine sump. As for gaskets, you should strive to preserve the ones you already have, since it can be difficult to purchase new ones of good quality.
Further improvements to the engine include replacing the oil pump of the lubrication system. You also need to replace the standard generator pulley with a damping one. At the same time, the generator is also being changed, for which fastenings are prepared separately. The alternator belt is replaced with a V-type belt.
- Now you can move on to the ignition, power and electronic control systems. You will need to remove the battery, distributor, fuel pump, air filter housing, carburetor, manifold and other elements.
You also need to remove the throttle cable, since on versions with an injector this cable is longer. The choke cable, the ignition system wiring under the hood, the coil and switch, and the idle control system are also removed. Replacement work will also require removing the fuel pipes and the vacuum booster hose, which also needs to be replaced with a longer hose (suitable from a VAZ classic).
- A sufficient number of manipulations will require connecting various elements of the ECM, ignition, sensors, etc. In other words, electrical work begins, for which you need to disassemble the instrument panel.
Among the main operations, the need to lay out the wiring harness from the ignition switch and implement the tachometer input should be highlighted. Connecting the check light bulb will also require laying a separate wire. The wiring from the engine compartment must be pushed into the cabin, after which the connection is made. You also need to connect the injection system wiring to the mounting block.
You will also need wiring to connect the dashboard with the wires to the fuel pump. This is necessary for the correct operation of the fuel level indicator in the tank. The standard wires running along the floor to the tank are replaced with new ones, and there must be a special connector for connecting the pump.
Additionally, you need to make sure that the cooling system fan is working properly. To do this, you need to short-circuit the wires that go from the fan to the sensor that turns it on. Next, the controller, fuses and relays are mounted in those places where their placement was previously provided. Upon completion, a so-called plug is mounted on the cylinder head, to which the “ground” of the injection system is connected.
- Now you can install the manifold, install the fuel rail with injection nozzles, install the receiver and throttle pipe. Also at this stage the throttle cable is replaced.
Then the fuel line is laid along the bottom of the car. The most difficult part is often the passage of the “return”, which must be carried out under the steering mechanism. To solve the problem, you need to release the steering rack fasteners on one side, and then ask an assistant to press the mechanism with a crowbar or pry bar.
- The final stage of work with the internal combustion engine power system can be considered the final installation of the fuel tank. If everything is in order, you should connect the fuel lines. Maintain reliable fixation of all elements using clamps and fasteners.
Now you can activate the fuel pump (supply power to it) and create pressure in the fuel system. This is necessary to check the tightness, and such diagnostics must be done before the injectors are installed in their injector holes. If the check of the injectors and all pressure connections is successful (no fuel is leaking anywhere), then the fuel rail can be attached to the manifold.
- Next, you will need to install the necessary ECM sensors, mount the ignition module, and install the spark plug wires. Separately, you should check the reliability of the “ground” fastening, the quality of the wiring, the tightness of the connections of hoses and pipes.
The completion of the entire process of modifications can be considered the installation of an air filter, as well as the connection of the heating of the throttle pipe and the crankcase ventilation hoses of the internal combustion engine. Now the engine can be started, after which it may be necessary to adjust the quality of the fuel-air mixture in idle mode, etc. It is best to entrust such work to those who specialize in ECU chip tuning.
Why change a carburetor engine to an injection engine, and is it necessary?
Some drivers ask: why is it necessary to replace a carburetor engine with an injection one? Basically, everyone does this to install 4th generation gas equipment, and 2-3rd generation gas installations will work much better than on a carburetor.
This is due to the fact that the injection will no longer go through two chokes, but through one. You can leave everything on the carburetor brains, but then you will have to forget about gasoline, because standard injectors will not work if the control unit is carburetor.
Another positive point is that in the design of the intake manifold, in any throttle position, both intake valves operate. There is also a difference in fuel consumption. But the consumption itself mainly depends on the car, gearbox, axle, etc. And the mandatory use of high-grade fuel in an injection engine will not save you money. The car starts up much better after the changes, in any frost.
Important! For normal operation of the injector, it is necessary to flush the system every 25 thousand kilometers.
Pros and cons of the injector.
The injector provides fuel injection either into the air stream or into the combustion chamber.
Numerous sensors monitor air flow, engine speed, knock and crankshaft position. The control unit processes data from sensors and controls the injectors, ensuring the right amount of fuel is supplied at the right time. The injector provides better mixing of air and fuel compared to a carburetor. Therefore, the power increases slightly.
Injection engines are more complex, but the composition of the air-fuel mixture better suits any operating mode.
How to install an injector on a VAZ 2106
Installing an injector on a VAZ is accompanied, first of all, by purchasing the necessary parts. There are special kits for sale for the VAZ 2106. You just buy and install. A description of the installation process is usually included in the kit. This installation is the simplest option for the VAZ 2106. However, buying the entire kit will be quite expensive. In this case, of course, you won’t have to rack your brains over what, how and where to put it.
Another option is to purchase all the parts separately.
Preparation
Installation of the injector is carried out after preparing the VAZ 2106:
- Removing the carburetor;
- Remove the carburetor wires;
- Ignition coil;
- Switch (if any);
- Drain the coolant;
- Disconnect the intake and exhaust manifold;
- We change the forced cooling of the radiator to electric;
- We change the gas tank to another with an electric fuel pump;
- Remove the distributor and fuel pump;
- We install the plugs in their place.
Before you buy all the equipment, you need to decide which controller will be installed on the car. Depending on this, we purchase everything else.
Equipment installation
Installing a crankshaft position sensor (CPS) requires replacing the VAZ 2106 engine cover with a new one with a shimmer. To do this, you will first need to remove the crankshaft pulley. When a new cover is installed, all the sealing parts are changed. The engine head will need to be bored out or replaced with a new one from the injection Niva, since the carburetor has smaller inlet ports than the injection one. In addition, it will be necessary to provide for mounting the receiver.
Next, we fix the receiver, the ramp with injectors, and the exhaust manifold. Don't forget about gaskets between connections. We screw the throttle assembly to the receiver. You also need to install an ignition module and a knock sensor (DS). On some engine models, installing the latter can be difficult because it needs to be positioned as close to the cylinders as possible.
A fuel filter must be inserted into the rupture of the supply tube. We select it from those available for sale. It all depends on your preference.
The speed sensor is located between the gearbox and the speedometer cable input. It will be most convenient to extend the pipe for reverse drainage of fuel along the bottom of the VAZ 2106 car.
Features of the updated model
The car is equipped with a 1.6-liter engine, with a fuel injection complex and a catalytic-type converter installed in the exhaust gas system. It meets the requirements for toxicity standards that meet the parameters of the Euro 2 standard.
To determine from what year the VAZ 2106 injector was produced, you need to know that the production of such cars was established at the Izhevsk Automobile Plant in the period from 2002 to 2006, when it became economically unprofitable for VAZ to use the production line for the production of cars, the demand for which had become significantly less. As an innovation, the installation of an injector significantly improved the dynamic characteristics of the car, and the number of failures and defects associated with the operation of the power plant significantly decreased.
If we talk about the configuration, it must be stated that in the latest carburetor generation of the “six”, in connection with the replacement of the engine, certain changes have occurred in the configuration of the remaining vehicle control systems.
The Izhevsk-made VAZ 21067 lacks a distributor-distributor, a mechanical fuel pump with a pumping lever and a carburetor device. The elements of the fuel system for the injector are similar to the components of the fuel supply system of VAZ models produced with front-wheel drive. The on-board control system has the “January 5.1” codification, calibrated for a given model.
Designers and engineers of the AvtoVAZ enterprise carried out the unification of filters for purifying air masses and fuel, as well as the electronic module of the vehicle ignition system. The receiver for this model is used from a VAZ 21214 Niva car with an injection power plant.
The speed sensor is positioned on a manual transmission in the cable connection socket for the speed measuring device, and the speedometer is directly integrated into the system through an adapter device, similar to the placement in the Nivov model. The exhaust system of exhaust gases in this modification has also undergone some changes, but the catalytic converter and absorber comply with Level II European standards, both in terms of the degree of CO content in the exhaust gases and in terms of the fuel volatility coefficient. The compression ratio of the engine has not changed, which means that the fuel used has not either.