Many motorists have come across the concept of car engine repair. But not everyone understands what this process is. Not every car owner can repair his car, since many simply do not know what technology to repair a car engine. This article will tell you about the main processes of restoring a power unit.
General concepts of engine repair
Repairing gasoline engines is a rather complex process of restoring worn components and parts of the power unit to their original condition or close to it. This process includes many operations and depends on the type and class of the motor.
During the operation of a vehicle, many motorists do not pay attention to maintenance, which plays a very important role on the condition of the power unit, as well as on its service life. Subsequently, it may happen that repairing a gasoline engine will be impossible. Therefore, the restoration of the power unit is affected not only by physical wear, but also by how it is cared for.
Stages of internal combustion engine repair
When removing the engine, a certain sequence must be followed.
- Removing the engine.
- Washing away accumulated dirt and thoroughly cleaning parts.
- Inspection and identification of faulty crankshaft parts. Gaps and cracks are revealed.
- Repair of engine cylinder head (head),
- Restoration of the main part of the crank mechanism.
- Reassembling and installing the engine back.
Removing the motor
Dismantling the main unit depends on the make of the vehicle. It is advisable to remove the VAZ gasoline engine with four hands; it will be more difficult for one person. The process is carried out on a pit or a lift. The tools you will need are wrenches, screwdrivers, a winch, and a canister to drain the liquid.
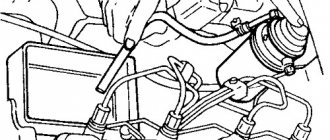
First of all, you need to disconnect the battery; the shelf is unscrewed. Next, the air filter and engine protection are removed. The container is inserted and the plugs are unscrewed. In order for the oil to flow out faster, the engine must be warmed up. But when draining the antifreeze, the engine must be cold.
After removing the liquid, you can disassemble the mechanism. The generator, drive belts and wires for the battery are removed. Next is the cooling system, all spare parts are dismantled. The ignition and fuel systems are being disassembled. The engine power system unit, pipes and intake manifold are removed. Before proceeding with the disassembly of the cylinder block, the camshaft pulley and valve cover are removed. The motor is rigidly fixed to the winch. The gearbox is unscrewed from the engine. The motor mounting nuts are unscrewed. When removing, you must act carefully and do not touch the hood with spare parts. Under no circumstances should the battery be thrown or overturned. The terminals can only be removed with keys.
On average, disassembling a modern car model takes about ten hours, however, a VAZ engine will require only three hours.
Cleaning and flushing the engine
You should not skip this stage, considering it unimportant. Plaque on spare parts makes it difficult to assess the degree of wear, which will subsequently affect the operation of the engine. Over time, carbon deposits and dirt can build up in the engine, increasing fuel consumption and also reducing power. Using an engine flush will help remove contaminants. This is often the first step to restoring an old car's engine to factory specifications.
Identification of damaged spare parts
A thorough inspection will reveal any defects. Special measuring devices are used. At this stage, you can find cracks or chips on the parts. The integrity of the cylinder block is revealed, as well as:
- Parts are rejected if the output is more than 50%. Checks for correct alignment.
- The moving and stationary parts of the crankshaft are inspected.
- Gas distribution mechanism.
Cylinder block: repair and replacement
It is a body part of the internal combustion engine. The main components and mechanisms are located in the cylinder block. Has supporting surfaces for mounting the crankshaft. The head is attached to the top side of the block, and underneath the bottom is the crankcase. The main cause of block failure is surface wear. Possible causes of head malfunctions include gas breakthrough, cracks and wear of parts. The cylinders bear heavy loads when driving. Under conditions of high pressure and temperature, the walls wear out faster and the cylinder changes its original shape.
For repairs, the disassembled head is cleaned of old gaskets and washed thoroughly. Repair begins with finding defects. The main breakdowns include:
- Wear of the cylinder surface.
- Wear in the direction of the crankshaft axis.
- Cracks in the sleeve.
- Deformation of the crankshaft bearing bed in the cylinder head.
First of all, the surface is cleaned. Scratches and chips are revealed. Next, the surface of the cylinders is bored. The seat of the cylinder head is polished to a shine using a milling machine. If the sinks are too deep, then the process is carried out in several stages.
Replacing bushings
The process is carried out if it is impossible to continue using the previous bushings. When working, a special mandrel is used. The bushings are easy to remove. The diameter of the new parts should be 0.05 mm larger than the previous ones. You will also need lubrication.
Place the cylinder block on the stand. Before lubricating the bushings, you can put them in the freezer for half an hour. This will help them enter more easily. The valves should not dangle or jam. Otherwise, dismantling will be useless.
Valve lapping
The final stage of cylinder block repair. Lapping is necessary for a tighter fit to the seats. The valve is cleaned of carbon deposits using an abrasive surface and treated on all sides with lapping paste. Next comes installation into the head. The following methods can be used to rotate the valve:
- using a piece of hose. Most importantly, it must have a diameter similar to that of the valve. Holding the hose on both sides, rotate alternately to the right and left. The disadvantage of the method is its inconvenience;
- modern method. Buy a lapping device at the store. This will make the process much easier.
A sign that the valve is worn in is the dullness and continuity of the installation surface and the end of the valve. Another sign is a more muffled sound. At the end, the seat and valve are wiped, and the remaining paste is removed with water.
Crankshaft repair
The extremely high dynamic loads to which the crankshaft is subjected during operation make this part one of the most important in the engine. This part can be repaired no more than 4 times. After dismantling, the first thing you need to determine is whether it can be restored. If the answer is yes, then you can start repairing. Next, the question arises: is it worth grinding and boring the crankshaft journals? If wave-like grooves or waviness are detected, both are required.
With each boring, the repair size of the liners increases. If for the first time it is equal to 0.25, then the last boring for the liners will be equal to 1.00. Therefore, after removing the part from the cylinder block, you need to look at the size. The factory crankshaft, not yet bored, does not have numbers.
Cracks on this part are unacceptable. The presence of a crack can cause a fatigue fracture. The latter can harm the operation of mating parts. Together with a visual inspection, it is tapped with a hammer. A cracked crankshaft must be replaced immediately.
Engine assembly and installation
Having completed the repair work, you can begin assembling the motor, which is carried out in the following sequence:
- Installation of liners, shrinkage of the crankshaft.
- Assembling and installing the piston and connecting rod.
- Fastening the crankshaft with yokes.
- Installing the cylinder head gasket.
- Installing the motor cover.
- Fixing the pump and pump.
- Replacing the pulley.
- Head mount.
- Installation of the oil pan.
The engine is installed using a lift. In case of his absence, 2-3 people will be needed. It is necessary to direct the engine to the gearbox shaft. The box is fixed in a raised position using a jack. The unit slowly lowers onto the box; there should be no distortions. If you follow the instructions, the process will only take a few minutes. When lowering the jack gradually, you need to make sure that the fasteners hit the pads. After screwing the gearbox to the engine, the pipes are connected to the pump.
Next, the heads are installed. You need to lift the chain and put a mark on the pulley. The chain is placed on the tensioner shoe. Gaskets are installed, the head is installed on the block. After tightening the bolts, you need to turn each one a little again. The bolts are pre-lubricated with oil, which allows for better pulling. Don't twist it too hard, it might break.
Now the radiator is installed and the pipes are connected. The camshaft is screwed onto the head (it is advisable to purchase a factory one with a limiter). A hook is made from wire, which is threaded into the chain. The tensioner is loosened until the shoe is pressed in, and then tightened again. The sprocket is placed on the camshaft. The mark on the chain will match the mark on the shaft and pulley. If everything matches, the sprocket is tightened tightly.
You can start adjusting the valves. The process starts from the fourth cylinder. To check and adjust the gaps between the valves, a special tool is inserted - a feeler gauge. After starting the engine, the valves will sit in place, which will require re-adjustment.
The next step is installing the ignition system. A sealing layer is applied under the ignition distributor to prevent oil leakage. The pulley is brought to the first mark. The distributor turns clockwise, after opening the contact, it tightens. The meters are connected, the valve cover, choke, and throttle lever are mounted. Antifreeze is poured. It is recommended to fill the radiator with water before antifreeze. If the pipes are not tightened well, it will leak. Such leaks can be easily fixed without spilled antifreeze. When pouring coolant, an air lock should not form. After changing the filter, oil is poured into the engine.
In what cases is the power unit repaired?
Let's consider in what cases it will be necessary to repair the engine:
- Wear and wear of parts exceeds 80% of the resource.
- The appearance of mechanical damage to the main components of the power unit.
- Failure due to improper setup or maintenance.
- Other reasons that could cause malfunctions.
How to classify the repair of gasoline engines:
- On-line repair. This is the repair of worn parts, which during operation have a service life lower than the main power unit.
- Technical repair of engines. It is carried out during routine maintenance for the planned replacement of worn out elements.
- Unscheduled repairs of car engines. This is an unexpected breakdown of the power unit, which is caused by poor-quality maintenance, spare parts or other reasons that led to restoration operations on the motor.
- Planned repairs. It is also called a major overhaul. It is usually carried out according to the mileage of the car, when the resource of the power unit is exhausted.
When was the time for capital?
How long has your car been used? What is the mileage? Which roads – asphalt or potholes? Do you have to add oil more often than usual? Has your gas mileage increased? Is compression dropping in at least one cylinder? Is the internal combustion engine shaking on its supports? Are the piston pins knocking? And you will have to answer as many other questions for yourself.
Let’s add: if your car has 150 thousand kilometers and the power drops, then this is a reason for capital investment. Although the “classic” can withstand 200 – 250 thousand without major repairs.
If your car is more than ten years old, it is domestic, for example, “Zhiguli” or “Moskvich”, then its limit before the first overhaul is 150 thousand km.
Where to begin
Many motorists wonder where to start repairing gasoline engines? The answer is quite simple - it is necessary to determine the signs: is repair of the unit generally necessary, or is the problem hidden in something else? To do this, you will have to carry out a number of diagnostic procedures. They are divided into 2 types: electronic and mechanical.
Electronic diagnostics can show whether car repairs are necessary in terms of electronics and whether there are any problems at all. To do this, the electronic engine control unit is checked, as well as the condition of all sensors and connections. If no problem has been identified, then there is no point in going any further, as you may create a problem that will have to be solved.
Mechanical diagnostics will require a lot of time, effort and knowledge. To carry out this operation, there are instructions on the Internet, but in this article we will try to explain everything in much more detail and clarity. If problems are discovered during diagnostic operations, gasoline engines will have to be disassembled and repaired.
By the way, there is an engine repair manual for this, which is issued by the manufacturer, both in paper and electronic form. So, let's look at the process of repairing a car, or rather its power unit, in more detail.
The need for engine overhaul
Various reasons contribute to the gradual wear of parts; this occurs over a long period of time. Signs of engine malfunction appear in a certain sequence.
High oil and fuel consumption. Fuel fills the gaps between parts. Oil is consumed when the piston rings become clogged and the elasticity of the cap seals decreases.
- The car's power decreases and traction disappears.
- Black, dark blue smoke from the exhaust system. This indicates that there are problems in the internal combustion engine.
- The oil pressure light does not turn off.
- Extraneous sounds that are not typical during normal driving. The knocking noise may be a result of the bearings being worn out.
- A decrease in compression pressure in the cylinder occurs when the gaskets and piston rings are faulty.
- Burnt spark plugs.
- Reduced coolant level, frequent overheating.
- Excessive play in the steering mechanism.
Any of the listed signs is a reason for a thorough inspection of the engine, and perhaps even a reason for a major overhaul. Postponing repairs can lead to undesirable consequences. If the part is not repaired in time, you may have to buy a new part, or replace the entire system.
Dismantling and disassembly
The first process is to remove the power unit from the car and disassemble it. In each specific case, engines are removed differently. This is influenced by the following indicators: drive, engine location, number of cylinders, body design features, gearbox type and others.
For example, dismantling the power unit from a Lada or a domestically produced truck is much easier than from other cars. They contain fewer electronic devices, so dismantling is quite easy and simple.
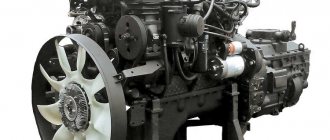
For example, diesel engines YaMZ-236 and YaMZ-238 can be removed from a vehicle in 10-12 hours, while their foreign counterparts can be removed in more than 36 hours. The same situation applies to the disassembly process, which can take Zhiguli cars from 3 hours and foreign-made cars from 10 hours.
The disassembly process should be treated carefully, since it is at this moment that the first diagnostic operations are carried out. A car enthusiast, if he is repairing an engine with his own hands, must visually inspect the presence of damage, cracks and other defects on the power unit and its components.
When is it necessary to overhaul an engine?
Car engine wear occurs gradually.
There are a number of signs indicating a malfunction of the internal combustion engine.
Precursors of “disease” may appear in the following sequence:
- Increased fuel and oil consumption. When parts wear out, gaps appear between them, which are filled with fuel during operation. An increase in oil consumption occurs due to clogging of the piston rings or loss of elasticity of the valve stem seals.
- Vehicle power is reduced.
- Dark blue smoke is visible from the exhaust pipe. This indicates that oil has entered the fuel mixture.
- The oil pressure indicator starts flashing or stays on.
- The engine makes an unusual knocking noise during operation. The crank bearings may be worn.
- When measuring compression, the instruments show a significant deviation from the norm (decrease). Low compression indicates damage to the seals and wear of the piston rings.
- When you unscrew the spark plugs, carbon, oil and dirt always remain on them.
- Frequent overheating for no apparent reason.
Troubleshooting elements
The next stage will be troubleshooting, which will determine the signs of a malfunction and also show what condition the mechanics are in. What is this procedure:
- Measurement of the crankshaft for size, hardness, deflection and alignment.
- Diagnostics of the condition of the plane and body of the cylinder block.
- Condition of the piston group.
- Worn elements and cylinder head housing.
- Other indicators.
- Feasibility of engine repair.
Installing pistons
Install the pistons with connecting rods. First, install the liner into the lower head of the connecting rod. Each connecting rod must be installed in its place. In order to compress the piston rings, we use a mandrel; you can make it yourself from a thin strip of metal.
We insert the connecting rod with the piston through the cylinder liner from above, having first clamped the rings with a mandrel, and do not forget about the direction of the piston. After the mandrel has approached the upper edge of the cylinder, with a slight but sharp blow on the piston, here it is necessary to use a wooden spacer, we push the piston into the cylinder liner. The blows should in no case be strong, so as not to damage the rings. If the mandrel is pressed tightly and evenly, the piston easily enters the cylinder.
We bring the lower head of the connecting rod under the crankshaft journal and install the connecting rod cover. It is very important here that the liners in the connecting rod and the cap are positioned lock to lock and in no case should you confuse the caps from other connecting rods. Tightening of the connecting rod caps must be done using a torque wrench, which will ensure uniform tightening and the force allowed for the given engine model will be applied.
Now we can install the cylinder head. First install the gasket. On some engine models, if you put it in reverse, you won’t notice the error at first glance. Therefore, carefully ensure that the hole in the oil channel in the engine block coincides with the hole on the gasket; as a rule, it has a metal or rubber edging.
Spare parts
When diagnostics have been carried out and all the parts that need to be replaced have been identified, it is worth ordering the necessary spare parts, since preparation is required before installing them on the engine. Often, when gasoline engines are repaired, the following spare parts are changed:
- Main and connecting rod bearings.
- Piston group.
- Connecting rod pins.
- Connecting rod bushings.
- Oil filter and pump.
- Pump or its repair kit.
- Inlet and exhaust valves.
- Oil scraper rings.
- Gasket set.
- Valve guides and seats.
- Other details.
Stages of engine repair
Engine overhaul involves the following steps:
- Engine disassembly.
- Complete disassembly and removal of accumulated dirt by rinsing and cleaning.
- Identification of defective parts of the replaced block: inspection of the cylinder block for cracks, measurement of the resulting play, assessment of the condition of the crankshaft, identification of worn parts.
- Major repair of the cylinder head.
- Restoration of the cylinder block.
- Assembly of the unit and installation on the car.
Disassembly and dismantling of the engine
Removal from the vehicle may vary depending on the vehicle model. It is much easier to disassemble a carburetor engine than an injection engine. There are fewer electronics that need to be removed beforehand. There will also be a different disassembly process for front and rear wheel drive brands.
The preparatory stage before dismantling will be the removal of interfering mechanisms and unscrewing the fastening bolts. A heavy unit is removed from the body using a special lift or winch. If there is no such device, all possible engine parts and spare parts are removed to reduce weight and removed manually. This will require the help of more people.
Disassembly follows. Work should be performed sequentially, carefully inspecting the parts for wear and placing them in order.
It is worth knowing that a VAZ engine can be disassembled in about 3 hours; disassembling a foreign-made engine takes more time - about 10 hours.
Washing engine parts
Washing is an important step in the work that many people miss.
It is not right. Each detail has a specific meaning. If the parts are not washed and the deposits are not removed, the degree of wear may be determined incorrectly, which can cause rapid failure of the entire engine. In addition, extreme care must be taken to flush the block and head to inspect for any cracks.
Diagnosis of damage and defects
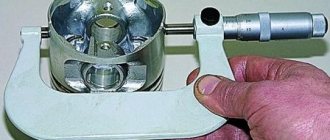
Defects are detected visually and using measuring instruments. All parts are checked for wear, scratches, cracks and nicks. Particular attention should be paid to the following details.
- The crankshaft is inspected and measured for wear and checked for alignment and deflection.
- Gas distribution mechanism.
- Parts of the connecting rod and crank mechanism: the general condition and the presence of play are determined.
- The cylinder block and cylinder head are checked for integrity, paying special attention to cracks and chips.
Cylinder head repair
Repairing this spare part is not so difficult, but many car owners turn to service for help. If you decide to do the repair yourself, you will need to replace or repair the following parts.
- Camshafts.
- Valve.
- Guide bushings.
- Valve stem seals.
If you find cracks in the cylinder head, it must be replaced or polished. It is possible that there will be a specialist who will repair the damage with argon.
Cylinder block repair
After cleaning and rinsing the unit, it is necessary to restore it to close to factory quality. The head seat must be sanded to a mirror finish, removing any existing shells and shavings. For this, a grinding or milling machine is used. Depending on the degree of damage, the cutting thickness can vary from 0.05 mm to 1 mm. If there are too deep cavities, grinding may consist of several stages.
Crankshaft repair and restoration
A car's crankshaft can be repaired and bored several times, depending on the model. For example, the crankshaft on a VAZ needs to be repaired and bored 4 times to fit different shirt sizes and then increase them. After disassembling a part, the first thing to check is whether it can be restored. In this case, you can buy larger headphones and get to work.
The second thing to pay attention to is the crankshaft pins. If after inspection, ripples and wavy hazards are found, they must be corrected. This is done by grinding on a special machine. Remember the main thing! Replacing covers without troubleshooting is not allowed. Repairing a car engine with your own hands will be in vain, the result will be zero.
Assembly and installation of internal combustion engines
After preparing the head, cylinder block and crankshaft, the engine is assembled. To overhaul the engine, you may need to purchase the following parts from the dealership:
- Piston rings;
- Set of gaskets.
- Connecting rod pins and bushings for them;
- Connecting rod and main bearings;
- Valves, guide bushings and seats for them;
- Pump repair kit;
- Oil filter;
Engine assembly is performed in the following order:
- Installation of liners and crankshaft shrinkage.
- Installation of pistons and connecting rods.
- Fixing the crankshaft with rocker arms.
- Installing the gasket.
- Installing the engine casing.
- Assembling the pump and oil pump.
- Installing the crankshaft pulley.
- Installing the head.
- Fastening the pallet and base.
When installing the liners and piston assembly, lubricate the parts and cylinder walls with a special lubricant. Its additional characteristics and resources depend on the high-quality assembly of the internal combustion engine. It is recommended that it be performed by a person who knows the principles of operation and the design of the motor.
We install the unit in its original position using a lifting device. After proper installation, it is fastened, then the removed equipment and electrics are installed in the reverse order. It is also recommended to align the clutch and apply pressure to the engine before starting the engine.
Running in the engine
After turning off the engine, you must start it correctly.
Otherwise, the engine will quickly fail without even processing half of its resource. During the break-in period, parts are ground in and excessive stress damages them. According to existing standards, it is necessary to drive a car approximately 2-3 thousand km. In this case, the driving speed should not exceed 60 km/h.
Grinding the block and crankshaft
The next stage of repair and restoration work is grinding the crankshaft, as well as the planes of the block and head. Using surface grinding and milling machines, the plane of the GBU and the block is brought into a mirror surface. As a rule, the following can be removed: 0.05mm, 0.1mm, 0.25mm, 0.5mm, 1mm or more of the thickness of the product.
As for grinding the crankshaft, there are types of repairs for this unit:
| Type of repair | Thickness, mm | Efficiency compared to new |
| Repair No. 1 | 0,25 | 80-90% |
| Repair No. 2 | 0,50 | 70-75% |
| Repair No. 3 | 0,75 | 65-70% |
| Repair No. 4 | 1,00 | 50-55% |
| Repair No. 5 | 1,25 | 40-45% |
| Repair No. 6 | 1,50 | Less than 30% |
| Repair No. 7 | 2,00 | Not applicable since 1995 |
Block head repair
Repairing the cylinder head is one of the simplest operations in the process of engine overhaul. It is recommended, of course, to carry it out at a car service center, but many motorists, after repair operations on Zhiguli cars, repair the cylinder head of foreign cars themselves. So, what is included in the process of overhauling the cylinder head:
- Replacement of the camshaft (or several, if there are 2 or more of them on the car).
- Replacement of valves, both exhaust and intake.
- Replacement of guide bushings.
- Changing seats and valve stem seals.
- Argon welding, in the presence of cracks or leaks.
- Other work related to the repair of cylinder head of one type or another.
Car engine maintenance and repair.
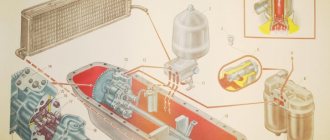
Maintenance of the internal combustion engine consists of its external cleaning, control inspection, general diagnostics and diagnosing and regulating its systems.
External cleaning of internal combustion engines
carried out by pre-blowing it with compressed air, followed by wiping with cloth ends soaked in kerosene or diesel fuel.
Inspection of internal combustion engine
consists of visually establishing its completeness and places where oil, fuel and coolant are leaking, monitoring the mounting of the engine and its systems, and testing the start-up. When starting the engine, pay attention to the ease of starting, the duration of which should not exceed 20 seconds. Restart is carried out after 1... ...2 minutes. During a control inspection of the internal combustion engine, its obvious malfunctions are revealed.
General diagnosis of internal combustion engine
allows you to assess the technical condition of the entire engine according to some generalized parameters, both from a qualitative and, in some cases, from a quantitative side.
General engine diagnostics can be carried out both on the basis of an analysis of various external symptoms characterizing its operation, and through instrumental research. The most common methods are based on the analysis of the color of exhaust gases, noise generated by the engine, and impurities contained in the crankcase oil.
Exhaust gas color analysis. This method is based on the relationship between the technical condition of individual engine parts and the color of the exhaust gases.
Analysis of noise generated by the engine. This method is carried out by listening to the engine. Mechanical noise is picked up quite well. Therefore, assessing the technical condition of an engine based on the nature of noise is quite widespread in operating conditions, although it is to a certain extent subjective and requires high qualifications.
Analysis of impurities contained in crankcase oil. A very promising and accurate method of general diagnostics of the technical condition of an engine by analyzing the wear products of its parts entering the oil.
Current repairs of engines are carried out in the presence of the following defects: violation of valve adjustment; faulty valve cover and head gaskets; block head malfunction; knocking of main and connecting rod bearings
; increased oil consumption, gas leakage; power drop; low oil pressure in the engine lubrication system. Elimination of the first four defects is carried out without removing the engine from the car.
To replace the cylinder-piston group, parts of the crank mechanism, and the lubrication system, the engine must be removed from the machine.
If there are several defects at the same time (knocking of valves, bearings, drop in engine power, etc.) and the operating time is close to the operating time before a major overhaul, the engine undergoes an external wash and is sent to the warehouse of circulating units for delivery to a technical exchange point for undergoing a major overhaul at a repair shop. factory
Disassembly and reassembly of engines during routine repairs are carried out after external washing and cleaning in the assembly area. Disassembly is carried out on universal or specialized stands.
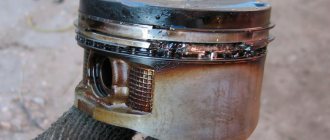
Repair of the crank mechanism. The engine crank mechanism consists of cylinder-piston and crank-rod groups and includes the following parts: cylinder, piston, piston rings, piston pin, connecting rod, crankshaft, connecting rod and main bearings, flywheel. External signs of wear of parts in this group are smoky exhaust gases, increased oil consumption, drop in pressure in the lubrication system, knocking noises. Knocking occurs as a result of natural wear of the rubbing surfaces of the crank mechanism parts and an increase in the gap between them. An increase in the gap between the parts of the cylinder-piston group leads to a decrease in pressure in the cylinders (compression) and increased oil consumption. An increase in the clearance in the crankshaft bearings causes a decrease in oil pressure in the main oil line.
The cylinder surfaces wear unevenly both along the axis and around the circumference. Along the circumference, the cylinders wear more strongly in the plane of swing of the connecting rod, and along the axis - in the area of \u200b\u200bthe compression rings. Pistons and piston rings, as a rule, are not repaired, but replaced with new ones. Engine connecting rods in the presence of cracks, bends, twisting, large wear under the pin bushing and liners are rejected and replaced with new ones. For connecting rods of all engine brands, bending of 0.08 mm and twisting of 0.12 mm over a length of 100 mm are allowed.
The crankshaft wears out in the area of the main and connecting rod journals. To restore the shape of the necks and their cleanliness, the surfaces are ground to the repair size. For crankshafts of tractor engines, four main repair sizes are accepted with an interval of 0.75 mm for connecting rods and 0.5 mm for main journals. For automotive shafts, the interval is 0.25 mm for the main and connecting rod journals. If there are kinks, cracks, or bent, the crankshaft is rejected.
When repairing, pistons and connecting rods are selected based on weight. The difference in mass leads to imbalance, increased vibration and reduced engine durability. Before assembly, the pistons are heated to 75 ... 85 ° C and connected to the connecting rods by pressing the pin.
The crankshaft is assembled in a fixture. During assembly, install the oil pump drive gear. The gear is positioned with the marks facing outward. The oil channels are blown out with compressed air. A set of connecting rod and main bearings is selected for the shaft.
Repair of cylinder heads and gas distribution mechanism parts. The main defects of cylinder heads are the following: cracks, wear of valve seats, corrosive wear of heads made of aluminum alloys, wear or breakage of threads, warping.
Large cracks are detected visually, small ones - during a hydraulic test with water pressure of 0.4 MPa for 3 ... 5 minutes, while there should be no leaks on the surface. The head is rejected if there are cracks passing through the holes for the studs, valve guides or socket bridges. Cracks are repaired using electric arc welding or epoxy resins. When warping occurs, the plane of contact between the head and the block is milled and lapped on a lapping plate. Warping of the plane is allowed up to 0.15 mm.
Valve seats are restored by milling with a countersink cutting edge angle of 15, 45 and 75°. The milling procedure is as follows: using a roughing cutter with an angle of 45°, remove the chamfer until traces of wear are removed, using a cutter with an angle of 15°, remove a layer of metal from the surface of the sockets until a clear upper edge of the chamfer is formed, located at an angle of 45°, using a finishing cutter with an angle of 45°, clean the chamfer until obtaining a working chamfer with a width of 2 ... 3 mm. After installing the valve, the chamfer on its plate should completely overlap the chamfers of the seat without gaps.
In valves, chamfers, plates and rods wear out along the diameter and end. These defects are eliminated by grinding. After grinding, to ensure complete fit of the valve plate to the seat, grinding is carried out using GOI paste or a mixture of sanding powder with a grain size of 240 ... 280 with diesel oil.
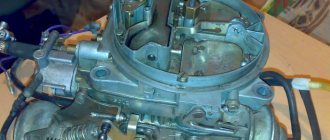
Lubrication system repair. The main malfunctions of the lubrication system relate to wear and damage to parts of the oil pump and centrifuge. Before disassembling, the oil pump is checked on a KI-5278 or KI-1575 stand; If malfunctions are detected and parameters are lost, the pump must be disassembled and faulty parts replaced. After assembly, the pump is checked on the stand and the bypass valve is adjusted to a pressure of 0.6 ... 0.8 MPa.
Running in and testing of engines. The assembled engine is run in and tested on special stands. The purpose of running-in is to break in rubbing surfaces and identify defects that arise as a result of deviations from technical specifications. The main running-in of engine parts occurs in the first 2 ... 3 hours and is completely completed after 40 ... 60 hours. Therefore, running-in is carried out in two stages: first on stands according to the regime specified in the technical specifications for the engine of a given brand, and then under operating conditions with a reduced load . Automobile and tractor engines are subjected to cold and hot running-in (without load and under load) on universal stands KI-1363B and KI-1218A. (SMD-14, YAME-236, YAME-238, SMD-60, etc.).
Cold running of automobile carburetor engines is carried out for 20 minutes, and diesel engines - 80 ... 100 minutes, first with compression turned off and then with compression turned on according to the mode established by the technical specifications. During cold running-in, the oil pressure in the line is checked, while the water temperature in the cooling system is maintained at 80° C. During running-in, sharp noises and knocks, as well as leakage of oil, fuel and water, are not allowed. After the cold running-in is completed, the engine is inspected and the cylinder head nuts are tightened.
During the hot run-in, the fuel supply is turned on and the engine is started using the electric motor of the stand. It is run in for 10…15 minutes without load at a reduced shaft speed, and then for 10…15 minutes at an increased shaft speed. At the same time, the oil pressure is checked, the idle speed is adjusted, and the engine is listened to with a stethoscope in areas of possible knocking.
Under load, the engines are run in according to the regime established by the technical specifications. The maximum load should not exceed 85% of the rated load. During the running-in process, engine power and fuel consumption are measured.
60.Maintenance and repair of car suspensions.
Most often, a car requires suspension diagnostics. This is due to the fact that the chassis of the car takes on the main load while driving.
Maintenance of suspension. After the first 2000 km, and then every 10,000 kilometers, as well as after strong impacts on obstacles on the road (falling into holes, hitting random objects or stones, etc.), check the condition of the front suspension parts by inspecting the car from below installing it on a lift, overpass or inspection pit.
By inspection, they check whether there are any cracks or traces of contact with road obstacles or the body on the suspension parts, deformations of the arms, extensions of the stabilizer bar, its struts and body front elements in the bridges for fastening components and suspension parts. Deformation of suspension parts and, above all, braces, torque rods and front body parts disrupts the wheel alignment angles and can make it impossible to adjust them. If such deformations are detected, it is necessary to check the wheel alignment angles.
Suspension repair includes checking its technical condition, disassembling, replacing and repairing parts, assembling and adjusting the angles of the front wheels. Repair of suspension parts usually includes repair of the suspension strut or shock absorber, as well as re-pressing the silent blocks of the suspension arms. The technical condition of the front suspension is checked both when it appears and for preventive purposes (usually during the next vehicle maintenance), since the serviceability of the suspension is directly related to traffic safety.
Inspection of the suspension is carried out from below the vehicle, for which it is most convenient to hang it on a lift or install it on a ditch with a lift. If there are deformations and cracks on the levers and other suspension elements, damage to the protective covers of the ball joints (silent blocks), as well as leakage of fluid from the shock absorber struts and shock absorbers. If there are deformations and cracks on the levers and other suspension elements, damage to the protective covers of the ball joints, as well as increased wear of the elastic elements, they must be replaced. Wear of rubber-metal hinges is determined by their subsidence and bulging of rubber from them. During the inspection, the fastenings of the suspension elements are simultaneously checked by tightening them.
The ball joints of the front suspension arms are checked by checking the play in the joints when the suspended wheel is rocked in a vertical plane. On front-wheel drive vehicles, the play is controlled by changing the distance between the lower lever and the protective cover of the brake eye when the wheel is suspended and removed from the hub.
Checking the settlement of the front suspension springs is carried out after installing the vehicle on a flat horizontal platform with its full load. In this case, the distance from the surface of the platform to the front beam or cross member of the body is measured.
Checking shock absorbers and shock absorber struts on a car on a special diagnostic stand; if it is not available, you can check the shock absorber by rocking the body with your hands by pressing on top of the edge of the wing on the side of the shock absorber being tested. After stopping the application of manual forces, the position of the body should stabilize in 1-2 moves.
Auxiliary works
Auxiliary work includes pressure testing and alignment of the clutch. The first is a process that determines the tightness of the cylinder head and block. Using kerosene, the inside of the engine is filled, after closing all the holes. If no leaks are found, then the engine is completely sealed, but if there are cracks, then they need to be welded.
The second process involves setting the centrifugal clutch force in relation to the crankshaft. As a rule, it is carried out at a special stand, which is not available at all car services. The clutch is attached to the crankshaft and they are balanced together. This will help reduce wear and friction.
Assembly of the unit
The assembly of the unit is carried out using a stand that allows you to rotate the engine 360 degrees. So, let's look at the sequence of the operation:
- Installation of liners and “laying” of the crankshaft.
- Installation of connecting rods and piston group.
- Installing the yokes in the correct position, as well as their final tightening.
- Installation of gaskets and covers covering the motor.
- Installation of the oil pump and pump.
- Installation of the crankshaft pulley.
- Installing the cylinder head(s).
- Pallet installation.
- Assembly of small units.
- Installation of fuel equipment.
- Other assembly work.
This process is quite labor-intensive and difficult, so it is recommended to entrust it to professionals.
Disassembly and assembly of the power unit
To completely disassemble the engine you will have to remove it. You can do this immediately, or you can do it after the cylinder head has been removed. To remove it, you will need a hand winch and a strong support (for example, a beam) on which to hang it. Filming the motor also takes several hours.
In what order does the engine disassemble: main stages
Disassembling and reassembling an engine in general terms is almost always the same. There may be some differences in details depending on the brand and model. The following is a suggested procedure for the removed power unit.
- The gearbox is disconnected. There is nothing particularly complicated about this, since it is attached with bolts. It is most convenient to remove it after dismantling the engine, but you can separate the assembly earlier. In this case, difficulties may arise when installing the motor in its place.
- The clutch disengages. To do this, unscrew the bolts securing the clutch housing, after which the entire assembly is removed.
- Now you need to remove the crankshaft drive pulley. To do this, you will need a strong flathead screwdriver and a suitable size wrench (it is better to also have a gas wrench). First you need to fix the crankshaft. To do this, use a screwdriver to lock the flywheel. To do this, you need to screw a bolt into the clutch mounting hole, insert a screwdriver between the flywheel teeth and press it against the bolt.
- Use a gas wrench (or an open-end wrench of the corresponding number) to unscrew the nut (on some cars it is a ratchet). After this, use something suitable (it can be a wheel wrench) to function as a lever, pry up the pulley and remove it from its place. Now the bolts securing the flywheel are unscrewed, after which this part is removed. There is a plate underneath that is held in place by bolts. It also needs to be removed.
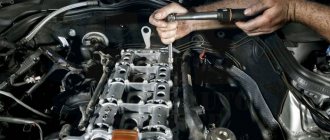
- The timing belt or chain is removed from the camshaft if the cylinder head has not been removed first. In some cars, to get to the timing belt or chain, you must first remove the valve cover (also known as the cylinder head cover). It is secured with nuts on studs or bolts. There is a gasket under the cover that can be saved and, if suitable, reused.
Run-in and testing
The final stage of engine overhaul is its running-in and testing. The best way to break in an engine is a combined one, which we wrote about in one of the articles. For the most efficient operation of the power unit, it is necessary to run it in, both hot and cold.
In many foreign countries, in addition to the running-in stand, there is a test stand, which, using a large number of sensors and indicators, tests the engine and determines the service life after repair and restoration work. Unfortunately, there are no such stands in the CIS, since it is believed that their use is not economically feasible.