The car's optics retain an attractive appearance for a limited time. After prolonged use, the plastic darkens, stops shining, and the light becomes dim. The situation is typical for all car brands. To ensure that the light remains bright, the beam is directed, dispersed correctly, and the well-groomed appearance is preserved for a long time, headlight polishing is used. Simple cleaning of a car lens is ineffective, since the material has persistent stains and damage that are difficult to remove. We will look at how to polish headlights with your own hands simply and reliably.
How to make car headlights more transparent
If the plastic has darkened in places, become cloudy and dull, it is first recommended to conduct a full inspection of the headlight. Determining the degree of contamination and the level of damage will help determine the nature and scope of restoration work.
Do-it-yourself headlight polishing
If the plastic is not damaged, but the car is very dirty, washing with a special substance for washing glass will be enough. For minor damage, use toothpaste, preferably with a whitening effect, or “GOI No. 1”. They are applied after preliminary washing. The paste is a slightly abrasive substance with the ability to level the surface.
If more serious problems with optics are detected - relatively deep scratches, chips, many small cracks, etc. - the driver has two ways to solve the problem:
- take the car to a service center, where the procedure will be performed by specialists. Advantage - high quality of work, sometimes a guarantee;
- Polish the plastic coating yourself. There are many effective ways to polish headlights. Each of them will help you save money.
Before carrying out polishing yourself, you should prepare for the work:
- identify the presence and complexity of defects;
- choose the right polish for optics;
- determine the order of work.
Why is polishing needed?
Clean, smooth and transparent headlights are one of the key elements in creating a presentable and stylish appearance of a car. Clear headlights improve the overall appearance and maintain sufficient visibility on the road. Over time, tarnishing, scratches and chips appear. It is impossible to avoid such a fate.
The smoothness and transparency of the headlights is one of the key elements in creating a presentable and stylish appearance of the car.
Polishing your car headlights will be necessary when the lighting level deteriorates. There is no need to install more powerful bulbs, since the reason is to reduce the transmission of light through the plastic coating. Weak light with improper dispersion leads to the risk of an emergency at night. Given the importance of headlights, there is a need to monitor the condition of the optics.
You can polish your headlights yourself; the procedure will help get rid of small chips and cracks. Dirt is cleaned out of the recesses, then they are sealed with a connecting substance from a specialized polish or polymer.
Why is polishing headlights at home beneficial?
First of all, doing this process yourself will save you a significant amount. The second argument is quality. The car owner himself will polish the headlights with maximum diligence, will follow the technology so as not to damage the surface and achieve an ideal result.
Such a guarantee is not provided by visiting a service station. Here the procedure can be carried out partially, which will lead to rapid dimming of the headlights.
There is an opinion that glass headlights must be polished by professionals, while plastic ones can be restored independently.
This is an erroneous opinion; with strict adherence to polishing technology, the material from which the optical device is made does not matter as much as the cost of the car. Anyone can carry out this procedure and get results no worse than at a service station. The exception is when there is not enough time or money.
To clearly show the economic benefits of independently restoring the surface of optical devices, you need to find out how much it costs to polish headlights .
The average price, depending on the region, varies from 20 to 40 dollars. It is worth remembering that price in most cases determines quality.
A headlight polishing kit costs only $20 and is enough for 3 procedures on average. Taking into account that it is necessary to restore the shine and transparency of the optical devices of a car during intensive use at least once a year, at least a triple savings is obtained.
Causes of wear
There are many reasons why headlights wear out:
- ingress of sand and dust;
- damage from small stones from the road;
- adverse weather conditions: rain, snow, fog;
- fading of plastic under the influence of ultraviolet radiation;
- scratches from bushes and branches;
- destruction from aggressive chemicals;
- other mechanical damage.
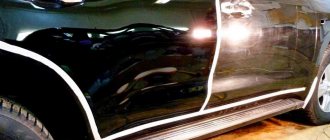
Polishing car headlights, before and after
Minor but noticeable scratches appear due to sand and small stones from the road. At high speed, various hard particles and stones fly into the glass, damaging the optics. Dirt and sand get into the formed recesses, causing the material to become dull, yellowing and turbidity appear.
Additionally, chips appear in which blockages accumulate, worsening the quality of lighting.
Tools and materials
For self-polishing you will need to prepare:
- 10 liters or more of distilled water;
- car polish depending on the method of use and the nature of the damage;
- microfiber cloths for cleaning, as they do not leave threads or other contaminants;
- sandpaper with grit up to 2500;
- masking tape;
- headlight polishing varnish, used during glass finishing.
Before polishing your headlights, purchase or rent the following tools:
- polishing machine. It will speed up and improve the result, but if you don’t have it, you can use an electric drill with a special attachment on which the circles are fixed;
Polishing machine
- polishing wheels, several dense and soft;
- spray bottle for spraying water.
Soft circles are often made in black, while hard circles are painted in white and orange.
How to polish headlights correctly
After cleaning the plastic glass of the headlights and determining the degree of haze and scratches, we select sandpaper, generally, first use sandpaper with large grains P600.
There are 2 grinding options:
- For wet ones. We polish with sandpaper, after wetting it in clean water.
- Dry.
Important! To avoid even more scratches, you need to check the sandpaper more often to make sure there is no sand on it.
You can also use an anti-rain product to polish headlights. But not all types of anti-rain can be used for plastic; there are some that corrode plastic products and are intended exclusively for treating glass surfaces. It is also recommended to keep the additional low and high beam headlights clean.
The surface of the plastic glass should be matte and free of stains.
After initial processing, the following sandpaper P1200-P1500 is generally used. This sandpaper smooths out unevenness caused by coarse sandpaper.
Until the micro-scratches from the coarse sandpaper disappear, you need to sand it.
P200 sandpaper is used for pre-finishing work. Next, apply paper number 2500, this is finishing. The surface after treatment with 2500 becomes close to glossy.
Remains of abrasive from sanding paper should be removed with microfiber or simply washed off with water.
After sanding, rinse with water pressure without rubbing with a rag, since a rag can cause new scratches.
After this, the process of polishing car headlights begins. The polishing substance must be applied to the surface of the glass and rubbed over the area of the headlight, and not in a circle. You need to polish it with a machine until the headlight glass becomes like new.
Do not apply too much polishing paste. The circle should be slightly moistened, which will create favorable conditions for polishing.
You need to start with a coarse-grained polish and a wheel with a high level of hardness. The speed during such work should not exceed 1800 rpm.
Tips for polishing headlights:
- It is advisable to remove the headlights.
- It is forbidden to keep the car in one place, otherwise the glass will overheat and it may crack or darken from the inside (this is called overheating). When working, do not press the machine too hard and move evenly in different directions.
After polishing with large grains, polish with a medium-grain paste and a wheel with a lower degree of hardness. In this case, the speed must be maintained from 2000 to 2500 rpm.
After cleaning this paste, polish with finishing paste. In this case we use a soft circle. After finishing work, the surface of the headlight shines like new.
For fans of external tuning, learn how to use immersion printing technology with your own hands at home. What equipment is needed for this and what is the sequence of actions.
If desired, after carrying out this work, varnish is applied to the headlights, which serves as protection. This varnish can be applied with a lint-free cloth for no more than 10 minutes. In this case, the napkin should be applied from top to bottom, then, slightly grabbing the place where the varnish went through, also from top to bottom.
Important! When applying a special protective varnish to the headlights, there should be no draft in the garage, the air should be clean, otherwise all the work on polishing the headlights will become a futile effort.
Do you know what the most commonly installed lamps are on modern cars? H8 and H11 lamps are widely used.
Polishing plastic headlights
A number of methods have been developed for polishing glass and plastic surfaces. The store's assortment includes a product for chemically cleaning headlights, as well as a plastic material used for polishing. A chemical cleaner is easier to use and quite effective. In relation to other materials, high recovery efficiency can be noted.
Before polishing plastic headlights, you should assess the level of damage. If there are severe deformations, you will have to use coarse sandpaper. Plastic or glass polish is made using various formulas; the best composition can be selected solely by individual consideration of the surface.
Method No. 1: Abrasive paste
Headlight abrasives containing abrasives are sold in every automotive store. Before application, be sure to read the instructions. The procedure itself is very simple and is no different from other methods of grinding head optics:
- The substance is applied to a previously cleaned coating.
- The paste is rubbed with a soft brush.
- The remaining product is removed with gentle movements.
Polishing plastic headlights using abrasive paste
When choosing the best pasta, it is recommended to pay attention to 4 options:
- Menzerna. The German brand helps remove small defects and cloudiness. Recommended for use by beginners who have no experience in polishing parts. There is no silicone in the composition. A rotary or eccentric tool is used for application. The glass is covered with a small layer of paste and waited for it to dry. When the product has hardened, it is removed with a napkin. This completes the cleaning process. The cost of 1 liter is 2100 rubles.
- ZM. It is characterized by fast action. Manufactured in the USA and meets all technical standards. Numerous user reviews indicate the successful elimination of oxidation marks, scratches and marks from the sanding machine. Suitable for processing glass and plastic. The manufacturer recommends using special polishing pads with the Trizact wheel. The price for 1 liter of liquid is 1,700 rubles.
- APP. The paste is made in Poland and does not contain silicone. Intended for treating coatings with serious damage or when it is necessary to create a matte finish. The product is evenly distributed over the surface and thoroughly polished. Cost – 1500 rubles.
- Farecla. A substance with a high-quality composition made in the UK. Promotes the appearance of an attractive shine on plastic and paintwork. The advantage is the elimination of heat when polishing with a grinder, even in the case of lengthy procedures. The paste is suitable for application by hand and with a grinding machine. If the composition gets on another surface, it can be easily removed with a napkin.
Full polishing will take about 1 hour. To maintain a presentable appearance, optics need to be polished at least once every 2 years. After a high-quality procedure, the throughput of plastic headlights improves by 80%.
Polishing paste FARECLA G4
Method #2: Sandpaper
Automotive stores offer customers specialized kits that simplify the procedure. The main tool of the method is sandpaper; it should be used carefully so as not to damage the surface.
The essence of the method:
- Adjacent areas are finished using masking tape. You cannot use regular tape, as it leaves marks on the paintwork and damages the paint.
- Polish is applied to the target area, and a sponge is used to distribute the product.
- When using sandpaper, initially select the option with P600 grit. It is better to wet the paper before each start of work. It is important to polish using smooth movements with even pressure distribution. The product should not come into contact with the paint.
- Next, change the sandpaper to a version with a P1200 marker; during the work it is recommended to use P2000, then P2500. The smallest grit of sandpaper is used for the final layer.
- Remove any remaining sandpaper from the lens surface. Most compounds can be removed with soapy water.
- If the result remains unsatisfactory, it is recommended to repeat the procedure.
Remember that sanding with strong force can cause small scratches. It is important to regulate the amount of pressure and avoid applying too much force. Before work, it is recommended to wet the sandpaper in a solution of a soapy substance.
Polishing headlights with sandpaper
Method number 3: Toothpaste
An unusual and effective way to remove scratches is to use toothpaste. Additionally you will need:
- distilled water;
- masking tape;
- brush;
- degreaser;
- towels
Felt or felt will help improve the result. An alternative is to use a drill with a sanding attachment.
Polishing goes like this:
- All seals and interfering elements are removed from the headlight, which should be protected from abrasive substances.
- Toothpaste is applied to the surface of the headlight and rubbed with a felt rag or brush. The treatment is performed in a circular motion until the damage is completely eliminated.
- When the surface dries, the paste is re-added to it.
- The remaining product is washed off with water.
Using an electric drill you can speed up the process and achieve a better result. The work is performed at maximum speed when putting on a special attachment.
Polishing headlights with toothpaste
Method number 4: Special sets
If you don’t want to select the material yourself: paste, different paper grains, degreaser, etc., you can buy a ready-made polishing kit. Stores have pre-formed kits for use without using a polishing machine. The kit is perfect for car owners without proper polishing experience.
The main advantage of store-bought kits is the ability to restore the glass of head optics without the use of auxiliary tools. The composition always contains a potent chemical that can remove yellowing, plaque and protect against ultraviolet exposure.
The best kits on the market:
- Kent. One of the most effective recovery kits, manufactured in the UK. Helps quickly remove scratches, restore the original appearance and provide subsequent protection. The set includes 3 products for quick and high-quality polishing. The kit is designed to restore 20 headlights. Price position – 12,000 rubles, 600 rubles per lens.
- Turtle Wax. This is a professional kit from England that can be used to repair damage to any headlight material. The special composition improves the efficiency of light transmission recovery. The kit comes with polish, lubricant, abrasive and gloves. Price – 900 rubles.
- ZM. An extremely simple set, its advantage is its low cost and the highest quality. Used for plastic headlights. The set includes polishing and grinding discs with different grits, polishing paste and a mandrel. Cost – 3000 rubles.
ZM for headlight polishing
Method number 5: Using a grinder
To ensure that headlight polishing goes smoothly, you will need:
- fine-grained sandpaper;
- tape with paper to create a protective layer around the headlights;
- sander;
- set with fine and coarse abrasive polishes.
When the materials are ready, it’s time to start preparing:
- if you have jewelry on your hands, remove them so as not to interfere with your work;
- put the tools in working condition and place them close to the car.
Polishing headlights using a grinder:
- Restoration begins with surface preparation. Degreasing is a procedure for treating a surface with a special solvent or shampoo.
- Next, adjacent body elements are glued to protect against damage to the paintwork.
- Sanding the plastic with coarse-grain sandpaper, then with finer grains. One of the processing options: first, coarse-grain paper 600, then 800, 1000, and so on up to 4000. The headlight is processed with each material for about 3-4 minutes. To prevent heating due to friction and accumulation of chips, the sandpaper is wetted in water.
- Polishing using a grinding machine. Polish is applied to the headlight and a foam rubber circle is put on. Processing is carried out until the original appearance is restored.
By cleaning with abrasive paper, scratches of varying depths and chips are eliminated. Additionally, sandpaper creates a matte effect.
Polishing headlights with a grinder
Step-by-step instructions for polishing headlights yourself
In order to prepare the necessary material and equipment in advance, we suggest that you immediately read the step-by-step instructions.
- Preparation of the workplace and all required tools and materials.
- Preparation of lenses, including their dismantling or covering the areas adjacent to the diffusers.
- Direct grinding work.
- Final polishing.
- Varnish coating.
Description of stages
Next, we will analyze in detail each of the stages, how the polishing process is carried out using a grinder and drill.
Preparing the headlights. Before polishing the headlights, wash with car shampoo or vinegar solution, then wipe dry with a soft, water-absorbing natural cloth or a regular paper napkin.
Caution: areas bordering the optics are protected with masking tape or film; it is even better to remove the optics, this makes cleaning and polishing easier.
Grinding process. You can clean your headlights yourself using grinding wheels of different sizes or use additional polishing pastes. First, deep damage and yellowness are removed by applying an abrasive composition with the largest grain to the light diffuser.
Then install a nozzle with a medium grit and, finally, with the smallest grit, grind the entire surface to a perfectly transparent state. To clean small defects, an abrasive wheel with a coefficient of P320 is installed on a grinding machine; deep scratches and chips are treated with a wheel with a grain of P180.
Automotive stores sell ready-made kits for grinding lenses . The kit includes several circles of different gradations: P500, P800, P3000. For convenience, they are offered in three colors. Before each stage of processing, the surface and the circles themselves must be moistened with water from a spray bottle. If during processing the circle and surface become dry, they must be sprayed with water again.
For uniform processing, select the average speed of the drill; an equally smooth structure will be obtained if you slowly move the circle along the glass, do not press and linger in one area for too long.
Hint: if the circle is clogged, you need to remove dust from it or replace it with a new one.
As a result, you should have a matte surface with a white coating. Transparent and shiny areas must be processed further.
Application of polish and varnish. Polishing pastes are applied either manually or using a foam pad. A pea-sized drop of the product is applied to the foam rubber, the lens is polished until the cloudiness disappears and transparency appears. If after polishing scratches are still visible, all the work must be done again until all defects disappear.
The final stage is the application of protective varnish . How to apply the composition correctly is indicated in the varnish manufacturer's instructions.
It is necessary to allow the protective layer to dry thoroughly, then you can remove the masking tapes. It is advisable not to use transport for a day.
Selecting a Polishing Tool
How to polish using sandpaper . Sanding with sandpaper is carried out according to the same scheme as when polishing with a drill or grinding machine. For rough processing, you will need material with a maximum fraction of 600; minor defects are eliminated with sandpaper with a coefficient of 1000. Final polishing is done with sandpaper 2000. Before work, it is recommended to soak the sandpaper in water for 8-10 minutes. After each treatment of light diffusers, it is necessary to remove dust and rinse the surface with a spray bottle.
Finally, the surface is treated with polish and rubbed with a soft natural cloth.
Sanding involves removing the surface layer. The most convenient way to polish lenses at home is with a grinding machine or drill. In addition to these tools, you need to prepare :
- masking tape;
- car shampoo;
- soft moisture-wicking fabric;
- grinding wheels (for a grinding machine) or attachments (for a drill) of different abrasiveness;
- abrasives;
- polishing compound;
- protective varnish.
To polish your headlights with sandpaper yourself, you will need the following set :
- sandpapers of different grain sizes;
- sandpaper holder;
- car shampoo;
- napkin;
- masking tape;
- polishing compound;
- varnish
Polishing headlights yourself with a drill is the best option; it gives both good results and saves time. In addition, every driver in the household always has this tool, which cannot be said about a grinding machine.
The above polishing methods are applicable for plastic headlights . Plastic is a softer material and is easy to clean. It is not economically profitable to polish glass headlights yourself; you need special, expensive equipment. If the glass is badly damaged, it is cheaper to buy new optics.
When working on plastic with a grinding machine or drill, you must take into account that at high speeds, overheating of the plastic and its subsequent clouding can occur, up to deformation of the shape.
Selection of polishing paste
Specialty stores offer a wide range of car care products , including headlight polishing compounds. Like all abrasives, polishing pastes are available in different grits. To polish car headlights with paste, you need to purchase three such compounds: coarse-grained, medium-grained and fine-grained pastes.
First, a composition with a coarse abrasive is applied to the light diffuser , and the topmost damaged layer is removed with a grinding machine. Next comes the processing of the glass with a medium-grain paste. A fine abrasive removes all roughness left after processing headlights with previous compounds. To give the optics transparency and shine, they are manually rubbed with polish.
For initial treatment of the surface of light diffusers, removing scratches and chips, a composition with a grain size below 1000 is suitable. For fine polishing, choose abrasive compositions with a grain coefficient above P1200 or GOI paste number 1 and 2.
Remains of abrasive compounds can be removed with ordinary paper napkins or paper towels used in the kitchen.
To restore the transparency of glass light diffusers, ordinary pastes are not suitable , since glass is harder in structure; special diamond mixtures are used for grinding it.
Polishing with toothpaste. The technology for polishing lenses with toothpaste is the same as when using polishing pastes. The brand of the product can be any, the main thing is that it contains abrasive particles. The process is carried out either using a brush or using grinding wheels.
Performing internal polishing
The best cleaning effect occurs when polishing not only the outside of the headlight, but also the inner surface, otherwise defects may appear: leaking dirt, a visible difference between the treated part and the cloudy area of the headlight.
Algorithm of actions for grinding:
- Dismantle the headlight. Initially, a thorough inspection of the coating is carried out to confirm or exclude the presence of through holes and chips. If the damage is serious and polishing will not help restore it, it is better to purchase new plastic.
- Cleaning. After removing the headlight, all dirt is removed from it.
- Degreasing the surface. You can use a household detergent, but it is better to choose a specialized degreaser.
- Grinding. The cap is immediately rinsed, then a grinding machine is connected, and then the plastic is processed with it. The nozzles should be changed every 3-5 minutes. The duration of the procedure depends on the degree of damage; it is better to focus on the result - the surface should become perfectly smooth.
- Polishing. Polish is applied to the treated and wetted coating. A rag is used for rubbing.
- Installing the headlight into the seat.
Polishing glass headlights
Today, glass headlights are extremely rare, because plastic is much more reliable, durable and cheaper. Almost all manufacturers give preference to the lightness and cheapness of plastic. Glass optics are an option for new cars or indicate the presence of an old car.
Polishing glass car headlights
The procedure for polishing plastic and glass is not much different, but there are several features:
- Before polishing, the glass should be restored using special polymer substances. Polymers are colorless, they are completely invisible and maintain the correct dispersion of the light beam. If you ignore this step, there is a high risk of destruction of the grinder wheel, personal injury and increasing the size of the crack. A UV lamp is used to dry the polymer;
- the glass surface should be regularly watered to reduce the temperature and eliminate glass particles;
- a special composition or toothpaste can be used as a polish. Car enthusiasts often prefer toothpaste due to the low cost of the composition. It is applied to the glass and rubbed with felt cloth. After treatment is completed, the remaining product is washed off. Re-processing is performed upon request.
Polishing headlights with toothpaste
The most popular means of polishing car headlights, if financial resources are quite limited, is regular toothpaste. There is no need to choose any special products - you can simply use the one that is in the driver’s bathroom.
Despite the fact that the paste is intended for cleaning enamel, it is well suited for both plastic and glass headlights. Its restorative function has been known for many years, so there is no point in arguing with the effects it brings. However, there are certain features of the use of this substance.
In case of serious damage in the form of deep scratches, toothpaste will not help. The effect of this oral hygiene product on glass is minimal, but it is also present. Since the paste is quite cheap, it can be applied before other polishing methods.
The most effective toothpaste is in the fight against clouding and yellowing of the plastic surfaces of car headlights. The way it works is quite simple:
- Buy a paste and squeeze its contents onto the surface of the headlight, wiping it first.
- Rub the substance onto plastic or glass.
- Rub with a napkin.
- Wash off the paste after the appearance improves.
There is no simpler or cheaper way to deal with minimal damage to headlights.
For an example of polishing a headlight with toothpaste, watch this video: