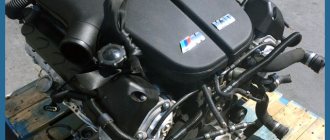
VAZ 2109 engine assembly – Auto repair
Gasoline engine on the "eight"
The appearance of the VAZ 21083 gasoline engine is directly related to the low quality of domestic rubber products. The fact is that at the very beginning of production, the Lada Samara family of cars was equipped with a VAZ 2108 engine, the first domestic power unit designed specifically for transverse placement under the hood of a front-wheel drive car.
However, the VAZ 2108 engine had an unpleasant feature, also characteristic of foreign engines with a timing belt drive. When the timing belt breaks, the engine pistons meet the cylinder head valves, and the latter inevitably bend, which leads to expensive repairs of the VAZ 2108 engine. On foreign cars, such a breakdown occurred extremely rarely due to the high reliability of timing belts.
However, in the first Samaras, the breakage of a low-quality belt was such a frequent occurrence that it was necessary to urgently modify the engine with the help of specialists from German automakers. As a result, a new engine appeared, which became the progenitor of a whole family of power units.
Assembling a VAZ 21083 engine is not a difficult task; it can be completed without the help of specialists.
Return
Installing a crankshaft on a VAZ
Crankshaft repair
Wear of piston group parts occurs after approximately 150 thousand kilometers due to the action of gases and friction of metal parts. They need to be changed if the following symptoms are present:
- compression drop;
- increased fuel consumption;
- the appearance of bluish smoke in the exhaust gases;
- increased oil consumption.
The cause of deterioration in engine performance may be coking of the piston and stuck rings. This happens when using low-quality fuels and lubricants that do not meet the manufacturers’ recommendations. During long-term operation, carbon deposits form, which covers the combustion chamber and its parts. Piston rings covered with carbon deposits “stick” and cannot perform their functions properly. In this case, they should be changed or decarbonized.
Coked piston with traces of carbon deposits
What will you need?
To repair a VAZ 2109 engine with your own hands, you need the following tools:
- a set of keys;
- set of heads;
- funnels;
- extension cords;
- torque wrench;
- set of probes;
Set of gap gauges
- mandrel for pressing products on the piston;
- hammer;
- needle file;
- new repair kit.
New consumables for piston VAZ 2109
When purchasing piston rings for the VAZ 2109, you should take into account the material of manufacture and their width. It is better to purchase original products to avoid fakes.
Stages
- First of all, you need to dismantle the cylinder head with your own hands.
- Then you need to remove the engine oil pan.
- After rotating the crankshaft, install it so that the connecting rod mounting nuts extend as far as possible.
- After unscrewing the fastening nuts, remove the connecting rod caps.
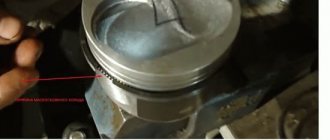
- Using a hammer, tapping lightly, remove the piston with connecting rod from the cylinder.
- Having opened the gap with your fingers, you need to remove all three products from the groove in turn and dismantle them from the piston. Together with the oil scraper, its expander is removed.
Use your fingers to widen the gap
Using old products, you should clean the grooves from carbon deposits. Removed products must be checked for suitability. To do this, they must be inserted into the cylinder and the gap measured using a feeler gauge. It should be in the range of 0.25 - 0.45 mm. A gap of up to 1 mm is allowed. If the value is greater, then the part must be urgently replaced. If the gap is larger, then the product needs to be sharpened using a needle file. Before installing new products on VAZ 2109 pistons, they should be run in the grooves. If biting is detected, the part must be ground in using fine-grained sandpaper.
The table shows the maximum values of the gaps between the part being replaced and the groove walls.
| Gap value, mm |
| 0,04 — 0,075 |
| 0,03 — 0,065 |
| 0,02 — 0,055 |
- When installing, all parts should be thoroughly lubricated with oil.
- Installation of products begins with the oil scraper. First, the expander is installed - a special spring with a lock. Then the product itself is put on her. The expander lock and the oil scraper ring gap must be opposite each other.
- The lower compression ring has a groove and a tooth. When installed, they should be at the bottom of the part. On the upper surface there is usually an inscription “vas” or “tor”.
- The upper compression ring is installed in the same way - with the lettering facing up.
- The sequence of putting on the parts is as follows:
first, the lock is released so that the part can easily fit onto the piston; then the lock itself starts; the remaining part is installed.
What is included in the overhaul of the VAZ 2109 engine
During operation, the power plant of your car will wear out more and more.
At a certain point in time, there will be a need for major repairs (CR). If all the necessary maintenance and routine repair work was carried out regularly, then the engine will easily operate for up to 100,000 - 150,000 km without a major overhaul. Otherwise, the mileage to the Kyrgyz Republic will be significantly reduced. Content:
The technology for overhauling a power plant includes complete disassembly of the engine, diagnostics of its individual components, repair or replacement of parts and assemblies. Repair work often involves metalworking of certain components, for example, grinding the crankshaft, milling the cylinder head, or honing the engine block. The service will charge a truly draconian fee for this. And if your car is a foreign car, then it is better to contact a service station. Owners of domestic cars can do everything themselves, and in this article we will tell you how to overhaul a VAZ 2109 engine yourself.
Overhaul of VAZ 2109, 2108 engine
To begin with, it is very important to determine whether the engine of your car needs CR. This applies to absolutely any power plant – both foreign and domestic. Perhaps it is enough to change or repair just a few components, and the engine will start working normally again. Let's look at the factors that indicate the need for an engine overhaul.
The widely held belief that high mileage on a car is directly related to major repairs is not entirely true. Indeed, if maintenance was carried out regularly, filters, oil, coolant, etc. were replaced. - then a six-digit figure on the odometer may indicate that it’s time to “shake up” the engine, but not always. If diagnostics show that all systems are working normally, why do anything? Now let's consider another situation. The owner of the car is irresponsible in its maintenance. Maintenance is not carried out, the car is operated in a suboptimal mode (for example, it takes part in racing events, although it is not prepared for them). Obviously, in this case the engine will have to be overhauled very quickly.
Do-it-yourself engine repair VAZ 2109
RepairDo-it-yourself engine repair VAZ 2109
THIS IS INTERESTING: Misfire in cylinder 1 of VAZ 2114
vaz-sputnik.ru
Do-it-yourself VAZ 2109 engine repair
Author of the article June 02, 2014
If suddenly the fuel consumption of a VAZ 2109 sharply increases, knocking noises appear, power is lost, and black smoke is released from the exhaust pipe, most likely the engine life has been exhausted. But you shouldn’t despair, repairing a VAZ 2109 engine is not expensive, and besides, you can even do it yourself. To do this, you need to know how the engine works, and have some money to buy spare parts.
Even a beginner can repair the engine of a VAZ 2109 only if it is an old carburetor engine. If it is an injector, then much more skills are required in understanding the principle of its operation.
The VAZ 2109 has an in-line, four-piston, 8-valve engine.
The principle of its operation is very simple, it is only important to adhere to some rules when assembling
Before deciding to remove and repair the VAZ 2109 engine, you need to determine whether it needs it. First of all, you need to measure the compression; if it is low, the piston needs to be changed. However, low compression may be the result of burnt-out valves or a broken cylinder head gasket.
You also need to look at the oil pressure; if it is low, then the bearings are worn out or the oil pump has failed.
Engine repair
The heaviest load in the VAZ 2109 engine is placed on such components as piston and plain bearings. When the piston wears out, compression drops, and oil begins to pass into the combustion chamber, so its consumption increases. The piston rings wear out first, so sometimes the entire piston repair consists of replacing them. If the piston is very worn, shells or grooves are visible on the liners and pistons, the piston is replaced.
As for the plain bearings, with high mileage and loads, the crankshaft journals wear out. In this case, either the crankshaft is changed, or its necks are sharpened to a smaller size. After this, repair size liners are used.
The next important system of the VAZ 2109 engine is the gas distribution system. When repairing, the cylinder head must be disassembled and the valves removed. They must first be numbered to be installed back in the same order.
Some craftsmen do this using a drill and a small piece of hose.
Attachments VAZ 2109
When repairing a VAZ 2109 engine, the serviceability of all other additional devices is also diagnosed. This includes the carburetor, generator, starter, fuel and oil pump, and so on. Most often, the fuel pump and starter break down on the VAZ 2109.
Since the fuel pump is relatively inexpensive, during a complete overhaul it is best to replace it with a new one. As for the starter, it can be repaired quite successfully.
In it, only bushings and brushes can be replaced, which can be purchased at any auto store.
When repairing an engine on a VAZ 2109, it is mandatory to disassemble and adjust the carburetor. In principle, there is nothing to break here.
All you need to do is disassemble the carburetor, wash it, blow it out and put it back together in exactly the reverse order, without mixing up the jets. Before assembly, you need to set the correct gasoline level in the float chamber.
If the carburetor is already very old, it is best to purchase a repair kit to replace the gasket, accelerator pump diaphragm and jets.
“Likes” on social media networks:
Factors for the need for CR
To identify the need for a major overhaul of the Nine, you need to monitor the “symptoms” of your specific car. There are cases when, to eliminate a malfunction, it is enough to make do with scheduled repairs or spot replacement of components. But in some situations, such “refreshing” is not enough, and a faulty unit requires a radical restoration.
It is a mistake to believe that the most important criterion by which the overhaul period of the Lada 2109 is determined is mileage. This is not entirely true. If the driver carefully operates the engine, carries out timely maintenance, replaces the oil filter, oil, and coolant, then even when the indicator reaches 100–150 thousand km on the instrument panel, the car is not in danger of major repairs. And it happens the other way around. With a relatively low mileage, but irrational use of the engine, diagnostics show the need to completely repair the power unit.
The mileage goes on, and the need for major repairs is indicated by specific signs:
- oil consumption increases;
- compression (compression) in the cylinders decreases;
- fuel costs increase;
- There is a knocking sound in the VAZ 2109 engine.
An increase in oil consumption in the absence of leaks indicates wear of the piston rings and the inevitability of major repairs. If the engine is breathing, that is, oil leaks occur, you can get by with scheduled repairs. The frequency of replacement is also affected by the condition of the guide bushings and oil seals.
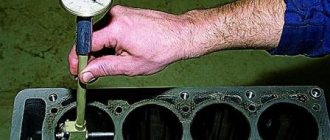
The second factor is the deterioration of the crank mechanism (crank mechanism). The quality of performance of the functions of the crankshaft is indicated by the compression value (maximum pressure in the combustion chamber at the greatest compression of the piston). This indicator can be measured using a pressure gauge, which is fixed in place of the pressure sensor. In this case, the engine must be running. We compare the obtained values with the passport compression indicators (for the VAZ 2109 it should be in the range of 9.5–13 atmospheres). If the measured value does not reach the norm, there is severe wear of the bearings or hydraulic pump.
You cannot ignore such signs as a decrease in the stability of the internal combustion engine, the appearance of characteristic sounds (tapping, tinkling) at idle speed, an increase in gasoline consumption and a decrease in traction. There are times when the engine smokes. If one of these symptoms appears, you can do without major repairs, but if the problems appear in a complex and the engine does not pull, then, most likely, diagnostics will show the need for extensive engine repairs.
If the unit is running to the point of emergency, the VAZ 2109 engine may need to be replaced.
Removal from gearbox
Follow the instructions clearly, be sure to watch the video tutorials. Plus, don't forget to check the condition of all engine mounts, since you'll probably be reassembling it again. All damaged elements will have to be replaced without fail.
- First, disconnect the battery to completely cut off the power to the car.
- Drain the oil from the engine crankcase. Here it is better for the engine to be warm. This will allow the oil to drain out faster.
- Drain the coolant from the cooling system. A cold motor is already required here. Be careful.
- To disconnect the exhaust systems, you will have to completely remove the engine crankcase protection and dismantle the exhaust pipe.
- Remove the air filter housing, and then disconnect all hoses from the engine, power wiring, sensors, damper rods, and brake system vacuum hoses.
- Unscrew the fastening nut of the ground wire, put on the stud and located on the clutch housing.
- Disconnect the cooling system pipes and turn off the thermostat.
- Disconnect the central high voltage from the ignition distributor. After this, you can release the clamp of the block with the supply wiring and remove the entire block.
- Disconnect the fuel supply hoses from the fuel pump. To do this, just loosen the fastening clamp.
- Unscrew the adjusting nuts to remove the drive cable from the clutch lever.
- Disconnect the power supply wires from the starter - one wire from the battery going to the solenoid relay and the wiring block.
- Switch off the generator in the same way.
- Deprive power by disconnecting the corresponding wires from the coolant temperature sensor and oil pressure sensor.
- Disconnect a pair of pipes from the radiator for the car interior. Loosen the clamps, which will allow you to remove the elements.
- We go directly under the car. Here it is better to have a pit or overpass available, otherwise it is inconvenient and unsafe to remove the engine while lying down.
- Unscrew the fastening nuts of the drive rod from the tip of the gearbox shift joint. The speedometer drive rod and the reverse sensor are also disconnected here. You need to disconnect the power wires.
- Disconnect both guy wires, right and left. Before this, you need to loosen the clamp of the tensioner fastening nut to the suspension arm on both sides. Next, unscrew the three bolts of the bracket to the car body. It is not necessary to remove them completely, but just move them to the side. This way they will not interfere with further processes.
- The next step is to disconnect the tie rods. To achieve the desired result, remove the cotter pin and unscrew the nut. Next, armed with a special puller, press the pin out of the swing arm.
- We perform the same actions with the ball joint, which will need to be similarly disconnected from the lever.
- Using a pry bar, pull out the upper tail of the front wheel drive and move it slightly to the side. Don't forget to insert a technological plug in place of this tail. A plug from an old grenade will suit you just fine, if you have one available.
- Now comes the stage of directly dismantling the power unit itself.
- Securely secure the motor by tying it by the eyelets using a strong rope or metal wire. Rym translated from Dutch “ring” means ring. That is, instead of a head, the eye bolt and eye nut end in a ring. And the eye bolt and eye nut are intended for gripping and moving machines, parts, as well as during installation, disassembly, loading, etc.
- The fastening rope is properly attached to the support or winch. It is best to remove the motor from the top, but a lifting mechanism will come in handy here.
- You can also remove the engine through the bottom. To do this, the engine is lowered to the floor, after which the front of the car is raised with jacks. Here, act at your own discretion and do not forget that the motor weighs quite a lot. We strongly do not recommend trying to get it out manually.
- Once you have secured the engine with ropes and a winch, unscrew the motor mounting nuts holding it to the supports.
- That's it, nothing now prevents you from removing the engine from its seat.
- Act as carefully as possible so that the engine elements are not damaged during removal, it does not touch or damage the body, and also does not fall off the mounts at the most inopportune moment.
Accuracy is the main requirement when independently dismantling the power unit from a VAZ 2109 or any other car. Be sure to enlist the support of a partner, since it is quite difficult to complete all stages with two hands.
Take your time, don't try to get the job done in a few hours. It may take several days to remove the motor.
The main thing here is not speed, but the quality and care of each manipulation.
How to change the belt on a VAZ 2109?
To replace the camshaft belt on a VAZ 2109, an inspection hole and special tools are not required. The owner is able to complete the work independently within 2-3 hours. To carry out repairs, you need to purchase spare parts - a belt and a tension roller.
Timing diagram on a VAZ 2109 engine
The diagram shows the nodes:
- 1 - crankshaft gear;
- 2 — pump gear;
- 3 - tensioner;
- 4 — bracket with position mark;
- 5 - camshaft gear;
- 6 — belt;
- 7 - the letters A, B, C and D indicate marks on the gears and housing.
Tools and materials
Before changing parts, you will need to prepare:
- a set of wrenches or sockets (with sizes 8, 10, 17 and 19 mm);
- a screwdriver with a thick flat blade;
- a key for turning the tension roller (factory or homemade);
- spark plug key;
- marker for marking parts;
- rags for wiping the lid;
- camshaft drive belt;
- tension roller.
If a special wrench is not available, the roller can be installed using two suitable pins (for example, nails or bolts) and pliers. The pins are inserted into the guide holes and turned with pliers.
Belt selection
When purchasing a belt, you must pay attention to the manufacturer. According to reviews from service stations and owners, products from Gates and Contitech factories have the optimal price-quality ratio. It is recommended to install Gates tension rollers with a single row ball bearing and a working part consisting of two segments.
Gates video appearance
Instructions for replacing the belt on a car with a carburetor engine
To ensure smooth removal of the belt on a VAZ 2109 engine with a carburetor, you must:
- Place the machine in a convenient place (garage or open area). Shift into gear and apply the parking brake.
- Turn the steering wheel to the right until it stops, freeing access to the right mudguard.
- Remove the engine splash guard on the right side. The parts are fastened with 8 mm wrench bolts. A number of owners dismantle only the fastenings along the lower part of the arch and bend the shield to the side, providing access to the crankshaft pulley.
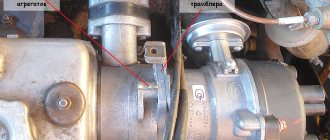
- Loosen the nut of the lower mounting of the generator to the engine (with a 19 mm wrench).
- Release the top mounting point of the generator (by 17 mm). Move the assembly to the side, reducing the tension on the rotor drive belt.
- Remove the belt from the pulleys. Some owners do not use this method of removing the part, dismantling it when removing the pulley from the crankshaft.
- Unscrew the three bolts securing the plastic protective casing to the engine. The operation is performed with a 10 mm wrench. The fastening design has spacer bushings placed under the bolts.
- Remove the casing by pulling it up. Wipe the inner surface from dirt with a rag.
- Remove the rubber cover from the inspection hatch of the gearbox housing. The plug is located above the engine flywheel.
- Insert a screwdriver into the resulting hole to secure the flywheel and crankshaft of the engine.
- Unscrew the crankshaft pulley mounting bolt (19 mm). Due to the large tightening torque, it is necessary to use an extension that fits onto the wrench or wrench. When unscrewing the nut, cases of the screwdriver falling out have been noted, so at this stage it is recommended to seek the help of a second person.
- Remove the pulley from the shaft. Check the condition of the sealing gland. If the slightest oil leakage is detected, the part must be replaced. If you leave the old oil seal, there is a risk of oil getting onto the surface of the belt, which leads to its destruction.
- Screw the bolt into place.
How to replace piston rings yourself
Of course, replacing rings is a rather labor-intensive procedure. It requires accuracy and certain skills, but by and large there is nothing complicated about it (unless you remove the engine). To do this you need:
- remove the cylinder head, following all the recommendations of the car manufacturer;
- drain the oil, remove the flywheel protection and engine sump;
- remove the oil intake;
- Having turned the crankshaft, set the desired piston to bottom dead center;
- unscrew the connecting rod cover and remove it;
- pull the piston along with the connecting rod out of the cylinder, pushing it upward with a wooden strip;
- clean the piston from carbon deposits. Based on its marking, determine the piston class, purchase a new set of piston rings corresponding to it;
- Before installation, each new ring is first inserted into the cylinder to check the clearance in the lock. The gap must correspond to the value specified in the vehicle's operating manual. If it is less than necessary, then the ends of the lock are carefully filed with a file;
- The pistons are thoroughly cleaned of carbon deposits. The holes intended for draining oil are also cleaned with a suitable wooden stick. The cleaned grooves are lubricated with clean engine oil;
- The rings are put on starting with the oil scraper. On one side of the ring is marked “TOP” (up), which indicates how it should be installed in the piston. The locks must be installed at 120 degrees relative to each other. This will prevent gases from penetrating through them. You cannot put the rings on in a “twist”; such installation may be accompanied by the appearance of microcracks, which will lead to their breakage;
- Reassemble in the reverse order, simultaneously cleaning everything with a clean rag and lubricating it with fresh engine oil. Pistons must be installed exactly in the cylinders from which they were removed. Also, the connecting rod caps with connecting rod bearings must be put on the same connecting rods from which they were removed.
If the wear of the connecting rod bearings allows them to be reused, then there is no need to replace them, since this will require boring the crankshaft journals. You won’t be able to do this kind of work on your own without experience.
Tools required for work
To replace the rings you will need:
- sets of open-end and ring wrenches, as well as wrenches with an extension and heads with a nominal value of 10 – 19;
- torque wrench;
- specialist. crimp (mandrel).
In addition, you will need an oil-resistant sealant. It will come in handy when installing the oil pan and valve cover gaskets.
And there seems to be nothing complicated in the steps listed above, if the replacement is made without removing the engine from the car. However, there are nuances without which an engine with new rings will not work for a long time. When the cylinder reaches the extreme stage of wear, a “step” is formed on the surface of its mirror. Having hit it, the new ring will either break immediately or get a crack, which will ultimately lead to its failure. In addition, the grooves of the old piston also have wear, so grinding new rings to the cylinder will be difficult or completely impossible. This means that it is better to entrust the troubleshooting of the piston group and cylinders to professionals.
Boring and honing of cylinders should also be carried out by qualified specialists. In addition, this work cannot be done without removing the engine. Therefore, before getting down to business, you should think carefully and realistically assess your strengths and capabilities. So that the result of the repair would not be the replacement of the piston group as a whole, or even worse, it would not be necessary to submit the engine for a major overhaul.
VAZ 2108 engine repair
Details Created: 12/29/2013 1:24 pm Engine disassembly
Repair of the VAZ 2108 engine takes place in several stages:
· Crankshaft repair.
· Repair of cylinder block.
· Repair of connecting rod and piston assembly.
· Piston repair.
Let's look at each in detail.
1) Piston. First, the piston head is cleaned of carbon deposits. A hole is made with wire to drain the engine oil. If necessary, the gaps located on the rings and piston are adjusted. To measure them, the piston ring is inserted into the frame. The gap should be less than one millimeter. Otherwise, the rings need to be replaced. If there is a gap the size of which does not exceed 0.15 millimeters, the ends of the rings are sharpened with a needle file.
2) Connecting rod and piston assembly. When repairing a VAZ 2108 engine, you may need to replace some elements of the connecting rod and piston assembly. In this case, it is recommended to sort the pistons and cylinders by purpose and weight. Opposite each cylinder, a group of cylinders is knocked out, which are located in the lower plane. If there is poor fit or cracks, the piston pins must be replaced.
Also subject to replacement:
· Oil scraper rings and piston rings that have become unusable.
· Retaining rings.
· If there are even minor scratches on the upper bushing head, the connecting rod must be replaced.
· It is not recommended to use a connecting rod when rocking the piston ring
3) Crankshaft. It must be replaced if scratches are found on its surface. It is necessary to take measurements of the crankshaft journal. The connecting rod diameters are considered normal: from 47.930 to 48.950. For larger diameters, the necks must be ground. Also, if scratches, marks, or burrs are noticeable on the surface of the half-rings, they should be replaced. Next, the main and connecting rod bearings are inspected; if there are cracks or burrs, new bearings will be required. No work is carried out to adjust the liners. The standard thickness of the main liner is 1.825-1.832 millimeters, and the thickness of the connecting rod liner is 1.722-1.731 millimeters.
The gap between the main bearings and the crankshaft journals should be measured. Main bearing clearances should range from 0.036 to 0.073 millimeters. For connecting rod bearings, the optimal dimensions are from 0.03 to 0.08 millimeters, although a value of 0.15 mm is acceptable.
4) Cylinder block. The surface of the block should be cleaned of gasket residues. If cracks are found, the block with covers must be completely replaced. Next, you need to plug the water pump and add coolant to check for leaks. If leaks occur as a result, the cylinder block should be replaced. The cylinders are cleaned of carbon deposits, bored, the diameters are measured, and if scratches or scuffs are found, a new cylinder block is installed. If there are defects whose dimensions exceed 0.8 millimeters, repairing the cylinder block is impractical. In this case, it is better to replace it.
- Back
- Forward
Assembling the flywheel, oil receiver and pump
It is important to install the flywheel so that the notch on it is located against the connecting rod cap 4, and the ring gear is adjacent to the clutch
- Apply a thin layer of auto sealant to the bolts securing the crankshaft.
- We put the flywheel and its washer on the shaft and tighten the bolts securing it until it stops.
That's it, the flywheel is installed. We mount the oil receiver and engine crankcase.
- We change the seal ring of the oil receiver.
- Lubricate the new ring with oil.
- We put the oil receiver in its proper place and screw it to the oil pump.
- We fasten the part with 2 bolts to the second main bearing.
- Tighten the bolts.
- We cut off the excess parts of the oil seal holder and oil pump gaskets.
- Apply consistency to the lower edges of the block and glue the crankcase gasket.
- Carefully put the crankcase in place so as not to move the gasket.
- We secure the crankcase with bolts around the perimeter.
- We tighten all the bolts one by one.
Now you can rest, since the assembly is almost complete. And after the break, you need to return the pump to its place.
- We place the gasket on the pump and lubricate it with lithol or other grease.
- We install the pump with the markings facing up and screw the part to the block with 2 bolts.
That's all, the cylinder block is assembled. After this, you need to install the head, clutch, pulleys, timing covers, generator and other attachments on it.
Above are videos about dismantling and assembling the engine, which should be studied before carrying out work.
Boring cylinder blocks
If a number of previous operations could be performed with one’s own hands, then to bore cylinder blocks it is necessary to hire a master who has the skills to work on special equipment. The owners of the car take out the cylinder block and give it to the craftsmen for boring, and after restoration they put the cylinder blocks in their original place.
The cylinder head has a sufficient margin of safety and a solid resource to operate it for quite a long time, and rarely breaks ahead of schedule. Cylinders are mostly repaired on a scheduled basis, but sometimes are subject to immediate repairs. For example, when you need to weld a hole in the block, which is formed by a break in the connecting rod mechanism.
Sometimes a car owner wants to bore cylinder blocks, not for routine repairs, but in order to increase engine power. Under the influence of such a process, which is called boosting, the combustion chamber increases in working volume, which leads to a significant increase in power. Before performing such an operation, all risks are carefully calculated, because forcing can bore both the block and the head so much that the walls of the head can become deformed and become unusable.
When boring cylinder blocks, expansion of the seat slots is provided - liners are used that have already been increased in size. To know exactly their parameters, you should consult with a specialist who will perform this operation. Determination of new sizes is carried out using a bore gauge.
The boring operation is carried out on a special machine at low speed, showing certain skills in this area. When boring, it is necessary to simultaneously adhere to the dimensions of the future cylinder, not to disturb its shape and adhere to the principles of high-quality processing
It is also very important to adhere to strict positions - the cylinders must be placed strictly parallel and perpendicular to the camshaft bed. And it is important that during boring there is an allowance left so that the axis does not move during honing - the final operation during boring to correct possible defects during the previous operation
This completes the overhaul of the VAZ 2109 engine and it is necessary to assemble and install the power plant in its original position. After the final stages of assembly and filling with antifreeze, technical oil and water for further operation, manipulation of the valves is certainly carried out. This operation will be the final one as part of a major overhaul of the power plant.
Engine overhaul is carried out after a certain mileage of the car. The engine can be replaced completely, or its individual parts are changed - to determine which parts have already worn out and need to be repaired, a thorough diagnosis is carried out. The fact that the engine needs a major overhaul is recognized by high oil consumption, compression checks and comparison with control ones in the cylinder. With characteristic engine sounds and a drop in power of the power plant.
When the owner took good care of his car and regularly carried out maintenance, changed the oil and air filters, then the timing of major repairs comes later. If the car owner neglected the needs of his vehicle, the need for major repairs would approach faster.
When carrying out a major overhaul of a power plant, the engine is removed using lifting mechanisms, installed on a pallet and moved. When the power plant is severely depleted, the entire engine is changed. If it is in good condition, only individual parts are changed. The engine is disassembled and its parts are marked in order to install them strictly in their places. Those parts that have not yet exhausted their capital life are removed, cleaned, lubricated with technical oil and await their turn for installation. The sequence of engine assembly after a major overhaul is strictly defined and must be followed.
The cylinder head is removed by the car owner, but it is bored by specialists using special equipment. The owner of the car installs the bored cylinders himself. Properly performed major repairs provide the vehicle with long mileage and high-quality further operation. If the overhaul repair was carried out correctly, all parts of the car engine were torn, and the worn ones were replaced with new ones, then such a repair will eliminate all problems and return the car to ease of movement.
https://youtube.com/watch?v=JGLX-tL4mWg
Auto repair
Any of the listed malfunctions requires VAZ 2109 repairs - periodic or major.
Periodic car repairs
Regular car maintenance involves maintaining the normal operation of all components and parts of the car. In this case, the VAZ 2109 may not need major repairs for a long time, which will significantly reduce the costs of operating the car. The frequency of maintenance and repair of the VAZ 2109 car must be performed:
- Before winter and spring, the technical condition of the car is checked.
- After 15,000 kilometers, the oil and filter must be changed to clean it.
- After a run of 30,000 kilometers, the fuel filter is changed.
- Brake pads must be replaced as they wear out physically.
- Every 10,000 kilometers it is necessary to carry out diagnostics of the chassis.
- After 60,000 kilometers, the timing belt needs to be replaced.
- Spark plugs are changed every 30,000 kilometers.
This work is necessary to prevent possible malfunctions. For more serious interference with the operation of the car, you need to use the VAZ 2109 repair manual. If you follow all its basic recommendations, the car enthusiast will be able to repair the car with his own hands without much effort.
Engine overhaul
The need for major engine repairs may be indicated by:
- Instability in the operation of the unit.
- Extraneous noise.
- Tapping at the knot.
- Increased fuel consumption.
- Reduced engine power.
When performing work, the technical characteristics of the unit are restored to values that correspond to the original indicators. To do this, the engine is pulled out of the VAZ 2109, disassembled, and a defect list is drawn up. All parts and assemblies are carefully examined, measured, the necessary gaps are measured, and the sequence and cost of repairs are determined. Parts that need to be restored are repaired, those that have become unusable are replaced with new ones. According to the rules, a major overhaul of the VAZ 2109 engine must be done after the car has traveled 150,000 kilometers:
- Engine repair begins with replacing rings and pistons.
- The cylinder block is bored.
- The crankshaft journal is ground.
- The starter is visually inspected.
- The serviceability of the generator and ignition distributor is determined.
- The thermostat, pump, hoses, and drive belts are replaced in the cooling system.
- The radiator is cleaned of dirt and washed.
Advice: During repairs, it is imperative to change all rubber elements.
All units are assembled in the reverse order of their disassembly.
Tip: When replacing the cylinder block, the bearing housing assemblies also need to be replaced. This is due to their joint processing.
Repair of the VAZ 2109 cylinder head requires special attention:
- The carburetor is removed from the intake pipe (see Repairing a VAZ 2109 carburetor at home).
- Its gaskets are removed.
- The carburetor heat insulating shield is removed.
- The cylinder head is removed from the car.
- The warm air intake pipe, exhaust manifold, and intake pipe are removed. The gaskets are removed.
Tip: The sealing gaskets must be removed carefully. If they are not damaged, they are reused.
- The spark plugs and coolant temperature sensor are unscrewed.
- The camshaft is pulled out.
- The tension roller and the thrust washer located under it are removed.
- The valves and stops for them are removed.
- All parts of the assembly are washed in gasoline, wiped, and dried.
- They are visually inspected and their serviceability is determined. If necessary, they are repaired or replaced with new ones.
- Assembly of the unit is performed in reverse order.
How to replace bearings without removing the engine?
Many car owners think and write on forums that it is impossible to get to the liners without removing or removing them from the engine hood. However, such operations are carried out by repairmen on ships, where the size of the parts is enormous and too much force is required to remove the engine. And if the technique exists, it can be used for simple cars.
- Park the vehicle on a ramp to gain easy access to the engine. If there is protection installed on it, it should be removed and the lubricant drained.
- Remove the box, front cover and loosen the camshaft chain in advance. If you're not too lazy, it's better to remove it entirely so it doesn't interfere.
- Remove the starter and pan (if the beam does not interfere). If it interferes with operation, you will have to lift the motor and pull out the pan from under it.
- You now have access to the crankshaft. The easiest way is to replace the connecting rod bearings. The old bearings are pulled out after unscrewing the head screws; it’s easy to put new ones in place, just don’t forget to lubricate them well with the same engine oil that is in your engine.
- It is more difficult to replace the main bearings without removing the engine. You will need to lower the crankshaft by loosening its fastening. You don’t need to lower it much, ten, maximum fifteen centimeters.
- Now it will be easier to pull out the earbuds. But you will need an aluminum rivet, which must be inserted into the lubrication hole, so it will push the bearing out. The main thing is that the size of the rivet is suitable and does not scratch the crankshaft.
VAZ 21099 engine repair
Details Created: 06/03/2014 19:51
Engine ZMZ-406 matters of the heart BEHIND THE VOLGA WIDESPIRAL OF EVOLUTIONSTAIR
There are situations when several serious faults are detected in a car engine at once. Not a single car is immune from this, especially the VAZ 21099. The decision to begin a major overhaul of the VAZ 21099 engine must be made carefully, having assessed all the arguments for and against this procedure. It is also recommended to enlist the opinion of a professional - an automobile mechanic, who will tell you what other faults may be hidden.
Many car enthusiasts in our country are sure that a car with high mileage definitely needs a major engine overhaul. And this is partly true. But in fact, the number of kilometers traveled is not the only assessment factor. Engine repair may also be required for a young car with little or no mileage.
It is worth paying attention to how often engine maintenance operations were carried out: replacing filters, updating parts, cleaning and washing. If the service was carried out in a timely and professional manner, then there may be no reason to completely overhaul the engine.
But if the car owner ignored the care recommendations, rarely changed the oil and filters and did not carry out diagnostics, then the engine almost certainly needs repair.
One indicator of problems may be frequent engine oil changes. In this case, check whether the piston gaskets are in order and the condition of the bushings and caps. Check the pistons for leaks. It is possible that oil simply leaks during operation from a damaged piston channel.
To check the condition of the piston group, measure the pressure in the pistons by connecting a pressure gauge to the piston instead of a pressure sensor. Normal pressure readings are indicated in the service certificate of your car. If the pressure is below normal, the air pump or bearings may need to be replaced.
If the engine makes various noises and periodically stalls, gasoline consumption has increased and power has dropped, this may be one of the indicators that the VAZ 21099 engine urgently needs repairs. If only one of these problems is noted, then it is possible to perform a routine service of any unit . But if several problems are observed at once, then major maintenance cannot be avoided.
The main goal of a major overhaul is to restore stable operation and return the characteristics to the level specified in the data sheet. The repair includes replacing piston gaskets, boring bores and replacing bushings. This procedure should only be performed by a specialist who has the necessary tools, since it is impossible to independently obtain the required quality of the procedure. In addition, bearings are completely replaced, shafts are repaired and new pistons are installed. All valves are cleaned. All small parts are also replaced, the service life of which is very short.
In the process of repairing a VAZ 21099 engine, the condition of such important engine elements as the electric starter and generator is checked. They may need to be replaced, which is also best left to professionals.
When the repair is completely completed, engine operation should be stable. The next repair is carried out after 10-15 thousand kilometers, unless the need arises.
Carrying out engine repairs is a very complicated procedure. This requires a lot of time, a responsible approach and care. You need to know which procedures you can perform yourself, and which ones it is better to involve service center specialists.
It is worth cautioning against purchasing all the parts at once. Buy the necessary spare parts only when you are sure that the old part is in poor condition. Before you begin any repairs yourself, assess the general condition of the unit. It may turn out that carrying out repairs will be a waste of time and effort. It would be more profitable and easier to buy a new engine or a rebuilt unit than to bring an old one back to life.
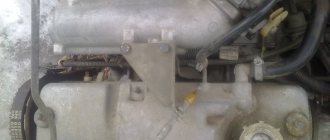
External view of the VAZ 2108, VAZ 2109, VAZ 21099 engine 1 - carburetor; 2 — valve cover; 3 — cylinder head; 4 — front cover; 5 - water pump; 6 - generator; 7 — crankshaft pulley; 8 — oil pump; 9 — oil drain plug; 10 - oil sump; 11 — oil filter; 12 — cylinder block; 13 - flywheel; 14 - fuel pump
- Back
- Forward
Signs of piston wear
On average, a piston replacement on a VAZ 2109 is required every 150,000 km
The car owner should pay attention to warning signs that indicate the need to change the rings
- The car began to require more fuel.
- Compression measurements showed a value of less than 10 atmospheres.
- There is less engine oil.
- Replacing oil seals does not help eliminate oil leaks.
The VAZ 2109 piston group is a set consisting of a piston, piston rings mounted on it, a piston pin and its fasteners. There are three grooves on the surface of the piston for rings.
The oil scraper is responsible for removing excess oil from the cylinder walls, thereby reducing fuel consumption. Only a film a few microns thick is left inside the cylinder liner to lower the piston. Well, the pin, which is inserted transversely inside the piston cavity, attaches the connecting rod to the piston.
engine assembly for VAZ 2108, VAZ 2109, VAZ 21099
VAZ 2103 engine
3. Install the crankshaft into the cylinder block.
6. ...ceramic metal half-ring (yellow) - on the other side of the bed.
9. Install the main bearing caps according to the marks. The main bearing caps have marks (notches) in accordance with the cylinder number. The exception is the fifth cover, on which, like the second, two marks are applied. The second cover has two threaded holes for the oil receiver mounting bolts. In this case, the cylinder numbers are counted from the camshaft drive side, and the main bearing caps are installed with marks 1 towards the generator bracket 2. 10. Lubricate the threads and ends of the heads of the cap mounting bolts with engine oil.
It is easy to eat, without jamming. 12. For ease of installation, lubricate the oil pump gasket with a thin layer of grease and “glue” the oil pump gasket to the block. Remove excess grease. 13. Install the oil pump and tighten its mounting bolts (see “Removing and installing the oil pump”). 14. For ease of installation, lubricate the rear oil seal holder gasket with a thin layer of grease and “glue” it to the block. Remove excess grease. 15. Install the rear oil seal holder and tighten the bolts securing it (see “Front crankshaft oil seal”), (see “Rear crankshaft oil seal”).
Rice. 4.10. Device for pressing in the piston pin: 1 - roller; 2 — piston pin; 3 - guide sleeve; 4 - screw; 5 - spacer ring
17. It is better to use a special tool to press in the piston pin. If there is no device for pressing the piston pin, you can select a suitable mandrel. Place piston pin 2 (Fig. 4.10) onto shaft 1 of the device for installing the piston pin with spacer ring 5 put on it. Then put on guide sleeve 3 and secure it with screw 4 without tightening the screw. Dimensions of the spacer ring: outer diameter 22 mm, inner diameter -15 mm, thickness - 4 mm.
Ora device with a finger in the holes of the piston and connecting rod. For proper installation of the piston pin, the piston must be pressed with the boss against the upper head of the connecting rod in the pressing direction.
21, Install the oil ring expansion spring onto the piston.
24
Please note: the words “VAZ”, “TOP” or “TOP” may be stamped on the piston rings. With this inscription, the piston rings are installed upward (towards the piston bottom)
If there is no inscription on the piston rings, the oil scraper and upper compression rings can be installed in any position.
27. Rotate the piston rings on the piston so that the piston ring locks are at an angle of 120° to each other.
n into the cylinder. It is recommended to first rotate the crankshaft so that the installed piston is at BDC. In this case, the arrow on the piston bottom should be directed forward of the engine (towards the camshaft drive).
34. Insert the liner into the connecting rod cap in accordance with the previously made marks so that the antenna of the connecting rod liner fits into the groove in the cap. After this, lubricate the liner with engine oil.
The weight of the crankshaft did not interfere with inserting the oil level sensor. Then tighten the oil level sensor mounting bolt. 38. Install the oil receiver and tighten the three bolts securing the oil receiver. 39. Apply sealant to the flywheel mounting bolts. Install the flywheel, locking plate and tighten the flywheel mounting bolts (see “Removing, installing and troubleshooting the flywheel”). 40. For ease of installation, apply a thin layer of grease to the surface of the block and “glue” the oil pan gasket to it. 41. Install the oil sump and tighten its mounting bolts (see appendix 1). Next, the engine of VAZ 2108, VAZ 2109, VAZ 21099 cars is assembled in the reverse order. Installing the cylinder head (see “Replacing the cylinder head gasket”), the camshaft drive belt (see “Replacing the camshaft drive belt on VAZ 2108, VAZ 2109, VAZ 21099 cars and adjusting the belt tension”).
next article:
Problems when paying with bank cards
Sometimes difficulties may arise when paying with Visa/MasterCard bank cards. The most common of them:
- There is a restriction on the card for paying for online purchases
- A plastic card is not intended for making payments online.
- The plastic card is not activated for making payments online.
- There are not enough funds on the plastic card.
In order to solve these problems, you need to call or write to the technical support of the bank where you are served. Bank specialists will help you resolve them and make payments.
That's basically it. The entire process of paying for a book in PDF format on car repair on our website takes 1-2 minutes.
If you still have any questions, you can ask them using the feedback form, or write us an email at
What are piston rings and their purpose
Piston rings are elastic, open elements that are installed in special grooves on the piston body. They are made of high-strength steel or cast iron, and covered with an alloying material on top. The alloy coating further increases strength and also reduces wear rates.
Typically, 3 rings are inserted into the piston: 2 compression rings (occupying the 2 upper grooves) and 1 oil scraper ring (the lower groove). The purpose of the compression rings is to prevent hot gases from breaking through along the piston into the engine crankcase. Oil scraper - removes excess oil from the cylinder mirror, preventing it from entering the combustion chamber. In addition, the rings reduce the temperature of the piston, transferring almost half of the heat from its surface to the cylinder walls.
When the piston rings no longer cope with the tasks assigned to them due to their wear, the car engine signals this by displaying the corresponding symptoms.
Signs of piston ring wear
Blue or black smoke from the exhaust pipe indicates that wear has reached a critical stage. This indicates that excess oil entered the combustion chamber past the oil scraper ring and burned there along with the fuel. Black smoke coming out of the crankcase ventilation tube indicates that the compression rings, due to wear, allow gases to escape from the combustion chamber into its cavity.
Critical wear is accompanied by a decrease in compression (the ability to maintain pressure) in the engine cylinders. This means that some of the gases formed during the combustion of the fuel mixture, which was supposed to push the piston, broke into the crankcase without performing useful work. This is what will lead to a drop in pressure in the cylinder, therefore, the engine will lose some power. Increased oil consumption is observed.
Compression is checked with a special device - a compression meter. When the nominal pressure values are unknown (there are no operating instructions), it is first measured in a dry cylinder, then a little engine oil is poured through the spark plug hole, and the measurement is made again. If the compression increases, then the rings need to be replaced. Similar signs can be observed in the case of their “occurrence”.
This problem, if the case is not very advanced, can be corrected with the help of special fuel additives. For an engine with a carburetor system, you can try cleaning it with a carbon remover spray that is injected directly into the carburetor. If removing carbon deposits from the combustion chamber has no effect, then there is only one way out - replacing the piston rings and cleaning the grooves.
Installing the connecting rod and piston group
The connecting rod and piston group (CPG) must be installed as an assembly. It is not recommended to press the piston pin into the connecting rod head without special tools. This procedure is best left to professionals.
To install the ShPG, you need a steel mandrel in the shape of a ring. The height of the ring is 2-3 cm, the diameter of the hole is slightly larger than the diameter of the cylinder. The pistons must be mounted in such a way that the arrow on their bottom (the part adjacent to the valves) is turned towards the oil pump. The number of the connecting rod and piston must correspond to the number of the cylinder. Before installation, you need to separate the locks of the oil scraper and compression rings at an angle of 120 degrees.
- Turn the block over.
- We wipe the cylinder walls and crankpins with a dry cloth.
- Thoroughly lubricate the cylinder walls, the side surfaces of the pistons and the inside of the mandrel with oil.
- We place the mandrel on the cylinder and insert the piston and connecting rod assembly through it. We push the piston into the cylinder using a round wooden stick (hammer handle).
- Place the liner in the connecting rod cover and lubricate it with oil.
- We lay the block on its side and install the connecting rod cap so that the cylinder number on it and on the connecting rod are on the same side. We secure the cover with nuts.
- In the same way we mount the remaining pistons and connecting rods. After this, turn the cylinder block upside down and tighten all 8 nuts securing the connecting rod caps.
If you don't have a mandrel, you can cut it yourself from a piece of thick-walled steel pipe.