Hyundai Lantra › Logbook › timing belt replacement 4g15 soch
Prepare right away the keys, a set of sockets with collars, a jack with a couple of pieces of wood, a pry bar (for every fireman), a small and powerful slotted screwdriver... I needed keys and heads for 10, 12, 14, 17, 19, and one large one for 32 (oil seals I installed it) as well as a torque wrench (for special perverts, small hand scales are suitable).
For a complete replacement, you will need new (preferably original): timing belt, timing belt tensioner pulley, timing belt tensioner spring (more about it below), KV and RV oil seals.
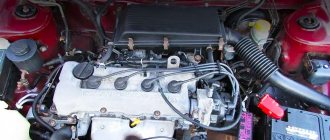
First we turn off the car. Then we remove the battery terminal, otherwise you never know... Now we unscrew the pulley on the water pump, because... it will interfere with us later (4 bolts per 10).
Now we need to remove the right front wheel. those. Jack up the car and remove the wheel. And there is a plastic protection that covers the engine. Under it we will see the crankshaft pulley (CV), oil filter, oil pan on the side, and attachment belts. Now we take pieces of wood or something else strong and place them under the engine oil pan. We place it so that the pallet rests on almost its entire plane. We lower the jacked car so that the oil pan rests lightly on what has been supported.
Next, unscrew the right engine mount. because it will interfere with us putting on the timing belt. We film it and see how alive it is. She's usually resilient. Next, we disconnect the chip (it seems to go to the HF position sensor), and remove it with the wire towards the injectors so that it does not interfere. Take a 10mm wrench and unscrew the 3 bolts that hold the upper part of the timing belt cover. We remove this cover and see if the marks on the Camshaft gear (CV) and the stamped triangle on the engine head match. If not, then don’t worry for now and start removing the attachment belts.
Now it would be good to unscrew the nut. which fixes the KV pulley. because I didn’t find any windows for the teeth on the flywheel on my car (although this is recommended in the manuals; fix it by inserting a good screwdriver there), I decided to just rest the key against the joint and just turn the engine a little with the starter. I took a 19mm head, a stronger and longer knob. I put it on, rested it on the floor, and literally a quarter turn of the starter (remember that we removed the battery terminal!) I tore off the nut. Now the nut unscrews freely.
Next, I removed the KV pulley, and behind it the lower part of the plastic cover covering the timing belt. Now we again check the marks on the RV gear and the KV gear. both here and there must coincide with the marks on the engine! If not, then either the belt slipped on a tooth, or they did it on purpose for some reason before you. I had everything clearly marked. If the marks do not match, then take the key and manually turn it clockwise behind the HF until the marks match. I didn’t do anything like that about marks, I applied my own (the method was both removing and installing)
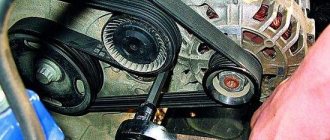
Now you can start removing the timing belt. The fastening of the power steering pump was in the way, so I had to unscrew it too.
Before pulling off the timing belt, mark on it the direction of its rotation, otherwise you never know, you might have to put it back. and in general it’s better to attach a new belt and compare before removing it. Does what you bought look real?
To remove the belt, you need to loosen its tension. To do this, you need to unscrew one bolt on the tensioner roller and remove it along with the spring. After this, you can remove the timing belt and inspect it for wear (all sorts of cracks, delaminations, etc.). After removing the belt, compare it again with the one you bought.
Next, remove the KV gear. Perhaps the “butterfly” that clings to the HF position sensors will interfere with its removal. In this case, the sensor can be easily unscrewed with a 10mm wrench. We remove the gear wheel together with this “butterfly” and see the KV oil seal underneath it. To avoid getting stuck, take a new oil seal and apply it for comparison. If everything is OK, then take an awl, a small screwdriver and pry the KV oil seal out of the engine housing. It must be picked out and hooked from the side of the engine housing, and not from the shaft side! because if you scratch the shaft, the new oil seal will quickly be chewed off by this small scratch when rotating... and the oil seal will leak. We install a new oil seal, having first thoroughly lubricated it with engine oil. In order to drive it into place, I used a 32 deep socket (like for VAZ hubs). Carefully hammer the oil seal into its rightful place. As soon as you have installed it, check whether it is level and whether the inner “lip” of the oil seal is sticking out along the shaft. If everything is OK, then put in place the HF gear with a “butterfly” and the HF position sensor.
Now go to the top Remove the RV gear. for this I used a 17 mm socket with a long knob and a strong screwdriver. If you can, you can also use a pry bar. There are holes in the RV gear, through these holes I fixed the gear, resting the screwdriver against some square castings on the engine head. Everything was fixed well behind them and I used a head to unscrew the bolt securing the RV gear. The gear has a hole for the cotter pin, so you won’t be able to confuse how to install it later.
We remove the gear and, just like on the HF, change the oil seal. having tried it on first.
We changed the oil seal - put the RV gear in place, and screw it on with a torque of 100 N*m, fixing it in the same way as when removing it. We align the RV gear according to the mark. Now we put the timing belt in place, checking that the marks on the HF and RV match. We install a new timing belt tensioner pulley and a spring to it (you can use the old one). The roller is attached to two points - a small cotter pin and a bolt through its center. We screw the roller, but so that it moves freely along the fixing bolt. We install the spring, stretch it to its normal position - it should, by its elasticity, tension the timing belt. Holding the roller to help the spring, fix it with a bolt, tightening it with a torque of 24 N*m. Once again we check that the marks match, take the key and begin to manually turn the engine clockwise. You need to rotate 3-4 circles, then check the marks again, loosen the tensioner roller again so that the spring “selects” the belt tension under its elasticity, and again holding the roller with your hand - fix it with a bolt with a torque of 24 N*m.
Step-by-step instruction
Remove the plastic protective cover and remove the high-voltage wires.
Unscrew all the bolts securing the valve cover and remove it.
Using a 17 key, we pull back the service belt tensioner and remove the latter. Although the books say that next we must remove the tensioner, the bolt that rests on the spar will not allow us to do this. We remove it after we unscrew the support and jack up the engine.
Set the top dead center
Using the crankshaft bolt, be sure to turn the engine clockwise until the mark on the crankshaft pulley coincides with the “0” mark on the front timing cover. For convenience, shown on removed parts.
In this case, the mark on the exhaust camshaft sprockets should point upward.
On the phase shifter body, the drawn arrow should be at the top.
Unscrew the crankshaft pulley bolt. We stop the flywheel with a large flat-head screwdriver, this is easy to do. Since there is a plastic cover at the bottom of the gearbox, after removing it you will see the flywheel crown, insert a screwdriver into the wedge between the teeth and the housing and calmly tear off the bolt. Unfortunately, we didn’t take a photo, but you can easily find it.
Unscrew the engine mount. A bolt and nut on top and two nuts on the bottom.
Remove the generator, two bolts.
After jacking up the engine, remove the service belt tensioner and unscrew the three bolts and remove the front support bracket. In the photo, two bolts have already been removed, but the third one was so stuck that I had to spend a couple of extra hours on it. The bracket is indicated by a green arrow. Before dismantling the support, I had to remove the pump; for the convenience of unscrewing the boiled bolt, you remove it after the support, six bolts per ten.
Unscrew the two 10mm nuts and remove the automatic chain tensioner.
We unscrew everything that holds the front timing chain cover, and there will be 10 nuts and bolts, as well as 12 bolts. The figure shows their locations, the location of the tensioner is indicated in blue.
Removing the old timing chain
Two shoes are hidden under the timing cover, a tensioner on the left and a damper, also known as a guide, on the right.
Unscrew the bolt securing the tensioner shoe and the three damper bolts.
We put color marks on the chain opposite the marks on the camshaft sprockets and opposite the marks on the crankshaft; later we will compare them with the marks on the new chain, just in case!
The crankshaft mark is shown below.
We remove the old chain and compare it with the new one.
Replacing the timing belt on a 4G15GDI in the field.
1. How to correctly set marks on the camshaft and crankshaft pulleys?
2. How to align the marks on the crankshaft (on a manual, I used to spin the suspended front wheel in 5th gear)? How to turn the crankshaft to align the marks with an automatic transmission and 4WD?
3. I read about the “disease” 4G15 - backlash in the crankshaft toothed pulley. How can I troubleshoot it and then fix it? Replacing a pulley or fastener?
4. Can I confuse the position of the pulleys on the camshafts and crankshaft after they are removed to replace the seals, or is there a foolproof feature?
5. What else will a person need to pay attention to when changing the timing belt on a 4G15 GDI for the first time?
Thank you all in advance and forgive me if my questions seemed stupid to you.
1. The marks on the camshafts are aligned with the marks on the valve covers. The crankshaft is aligned in accordance with the mark of the required ignition timing. The ignition timing is usually indicated on the hood sticker. 2. Rotate the crankshaft pulley with a wrench. 3. I won’t say anything about 4G15. 4. The camshaft pulleys are the same. But you can’t put the camshaft pulley in place of the crankshaft pulley - protection from fools. 5. Immediately change all seals on the windshield and rollers. Check the tensioner. If the crankshaft is at TDC, you cannot turn the camshafts; the pistons rest against the valves.
Clarifying questions: 1. If there is no such data (on the angle), then where can you clarify it? 2. Should there be a box in “N”? How can I remove the crankshaft pulley, how can I “lock” the shaft in order to unscrew the nut? 4. Did I mean to place the pulleys on the shafts only in one position, or can they be rotated 90 or 180 degrees by mistake? 5. This is how I do it, that’s why I have questions. 5 (encore). Can I “manually” rotate the shaft with a wrench to bend the valves if by chance they “meet”?
Still, I would like to take a look at the manual.
1. The angle data is located on the housing next to the outer crankshaft pulley, i.e. on ct. The generator belt is put on. 2. The box can be in any position. The shaft can be locked with a special device, but in the field it is unscrewed with a starter (put the key on, press it against the bottom, move it back a couple of centimeters and with the starter, literally for a split second). 4. The pulleys are placed in only one position; you can’t turn them 90 or 180 degrees without a sledgehammer :). 5. (encore) manually, again, if you don’t use a sledgehammer, you won’t bend the valve :).
source
We select replacement parts
Along with the timing belt on the Mitsubishi Lancer 9 1.6, the tension roller must also be replaced, so you also need to purchase it. You can choose both original spare parts and their analogues.
Original for Lancer 9 are Mitsubishi belts with indexes MD342154 and 1145A051.
Analogs for them are consumables:
As for the roller, the original spare part bears the Mitsubishi MD356509 index.
As an analogue, you can use NTN JPU57-008A-4 or NEP57008A6 rollers.
It is also worth noting one fact - the automaker Mitsubishi does not produce consumables - rollers and belts - on its own. Because of this, a situation often occurs that a car owner orders an original, and receives analogues - a Sun belt and an NTN roller.
In fact, these spare parts are original - they are what the automaker installs on engines from the factory, so it doesn’t make much sense to look for parts with only the Mitsubishi label, and you can safely install Sun and NTN products on your car.
History and design features
ATTENTION! A completely simple way to reduce fuel consumption has been found! Don't believe me? An auto mechanic with 15 years of experience also didn’t believe it until he tried it. And now he saves 35,000 rubles a year on gasoline! Read more"
The 4g15 engine has proven itself well among car enthusiasts. The manual will allow you to carry out repairs yourself, including major repairs. Self-diagnosis will not cause difficulties; a minimum of knowledge and special equipment is required. The engine has a number of advantages even over modern analogues. Fuel consumption is relatively low.
The 4g15 dohc 16v is a slightly modified 4G13 engine. Design features and borrowings from other motors:
- The cylinder block design is used from a 1.3 liter engine, 4g15 is bored out for a 75.5 mm piston;
- initially SOHC 12V was used - a model with 12 valves, later the design was changed to a 16 valve model (DOHC 16V, two-shaft);
- there are no hydraulic compensators, valve adjustment is performed once every 90 thousand km according to the regulations (more often, adjustment is carried out only after knocking occurs in the internal combustion engine);
- some modifications were equipped with CVTs;
- produced in two versions: naturally aspirated and turbo;
- chip tuning possible;
- The model with a variator is quite reliable, there are no problems typical for automatic transmissions.
What spare parts are worth purchasing?
Before you begin scheduled repairs, you need to prepare original consumables:
- Timing drive. The original belt for Mitsubishi Lancer 9 should have the article number MD342154. There is also a replacement for this timing drive under serial number 1145A051, Gates 5535XS, Contitech CT1008. They are not supplied from the manufacturer's factory, but according to their characteristics they are well suited as an analogue.
- Power steering drive MD375935 (Gates 5PK1063 – analogue).
- Alternator belt MN183019 (Gates 5PK903 - analogue).
- Belt tension roller MD356509 (NTN JPU57-008A-4 analogue).
- Camshaft seals – 2 pcs.
- Crankshaft oil seals – 2 pcs.
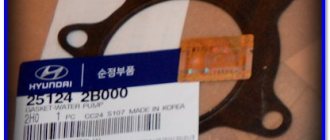
- Water pump.
It should be noted here that experts recommend replacing the tension roller and pump on Lancer 9 after 150–170 thousand kilometers, it all depends on their wear. If after removing the belt there is no play in the bearings of these parts, then they can not be removed during scheduled repairs after 90 thousand km. Also, seals can only be changed during the second scheduled repair.
What car models was it installed in?
The engine, due to its versatility and performance characteristics, was used in various car models from Mitsubishi. The following machines were sold on the territory of the Russian Federation and in European countries:
- until 2012 - second restyling, 6th generation, hatchback;
- until 2008 – restyling, hatchback, 6th generation, Z20;
- until 2004 – hatchback, 6th generation, Z20;
- until 2012 – restyled version, station wagon, 6th generation;
- until 2006 - station wagon, 6th generation;
Mitsubishi Lancer for the Japanese market was also equipped with these engines:
- Mitsubishi Lancer – 2nd restyling, station wagon with 6 doors, CS (mivec 4g15 was installed until 2007);
- Mitsubishi Lancer – 2nd restyling, 6th generation sedan, CS and others (ck2a 4g15).
Mitsubishi Lancer for Europe was also produced with this engine. The difference was in the appearance of the car and the interior (instrument panel, etc.). But only until 1988 - 3rd generation sedan, C12V, C37V. Installation was also carried out in Tsediya. Mitsubishi Lancer Cedia CS2A for Europe in this configuration was produced from 2000 to 2003. This is a sedan, sixth generation.
A separate line was the Mitsubishi Libero model. The 4g15 MPI engine was used in three different models. They were all station wagons, the first generation. The Mitsubishi Mirage, as well as the Mirage Dingo, were equipped with this engine. Many of the models mentioned above are still in production. But the engine was replaced with another, more modern one.
About the car
The Mitsubishi Lancer 9 first rolled off the assembly line in 1973. At first there were 12 modifications with engine capacities from 1.2 to 1.6 liters. In the 70s, Lancer 9 was produced with a coupe body. Then the car began to be produced with four doors and engines of 1.6 and 1.8 liters.
Lancer 9 is the ninth generation and, under an agreement with Mitsubishi, it was produced in our country from 2007 to 2015. Over 8 years, 145 thousand copies of the model were sold in our country at a price starting at 760 thousand rubles.
The car is equipped with two versions of 16 valve engines:
Engine technical characteristics, its service life
The contract 4g15 engine has an impressive service life, so in case of serious breakdowns (the camshaft is bent, the valves are bent, or something else), it makes sense to simply purchase another engine - its cost is low. Contract engines from Japan, as a rule, are serviced only in service centers and do not require adjustment after installation. The characteristics of the engine depend on the ignition setting and the injection system (carburetor, injector). Parameters of the standard 1.5 l 4g15 engine:
| Parameter | Meaning |
| Production | Mizushima plant |
| Engine make | Orion 4G1 |
| Years of production of the motor | From 1983 to present |
| Fuel supply system | Using a carburetor and injector, depending on the modification |
| Number of cylinders | 4 things. |
| How many valves are there per cylinder? | ¾ |
| Piston parameters, stroke (piston rings are used), mm | 82 |
| Cylinder diameter, mm | 75.5 |
| Compression ratio | 09.09.2005 |
| Engine capacity, cm 3 | 1468 |
| Engine power – hp/rpm | 92-180/6000 |
| Torque | 132 – 245 N×m/4250-3500 rpm. |
| Fuel used | 92-95 |
| Environmental Compliance | Euro 5 |
| Engine weight, kg | 115 (dry weight, without various refill containers) |
| Fuel consumption, liters per 100 km | In the city - 8.2 l On the highway - 5.4 l Mixed consumption - 6.4 |
| Oil and lubricant consumption grams per 1,000 km | Up to 1,000 |
| Engine oil used | 5W-20 10W-40 5W-30 |
| Engine filling volume, oil | 3.3 l |
| How much do you need to fill when replacing? | 3 l |
| How often should you change the oil? | At least once every 10 thousand km, the optimal solution is once every 5 thousand km |
| Engine operating temperature conditions | — |
| Engine life in thousand km | There is no data from the manufacturer. In practice it is 250-300 thousand km. |
| Replacement of antifreeze | Depending on the type used |
| Antifreeze volume | From 5 to 6 liters depending on modification |
The engine life depends simultaneously on a number of factors. At the same time, the maximum resource of 300 thousand km is achieved by a large percentage of produced 4g15 units. This indicator is achieved through high-quality parts, reliable assembly and production control. The main points affecting operation include:
- terms of Use;
- frequency of oil and filter changes (including fuel);
- diagnostics;
- tuning - increased power reduces engine life;
- use of pre-heating (many car models may have antifreeze heating installed).
Easy replacement of timing chain for Geely Emgrand with JL4G15 1.5 liter engine
Recently we were visited by one of the representatives of the Chinese automobile industry Geely Emgrand JL4G15 (1.5 liters), the timing chain was replaced, and also after a little diagnostics, piston rings and valve seals, since oil consumption reached a liter per thousand, and there was no sign of blue smoke from the chimney nothing good. And this is not surprising, because the car worked tirelessly in a taxi and accumulated 213,000 on the speedometer in less than three years. We will talk about engine repair in a separate article.
And now a short epic about how resourceful our people are. According to the owner, at 140,000 miles the chain began to rattle because it had stretched so much that the tensioner could no longer cope with the task assigned to it, but did this force our hero to contact the service center? Not so. Estimating that the repair would cost a tidy sum, he remembered that earlier on Zhiguli cars, when the chain was pulled out, a special cap was put on the tensioner to increase its reach. Here he simply found a welder and welded the nut. Cheap and cheerful.
Possible malfunctions of the 4g15 engine
The 4g15 engine and its analogues have a standard list of malfunctions - the likelihood of which may occur. For example, if a swap is made from 4g15 to 4g93t, then the list of possible problems will remain standard. The causes of such occurrences and options for eliminating them are typical and trivial. Many problems can be prevented in advance by periodic diagnostics, promptly replacing the oil filter, and checking compression.
Main types of 4g15 engine malfunctions:
- the temperature sensor shows incorrect data;
- failure of the 4g15 switch, distributor;
- idle speed disappeared;
- increased vibrations – and at different engine speeds;
- difficulties in starting movement from a standstill (as a rule, these are problems with the flywheel petals);
- difficulty starting the engine;
- increased oil consumption;
- problems when shifting gears (the flywheel needs to be replaced).
Often it just requires adjusting the throttle. This will eliminate difficulties starting the engine. Problems often arise with the ignition and starter. If there are difficulties starting the engine, then first of all check the ignition coil. When idle speed disappears, the cause can be many factors, but most often it is the idle speed sensor.
It is not uncommon for the throttle position sensor to fail. The cost of replacing it is low - just like the new part itself. Purchasing a repair kit for the 4g15 unit will not be difficult; all parts are available for open sale. Difficulties often arise with increasing fuel consumption - suspicion primarily falls on the lambda probe, since it is this sensor that is responsible for obtaining information about the residual amount of oxygen in the exhaust gases.
If the car simply does not start, you need to familiarize yourself with the error codes. It is often necessary to adjust the tightening torque of the bolts on the cylinder head. Not often, but valve cover gaskets leak, which causes oil to get into the spark plug wells. It is important to constantly check the engine for loose tightening of bolted joints - the elimination of backlashes must occur in a timely manner.
Maintainability
The list of spare parts that may be needed for repairs is quite wide, but accessible - which is due to the high maintainability of cars equipped with 4g15 and analogues. The selection of parts is carried out precisely according to the engine number. To select sensors, distributor, crankshaft or fuel injection pump, you will need to know it. Finding it is not so easy; it is located on the right side next to the pipe coming from the radiator (the photo shows the place where the engine number is located):
Further, the search for spare parts can be carried out through the catalog, using the article number. It is worth familiarizing yourself in advance with the location of sensors and other parts that often fail (primarily fuel injection pump, pump, thermostat, distributor). The oil pressure sensor must be checked more often than others - since if the level of lubricants is insufficient, scuffing on the surface of the pistons is possible. You need to know where the engine number is located - since it will be needed to register the car.
It is worth noting the main advantages of operating the 4g15 engine:
- valve clearances need to be adjusted relatively rarely;
- replacing many parts does not require visiting a car service center; everything can be repaired in a garage (replace the ignition coil, exhaust manifold, oil pump);
- the repair process is quite simple from a technical point of view, so servicing a car even with high mileage will be relatively inexpensive (repair of hydraulic compensators, camshaft gears);
- the cost of spare parts is low - for example, purchasing valve stem seals or a pressure sensor in the intake manifold will cost several hundred rubles;
- checking the DPTZ can be carried out in any service center, adjusting the throttle position sensor can be done in a garage;
- Repair of the starter solenoid relay is rarely required - which simplifies troubleshooting if the engine cannot be started.
This is what the low-end dip graph looks like on a 4g15 engine:
If the car does not start, then there is probably a problem in the ignition circuit (it may lie in the starter, the intake manifold may be clogged). This circuit is simple in design, but you need to carefully examine all the components to find a fault. If starting problems occur in sub-zero temperatures, then the spark plugs are most likely flooded. Using a 4g15 engine at temperatures significantly below zero is problematic. You need to carefully monitor the voltage in the electrical wiring - if necessary, remove the generator and replace it.
The main bearings are, in fact, bearings for the connecting rod (designated as crankshaft bearings). It is necessary to carefully monitor their wear. Piston repairs are often required due to poor quality oil. Floating speeds can also be a consequence of poor-quality lubricant. In addition, there may be other reasons for this, for example, the use of a repair kit from an unknown manufacturer.
Replacement frequency
In order to prevent the Lancer 9 from breaking the timing drive and subsequent serious and expensive repairs, the belt should be replaced every 90 thousand km (according to the recommendation of the car manufacturer). But in reality, it is better not to reach such a mileage and change the drive a little earlier - at 70-80 thousand km.
We also note that you should not rely on the high quality of the belt and be sure that it will serve the required period, and periodically inspect it.
Delamination, small cracks, severe wear of the teeth, traces of leaks of technical fluids on the drive surface are reasons for premature replacement, since a belt with such damage can break at any time.