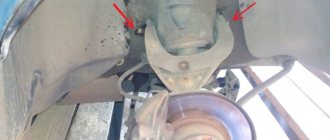
Rear suspension Focus 2
The Ford Focus 2 is known to car owners as a reliable and fairly durable car with a good suspension. At the same time, repairing the rear suspension of a car is quite complicated, and we will tell you how to do it in this material.
To replace Ford Focus 2 suspension parts, you can contact a specialized workshop, or you can save your own money and do it yourself in a garage. The rear suspension of the car is independent and multi-link. It has telescopic shock absorbers and anti-roll bars. Unlike the front axle, which is created according to the MacPherson principle (balls, levers, springs, struts and shock absorbers), it is more difficult and more expensive to maintain. In this regard, when repairing the rear suspension of a Ford Focus on their own, car owners have many questions.
Design features
The rear suspension design of the Ford Focus 2 consists of many parts and elements, including the following:
- shock absorbers;
- springs;
- trailing arms;
- anti-roll bars;
- levers below and above;
- adjustment bolts;
- silent blocks;
- brake flaps.
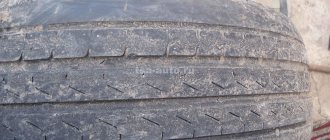
All of them are quite durable, but sooner or later they will definitely require replacement. For example, silent blocks are enough for about 100 thousand kilometers, stabilizer struts - up to 150 thousand, and shock absorbers - for 120-130 thousand kilometers. Note that the durability of the listed parts largely depends on the accuracy of the motorist and the roads on which the car is driven. The high cost of repair work on the Ford Focus 2 chassis is due to the fact that to replace even the smallest parts you have to disassemble the entire suspension of the car.
Ford Focus suspension diagram
Repair schemes for the two most common problems with the front suspension of Ford Focus 2
Front wheel bearing replacement diagram
It is advisable to replace both bearings at the same time.
- Jack up the car, unscrew the hub bolt, unscrew and remove the wheel.
- To avoid damage, we release the stabilizer bar link.
- Disconnect the ABS (anti-lock braking system) sensor terminal.
- Release the tie rod end.
- Remove the brake caliper. We do not disconnect the brake system hose. We secure the brake caliper in such a way as not to damage the hose. We knock down the brake disc.
- We unscrew the ball fastening nut and press it out using a puller or knock the pin out of the lever with a hammer. Please note that under no circumstances should you hit the ball, we hit the bottom of the steering knuckle.
- Unscrew the bolt connecting the shock absorber and steering knuckle. Using a chisel and hammer, loosen the terminal connection and release the shock absorber strut.
- We remove the steering knuckle by pulling out the constant velocity joint of the front wheel drive from the hub.
- The ABS sensor can be pulled out if you are afraid of damaging it. The bearing is equipped with a red seal. When replacing a bearing, buy the same one. The fact is that the wheel rotation sensor ring is combined with a bearing, and if there is a bearing without this red seal, the ABS will not work.
- Using a puller, press out the hub together with the bearing and press in a new one.
- We collect everything and go to do the wheel alignment.
The second problem that is often encountered in Ford Focus 2 is the failure of elements of the front suspension arm: the rear mounting silent block or the ball. Changing the ball joint is quite simple, but the silent block is not removable, and if it fails, then most often, due to the lack of special tools for repairs, the entire front suspension arm is replaced.
Source
Checking the suspension condition
To extend the service life of the rear axle of the chassis, its condition must be checked regularly. This should be done every 20 thousand kilometers or immediately after entering large holes or other obstacles.
Lever silent block
To check the condition of the Ford Focus 2 chassis yourself, you must follow certain instructions:
- Having raised the car on a lift or jacks, spin the rear wheel and watch how it rotates: rotation should occur without unnecessary noise and as easily as possible.
- Press the wheel from below and from above, trying to swing it in this way. There should be no knocking or play. Otherwise, have a helper apply the brakes while you do the same again. If the problem goes away, the bearing may be faulty. If not, continue diagnostics.
- Carefully insert a screwdriver between the lever and the steering knuckle. If there is play, the ball joint must be replaced. If only the ball boot is damaged, replace it.
- Insert a screwdriver or small pry bar between the subframe and the arm and try to move the eye. If it moves easily, the silent block is worn out and should be replaced. Pay attention to the integrity of the rubber bushing.
- Move the ball joints on the struts: if there is play, replace the stabilizer struts. The covers must be intact, and if they are damaged, replace them.
- Check the condition of the bushings, springs, cushions and shock absorber motion buffer. If there are oil leaks, replace the shock absorber. A malfunction of the telescopic stand can be diagnosed by damage to the rubber part of the upper support.
This work can be carried out on a lift or jack, and a pit or overpass is also suitable, which will provide easy access to the rear suspension elements of the Ford Focus 2.
Rear suspension Ford Focus 1, 2
The rear suspension on Ford Focus cars is multi-link, independent. It is a rather vulnerable element for Focuses, as it contains 8 levers and 14 silent blocks.
If, over time, your suspension begins to rumble, or a slight wobble of the stern appears when driving, then this article is for you.
Figure: Screenshot from the program for selecting spare parts, Ford Focus 1 and 2 suspension. It shows all the main rear suspension arms. The diagram shows:
5A638
– trailing arm silent block,
5500A
“bone” lever,
5500b
– “sickle” lever,
5K652
– large wishbone,
HB1
– fastening bolts (8 pcs. in total),
HB3
– silent block bolt (4 pcs.)
5500b
is a crescent-shaped lever; on a sedan and a station wagon they differ in shape (in this diagram the lever for a station wagon is drawn).
The arrows point to the camber bolt, nut and washer, which need to be changed every time the lever is removed (if this is not done, it will not be possible to set the required rear wheel alignment angles in the wheel alignment stand).
5A638
– The silent block of the rear trailing arm usually requires replacement along with the arms.
Fastened with HB3
, which are supplied only in the original (with variable thread).
5500A
This is a small wishbone, the so-called “bone”. These levers take a lot of load, I recommend installing the original, Febi, Lemforder or Meyle.
Figure - sickle rear suspension Ford Focus 1, 2 (sedan and hatchback)
Sickles on a station wagon
On station wagon cars, crescent-shaped levers of a different shape were installed from the factory; this was done because in a station wagon there is more load on the trunk, and when the trunk was loaded at maximum, in large holes there could be impacts of the standard crescent-shaped lever on the body. The station wagon's crescent-shaped arms resemble a banana in shape. When buying levers for a station wagon, you can buy standard levers from a sedan and hatchback, because “banana-shaped” levers are more expensive and there is less choice, these are either Chinese levers or expensive original ones. Standard “sickle-shaped” levers are cheaper and there are good analogues. As practice shows, messages from forums and so on, standard “sickles” from a sedan are easily installed on a station wagon, and this does not lead to any impacts or wear.
Figure - Crescent lever of the banana station wagon
Ford Focus 2 cars are equipped with two rear suspension options.
The first suspension option (straight arms) is the same as the Ford Focus 1 suspension, it has direct spring arms. Straight levers can be original or non-original.
Figure - Straight arms (Ford original number: 1357317)
Figure Straight levers on a Focus 2 car A stabilizer bar “pin” (1719542) is installed on the “straight” levers.
The second suspension option is distinguished by spring-loaded arms - they are “bent”. According to statistics, such levers occur in 1 case out of 10 cars. Levers are only original. You can install levers from Mazda 3, they are absolutely the same, they even have a FoMOCo stamp on them.
Also, the suspension with “bent arms” has a different type of stabilizer link. In order to determine what type of suspension is installed on your car, it is sometimes not enough to look at the VIN number in the catalog - there, in most cases, it is not visible what kind of rear suspension arms you have.
To determine which levers (the first or second option) are on your car, you need to approach the car from the exhaust pipe, look under the bumper and look at the spring lever on which the spring is installed. If it is straight, then you have the appropriate suspension and stabilizer bar - stud. If the lever is “crooked,” then the stabilizer link is L-shaped.
Figure - Rear wishbone (Ford original number: 1548460)
Features of replacing rear suspension arms.
In total, the Ford rear suspension has 6 levers that can be replaced during repairs - 2 “bones”, 2 “sickles” and 2 “for springs”. Most often, they wear out simultaneously, and gaps appear in each of them. Then they are changed all together, but there are exceptions; you can change “bones” or “sickles” separately, for example.
Signs of a malfunctioning Ford Focus rear suspension.
Symptoms indicating a malfunction of the rear suspension are, firstly, extraneous sounds, secondly, the yaw of the rear of the car when driving, and of course, when examined at a service station, you can see the condition of the silent blocks and the suspension as a whole.
Non-original parts.
If you find out that you have “straight arms”, then you can purchase a Focus rear suspension kit at an affordable price. If the lever is “bent”, then you can only buy an original lever (bones and sickles can be purchased that are not original). A complete set of Ford Focus rear suspension is produced by several companies. Mapco, Meyle, Ruville, Teknorot and others, rarely found in
St. Petersburg from suppliers.
Mapco (Chinese Germany, budget option, there are two options - with a set of bolts, spare part number - 53612/1 and without a set of bolts 53612).
Picture - set of levers for Ford Focus, Mapco 53612/1
Picture - Meyle rear suspension kit 7160500039/S.
The second company is Meyle, made in Germany, the quality is good.
There is a kit from Ruville (935259S). It is more expensive, but in addition to levers and bolts, it also includes two additional silent blocks for the fist (“butterflies”), which are also always changed.
Picture - rear suspension kit Ford Ruville 935259S
(please note that the kit includes butterfly silent blocks and shock absorber bumpers)
Ford Focus 1
from the link: Link
the Ford Focus 2
from the link: Link
Information from the website https://ford-partly.ru/articles/203640
Tools for work
Self-repair of the rear chassis of a Ford Focus 2 will take a lot of time, but will not require any special knowledge and skills from you. If you've dealt with suspension repairs on any other car, you can probably handle this one too. To work, you will need a set of tools, including:
- jacks, pit or lift;
- hexagons;
- set of open-end wrenches and sockets;
- hammer;
- puller;
- spring ties;
- lubricant type VD-40;
- Litol;
- sometimes you need a grinder.
If you have all of the above, you can start replacing the Ford Focus 2 rear suspension kit yourself.
Replacement of silent blocks of rear arms of Ford Focus 2
We place the car on a viewing hole or overpass, install wheel chocks under the front wheels and remove the rear wheel nuts. Jack up the rear of the car and remove the wheel.
- We thoroughly clean all suspension elements from dirt, treat the threaded connections with penetrating lubricant, wait a few minutes for the lubricant to soak in.
We lubricate everything we see.
Remove the spring by compressing it with zip ties.
Unscrew the nut securing the stabilizer strut.
- We rest the hydraulic jack or stand against the lower rear arm in the place where it is articulated with the spring-loaded arm, thereby loading the suspension elements.
- We mark the position of the washer, which corrects the camber angles of the wheels. You can use a center punch for this, but setting the correct wheel alignment will still be necessary; we will set approximate angles.
- Using a 15mm spanner, unscrew the bolt of the joint between the trailing and lower rear arm, then remove the bolt from the hole.
- To get to the adjusting bolt on the subframe, you need to move the adsorber. We press the latch and move the adsorber as far as possible to the side, after which you can remove the bolt.
- We unscrew the marked wheel alignment adjustment nut with a 18mm spanner, while holding the bolt head with a 19mm spanner.
- We take out the adjusting bolt, the lower rear arm should remain in our hands.
Getting ready for re-pressing.
- Using spacers and a press or a special puller with grips, we press out the silent blocks, clean the seating surfaces from dirt, apply a small layer of grease and press in new silent blocks.
The remaining silent blocks are changed using the same method with the arms completely removed. Assembly is carried out in reverse order. Soft and silent suspension for everyone and vivid travel impressions!
Let's start the renovation
First you need to drive the car onto a lift, pit or lift it on a lift. Next, you should install the coupler on the springs and compress them as much as possible. You won't be able to remove them, but there's no need to. Raise the main lever, which is mounted on the wheel, using a jack, and unscrew the bolt that secures the lever under the spring.
Broken suspension arm
Remove the springs and move the lever to the side so that it does not interfere with you in the future. Remove the two arms and the shock absorber at the lower mounting point. Disconnect the handbrake cable from the hook. Remove the bolt from the ABS sensor, the terminal and unscrew the two bolts that hold the rear suspension wishbone.
Move the wishbone to the side and you will have the opportunity to replace the lower and upper arms of the Ford Focus 2. At this stage, take your time so that nothing breaks. Next, replace the silent block, even if it is still intact. It is better to replace it now so that you do not have to disassemble the entire rear suspension in the future because of it. This element is dismantled under pressure using a special metal cylinder. You can buy this device in a store or turn it from a turner to the following dimensions:
- diameter 58 mm;
- height 70 mm;
- internal diameter 35 mm;
- depth 50 mm.
Next, insert the new silent block into place and remove the spring-loaded lever, and then replace it with a new one if necessary. The rear suspension of the Ford Focus 2 is assembled independently in the reverse order. Thus, by spending a little free time you can save a considerable amount of money on the work of professional craftsmen at a service station. Additionally, we recommend watching videos that will help you understand everything.
Replacing rear shock absorber Ford Focus 2
If oil stains appear in the area of the rear shock absorber rod, and the car begins to drive over bumps with the rear part of the body swaying, the shock absorber has failed and needs to be replaced. We carry out the work as follows:
- for convenience, remove the rear wheel;
- We place a support under the rear suspension (for example, an old unnecessary wheel rim), and lower the car a little on the jack - you need to make sure that the suspension spring is compressed somewhat;
- this is done so that when the shock absorber is removed, the spring does not straighten without load and shoot upward;
- unscrew the bottom bolt that holds the shock absorber, for this you will need a wrench with a 15mm head;
- from the body (inside the wheel arch) unscrew the two bolts securing the shock absorber support to the body; here you will need a 10 mm socket wrench or a socket with an extension and a wrench;
- We dismantle the part to be replaced, install a new shock absorber in place, and carry out the assembly.