Basics of pistol shooting and some aspects of the training process
Introduction.
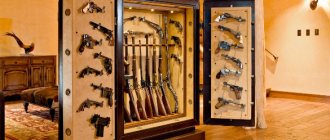
Shooting in general and pistol shooting in particular is a fascinating activity and is becoming increasingly popular today. The increased availability of firearms contributes to this. Now anyone can join the shooting sport and almost anyone can purchase a firearm for personal use.
Hence, the issue of training a shooter arises more and more acutely, and sometimes disputes arise about the methods of shooting training. The provisions of the IPSC, other sports disciplines, the achievements of individuals and methodological materials of law enforcement agencies are often cited as arguments. In this case, as a rule, the main attention is paid not to discussing the development of pistol shooting techniques, but only to specific shooting exercises. As a rule, the main task of shooting as an applied discipline, which has a clearly expressed practical orientation, is blurred. It can be argued that modern shooting sports have turned into isolated trends and divorced from real needs - this, as a rule, gives rise to disputes about the directions in which the development of shooting training should be carried out. Conducting pistol shooting requires the development of separate techniques for each of the assigned tasks.
It is logical to select a shooting training methodology based on an understanding of how to use the acquired skills in life. In principle, this is how biathlon, IPSC and other shooting disciplines were born. Another thing is that, having become formalized, they turned into a sport of high achievements. To put it mildly, disconnected from life processes. I don’t want to say at all that the athletes are wrong. I am sure that if a biathlete is given a backpack and hunting skis, and a machine gun instead of a sports rifle, he will still show results that are unattainable for an ordinary person. But it is still impossible to train according to sports rules for a wide range of shooters. Pistol shooting practice should be different. The main problem is that in order to achieve high sports results, every exercise is brought to automaticity by athletes and is performed on reflexes. And this is not always good.
For a better understanding of correct pistol shooting, we can cite the position of the Germans in matters of training fighters, what they call the formation of the “hunting spirit.” They believe that when studying martial art, one must not learn techniques for all occasions and develop behavioral models for all conceivable situations, which is in principle impossible. And you should learn the “hunting mood”, which will subordinate all the actions of the trainees to one goal - achieving superiority over the enemy and will itself suggest the correct action in any situation.
The main task for the Germans, when teaching specific tactics and handling weapons, is to feel this “hunting mood” and learn to achieve it if necessary. In my opinion, this is the right approach also because you can often see how developed reflexes do not correspond to the current situation, and sometimes even cause harm. Would you like an example from the practice of pistol shooting about the dangers of reflexes? Please!
Everyone is used to carrying a pistol with an empty chamber, and the rules require it. It is a very fashionable phenomenon to pull the bolt of a pistol by the front part, I agree, since the rule is easier. And so, in those cases when it is necessary to shoot from a position with a cartridge in the chamber, often the shooter, when taking the pistol out of the holster, out of habit, jerks the bolt. At the same time, if he pulls the bolt by the front part, then with his hand he blocks the window for ejecting cartridges and interferes with the normal extraction of the cartridge. Accordingly, the weapon jams and there is a delay in firing. And these are far from isolated cases. We will also talk about misfire when shooting a pistol and the reasons that cause it in separate materials.
Rapid fire
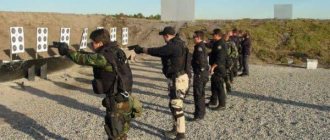
Unfortunately, there are no well-known training manuals for teaching high-speed pistol shooting in law enforcement agencies. Described in the shooting manual, the classic one-handed shooting stance is good for sports competitions and is rarely used in practice. A pistol has traditionally been viewed as an auxiliary and ineffective weapon. Although, with proper training, you can achieve amazing results in pistol shooting. For example, I had to observe how, from a PM, the first shots confidently hit such small targets as a bottle, a flask, or a spoon at a distance of 100 m. This is not a typo; with correct aiming, the PM allows you to “work” at IOO meters. At 25 meters from a PM, shooting at speed, you can place bullets in a size of 25 cm by 30 cm, i.e. approximately the size of a human head.
Abroad, they have always paid and continue to pay great attention to the theory and practice of high-speed shooting from a pistol. Moreover, recently, according to experts, it is not the ability to shoot quickly in general that is becoming increasingly important, but precisely the speed with which the shooter can open fire. A favorable outcome of a firefight depends in most cases not only on the ability to quickly pull the trigger, but also on the reaction of the guard, the proximity of the pistol to the hand, the convenience of snatching it and the skills of hitting the target as quickly as possible.
For example, statistics on the use of military weapons by US police indicate the following. Fire contact lasts on average 2.8 seconds before one of the opponents is disabled. On average, both sides manage to fire 2.8 rounds. In 75% of cases of fire confrontation, the distance does not exceed 6.4 meters. Although security forces work in a slightly different environment than the police, the conditions in which they use weapons are often similar to those described above. Therefore, it is necessary to teach security specialists not only marksmanship, but also how to carry a weapon in a way that is easy to grab, high-speed aiming, and the ability to fire quickly.
Let's start with how it is more convenient to carry a pistol so that it can be easily grabbed.
WAYS TO CARRY A PISTOL
Standard holsters for PMs and other domestic pistols are convenient for storing weapons in the field, but are not suitable for quickly removing a pistol. Even when properly adjusted, they are uncomfortable. Even if you cut off the lid and most of the outer side of the holster and remove the auxiliary strap, even in this case it is not easy to get the pistol with one hand in a calm environment.
The holster for shoulder (concealed) carry is not very convenient to grab. This holster hides the weapon well, especially if the outer clothing is loose or unbuttoned. There are 2 types of such holsters. Holsters in which the pistol is positioned vertically (barrel down), and with the pistol positioned horizontally (barrel back, handle forward). The latter type is more convenient to grab.
But, nevertheless, both types have disadvantages.
First, the pistol is positioned far from the hand, which must first rise up under the shoulder to draw the pistol, and then back down to chest level to aim at the target.
Secondly, you need to put your hand behind the lapel of your clothing, which also slows down the removal of the weapon.
Thirdly, in holsters of this type it is impossible to constantly carry a weapon without using a holster fastener, and unfastening it takes time.
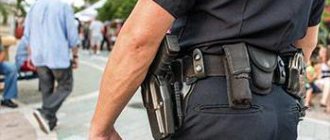
Quite often, guards carry weapons openly on a waist belt, on the right side of the abdomen or on the right side, believing that in this case the weapon is at hand and is convenient to take out.
In addition to the fact that openly carrying a weapon provokes a criminal’s desire to take possession of it, it should be noted that the enemy in this case easily notices the security guard’s attempt to get the weapon. By quickly approaching the guard, the enemy has the opportunity, by lowering his left hand onto the guard's right hand, to deprive the guard of freedom of movement.
At the same time, the enemy’s right hand remains free against the guard’s left hand and quite wide, compared to a shackled guard, freedom of movement. While practicing this option in training, I became convinced that, given the same physical conditions, the “enemy” in this position has an advantage over the “guard.”
In my opinion, for quick preparation for shooting, the following options for carrying weapons are most acceptable.
Option 1
On the left side of the stomach, in a so-called flatbread type holster, with the handle pointing to the right. The holster snaps onto the outer edge of the trouser top and sits between the trousers and the body. The handle is located above the top edge of the trousers and is adjacent to the stomach. This position is convenient because the gun can be quickly removed with both the right and left hands. The left hem of the clothing can be easily thrown to the side with your left hand or hip so that it does not interfere. The pistol can be removed easily and quickly, and is very convenient for shooting.
Option 2
The pistol is placed on the right thigh under loose or unbuttoned outer clothing. This is the method recommended by FBI agents as the most convenient for quickly snatching a weapon. It should be noted that in domestic holsters for such carrying, pistols are positioned with the barrel vertically down, the handle parallel to the trouser belt or below the belt.
Abroad, a more convenient method for snatching has been adopted. The pistol is positioned tilted, the handle forward, the barrel backward, the handle above the waist belt. In addition to faster drawing, when worn this way, the pistol fits more tightly to the body, does not dangle or move when walking, running and overcoming obstacles.
Option 3
The holster is attached to the waist belt with long fastening straps. This is how Western heroes carry revolvers. In this case, the weapon hangs in the hip area, so that the handle is next to the palm of the lowered hand.
This method is not suitable for bodyguards, but is very convenient for security guards of any facility (office, entrance area, checkpoint, etc.). Weapons are always at hand and can be obtained easily and quickly. The hand, moving upward, seems to pick up the pistol, and it is ready to fire. Even if the holster is fastened, the latter can be easily unfastened when pulled out with your thumb. If the enemy is close and tries to block the guard's hand when drawing a weapon, then he will have to bend over to reach the holster, i.e. assume an unstable position.
The guard will be in a more advantageous position. In emergency situations, you can fire point-blank without removing the pistol from the holster, from the hip, through the bottom of the holster, pointing it at the enemy.
CORRECT HOLDING OF THE WEAPON
Many shooters, wanting to grip the pistol more tightly, take it very deeply with their palm. In this case, the back of the handle is located close to the tubercle of the thumb. As a result of this grip, when pointed at the target, the pistol is located in the hand at an angle to the wrist bone. With such a grip, it becomes difficult to point the weapon at the target and hold the weapon, it is more difficult to press the trigger, and the recoil force is not perceived by the whole hand, but only by the thumb. The pistol bounces more when fired, making it difficult to re-aim the target.
An experienced athlete takes the pistol with his left hand, inserts it into his right hand and then adjusts it with his left hand so that the pistol fits correctly in his hand. How to properly grab a pistol with one hand? To do this, the correct position of the hand is first formed. Four fingers together, the thumb is set aside the width of the handle and parallel to the other fingers. We lower the brush formed in this way onto the handle. The thumb presses the handle to the palm, the pistol is removed from the holster and ends up in the position shown in Fig. The index finger rests on the trigger, the rest wrap around the handle.
Please pay attention to the following points:
The barrel of the gun should be in line with your hand.
The thumb is straightened, directed along the trunk. If you keep it bent, then the grip deteriorates, the tension of the thumb increases the shaking of the weapon.
The middle, ring and little fingers are closed and tightly grip the handle. The upper edge of the middle finger rests against the trigger guard so that, firstly, the weight of the weapon is better distributed in the hand, and secondly, the guard is used as a limiter for the fingers.
The nail and second phalanges of the index finger should not touch the side surface of the gun.
Having practiced the one-handed grip, we move on to the two-handed grip. We perform all the previous steps for gripping with one hand. The heel of the left palm is then pressed against the left side of the handle. The four fingers of the left hand are placed on top of the fingers of the right hand, supporting the pistol at the base of the barrel and under the trigger guard. The thumb of the left hand with its lateral surface is placed on the side surface of the bolt frame. At the same time, the thumb reduces vibrations and makes it easier to restore aim at the target after a shot.
You should not be afraid that the bolt frame will damage your finger when firing. When firing from PM-1, PM-2, PSS, PSM, APS, PB, Colt M-1911, Walter P-1 (P-38), VIS-35, STAR, TT, the thumb does not even feel the movement of the bolt frame. When firing a revolver, the thumb is placed on the side of the body below the cylinder.
The grip force is fixed in the shooter’s muscle memory and comes with training. At first, the shooter will have to carefully check the position of the weapon. The test is carried out like this: you need to get ready, aim and tighten and loosen the grip on the handle. With the correct grip, this action should not affect the position of the front sight in the sight slot.
SHOOTING STANCE
Upon locating the target, the shooter places his feet shoulder-width apart, feet slightly turned out in a circle, and the strong (usually right) leg is pushed back and acts as a support to absorb recoil. The body is turned slightly back with the right shoulder, the left shoulder is brought forward. The body leans forward. As American instructors say when describing this position, “the chin should be slightly in front of the knees.”
The pistol is raised to eye level with both hands; at close distances (5-10 m), the arms do not need to be fully straightened. If the target is located further than 15m, then it is better to keep your arms straight.
In this position, barrel jump is significantly reduced, aiming recovery is made easier, and recoil is absorbed by the entire body. In addition, in such a stance it is much more convenient to transfer fire to another target by turning the body using the back muscles.
When shooting with both hands, some shooters place their legs parallel on the same line and do not move their right leg back. With such a preparation, recoil is dampened worse, which means that aiming recovery is worse. For greater stability, you have to bend your knees more strongly, which means that muscle tension and trembling of the entire body increases. This configuration is more suitable for precision shooting at long distances, rather than for high-speed shooting.
It is advisable to keep your legs straight when shooting - this provides high rigidity to the arrow-weapon system.
DRAWING THE GUN AND SHOOTING
If the weapon is carried according to option 3, the hand is placed on the handle, then sharply bends at the elbow, removing the weapon.
In other variants, the arm is sharply bent at the elbow, the elbow moves up and back. At the same time, with the left hand or body movement, the hem of the clothing covering the weapon is thrown away.
The right hand grasps the handle of the weapon. The left hand is applied to the abdominal area. If necessary, from this position you can use it to hit the enemy, move his weapon to the side, or push or move the protected person behind you.
The pistol is removed from the holster, eyes looking at the target. Raising the pistol to the level of the stomach, the shooter removes the safety with his thumb. With your left hand, the trigger is cocked, and, if necessary, a cartridge is sent into the chamber.
It’s more convenient to do it this way. The left palm is placed on top of the bolt frame and squeezes it. The right hand moves forward and upward, bringing the gun to eye level. The left hand, having moved the bolt to the rear position, releases it and then picks up the pistol, as described above.
The first shot towards the enemy can be fired by self-cocking while still raising the weapon to eye level from the stomach or chest. The second shot can be fired more accurately, since the trigger is already cocked and the trigger force is reduced.
Each shooter must choose whether to aim with one eye or both. When aiming with one eye, his visual acuity is reduced by 30%. When aiming with two eyes, the target is better visible, it is easier to detect other targets, but it is more difficult to sight the rear sight, front sight and target - all these objects blur.
It should be remembered that with the tightest grip, the gun still makes oscillatory movements, as if floating.
When pulling the trigger, you should not be embarrassed by slight vibrations of the front sight in the target area. The desire to trigger the trigger at the moment of the best coincidence of the front sight and the aiming point entails tugging on the trigger and moving the pistol away from the target when shooting.
Depending on the shape and size of the target, there is an area around the aiming point, at each point of which a correct shot can be guaranteed to hit the center.
Hit accuracy, especially during high-speed shooting, depends on the ease of triggering. The lighter the trigger, the less the gun will jerk. The PM pistol and its analogues have a rather heavy trigger. The trigger force can be reduced by reducing the bending of the mainspring. Sharpening the trigger lug makes the descent much easier. But it should be remembered that pistols with a light trigger are more sensitive to contamination and misfire more often. But if you sharpen the trigger lug a little more, the pistol will fire in bursts.
A good shooter should know that in wet weather, fog, twilight, and poor visibility, the trajectory of a bullet decreases. When shooting in such conditions at long distances, you should aim higher than usual.
Due to the fact that the pistol is a short-barreled weapon, the trajectory of its shot differs from the trajectory of a long-barreled weapon. Taking this into account, when shooting, you should strive to keep the barrel of the pistol at the same level as the target. You should shoot from a kneeling position at a low target, while standing at a high target.
Some features of shooting in combat conditions When the life of a shooter is in danger, it is quite difficult for him to maintain composure and control his actions. The movements become convulsive, the index finger does not press, but tears the trigger, as a result the target remains unhit. During the fighting in Grozny in January 1995, there were cases when soldiers and officers fired bursts at fleeing militants at a distance of 10-15 meters and could not hit them. In close combat, the one with the stronger nerves wins.
Author: Anatoly Orekhov
Pistol shooting: technique*.
Returning to the debate about where to develop shooting training. I would like to present to you several chapters describing the training of shooters. This technique is quite old, time-tested, only in my memory it has existed for over 25 years. For several generations of shooters it has been used, developed and enriched. I hope this continues. I hope that the experience and skills of today’s readers will also, in due time, complement it and make it even better.
It is best to start shooting training with a pistol. Shooting with a pistol is technically easier to learn and psychologically more comfortable to switch from a pistol to a long barrel. Having mastered the basics of pistol shooting at short distances and gained possession of a full-fledged “thunder stick”, the shooter feels almost omnipotent. Such a shooter does not have the constant worry of a machine gunner that the cartridges are about to run out. There is no confusion when the enemy suddenly appears critically close, that is, at normal distances for a pistol. And the most useful thing is that, having gotten used to dynamic pistol shooting, the shooter transfers this quality to shooting from a machine gun or carbine, which gives him a significant advantage.
Article on the topic: “Basics of bullet shooting training methods”
Basics of bullet shooting training methods
Trainer-teacher of MAU DO Youth Sports School No. 5 Yu.N. Mitenev
The main feature of teaching shooting techniques and rules is that, along with acquiring certain knowledge, students must receive correct, strong skills in using weapons, therefore the main teaching methods are demonstration methods and exercises.
When studying shooting techniques and rules, the following organization and methods of conducting classes are considered the most appropriate:
– techniques learned for the first time should be shown to the whole group at the same time. For this purpose, the frontal group teaching method is used. After an exemplary demonstration of the technique, the leader of the lesson is located on one of the flanks, and his assistant is on the other. This type of construction is usually used when studying techniques that do not require students to move (inspecting weapons, loading, unloading, etc.);
– classes on practicing already learned techniques have a slightly different organization. The training group is divided into sections, which study separately in special, pre-prepared training places. The content of the material practiced at each training place is determined by the lesson leader in accordance with the plan. For example, when training to fire a shot, shooting techniques are practiced at one training place, standards are met at another, and shooting exercises are performed at a third.
When performing shooting techniques using training weapons, the leader must also pay special attention to compliance with safety measures: inspecting the weapon, monitoring its direction upward or away from people, checking the position of the safety catch, placing a finger on the trigger only in permitted cases, etc. During preparation Before classes, the leader should carefully consider the sequence of teaching each technique (action) element by element, highlight the key elements, and determine the connection between them.
To create a visual representation of the technique of performing various shooting techniques, students should concentrate their attention on the exercise being learned during the demonstration, for which it is necessary to correctly name the technique and demonstrate in an exemplary manner the technique of its implementation.
When demonstrating a technique, a certain sequence should be followed: name the technique, show its correct execution as a whole, first at a fast pace, then at a slow pace; demonstrate the elements of the technique with an accompanying explanation of the technique of its implementation. The most complex techniques can be demonstrated twice, in different positions in relation to the students. The techniques and elements (movements) demonstrated during the demonstration must be performed extremely accurately, exemplarily, with the students’ attention concentrated on the most important elements and actions.
The process of developing shooting skills includes three main stages: the first consists of dividing a technique (complex action) into parts and learning to perform each element separately; the second represents the sequential grouping and fused execution of individual elements, and then the execution of the technique as a whole; the third stage is the main and decisive one in the process of skill formation. It is aimed at consolidating and improving the correct technique of a learned technique or action, as well as increasing the physical and volitional capabilities of students by developing the necessary qualities.
Creating a variety of training conditions allows you to bring the learned technique to automaticity in any complex and rapidly changing environment, which is necessary both for shooting in real conditions and for the professional application of acquired skills and abilities. Automaticity of actions is formed gradually through repeated repetition of exercises during training.
When performing shooting techniques, many mistakes made by trainees cannot be identified on the spot, since they usually manifest themselves in a complex manner, as a rule, are most often expressed by small movements that are not noticeable to the eye, and occur in a short period of time. In these conditions, to objectively identify errors, it is necessary to use training shooting instruments. However, it is difficult to detect an error (a series of errors) using instruments; this requires extensive methodological experience of the lesson leader.
The most difficult shooting techniques are: aiming, holding the weapon (aiming) and smoothly releasing the trigger. Typically, in initial training, the main reasons for poor shooting depend on errors manifested in performing the specified actions. Thus, inaccuracies in aiming during shooting affect the result due to incorrect distribution of attention (for example, due to focusing vision on the position of the front sight relative to the aiming point), the shooter may not have enough control over the position of the front sight in the slot, which will cause an unsuccessful shot. In this case, the supervisor must explain to the trainee that the main attention when aiming should be paid to the position of the front sight in the rear sight slot. To prove it, you need to shoot at a white screen. Usually in this case, with a smooth release of the trigger, the shooting results are much better, and this occurs due to the concentration of attention on the even front sight in the slot, since there is no distracting object (aiming point). If, when shooting at a white screen, the results do not improve, then most often the mistakes consist of the fact that the shooter, at the moment of firing the shot, expecting a push of the weapon in the shoulder during recoil, sharply presses the trigger, while significantly displacing the weapon from aiming due to the sharp contractions of the muscles that support the weapon.
You can get rid of this error by sequentially performing the following preparatory exercises:
– training without shooting, including using SKAT shooting simulators;
– shooting from small-caliber weapons (the small caliber and low recoil of the weapon will help the trainee not be afraid of a shot) 5.6 mm MCM;
– shooting at a white screen (the absence of an aiming area will teach the student to concentrate attention when aiming on the sighting devices, and not on the target);
– shooting with alternating shots (live cartridges are loaded into the magazine interspersed with blanks). Only after this can you start shooting yourself with live ammunition. Difficulties experienced by inexperienced shooters include:
– excitement at the point of opening fire, fear when handling military weapons;
– the desire for absolutely precise placement of sighting devices at the aiming point. It is necessary to explain that in order to hit the top ten, it is necessary to keep the front sight with the rear sight in the aiming area with a diameter of 10 cm;
– the desire to overcome weapon vibrations that prevent you from keeping the front sight level while aiming;
- a self-defense reflex of the shooter to the expected sound of a shot and the recoil of a weapon, manifested in a sharp contraction of the muscle groups involved in holding it (when shooting from a machine gun - the muscles of the right shoulder, left hand, neck muscles, etc.; when shooting from a pistol - the muscles of the hand right hand, etc.), which leads to large weapon deflection angles and misses.
Overcoming the listed psychological difficulties is ensured in the learning process and is achieved:
a) creating in students the following ideas:
– how does the deviation of the straight front sight from the aiming point affect the shooting result;
– what are the consequences of a sharp impact on the trigger;
– the possibility of isolated, non-disturbing weapon aiming, movement of the index finger of the right hand when slowly, smoothly pressing the trigger;
- in what cases will aiming be correct - when the shooter, when aiming the pistol at the target, sees the sighting devices more clearly and the target less clearly, or vice versa;
– what happens when the muscles of the shoulder girdle are severely overstrained while waiting for a shot;
b) the formation of skills in trainees with the purposeful involvement of the shooter’s volitional effort to maintain the aim of the weapon when firing a shot:
– smooth, even pressing of the trigger with some slowdown before firing;
– concentration of the shooter’s attention on his own feeling of pressing the trigger of the weapon and on the stability of the force of holding the weapon;
– developing the ability to control one’s actions in the process of firing a shot.
The listed methods of training to shoot small arms allow you to overcome the listed psychological difficulties in a relatively short time and achieve high results in shooting.
THE MOST TYPICAL ERRORS WHEN SHOOTING AND METHODS FOR THEIR ELIMINATION
IVANYUK A.M. KLIMENKO A.A., Candidate of Legal SciencesProfessional training, shooting, shifting the point of impact, the shooter's breathing, aiming, technique of releasing the trigger, errors in preparation for shooting, ways to eliminate errors when shooting.
The article analyzes the most important aspects of the psychological state during the execution and firing of a shot. The most typical mistakes made when firing a shot at the initial stage of training are considered. It is concluded that a novice shooter needs to approach each training session consciously, thoughtfully and with an understanding of its goals. If training is reduced to monotonous learning of repetitive mechanical actions, then with a high degree of probability the shooter will not be able to achieve great success in this type of professional training.
One of the main sections of professional training for internal affairs officers is fire training. Its goal is to teach skillful use of service weapons, accurate fire in various situations, and ensure the completion of tasks related to the use of firearms. A study of the circumstances of the use and use of firearms by internal affairs officers made it possible to identify certain trends and conditions in which the shooting took place. According to statistics, weapons are most often used and used at shooting distances of less than 10 meters (86% of cases). Shooting is mainly carried out from a standing position (59.9%).
Let's look at the most common (typical) mistakes made when shooting. As a rule, these are errors in preparation for shooting, which are typical for the majority of both beginners and more experienced shooters, aiming errors, as well as errors in the technique of releasing the trigger.
When preparing for shooting, the shooter should expend as little effort as possible, that is, it is necessary to free himself from tension, ensure the most comfortable position of the legs, torso, arms and head. In addition, it is known that too narrow the position of the legs brings the support points closer together and negatively affects stability, especially in adverse weather conditions (for example, in rain) and when performing high-speed shooting associated with quick actions and pauses, and too wide the position of the legs leads to excessive muscle tension and makes it difficult for the shooter to assume a level body position.
The most typical mistakes in preparing for shooting are a twisted body, incorrect position of the legs, and bending of the arms with the weapon [1]. Let's look at them in more detail.
Let's assume that the shooter takes a shooting stance sideways to the target, and then twists the torso from the waist towards the target by 30-45 degrees, while maintaining half-bent legs in the original position. As a result, the body rotates. It is difficult to fire in this position; the spread of bullets relative to the target can be seen. This error can be eliminated by changing the position of the legs. The main thing is to identify and begin to correct this error in the early stages of shooting training, since in the future the shooter may form the habit of standing in a certain way and it will be extremely difficult to correct the stance.
In addition, beginners often notice a rotation of the toe of their right foot in the direction of the target. In this pose, the center of gravity is transferred to the back leg, the front leg relaxes. In this case, the shooter does not have sufficient body stability when shooting. Uneven distribution of body weight on the legs is also observed when throwing the body back or leaning forward. When preparing for shooting, the body must be in a straight position, then the legs are evenly loaded and a large angle of rotation of the body relative to the target is possible.
There are situations when the shooter, preparing to shoot, turns his body at an angle of more than 90 degrees relative to the target, that is, he becomes almost with his back to the target. Adopting such a stance does not lead to a positive result and, apart from harm, does nothing. In this position, the hand with the gun is extended to the right, the shoulder blades are brought to the spine, the muscles are tense. During shooting, the hand tends to take a comfortable position, which leads to bullets tearing to the left and up.
Let's look at the problems that arise when bending the arm with the weapon (at the elbow joint) and putting too much tension on the outstretched arm(s). As a general rule, shooting is carried out with the arm fully extended and without much tension in the elbow joint. With a half-bent arm, the hand is located at an angle to the forearm, which makes aiming the weapon more difficult. The force of the recoil causes the pistol to move sharply with each shot. The displacement of the weapon with a bent arm will always be greater than with an extended arm. Thus, the time spent on restoring aim for the next shot will be less when shooting with an outstretched arm than when shooting with a bent one. It should also be added that fear of recoil very often prevents the shooter from performing the exercise well. But if a student learns to hold a weapon correctly while shooting, he will be able to understand that there is nothing wrong with recoil.
Often shooters are faced with the problem of the point of impact shifting when shooting. This shift occurs for many reasons: uncertainty when shooting, the need to bring the weapon to normal combat, fear, etc.
It should be noted that each person has certain rhythms, which, under conditions of increased stress, manifest themselves in increased breathing, heartbeat, and involuntary twitching of muscles. If a novice shooter tries to control these rhythms, then nothing good will come of it. On the contrary, this will only distract the shooter from directly completing the task assigned to him. Therefore, it is better to learn to shoot according to your rhythms from the very beginning. And this means you need to be sensitive to waiting for the right moment to shoot. In any case, the weapon will tremble slightly in your hands, and the barrel will sway. Therefore, instead of forcibly combining the rear sight and front sight, you should wait until they themselves are level, and only then fire a shot. Of course, this may take seconds, but at the initial stage of shooting you should not chase speed.
Aiming is giving the weapon a certain position in space before firing to ensure that the projectile (bullet) meets the target. These actions are performed using a sight and front sight. Monocular aiming is pointing the weapon at a target by closing one eye. With the binocular method, visual perception of an open, non-aiming eye is suppressed not by squinting, but by volitional effort (mentally). The positive side of this method is that with binocular aiming, the visual acuity of the aiming eye increases by about 20%. At the same time, in no case should you “aim” or delay the firing of the shot.
It is necessary to concentrate your vision on the rear sight, you need to see the rear sight itself sharply, and also clearly and clearly see the front sight in the rear sight slot. The shooter should not see the target (or target) clearly; it should be blurry, without clear boundaries. You can practice holding a level front sight on a training target.
In order for aiming to be more accurate, you need to close your left eye and look through the slot of the sight at the front sight with your right eye so that the front sight is strictly in the middle of the slot, and its top is level with the upper edges of the mane of the sighting bar. After this, it is necessary, holding your breath as you exhale, to bring the front sight straight to the aiming point, while simultaneously pressing the trigger. If the front sight is moved away from the middle of the slot, as well as above or below its edges, accurate shooting will not work. And the greater the error in the position of the front sight relative to the sight slot, the greater will be the deviation of the bullets from the aiming point. The bullets are deflected in the direction of the front sight displacement.
In order not to reduce shooting accuracy, it is recommended not to aim for a long time. If the opening of fire for some reason was delayed by more than 10 seconds, then it is better to stop aiming and give the eye a rest for 5-10 seconds. The eye should also rest between shots.
Pulling the trigger is one of the most important and critical elements of shooting technology. You must hold your breath while pulling the trigger. If you breathe freely at this time, the weapon will be subject to vibrations: when you inhale, the barrel moves down, and when you exhale, it moves up. The barrel oscillates within 1-2 cm, which when shooting at a distance of 100 m will cause bullets to scatter up to 1 m up and down from the aiming point.
The most important element when aiming is constant visual control of the sight, that is, keeping the front sight in the rear sight throughout the entire time allotted for the shot. The trigger is released simultaneously with aiming. The method of releasing the trigger is of great importance in firing a shot. To achieve a good result and a well-aimed shot, the shooter must smoothly press the trigger and aim not separately, but strictly balanced. Producing a smooth trigger places special demands on the work of the index finger of the right hand when pressing the trigger. In order for the index finger to perform such work without disturbing the aim, it is first necessary that the left hand correctly grasps the neck of the rifle butt or the pistol handle, creating a support that will allow the index finger to overcome the resistance of the trigger when pressed. You need to grasp the neck of the butt and the pistol handle quite tightly, but without excessive force, since muscle tension in the hand can lead to increased vibration of the pistol or rifle. To fire a shot, the shooter must learn to smoothly and evenly increase pressure on the trigger, but this does not mean that he needs to press slowly: pulling the trigger should take no more than 1.5-2.5 seconds.
However, the ability to smoothly pull the trigger alone is not enough to fire a well-aimed shot. The second important condition: the work of the index finger when pressing the trigger must be balanced with correct aiming. To develop this skill, it is extremely useful to train the strength of your fingers. This can be done in many ways, it is usually recommended to exercise with an expander, which can be used as a training device almost anywhere. For physically stronger beginner shooters, finger push-ups are suitable; this exercise will also help develop the necessary strength.
As practice shows, shooters involved in sports shooting use a large number of trigger control methods. Their choice is made depending on the “character” of the trigger mechanism, the type of preparation used (they differ from each other in the degree of stability of the weapon), as well as the psychological preparedness of the shooter. In addition, a teacher or trainer can independently select certain methods of trigger control, taking into account the characteristics of the shooter. One of the most serious mistakes made by a shooter when firing a shot is the so-called “jerking,” that is, a sharp jerk of the trigger.
The shooter must promptly identify his mistakes and correct them. In order to detect errors, he should aim carefully and carefully monitor everything that happens to the weapon while pressing the trigger. This “idle” training has many positive aspects, as it contributes to the acquisition of motor skills for pulling the trigger. It allows you to practice the correct trigger release technique, in which the weapon will not move to the side or flinch too much when you pull the trigger. Therefore, during all shooting classes, students must constantly practice shooting skills with an empty magazine to improve the coordination of their movements and improve the quality of independent control over the position of the weapon. Exercises using a dumbbell or other device that can be held in a static position for a long time are very effective. They help train the trigger by simulating a trigger pull. These exercises help the shooter develop the necessary skills, including developing the ability to hold a pistol or other weapon used for shooting for a long time in a static position, due to which one can achieve better results when shooting with live ammunition.
To summarize all of the above, it should be noted that a novice shooter should approach each training session consciously, thoughtfully, with an understanding of its goals. After all, if training is reduced to monotonous learning of repetitive mechanical actions, then with a high degree of probability the shooter will not be able to achieve success in this type of training. Due to his repeated incorrect actions in practice and the downplaying of the theoretical aspects of fire training, the mistakes he makes will be reinforced, and it will be extremely difficult to correct them in the future. Therefore, you should learn shooting gradually, starting with learning the basics of shooting art.
Bibliography:
1. Ivanyuk A.M., Klimenko A.A. On the problem of developing knowledge, abilities and skills of shooting from service weapons by cadets of universities of the Ministry of Internal Affairs of Russia in the context of applying the principle of minimizing harm // Bulletin of the Kaliningrad branch of the St. Petersburg University of the Ministry of Internal Affairs of Russia. 2020. No. 2 (44). pp. 105-110.
Source: Bulletin of the Kaliningrad branch of the St. Petersburg University of the Ministry of Internal Affairs of Russia. 2020. No. 3 (53)
POSITIONS IN THE GATEWAY AND DOUBLE-GATEWAY
8. gun position
———————————————————————————————-
We have described the details and areas of importance in what constitutes the components of the holding position. The ready position in the trap discipline consists of three stages - the starting position, the transitional stage of positioning the gun and the final position before the command for the target to fly is given.
So far we have looked at the starting and ending positions, and how the body is positioned during these stages. We will now look at the transitional stage and see how this movement is produced and completed. During the lifting motion, the barrel is constantly and safely pointed in the direction of the target's flight.
The position of the gun on the shoulder has become customizable with many options.
The key to remembering all variations is the importance of positioning the gun at the same shoulder point with the head and ultimately the eye aligned with the barrel's rib.
Horizontal trunk
This is perhaps the most common and easiest method for beginners to learn and learn. It has the advantages of economy of movement and positioning of the head in a vertical and neutral position on the stock. It also requires less repositioning of the body to bring the barrel into grip position.
The horizontal position is based on the movement of the gun forward, relative to which the barrel is located almost horizontally. At the same time, the upper part of the body bends forward, the neck and head move forward. The gun is then retracted so that the back of the stock rests against the shoulder, and at the same time the comb of the stock slides along the cheek.
The gun is now in the shoulder, the head is in a position horizontal with the ground. The gun can be lowered to the shooter's chosen grip point, and the shooter is now ready for the next step in shooting technique - calling the target and moving the gun towards the target.
The position of the gun in the shoulder is the coordinated movement of the gun towards the target. Since this is a more complex set of individual actions performed simultaneously.
This movement is not a set of actions, but a coordinated action, and breaking it down into individual actions can create unnatural gaps in the movement, which can lead to loss of controlled movement.
When learning this movement, it's best to start slowly, just as you would when learning any difficult part. The speed of movement should only increase when the technique is perfected, which will happen as a natural result of training.
Movement is best shown as simultaneity
the following:
I. The gun is brought to the shoulder and to the cheek of the face
II. Rotation of the body in the direction of the target flight
III. The tip of the barrel is slightly below the target's flight path throughout the entire movement
When this occurs in a synchronized motion, the gun is brought to the shoulder and cheek of the face at the same time as the barrel reaches the target. An important aspect to remember when learning the positioning is that the movements should be done slowly, making sure that the coordination of the positioning coincides with the simultaneous approach of the gun stock to the shoulder and face. Do not allow the shooter to first rotate the shoulder and then take the second position of the gun.
9. target flight path
———————————————————————————————-
When the target is called, the only movement the shooter should see is that the target is in flight. This is an important point in shooting technique, since the next fraction of a second will determine the likely outcome of the shot.
How we influence the information we react to will determine the success of the shot, so let's look at how this information is received and processed.
From the moment the shooter calls the target, we have approximately 1/10 of a second when we must evaluate the target's flight path. It's not much, but it's enough if we take maximum advantage and use it to make sure that we don't start our movement until the target is clearly defined in flight.
The optical characteristics of the target differ depending on weather conditions and lighting. In poor lighting and cloudy conditions, the target may appear smaller and may give the impression of increased speed, greater than its actual speed.
As coaches, we need to make sure our shooters learn target flights on the range before they shoot. They should use this time to observe the effect of the background and lighting on the target. We must avoid surprises when we first call a target, which will cost targets and destroy the shooter's confidence early in the round.
The first movement of the shooter when the target appears is made with his eyes. The eyes follow the target when its flight path becomes clear. The initial movement of the gun follows this movement quickly.
Keeping both eyes open while shooting provides many benefits beyond the obvious. Our eyes provide binocular vision. Thus, we can estimate speed, perceive depth and distance to an object.
When we close our eyes, we eliminate our ability to perceive depth. This creates an obstacle for us in determining the flight trajectory of the target.
10. INITIAL MOVEMENT TOWARDS THE TARGET
———————————————————————————————-
The shooter's first movement should be controlled and smooth in nature. It’s easy to say this, but much more difficult to do and implement into the shooter’s technique.
Holding the gun at the ready during the call period, the shooter begins the initial movement, engaging the upper body and shoulders as the gun moves toward the target.
This movement is coordinated, it involves all the major muscle groups of the upper body, back and legs. It's hard to break down individual movements, and perhaps it's better to describe the overall effect and purpose instead.
Many respected coaches place great emphasis on this period of time. This forms the basis of some training techniques, but we must take the time to learn the logic and aspects involved in timing-based shooting.
The arms and body must move together in a synchronized motion to maintain true and accurate eye alignment with the barrel rib. We must avoid having our hands move the gun towards the target with a sudden change in the movement of the gun.
The end result will likely be a movement of the stock away from the cheekpiece, creating a visual separation of the gun from the target. The term “hand shooting” is a direct reference to a technique where the shooter points the gun towards the target using the front hand as the driving force.
The problem of intercepting the first target gives rise to the initial movement in the double trap, coinciding with the beginning of the movement to the second target in the pair.
This movement is created by switching the gaze from recognition of the first target, coming from below the barrel, to the flight of the second target. Automaticity follows the first shot, which, once the flight path is clear, is a function of timing. Through the use of timing, we have the ability to switch to the second target as if it were just one target that we are shooting at. The split-second advantage we create by this gives us a better opportunity to establish the flight path and interception point for the second shot. Due to the nature of the target’s flight path, the second shot is always carried out as a movement to intercept the target in flight, and not as in the ramp: to catch up with the target. The position of the gun after hitting the first target is never in the same plane of motion as for the second target.
11. MOVEMENT OF THE BODY TOWARDS THE TARGET AND EXECUTING A SHOT
———————————————————————————————-
This period of movement is characterized by a controlled and smooth movement towards the target. The range of angular movement can be up to 30˚, requiring the shooter to be comfortable with his movement on and off the range.
It may be too easy to simply describe the movement of the body towards the target as a controlled and smooth movement. Perhaps we need to take a closer look at what is happening on the physical level when we perform this movement and the factors involved.
The target's speed is relatively constant on all flight paths, varying from 96 km/h to 106 km/h.
Some target flight paths are easier to understand than others. Shorter and higher angle targets are seen better by the shooter for a receptively longer period of time. The risk to the shooter is that he may believe he has more time to hit the target.
The shooter is responsible for the energy required to start the gun moving. As we have seen, the ultimate goal is to control this movement and execute it smoothly.
As discussed in previous sections, on the ramp the gun moves at angular speed faster than the target. The gun will catch and move ahead of the target if its speed exceeds the target's speed. We need not be concerned with the full head start for the shot, since the speed at the point at which the gun reaches the target provides an inherent head start sufficient to hit the target if the shot is fired within the normal range.
The visual position of the grip will always be below the barrel of the gun, and visibility below the barrel is aided by the use of a high rib barrel. First shot timing must be learned through trial and error during range practice. Due to the speed of the target and the relative position of the barrel to the point of impact, the time remains constant at each number.
The second shot in a double trap corresponds to the same characteristics as in a trap, since the full handicap is a factor in the speed of the gun in advance of the target.
The effect of cyclical shooting positions represents an interesting phenomenon of perceived or relative overall handicap. The shooter's position relative to the target's flight path changes from almost 0 degrees at station 1 to a full 90 degrees at station 4. Therefore, the amount of total head start the shooter has to give the target seems to increase with distance as you move around the semicircle of the markings.
For many shooters, this attitude is difficult to explain, but it is often described as a feeling or sensation that it is time to pull the trigger. However, it is the combination of three objects that initiate the shooter's mental response to firing a shot.
The first ratio of the eye to the barrel is a constant that we must maintain for the correct outcome of the shot. Any elevation or deflection of the barrel tip can change this relationship, causing the shot to travel behind or below the target.
The idea is simple: we need to push the barrel through the target, and when the barrel touches the target, we press the trigger.
When the trigger(s) are pulled and the shot is fired, we must inquire about the final result of the shot. In this case, we must visually determine that the shot was successful, and in case of a miss, evaluate the error and make an appropriate adjustment for the second shot.
Once the shot is fired, it is important to maintain the attacking momentum of the gun in order to allow it to be used for a second shot if it misses. If the gun's movement is stopped during the first shot, that movement must be initiated again before the second shot is completed.
The last action of the shooting technique is to unload the gun. This should create a shot completion cycle and should be done in a positive and affirming manner by the shooter. Dispose of used ammunition non-aggressively, regardless of the outcome of the shot.
If a shot is unsuccessful and the shooter shows a negative reaction to the shot, the possibility arises that the shooter is setting himself up to repeat the mistake and result of the previous shot.
The shooter’s actions should not be determined by the result of the shot; a miss should be treated the same as a successful shot.
EDUCATIONAL MANUAL ON SPEED
Petrov A.I.
RAPID FIRE
FROM INDIVIDUAL WEAPONS
EDUCATIONAL MANUAL ON SPEED
SHOOTING FROM A PISTOL AND A KALASHNIKOV MACHINE
G. Chelyabinsk
G.
CONTENT
| INTRODUCTION. |
| Chapter 1. METHOD OF HOLDING A PISTOL WHEN SPEED FIRING. |
| Chapter 2. TRAINING PROGRAM FOR SPEED SHOOTING FROM A PISTOL BASED ON THE METHOD OF HOLDING A PISTOL DURING SPEED SHOOTING. |
| 1. Code of Practical Shooting. |
| 2. Practical exercises in the classroom, in the gym (without cartridges). |
| 2.1 Material part of a standard pistol. |
| 2.2 Training in safe handling of a pistol. |
| 2.3 Holding the pistol with a right (left) hand grip, two-handed grip. |
| 2.4 Aiming the weapon at the target (two-handed grip). |
| 2.5 Loading a cartridge into the chamber. |
| 2.6 Snatching the pistol - first shot. |
| 2.7 Reloading the pistol. |
| 2.8 Shooting while moving. |
| 2.9 Shooting on the move. |
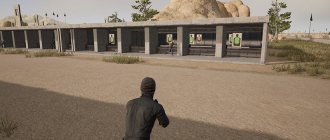
| 3. Practical exercises at the shooting range and shooting range. |
| 3.1 Organizational part. |
| 3.1.1 Organization of training at the shooting range. |
| 3.1.2 Provision of weapons. |
| 3.1.3 Technical support. |
| 3.2 Practical training in safe handling of a pistol. |
| 3.3 Holding a pistol with a right and left hand grip, a two-handed grip. |
| 3.4 Shooting with a two-handed grip and double shots. |
| 3.5 Aiming the weapon at the target (two-handed grip). |
| 3.6 Loading a cartridge into the chamber. |
| 3.7 Snatching the pistol - first shot. |
| 3.8 Reloading the pistol. |
| 3.9 Transferring fire (shooting at group targets). |
| 3.10 Step - shot. |
| 3.11 Shooting while moving. |
| 3.12 Shooting on the move. |
| 3.13 Shooting in a low stance. |
| 3.14 Bill Drill. |
| 3.15 El President. |
| Chapter 3. METHOD OF HOLDING THE KALASHNIKOV AUTOMATIC WHEN CONDUCTING SPEED FIRE. |
| Chapter 4. TRAINING PROGRAM FOR HIGH-SPEED SHOOTING WITH SINGLE AND AUTOMATIC FIRE FROM A KALASHNIKOV AUTOMATIC MACHINE BASED ON THE METHOD OF HOLDING A KALASHNIKOV AUTOMATIC MACHINE. |
| 1. Code of practical shooting. |
| 2. Theoretical and practical classes in the classroom, in the gym (without cartridges). |
| 2.1 Material part of a standard Kalashnikov assault rifle. |
| 2.2 Training in safe handling of a Kalashnikov assault rifle. |
| 2.3 Holding a Kalashnikov assault rifle, standing position when shooting. |
| 2.4 Raising the Kalashnikov assault rifle, first shot. |
| 2.5 Reloading a Kalashnikov assault rifle and chambering a cartridge. |
| 2.6 Shooting while moving. |
| 2.7 Shooting on the move. |
| 3. Practical exercises at the shooting range and shooting range. |
| 3.1 Organizational part. |
| 3.1.1 Organization of training at the shooting range. |
| 3.1.2 Provision of weapons. |
| 3.1.3 Technical support. |
| 3.2 Training in safe handling of a Kalashnikov assault rifle. |
| 3.3 Holding a Kalashnikov assault rifle, standing position when shooting. |
| 3.4 Raising the Kalashnikov assault rifle, first shot. |
| 3.5 Raising a Kalashnikov assault rifle, double shot. |
| 3.6 Reloading a Kalashnikov assault rifle and chambering a cartridge. |
| 3.7 Transferring fire (shooting at group targets). |
| 3.8 Shooting while moving. |
| 3.9 Shooting on the move. |
| 3.10 Shooting in a low stance. |
| 3.11 Ex-President |
| CONCLUSION. |
| Annex 1. |
| Appendix 2. |
| Appendix 3. |
INTRODUCTION
The development of individual small arms and its role in large-scale military operations and local military conflicts of the 20th and 21st centuries can be divided into several stages:
— The period of World War I, when small arms accounted for up to 80% of the losses of the armies participating in those events, while the main attention was paid to machine guns, and the technology of that time did not allow the creation of perfect examples of short-barreled and long-barreled self-loading semi-automatic and automatic weapons.
- The period before World War II and during the time when the emphasis was placed on the creation and production of tanks, aviation and artillery, and the infantry’s weapons consisted of pistols, revolvers and rifles of World War I and a small number of submachine guns chambered for a pistol cartridge with a relatively short effective shooting distance.
— In the period after World War II, the entire small arms system of the armies of the main countries of the world was created taking into account the conduct of large-scale combat operations in front-line and army offensive and defensive operations. In such combat operations, the main role in defeating the enemy belongs to aviation, missile forces and artillery, tanks and other armored vehicles, and small arms should have accounted for no more than 20-30% of the living targets that survived the most powerful fire strikes.
However, the experience of wars and local military conflicts of the 1970-80s. showed that they were often conducted not in the form of large-scale military operations, but as combat clashes between infantry units (company, battalion) supported by artillery and tank fire. Under these conditions, small arms sometimes accounted for up to 70% of the enemy’s live targets hit.
— The period from the 80s to the present, with its rapid development of high-precision and high-tech weapons, has finally proven that no matter how ultra-modern weapons combat operations begin, they continue and end with a fighter with conventional small arms. This objectively led to an increase in In recent decades, the role of fire from individual automatic weapons chambered for an intermediate (in terms of power between pistol and machine gun) cartridges and a certain revaluation of the role of a pistol as a military weapon.
All these periods can be equally traced in the development of small arms in Soviet and then Russian security forces.
However, a very interesting situation has arisen - both with the capacity of magazines for weapons (with an increase in the combat capabilities of individual small arms, and at the same time, with a decrease in the distances of fire contacts, where high-capacity magazines play a decisive role, it is somehow forgotten that since 1943 There were more than 190 appeals from the Eastern Front to the Wehrmacht command with the following content: “The PPSh-41 is superior to the MP-38 (40) in terms of magazine capacity, therefore Wehrmacht units suffer defeats in close-range battles in the trenches and in populated areas, please give the active army automatic weapons with high-capacity magazines"), as well as with training methods for shooting from them, which remained at the level of requirements for firing during the First World War - still the same shooting from a pistol and machine gun to knock out points in an unlimited time, at a very high dynamics of real military clashes. No less strange in the shooting training manuals available today is the fact that they practically do not pay attention to the safe and qualified handling of weapons, which results in the unreasonably large losses from “friendly” fire being hushed up.
Came to Russia in 1999. Practical shooting radically changed all ideas about the capabilities of individual small arms and changed views on fire training in general. Like everything progressive - Practical shooting was quickly taken as the basis for fire training by special forces units of various law enforcement agencies of Russia, which led to quantitative and qualitative changes in existing shooting courses, but all these shooting courses are actually collections of control exercises, while the standards in which The unit employee must fit in when practicing the exercises of these shooting courses - quite tough. The lack of teaching aids teaching how to shoot each of these exercises correctly has led to the fact that the level of fire training in the units has gone down, since employees no longer want to shoot 25-meter exercises from a pistol from a static stance, and new ones created on the basis of Practical shooting - they cannot, having encountered a problem: they begin to carefully fire at the targets - they do not fit into the time allotted by the standard, they try to meet the standard in time - the holes in the targets disappear somewhere, and why is not clear, and as a result, interest in the exercises is lost. Therefore, this educational and methodological manual was developed, summarizing and systematizing the experience of more than 200 classes and seminars conducted with law enforcement officers, based on 6 years of experience in training and participation in Practical Shooting competitions, including at the international level.
The basis of this teaching aid is the methods of holding a pistol and a machine gun during high-speed shooting, which give the student an understanding of the parasitic forces that arise when shooting from a pistol and a machine gun, and conscious counteraction to these forces by securing the weapon at certain points during high-speed shooting with single fire, rapid single fire, double shots and automatic fire, short and long bursts with high accuracy and accuracy, including when moving, on the move and from awkward shooting positions, even after prolonged physical exertion. The concept of shooting itself has been changed: if, according to previously known methods, the main task in making an accurate shot was to hold the front sight with the entirety on the aiming point without hesitating on it until the shot, and hence - holding your breath (especially when the chest is torn from lack of air after great physical exertion) and smoothly pressing the trigger with the first phalanx of the index finger of a strong hand along the axis of the pistol barrel so that it does not move to the left or right from the aiming line when the trigger is pulled (especially when the shooter wears size 12 gloves and uses a Makarov pistol in his official activities) , then according to the methods on which this educational manual is based, a shot is fired by quickly pressing the trigger with any phalanx of the index finger at any angle to the axis of the weapon barrel at the moment of combining its sighting devices with the aiming point, even at the maximum distances for this weapon, including after prolonged physical activity.
In one “weapon-related” magazine in 2008, another “luminary”, whose scientific titles and positions took up a quarter of the magazine page, after six pages of generalizations, graphs and diagrams, justifications for the psychological and physiological features of trigger control, at the end of the article concludes: “And if after all this you are not shooting, draw a conclusion for yourself - you are one of those 70% of the population who simply cannot shoot.” In fact, if a person has two arms, two legs and both eyes, and he really wants to learn how to shoot well, he must remember the main thing - in fact, he is already an excellent shooter, he just doesn’t know something yet.
Chapter 1.
WHEN SPEED FIRING
The maximum distance at which a duel confrontation with an armed enemy occurs, as a rule, in most cases, does not exceed 3-7 meters. To guarantee the defeat of the enemy, two bullets must hit the target. When hit by one bullet, there is the possibility of a return shot, so the second bullet hitting the target has a knocking effect and eliminates retaliatory aimed shooting.
The developed methodology is based on the pistol grip adopted in Practical shooting, where the shooter develops stable shooting skills with minimal preparation, selecting the most important targets, firing the first targeted, time-predictive shot, controlling the developing situation, therefore, high-speed shooting based on the principles Practical shooting is the most promising.
This technique explains the processes that occur when firing a pistol shot and teaches weapon control by counteracting the parasitic forces that arise during single and high-speed shooting.
To produce an effective shot using existing methods, you must follow 3 basic rules :
1. Holding the weapon.
2. Careful alignment of the front sight and rear sight at the aiming point before firing.
3. Hold your breath and smoothly press the nail phalanx of your index finger onto the trigger lever.
The proposed method of holding a pistol during high-speed shooting allows you not to adhere to the 3rd rule, and at short (3-7 m) distances - to the 2nd rule, which significantly reduces the time for firing an aimed shot (we will consider further).
Let's deal with holding the breath and smoothly pressing the nail phalanx of the index finger on the trigger lever.
The structure of the hand, tendons, muscles of the fingers and palms is such that if you do not clench your fingers into a fist and keep your index finger half-bent, then by simulating a shot (without a weapon), you can understand the processes occurring with the weapon in a relaxed palm.
Rice. 1
By jerking our index finger in the direction of movement of the imaginary trigger lever, we see that the other fingers also twitch, and in most cases the hand itself, since all the muscles and tendons of the hand are interconnected (Fig. 1). Hence the truth is that when firing a pistol with a relaxed grip, it is necessary to hold your breath and smoothly squeeze the trigger lever with the nail phalanx of your index finger along the longitudinal axis of the pistol, in order to avoid it leaving the aiming line.
If you place an oblong object in your palm and firmly squeeze it with your fingers - a ballpoint pen, an empty pistol magazine, etc., concentrating the main effort on squeezing the object with your little finger and ring finger at the bottom, and in the upper part, squeeze it counter to the bases of the thumb and index finger, then, by jerking the index finger in the direction of the imaginary trigger lever, the shooter's fingers and hand will remain motionless, since the force produced by the muscles and tendons of the index finger is significantly inferior to the force with which the remaining fingers of the hand are compressed (Fig. 2). Therefore, in this method of holding a pistol, a smooth descent does not play a role, since the hand holding the pistol grip is not affected by the actions of the index finger.
Rice. 2
Careful alignment of the front sight and rear sight at the aiming point before firing is replaced in this technique by practicing snatching the pistol and moving it to the axis: eye - rear sight - front sight - aiming point. This is done using the following method: the shooter selects a point on the wall at eye level (or a smaller copy of the target), then, closing both eyes , slowly removes the pistol from the holster and brings it to the line - the target eye, intuitively fixing the pistol at the aiming point. When there is confidence that the pistol is aimed at the target, the student opens his eyes: if the front sight relative to the rear sight is shifted to the left (right), then the handle is adjusted in the palm to the right (left), the position of the pistol handle in the hand (hands) is remembered Next, the pistol is placed in the holster, the trainee places his palm on the handle of the pistol to remove it from the holster, carefully ensuring that the palm rests on the handle with the already made.
The trainee, with his eyes closed, again brings the pistol to the axis: eye - rear sight - front sight - target, eyes open, and if necessary, corrections are introduced again; task: to find such a position of the pistol handle in the hand (hands with a double grip) in which the pistol, taken out of the holster and aimed at the center of the target model with the eyes closed, did not require any more adjustments when the eyes were opened.
The shooter must periodically repeat this exercise at a slow pace, each time achieving the required result, and each time forcefully squeeze the pistol grip briefly so that the muscles of the hand(s) remember the optimal position of the pistol grip in the palm. It should be noted that when changing the type of weapon (with a different ergonomic handle), the student performs the same manipulations, training muscle memory in relation to a different pistol. And so every time you change the type of pistol. Thus, at short distances (3-7 m), quick aiming is carried out by muscle memory of the hand(s).
The basis of the proposed method of holding a pistol during high-speed shooting is RIGID FITTING THE WEAPON IN THE HAND(S) AT FOUR POINTS .
It is known that in the process of firing a shot, two forces act on the pistol (the third force, which arises during the extraction of the cartridge case and moves the barrel of the pistol to the right and upward, is not considered in this technique, since when counteracting the two main ones, its value can be neglected):
- The recoil force (impulse) pushes the pistol straight back along the axis of the barrel (Fig. 3).
Rice. 3
2. The force of rotation of the pistol around its center of mass, arising due to the fact that the rear stop of the pistol handle is located below the axis of the barrel, as well as due to the meeting of the moving housing-bolt with the limiting stop (Fig. 4).
Rice. 4
Thus, the shooter's task is to counteract these two forces: at two points in the vertical plane and to hold the pistol in the horizontal plane at two additional points (Fig. 5).
Rice. 5
Counteraction to turning (throwing the barrel up) is achieved by firmly pressing the little finger and ring finger of the right hand into the handle.
Counteraction to the rectilinear recoil force is achieved by “driving” the membrane between the thumb and forefinger into the rear stop of the base of the pistol grip. The harder you press the membrane into the base of the handle (to eliminate the shock-absorbing properties of the membrane), the less the movement of the gun back inside the hand (Fig. 6).
Rice. 6
In the horizontal plane, the pistol is locked by the following 2 points: the joint of the base of the index finger, the joint of the base of the thumb and the second joint of the thumb, pressed tightly against the frame of the pistol (Fig. 7).
Rice. 7
When shooting from the left hand, the counteracting forces against recoil and tossing of the pistol are applied in a mirror manner.
This 4-point technique is important when shooting with a double grip (holding the pistol with both hands).
It is known that the rate of fire is the sum of the times between each previous and subsequent shots in a series of shots. The shorter the time between two shots, the higher the rate of fire, and the more important it is to reduce the time it takes for the pistol to return to the line of sight after exposure to recoil and toss. Therefore, additional coverage of the fingers of the left hand with the fingers of the right hand holding the pistol increases the forces against recoil and tossing of the weapon by 40%-60%. To achieve this goal, the thumb of the right hand is removed from the handle of the pistol to the side, and in its place a pillow for the base of the thumb of the left hand is placed (the clamping force increases significantly due to an increase in the support area). The unused thumb of the right hand is arbitrarily placed on the base of the thumb of the left hand (for the PM - it is moved far to the left to avoid injury to it when the bolt rolls back). The little finger and ring fingers of the left hand are placed on the little finger and ring finger of the right hand to increase the counter-force to throw the pistol barrel (rotating the pistol up around the center of mass).
In this case, it is necessary to use the characteristics of the joint of the human hand. The movement of the left (right) hand relative to the forearm is limited by movement in the wrist joint (Fig. 8).
Rice. 8
This is what needs to be used in this technique.
The left hand is lowered relative to the forearm until it stops at the joint and in this position is placed (Fig. 9) with the fingers of the right hand on the pistol handle. It is important to remember that the soft base of the left thumb firmly presses the frame of the pistol against the joint of the index finger of the right hand, pressing on the frame in the opposite direction (counter) (Fig. 10).
Rice. 9
Rice. 10
In this case, the little finger and ring finger of the left hand press with force on the little finger and ring finger of the right hand, rigidly covering the base of the pistol grip, the third (second) phalanx of the index finger of the left hand (depending on the size of the palm and fingers) serves as the most rigid stop for the trigger guard hook, thereby creating an additional support for the entire pistol (we place the thumb of the right hand without effort on top of the base of the thumb of the left hand in any convenient position).
Rice. eleven
This is very important, since the pistol bolt casing, returning under the influence of the return spring after recoil, hits the front stops with force, which leads to the pistol barrel “plunging” down. A rigid stop with a safety bracket in the 3rd (2nd) joint of the index finger of the left hand (middle finger of the right hand - when held with one hand) significantly reduces the downward dip of the barrel (Fig. 11).
Now let’s consider the requirement of known methods for shooting a pistol by pressing the trigger lever of the pistol with the nail phalanx of the index finger. According to the requirements of all methods, the nail phalanx must press on the trigger lever strictly along the axis of the pistol, otherwise it will leave the aiming line (especially when the pistol is held relaxed).
Rice. 12
The use of this technique, which locks the pistol from movement in the horizontal plane with the base of the index finger of the right hand and the entire soft base of the thumb of the left hand with a double grip, or with the bases of the thumb and index finger of the right hand (counter compression of the pistol) when shooting with one hand (all of the above – mirror for a left-handed person) allows you to make one or a series of accurate shots at any convenient point of the nail phalanx, joint or second phalanx of the index finger of the right hand without moving the pistol from the aiming line (Fig. 12).
Thus, this technique allows you to extremely minimize the toss of the barrel after a shot and fire a series of shots at maximum speed, without controlling the front and rear sights at close distances, since the front sight of the pistol cannot jump up much due to the resistance of the little finger (little fingers with a double grip) and ring finger (fingers with a double grip) to the base of the handle and after the shot does not fall down due to the hinge of the left hand, which is already at the lowest point of possible tilt.
This method of holding a pistol during high-speed shooting also has advantages in high-precision, “slow” sports shooting, since the entire hand is not secured, but only 60-70% due to the distribution of efforts to hold the pistol at 4 points. Rigidly holding the weapon using this method allows you to make accurate shots at maximum distances for a pistol.
The 4-point technique allows you to shoot pistols from 5.6 mm caliber to .45 caliber the same When shooting using this method from an APS in automatic fire mode at a distance of 10 m, all bullets are placed on the target.
Rice. 13
A person with his eyes closed finds another index finger with his index finger in front of his chest and with his eyes closed easily finds his own tip of the nose with his index finger (Fig. 13).
This natural gift is the basis of the pistol reloading technique. The shooter lowers the forearm of his left hand (for a right-handed person), resting the bottom of the magazine in the middle of the palm so that the index finger is located along the front end of the magazine, and the thumb and middle fingers cover the magazine on the other two sides (Fig. 14).
Rice. 14
In this case, the elbow of the left hand does not fall following the hand. Then, by rotating the forearm relative to the elbow from bottom to top, the magazine is fed with the neck up. The pistol, located on the aiming line, is turned to the left relative to the cartridge ejection window and slightly tilted with the barrel down so that the axis of the pistol handle coincides with the vertical axis of the fed magazine (important: it is not the magazine that is oriented relative to the pistol handle, but the pistol handle is oriented relative to the axis of the magazine fed by the natural movement of the forearm) .
The index finger of the left hand, lying along the front wall of the magazine, easily finds the middle of the little finger of the right hand, covering the magazine receiving window in the pistol grip (Fig. 15). With a sharp impact movement, with the simultaneous opening of the palm, the magazine is driven into the handle until the magazine lock clicks (all the way). (For shooters with large hands, it is recommended to remove the little finger that covers the receiving window of the pistol grip when the magazine is partially in the pistol grip, to avoid underloading of the magazine.)
Rice. 15
With this method of reloading the magazine, the pistol is not removed from the aiming line, creating an axis: eye - cartridge ejection window on the left side (for a right-handed person) - target, which, upon completion of reloading, allows you to return the pistol to the aiming line in a minimum time. Using this technique, the maximum recharging speed is achieved, including in stressful situations and in complete darkness.
CONCLUSION.
A pistol, clamped by the frame in a vice, screwed to a table fixedly attached to the floor, and aimed at the center of the target, will accurately hit the aiming point with any number of shots within its technical accuracy, no matter how the forces of recoil and toss influence it, no matter how the shooter did not pull the trigger lever or even hit it. Therefore, if the pistol is secured as rigidly as possible at the points considered, and the shooter’s stance relative to the floor creates an anti-recoil angle corresponding to the power of the cartridge used, then the parasitic consequences of the operation of the moving parts of the pistol and internal ballistics when firing (shots) can be minimized to the maximum, while pressing the lever trigger with any force and speed will not affect shooting accuracy.
Depending on the anatomy of the shooter’s hands and the ergonomics of the pistol, the shooter chooses for himself the degree of effort at each point of counteracting recoil and tossing of the weapon, achieving maximum speed and accuracy of fire, since two (or several) bullets hit the target with minimal dispersion and minimal gap time doubles (increases several times) the kinetic impact.
After firing a shot or series of shots, the shooter loosens his grip.
With sufficient dry-training, excess tension in the grip disappears.
Mastering this technique allows you to conduct effective shooting even after a long absence of training.
Chapter 2.
TRAINING PROGRAM
WHEN SPEED FIRING
1. CODE OF PRACTICE:
“I will always treat the weapon as if it were loaded.”
“I will never point a gun where I don’t want to shoot.”
— Before I shoot, I always check what is in front of and behind the target.
“I will never touch the trigger with my finger until the weapon is pointed at the target.”
RELOADING THE PISTOL.
The need to study the topic of the lesson: if a shooter knows how to hit targets with great speed and accuracy, but is not trained to quickly change the magazine, then if it is necessary to fire more shots than the number of cartridges in the magazine, especially in a stressful situation, his chances of survival are sharply reduced , therefore, the ability to quickly reload a pistol both during daylight hours and in the complete absence of visibility, in any body position and under stress, is invaluable.
Purpose of the lesson: to acquire stable skills in reloading pistols of any model and design based on natural human capabilities.
Provision: standard equipment, a pistol with two magazines, a means of signaling (MCPS timer, whistle), targets on stands according to the number of trainees.
Exercise: I.P. - pistol with an inserted magazine, not loaded with cartridges, at the chest, barrel towards the target, grip with one or two hands. The index finger is outside the trigger guard. The trainees are on the same line with an interval of at least 1.5 m. The target is 7 m in front of each trainee. At a signal, the student points the weapon at the target, places the index finger on the trigger, presses and removes the finger from the trigger, depending on the design of the magazine release, releases the magazine with the right or left hand, inserts the next one, aims at the target, placing the index finger on the trigger , fires a blank shot and removes his finger from the trigger. At the next signal (two whistles), the hand(s) with the weapon and straightened index finger returns to the chest.
Methodological recommendations: explain the importance of the ability to quickly reload a pistol and demonstrate hand movements based on natural coordination of movements. Reloading is done with a weak or strong hand, depending on the mechanism for fixing the magazine in the pistol:
1. For a pistol with a push-button lock: the strong hand, having intercepted the pistol handle, presses the magazine release with the thumb and, while the weak hand goes for the next magazine, intercepts the pistol handle and puts it back into the grip.
2. For pistols with a locking base of the magazine (PM, APS and other brands of weapons with a lock at the bottom of the pistol handle): with a weak hand, remove the magazine and lower your hand to the pouch with a replaceable magazine. The pistol handle is oriented relative to the axis of the magazine , fed by the natural movement of the forearm. The pistol is on the aiming line, turned to the left relative to the cartridge ejection window and slightly tilted with the barrel down so that the axis of the pistol handle coincides with the vertical axis of the fed magazine.
Pay special attention to the position of the index finger of the strong hand at the time of reloading. The finger is located outside the trigger guard, ensuring safe operation of the weapon.
Dosage: perform at least 20 times.
Typical mistakes when practicing the topic of the lesson: the bottom of the magazine does not rest against the palm, the index finger of the weak hand does not lie strictly along the front wall of the magazine, but diagonally. The elbow of the weak arm drops along with the hand, which, when the magazine is fed upward, leads to arching of the entire body. When reloading, the pistol moves downwards from the aiming line, which reduces the possibility of an aimed shot when there is a cartridge in the chamber and the magazine has not yet been changed.
SHOOTING WHILE MOVING.
The need to study the topic of the lesson: when it becomes necessary to fire a pistol in a forest, in a building, among ruins, etc., the ability to hit targets quickly and accurately, making short and long movements, is important.
Purpose of the lesson: to acquire stable skills in taking a position for firing a pistol after short and long movements.
Provision: standard equipment, pistol, means of signaling (MCPS timer, whistle), 2 targets on racks for each student.
Exercise No. 1: short movement, I.P. - a pistol with an inserted magazine, not loaded with cartridges, in a holster. A blank shield, 1.5-2 m wide, is installed at the starting line. To the left and right of the shield at a distance of 3-7 m are two targets. I.P. - on one of the sides of the shield. At the signal, the trainee points the weapon at the target, fires a dry shot (two shots), moves to the other end of the shield and fires another dry shot (two shots).
Methodological recommendations: during short movements, the weapon remains at eye level. You can hold the weapon while moving with either one or two hands. Monitor the position of your finger in the trigger area when moving with the pistol and maintaining the safety angle.
Dosage: perform at least 20 times until errors disappear completely.
Exercise No. 2: long movement, I.P. - a pistol with an inserted magazine, not loaded with cartridges, in a holster. A blank shield, 5-7 m wide, is installed at the starting line. To the left and right of the shield at a distance of 3-7 m are two targets. I.P. - on one of the sides of the shield. At the signal, the trainee points the weapon at the target, fires a dry shot (two shots), moves to the other end of the shield and fires another dry shot (two shots).
Methodological recommendations: when moving for a long time, it is necessary to release the weak hand from holding the weapon, and it should work as during normal running, helping the speed of movement.
Previous10Next
Didn't find what you were looking for? Use Google search on the site: