Characteristics
| engine's type | Diesel |
| Power | 113 - 126 hp (83 - 93 kW) |
| Torque | 245 - 255 Nm |
| Volume | 1991 cc cm. |
| Design | in-line |
| Fuel type | Diesel |
| Fuel mixture | Direct injection |
| Supply system | Turbocharger |
| timing belt | SOHC/OHC |
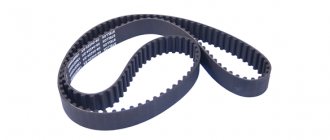
| Timing drive | Toothed belt |
| Valve control | traction rocker |
| Cooling type | liquid |
| Compression | 17.7 : 1 |
| Cylinder diameter | 83 mm |
| Piston stroke | 92 mm |
| Number of cylinders | 4 |
| Number of crankshaft bearings | 5 |
| Number of valves | 16 |
| CO2, g/km | Euro 3 |
The motor develops depending on the modification:
- maximum power - from 112 to 140 hp. at a rotation speed of 4000 rpm (cars imported from Korea can develop up to 151 hp);
- torque - from 250 to 300 N/m at a frequency of 2000-2500 rpm.
Diesel fuel consumption is in the range of 4.6-9.2 liters. There are samples with worn fuel supply equipment and piston group, consuming up to 12-14 liters of diesel fuel and more. Depending on the settings of the control units and injectors, the motors meet Euro 3 or 4 environmental standards. According to the owners, the resource of the power unit is 250 thousand km or more.
Piston group parameters:
- diameter - 83 mm;
- stroke - 92 mm;
- The compression ratio in all variants is 17.3 units.
Both turbo-diesel engine variants feature identical blocks and heads. The diameter and number of valves, the drive diagram of the gas distribution mechanism are identical. The more powerful version is equipped with an EGR valve with different parameters and is equipped with a particulate filter that reduces harmful emissions into the atmosphere. Additionally, a different fuel pump is used and a modified engine control unit is installed.
The basic version of the turbo diesel is a 112-horsepower engine equipped with a fixed-geometry turbine. The intensity of the boost is regulated by a special valve that bypasses some of the gases into the exhaust tract. The motors are equipped with a Mitsubishi compressor model TD025M. The unit is supplied as spare parts in both the original Hyundai packaging and the Mitsubishi version. This engine option is often called the WGT turbine version.
The engine, which develops a power of 140 hp, features a different supercharging system, including an adjustable Garrett GTB1649V supercharger. The use of a regulator made it possible to increase the engine power and also expand the operating range of the compressor. The term used to designate the power unit is VGT turbine.
Design
The engine is built according to an in-line design, has 4 vertical cylinders with a working volume of 1991 cm³. High-strength cast iron is used to manufacture the cylinder block. The cylinders are made directly in the body of the block. The pistons are aluminum and have devices for cooling the inner surface of the bottom with oil.
The block head is aluminum, the intake and exhaust valves are located on opposite sides. Each cylinder has 4 valves, which are driven by 1 camshaft. The gap between the cams and valve stems is adjusted by hydraulic compensators. The shaft is driven by a toothed belt equipped with an automatic tension regulator. The block head has places for installing glow plugs. The devices are used to heat the air in the cylinders during startup at low air temperatures.
The engine cooling system is sealed and equipped with an expansion tank. The system includes a pump and a thermostat, which ensure that the temperature is maintained. Coolant passages are made around the cylinders, as well as in the head (around the combustion chambers and gas channels).
The air supply system uses a cooler to reduce the temperature of the air passing through the compressor. The location of the cooler depends on the car model, but it is always located on the radiator of the cooling system. The air cooler radiator has a plate-and-band design and is made of aluminum alloy. Rubber pipes are used to connect the cooler to the engine and compressor.
Fuel is supplied to the cylinders through a Common Rail system equipped with a high-pressure pump. The fuel is supplied to the ramp, and from there it is distributed by electronically controlled nozzles. The frequency and intensity of fuel supply is determined by speed and load. The use of such a system ensures a stable supply of diesel fuel under high pressure already from idle speed. Electronic control reduces fuel consumption.
- Cold start
- The sound of the engine
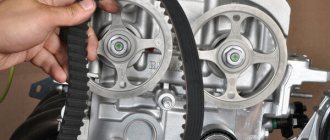
D4EA diesel gas distribution mechanism drive
Checking the technical condition of the timing drive
1. Remove the top cover. 2. Check the timing belt (A) for damage, oil or coolant contamination.
If oil or coolant has leaked onto the belt, it needs to be replaced.
Remove oil from the surface of the belt if it gets on the belt.
3. Check the camshaft gear. Check the camshaft gear, crankshaft, tensioner pulley, roller for wear and damage. Replace parts if necessary.
4. Check the tensioner pulley and roller for noise by turning them smoothly. Replace parts if necessary.
5. If there are stains of dirt from the bearing on the pulley, replace the pulley.
Removing the drive
1. Remove the front right wheel of the car.
2. Remove the side cover.
Lift the belt tensioner up to remove the accessory drive belt (A).
Remove the mounting bolts and nuts and remove the engine mounting bracket (A).
Unscrew the mounting bolts and remove the upper timing belt cover (A).
Loosen the mounting bolts and remove the crankshaft pulley (A).
Unscrew the fastening bolts and remove the lower timing belt cover (A).
If you remove the tensioner, performance will deteriorate.
Unscrew the mounting bolts and remove the engine support bracket (A).
Align the alignment marks (A, B) on the camshaft gear (C) and crankshaft gear (D) with the marks (E, F) on the cylinder head (G) and on the oil pump housing (H) while turning the crankshaft.
Install pin (A) into the aligned holes in the belt tensioner housing (B).
Using a 5mm socket wrench (A), loosen the locking bolt (B).
Then, turn the tensioner (C) clockwise until it stops, together with the main bolt (D) and a 12 mm socket wrench (E), and tighten the locking bolt (B).
Remove the timing belt.
If the belt is to be reused, it must be marked with the direction of rotation before removal.
Drive installation
Align the timing marks (A) on the camshaft gear (B) with the timing mark (C) on the cylinder head (D).
Align the timing marks (A) on the crankshaft gear (B) with the pin (C) installed in the oil pump housing (D).
Install the timing belt. Installation must be done in the following sequence: crankshaft gear (B) ► water pump pulley (C) ► idler pulley (D) ► camshaft gear (E) ► timing belt tensioner (F).
— Turn the automatic tensioner (C) counterclockwise until it stops.
- Rotate the crankshaft by hand one full turn (clockwise) to set the piston of the first cylinder to TDC
Using a special wrench, tighten the locking bolt. Tightening torque 10-12 Nm.
Remove the locking pin and tensioner (A).
Install the lower engine support bracket.
Tighten the fastening bolts with a tightening torque of 43 - 55 Nm.5.
Install the upper (A) and lower timing belt covers (B).
Tighten the fastening bolts with a tightening torque of 7.8 - 11.8 Nm
To install the belt (A), you need to lift the tensioner up.
Install the crankshaft pulley. Tighten the fastening bolts with a tightening torque of 30 - 34 Nm.
Install the engine mounting bracket.
Install the accessory drive belt as follows: alternator ► power steering ► pulley ► compressor ► crankshaft pulley ► tensioner.
Install the side cover.
Install the right front wheel.
Advantages and disadvantages
The advantages of motors are:
- Low fuel consumption.
- Possibility of raising parameters by flashing the control unit.
- Camshaft belt drive.
The disadvantages of the motor include:
- When operating at the factory settings of the compressor, there is a turbo lag.
- High cost of individual components (for example, compressor).
- Requires high quality fuel. When using low-grade fuel, the injectors fail.
- The unit is demanding on the quality of engine oil and compliance with replacement schedules.
Malfunctions and repairs
The most common breakdowns of D4EA motors are:
- Involuntary engine stopping at idle or while driving. The cause may be a stuck EGR valve or a failed injector. Repairs will require replacement of damaged components.
- At high mileage, the coolant pump rotor may jam, which leads to a break in the timing belt. Contact of the valves with the piston crown is structurally impossible. The repair consists of replacing the pump and belt along with the tensioner.
- Vibrations during operation can result from wear of the engine mounts, as well as clogged injectors. A more thorough diagnosis of the power unit is required, and then replacement of worn parts.
- A characteristic whistle when the engine is running indicates leaks in the compressed air supply lines. It is necessary to check the pipelines for leaks. At the same time, it is recommended to check the air supply channels from the filter, since dust ingress leads to increased wear of the diesel engine.
- Increased oil consumption and the appearance of smoky exhaust indicate wear on the compressor. In this case, there is only one repair - replacing the turbine assembly.
Some engine malfunctions are recorded in the form of error codes in the memory of control units. At the same time, the Check Engine indicator on the instrument cluster turns on. It is possible to include other control indicators. The codes are read by a computer connected to the diagnostic connector. The error number identifies a failed or incorrectly functioning node.
- Engine problems
- Block head repair
- Camshaft wear
- Injection pump repair
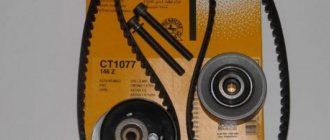
- Replacing the timing belt and pump
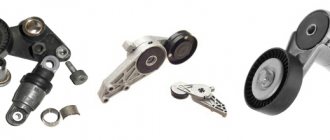
- Tensioner roller vibration
- Replacing the fuel filter
- Removing the timing belt
- Removing the generator
Replacing the timing belt for d4ea engine
Checking the technical condition of the timing drive
Remove the top cover.
Check the timing belt (A) for damage, oil or coolant contamination.
If oil or coolant has leaked onto the belt, it needs to be replaced.
Remove oil from the surface of the belt if it gets on the belt.
Check the camshaft gear.
Check the camshaft gear, crankshaft, tensioner pulley, roller for wear and damage. Replace parts if necessary.
Check the tensioner pulley and roller for noise by turning them smoothly. Replace parts if necessary.
If there are dirt stains from the bearing on the pulley, replace the pulley.
Removing the drive
1. Remove the front right wheel of the car.
2. Remove the side cover.
Lift the belt tensioner up to remove the accessory drive belt (A).
Remove the mounting bolts and nuts and remove the engine mounting bracket (A).
Unscrew the mounting bolts and remove the upper timing belt cover (A).
Loosen the mounting bolts and remove the crankshaft pulley (A).
Unscrew the fastening bolts and remove the lower timing belt cover (A).
If you remove the tensioner, performance will deteriorate.
Unscrew the mounting bolts and remove the engine support bracket (A).
Align the alignment marks (A, B) on the camshaft gear (C) and crankshaft gear (D) with the marks (E, F) on the cylinder head (G) and on the oil pump housing (H) while turning the crankshaft.
Install pin (A) into the aligned holes in the belt tensioner housing (B).
Using a 5mm socket wrench (A), loosen the locking bolt (B). Then, turn the tensioner (C) clockwise until it stops, together with the main bolt (D) and a 12 mm socket wrench (E), and tighten the locking bolt (B).
Remove the timing belt.
If the belt is to be reused, it must be marked with the direction of rotation before removal.
Drive installation
Align the timing marks (A) on the camshaft gear (B) with the timing mark (C) on the cylinder head (D).
Align the timing marks (A) on the crankshaft gear (B) with the pin (C) installed in the oil pump housing (D).
Install the timing belt. Installation must be done in the following sequence: crankshaft gear (B) ► water pump pulley (C) ► idler pulley (D) ► camshaft gear (E) ► timing belt tensioner (F).
— Turn the automatic tensioner (C) counterclockwise until it stops.
- Rotate the crankshaft by hand one full turn (clockwise) to set the piston of the first cylinder to TDC
Using a special wrench, tighten the locking bolt. Tightening torque 10-12 Nm.
Remove the locking pin and tensioner (A).
Install the lower engine support bracket. Tighten the fastening bolts with a tightening torque of 43 - 55 Nm.
Install the upper (A) and lower timing belt covers (B).
Tighten the fastening bolts with a tightening torque of 7.8 - 11.8 Nm.
To install the belt (A), you need to lift the tensioner up.
Install the crankshaft pulley. Tighten the fastening bolts with a tightening torque of 30 - 34 Nm.
Install the engine mounting bracket.
Install the accessory drive belt as follows: alternator ► power steering ► pulley ► compressor ► crankshaft pulley ► tensioner.
Exploitation
When operating D4EA engines, you must strictly follow the manufacturer's recommendations for changing oil and filters. Neglecting to change the oil leads to the formation of deposits inside the power unit and wear of the turbocharger bearings. An air filter clogged with dust does not allow the required volume of air to be supplied to the engine, which leads to excessive fuel consumption. Startup stability and injector life depend on the condition of the fuel filter.
Standards for maintenance
The manufacturer has established a maintenance frequency for vehicles with a D4EA engine once every 10 or 15 thousand km (depending on the sales market). For the engine, it is recommended to use motor oil of category ACEA C3 (if a particulate filter is installed) or B3 (without filter). It is allowed to use oils with a viscosity of 10W-30, 5W-30 or 0W-30. Refilling requires 6.6 liters of engine oil (in most cases, 5.5 liters is enough, the rest of the liquid is not drained).
Service regulations
When operating the engine, the following maintenance schedules should be adhered to:
- oil change interval in the crankcase - after 10 thousand kilometers or annually;
- when operating a car in city traffic jams or on rough terrain, it is recommended to change the oil every 7.5 thousand kilometers;
- cleaning the crankcase ventilation lines - after 30 thousand kilometers or every 2 years;
- replacing the air filter - every 20 thousand km;
- replacing the fuel filter - every 60 thousand km;
- replacement of coolant (antifreeze) - every 45 thousand km or 4 years (on a number of models, the first replacement is made after 6 years or 210 thousand km).
Each service requires additional steps:
- checking the condition of the attachment drive belt;
- inspection of cooling system lines;
- control of fuel pipes;
- checking the lines of the air conditioning system.
Some vehicles require the use of fuel additives to clean the injectors. Information is available in the list of routine maintenance.
Checking compression pressure
Measuring compression is one way to check the condition of the power unit. To check compression, a special indicator device is used - a compression meter. The device is inserted into the hole for the nozzle and fixed with a standard plate. Pressure is measured by cranking the crankshaft with the starter (without supplying fuel to the remaining cylinders). The standard compression value is 19-22 kg/cm², the spread across the cylinders is no more than 3 kg/cm². When reinstalling the injectors, new copper O-rings must be used.
It is possible to check compression by supplying compressed air through a compression meter. The piston of the cylinder being tested should be at top dead center. The air pressure is 0.2-0.3 MPa. To reduce the likelihood of crankshaft cranking, it is recommended to engage the gear and set the vehicle to the parking brake.
If air leaks into the throttle body or exhaust tract, there is a problem with the intake or exhaust valves, respectively. A gasket leak causes air bubbles to appear in the expansion tank or air to enter an adjacent cylinder. In the latter case, a characteristic hiss of passing air will be heard.
Replacing the timing belt for d4ea engine
Checking the technical condition of the timing drive
Remove the top cover.
Check the timing belt (A) for damage, oil or coolant contamination.
If oil or coolant has leaked onto the belt, it needs to be replaced.
Remove oil from the surface of the belt if it gets on the belt.
Check the camshaft gear. Check the camshaft gear, crankshaft, tensioner pulley, roller for wear and damage. Replace parts if necessary.
Check the tensioner pulley and roller for noise by turning them smoothly. Replace parts if necessary.
If there are dirt stains from the bearing on the pulley, replace the pulley.
Removing the drive
1. Remove the front right wheel of the car.
2. Remove the side cover.
Lift the belt tensioner up to remove the accessory drive belt (A).
Remove the mounting bolts and nuts and remove the engine mounting bracket (A).
Unscrew the mounting bolts and remove the upper timing belt cover (A).
Loosen the mounting bolts and remove the crankshaft pulley (A).
Unscrew the fastening bolts and remove the lower timing belt cover (A).
If you remove the tensioner, performance will deteriorate.
Unscrew the mounting bolts and remove the engine support bracket (A).
Align the alignment marks (A, B) on the camshaft gear (C) and crankshaft gear (D) with the marks (E, F) on the cylinder head (G) and on the oil pump housing (H) while turning the crankshaft.
Install pin (A) into the aligned holes in the belt tensioner housing (B).
Using a 5mm socket wrench (A), loosen the locking bolt (B).
Then, turn the tensioner (C) clockwise until it stops, together with the main bolt (D) and a 12 mm socket wrench (E), and tighten the locking bolt (B).
Remove the timing belt.
If the belt is to be reused, it must be marked with the direction of rotation before removal.
Tuning
Refinement of the 112-horsepower engine consists of replacing the firmware of the control unit. The engine design allows for an increase in power up to 140 hp. At the same time, the torque increases by 20%. At the same time, the torque curve changes, which ensures confident acceleration at low and high speeds. Despite the increase in power, fuel consumption in urban conditions is slightly reduced.
The engine option with a variable turbine, which initially develops 140 hp, is poorly suited to increasing performance. It is possible to install a more efficient compressor or replace the firmware, but these actions reduce the life of the power unit.
