Types of jets and their functions
The part is distinguished by the functions it performs, as well as depending on its location in the carburetor. Can be divided into several types: air jet, compensation jet, fuel jet. There is also an idle jet. The part is evaluated based on its operating properties. The amount of liquid passed through a calibrated hole in a certain amount of time is calculated. The part is marked with a three-digit number if it is a carburetor jet
, which is usually applied to the end. This number allows you to determine the functionality of the jet in cubic centimeters if the water column pressure is 1000 mm.
Carburetor jets. Types and sizes of jets
The hole that is located in the nozzle must be strictly calibrated. It is not recommended to clean the part with sharp objects so as not to disrupt its functionality.
The jet is made of non-ferrous metal, so it is easy to deform.
The main function of the nozzle is strict dosing of fuel or air (depending on what kind of nozzle it is) for further spraying into the combustion chamber of the cylinder.
In fact, this spare part directly affects the dynamic characteristics of the car. Specially selected and tuned jets can make the engine dynamic and powerful, or vice versa - more economical, but not so responsive.
What are the jets responsible for?
This is the name given to carburetor parts that have calibration holes for dosing fuel or air. As you may have guessed, depending on their purpose, jets are divided into fuel and air. These elements have opposite effects and have different effects on the composition of the fuel mixture. By increasing the cross-section of the fuel (main) jet, we get a rich mixture, and, on the contrary, a lean mixture of air.
From all of the above, it is clear that these parts affect fuel consumption and, naturally, the financial side of car maintenance. As the performance of the main element increases, fuel consumption in all modes will increase. And by changing the air performance, the car will “eat” more only when driving at higher speeds.
How to solve the clog problem?
Sequence of actions for cleaning the jets:
- completely remove the air filter;
- using a screwdriver, loosen the clamps that secure the hoses intended for supplying fuel;
- then you need to unscrew the plug of the third filter in the carburetor, remove the filtration element, having previously cleaned it, and then blow it out using a conventional pump;
- remove the carburetor cover;
- blow out: the idle jet, also the air jet, all valves and channels of the special sprayer from the accelerator pump, the transition system jets;
- We clean the fifth mixture screw when idling, then we blow through all the fuel channels, as well as the carburetor systems. If necessary, you can completely replace the jets from the repair kit. After performing this operation, install the carburetor cover and tighten the screws.
When cleaning the jets with a thin wire, be careful not to damage the hole; it is recommended to blow through rather than clean
.
Thus, as we see, the nozzle is a simple part of the car’s fuel system, but it also needs periodic checking, cleaning or replacement.
Carburetor adjustment
Each of the carburetors is adjustable to several values. After performing this operation, change:
- filling the float chamber with gasoline;
- the value of the maximum idle speed;
- saturation of the fuel-air mixture entering the engine.
Adjusting the quality of the mixture is quite easy. Every car enthusiast can do this:
- On a warm engine, using the mixture quality adjustment screw, set the number of revolutions to no more than 900 on the tachometer;
- We reduce the quality of the mixture to the maximum possible by tightening the adjustment screw. We bring the engine to very low speed;
- Gradually unscrewing the screw, we bring the speed to normal so that the engine runs smoothly. You can’t overdo it here; it’s better to perform the operation again. Increased idle speed will increase fuel consumption, so additional adjustments are made.
There are situations when the speed has to be increased due to failures in the engine. For example, if the speed does not change when rotating the screw. There are several reasons for this breakdown. You need to pay attention to:
- solenoid valve jet - it may be clogged;
- channel located under the mixture quality adjustment screw. If gasoline is of poor quality, it becomes clogged;
- solenoid valve - it may be the one that is faulty.
Checking the serviceability of the valve is quite simple. With the engine turned off, disconnect the wire from the electromagnet, unscrew the solenoid valve and disconnect the fuel nozzle. Now turn the key in the ignition switch and bring the wire removed from the valve.
A click and retraction of the valve stem into the body indicates the serviceability of the electromagnet. Otherwise, we change this device unit. Craftsmen advise an easier way. With the engine running, pull off the wire. If the engine stalls, you can continue working - the valve is working properly.
If debris gets into the nozzle, it should be cleaned. Cleaning is very simple. The jet can be purged using a pump or compressor. Often the specks are so small that they are not visible, but it is better to play it safe and, if the part is removed, then it is blown out to eliminate this problem. After completing all the operations, we put the nozzle in place and check the operation of the system.
It is not always possible to clean the idle air passage under the mixture adjustment screw on the road. Often it becomes so clogged that it cannot be vented, and disassembling the carburetor is necessary to eliminate the problem. Only after this does it become possible to clear this channel. In such a situation, there is a temporary solution.
Using a wrench, loosen the fastening of the solenoid valve on the carburetor until the engine is operating normally and drive home. In this case, gasoline passes by the idle fuel jet and this leads to increased fuel consumption. The main “symptom” of this malfunction is interruptions at minimum speeds and the engine turning off when the gas pedal is depressed, so mandatory cleaning of the channels and subsequent adjustment will help get rid of the breakdown.
Remember - tuning and adjustment is carried out only on a warm engine, but before this it is often necessary to replace the nozzle by installing a part from the kit. We'll look at how to do this correctly below.
How to choose jets for a carburetor
It is recommended to clean the jets every 30 thousand km, and replace them only in 3 cases:
- clogged internal channels of the nozzle that cannot be cleaned;
- physical damage;
- tuning (for example, to increase engine power, reduce fuel consumption).
The main thing you need to pay attention to when selecting jets is the diameter of the diffuser. For this there is the following formula:. Fuel nozzle (FJ) = Diffuser size × 4
Fuel nozzle (FJ) = Diffuser size × 4
When increasing the diffuser by 1 mm, the diameter of the fluid fluid must be increased by 10%.
The VJ is selected depending on the diameter of the TJ. There is also a formula for this:
Air jet (AJ) = Fuel jet size + 50
Also, without resorting to various calculations, you can buy a special repair kit for your carburetor model, which contains the necessary set of jets. But many experienced experts point out that the quality of the jets in repair kits is lower than in those sold separately.
If tuning is performed, then it is worth remembering that this is an individual procedure for each individual carburetor. Often, the selection of jets is made experimentally, by searching and comparing the results.
The choice of jets depends on the purpose of tuning. To increase power and dynamics, you need to proportionally increase the diameter of the fuel and air jets. To reduce consumption, only TJs with a smaller diameter are installed. To change the diameter of the jets, you can use special drills (1 mm, 1.5 mm, 1.75 mm, 2 mm).
| Dimensions of standard jets on the most popular VAZ carburetors | ||||
| Carburetor name, (article) | Main fuel jet, 1 cam. / 2 cam. | Main air jet, 1 cam. / 2 cam. | Idle fuel jet, 1 cam. / 2 cam. | Idle air jet, 1 cam. / 2 cam. |
| DAAZ “Solex”, (21083-1107010) | 95 / 97,5 | 155 / 125 | 40 / — | 170 / — |
| DAAZ “Solex”, (21073-1107010) | 107,5 / 117,5 | 150 / 135 | 40 / — | 140 / — |
| DAAZ “Solex”, (21053-1107010-20) | 107.5 / 110 | 140 / 165 | 40+-3 / — | 140 / — |
| DAAZ “Ozone”, (2107-1107010) | 112 / 150 | 150 / 150 | 50 / 60 | 170 / 70 |
| DAAZ “Weber”, (2101–1107010) | 135 / 135 | 170 / 190 | 45 / 60 | 180 / 70 |
Using the Solex carburetor (21083-1107010) as an example, we will consider which jets to install to reduce consumption and which to increase power.
To reduce consumption in the first chamber, you need to install a fuel nozzle with a reduced diameter. Instead of 95, 92.5 is set. An idle speed fluid with a smaller diameter is also installed - instead of 40, 38 is installed.
To increase power, main fuel jets with an increased diameter are installed in both chambers of the carburetor. In chamber No. 1, instead of 95, 102.5 is set, in chamber No. 2, instead of 97.5, 110 is set.
Related terms
- Throttle valve
- Carburetor
- Diffuser
Replacing the jet
The selection of carburetor jets is carried out according to the markings. The number of each part in the set must correspond to the diameter, according to the table. When choosing a set of carburetor parts, decide what power and take-off speed will suit you. If you are setting nominal dimensions, then everything is simple - you must first select a kit. This is the most important job when purchasing. It should be remembered that 80% of the parts on the market are from China. Pay attention to this when choosing them. Then you can make repairs.
Important. Engines for VAZ cars are produced with DAAZ carburetors. On almost all modifications, the primary chamber is equipped with a 4.5 atomizer. The main fuel jet is marked 135, the air jet is numbered 170. When installing atomizer number 4, 130 fuel and 150 air jets are installed in the first chamber. This ratio must be maintained.
To carry it out we will need to remove the carburetor from the engine. This will make further work more convenient. The carburetor removal diagram is described in other articles on the site; the only thing you need to pay attention to is the gasket between the carburetor and the engine body.
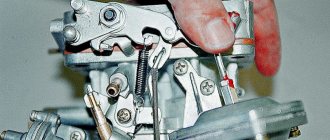
After removing the carburetor with a screwdriver, unscrew the screws securing the cover. We remove it and use a flat screwdriver to unscrew the fuel and air jets. On air ones, it is necessary to disconnect the emulsion tubes. Then new parts are installed or old serviceable jets are cleaned. For greater confidence, it is necessary to calibrate the jets on a special stand. “Incorrect” parts should be removed, but this operation cannot be performed independently.
Before installation, all carburetor parts must be washed in cleaning liquid, dirt and carbon deposits removed, and all channels cleaned. We are starting to install new jets. In this case, the correct location of each part of the mechanism must be observed. The jets on the carburetor must be placed according to the markings.
After assembling the device, install it on a new gasket and tighten the fastening nuts. Primary adjustment and tuning is carried out using the mixture saturation and idle speed adjustment screw. These operations will allow you to start the engine. We connect all the hoses and wires, install a new air filter. We make sure that all parts are in place and securely fastened. We test run the engine. Now we need to adjust the operation of the motor and warm it up.
After looking at the engine temperature data, we adjust its operation.
Having completed all the operations of installing jets and adjusting the carburetor reliably and in compliance with all instructions, think about how much fuel you will save.
If you have any questions, leave them in the comments below the article. We or our visitors will be happy to answer them
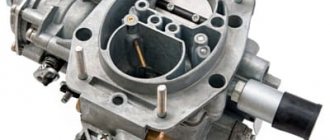
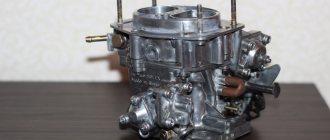
The power systems of modern cars are becoming more and more complex every year, but a simple, affordable and reliable carburetor will serve the owners of old cars for a long time. Now carburetor cars have not been produced for a long time. But this does not eliminate the need to maintain such machines. For example, the Solex 21073 carburetor produced by the Dimitrov Automotive Aggregate Plant is still manufactured and successfully operates in the engine power systems of classic VAZ models, as well as front-wheel drive VAZ 2108, 2109. It can also be found on early models of the “tenth family”.
Despite its simplicity, this element is in demand and popular among car enthusiasts. Solex 21073 was not only installed on the Niva. Reviews about it are positive, which means you need to learn more about it and learn how to configure it.
