When is valve adjustment needed?
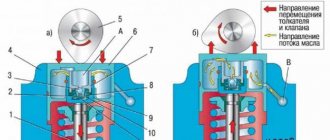
The parts of the gas distribution mechanism open one by one and at the right time. The camshaft controls them by pressing its cams on the rocker arms as they rotate. Thermal clearances of the valves are provided between the shaft protrusions and the elements. They are designed to compensate for the physical expansion of metal components from heating - the engine gets very hot during operation. In fact, adjusting the valves on a 402 engine means changing this very thermal gap up or down.
If the element does not close tightly due to thermal expansion, it will actually cease to hermetically seal the combustion chamber, without isolating it from the ducts. If the valve opens late, this already occurs due to an increase in the thermal gap and not only negatively affects the condition of the entire mechanism, but also worsens the supply of the fuel mixture.
The frequency of adjustment is specified in the engine manual: this needs to be done every 10-15 thousand kilometers. Such a short phase between settings is explained by the design failure of the ZMZ-402 motor. The camshaft here is too low and occasionally rattles, and the pushrods are too long. In addition, the quality of the parts used is low, which once again increases the vibration load on the timing belt. For example, the camshaft gear quickly falls off, as it is made of nylon. True, it is protected by a metal sleeve, but the ebonite gear, like on other engines, looks much more reliable.
Why make adjustments?
Why adjust engine valves at all? This procedure is necessary to maintain the unit in working order. More specifically, there are negative effects that worsen the operating condition of the engine, namely:
- An increase in the gap leads to deterioration in valve performance, as a result of which the air-fuel mixture is of poor quality, which deteriorates engine performance.
- As the gap increases, the chance of parts breaking during the operating cycle increases.
- Wear of parts also increases by about 2-3 times.
Required Tools
To correctly adjust the valves of a Gazelle with a 402 engine, you need to prepare the following tools:
- set of screwdrivers;
- probes of different sizes or a universal probe;
- ratchet with extension and 10 mm socket;
- a set of keys, sizes from 8 to 14 mm;
- spark plug key;
- hammer;
- rags.
Recommended gap size ZMZ-402
The caliber of the thermal gap, in accordance with the engine passport data, should be 0.4 mm. This indicator differs between the intake and exhaust valves, since the latter elements heat up more. Measurements should be taken with probes equipped with a pitch of 0.05 mm or less.
Parameters may also differ due to different operating conditions and driving styles:
- constant transportation of heavy loads, periodic driving in the mountains, use of non-standard gasoline - 0.4 mm;
- engine gas supply - 0.35 mm and 0.45 mm (exhaust);
- constant sharp starts, sporty driving style - 0.3-0.35 mm.
In addition, by reducing the thermal gap, it is possible to increase engine thrust and reduce fuel consumption. But this will only work in quiet driving modes, without load.
Engine Features
Adjusting valves VAZ 2114 injector
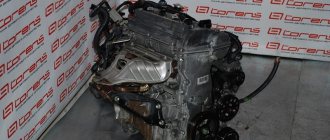
The Gazelle 402 is equipped with a 4-cylinder Cummins engine. The total engine volume is 2.7 liters, and its approximate service life is 500 thousand km.
If you use high-quality oil, this period increases slightly, but adjustments must be carried out even when using high-quality technical fluid. The engine has 16 valves - 4 per cylinder, 2 of which are intake, and 2 are exhaust. Each pair of cylinders is connected by a bridge, which is driven by a cam mechanism. We are interested in the part of the mechanism that is connected to the cam - the rocker arm. An adjusting bolt is screwed into the end of the rocker arm, transmitting force to the bridge with the valves. To reduce the gap, this bolt must be tightened so that the gap between its end and the bridge is minimal.
The procedure for adjusting the valves of the ZMZ-402 engine
Below is the detailed procedure:
- remove the terminals from the battery;
- put the gear in neutral;
- disconnect all attachments that extend from the valve cover, including the UOZ hose;
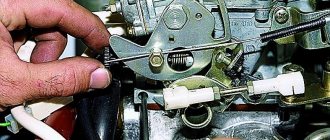
- remove the throttle cables attached to the carburetor;
- remove the air filter;
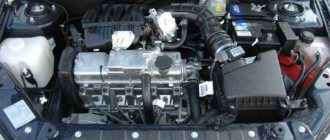
- unscrew the bolts and remove the upper part of the mechanism;
- remove the spark plugs;
- set the piston of cylinder 1 to TDC, aligning the crankshaft mark with the tide on the front cover of the engine - it is recommended to rotate the crankshaft only with the starter;
- remove the cover of the electrical distributor, check the slider - this element of the distributor should look strictly at cylinder 1;
- start adjusting the valves.
It is advisable to adjust the valves only when the engine is cold! On the other hand, the ZMZ-402 motor is equipped with an aluminum head. The rods tend to expand as the internal combustion engine heats up, and the gaps decrease. For this reason, experienced craftsmen recommend adjusting the 402 system on a warm engine, setting gaps of 0.3 mm on all elements. The exception is Gazelle cars.
As for the marks: they may coincide at TDC with the first or fourth cylinder. How can I check this besides the direction of the slider? If valves 1, 2, 4 and 6 are clamped, and the rest are free, the mark coincides with the 4th cylinder. And vice versa, if 8, 7, 5 and 3 are clamped, the mark coincides with the 1st cylinder.
Adjustment of engine valves 402 in two stages is carried out according to the following scheme:
- first the first intake and exhaust valves;
- then the second intake and exhaust;
- third inlet;
- rotate the crankshaft 360 degrees, align the marks and install the slider on the 4th cylinder;
- adjustment of the remaining valves.
Briefly, the order of adjusting the valves looks like this: first 1, 2, 4 and 6 - the rest are clamped, then - from the cockpit 8, 7, 5 and 3.
Adjustment of ZMZ 402 valves according to instructions:
- move the rocker arm along the shaft forward and backward;
- lightly and carefully hit the shaft with a hammer exactly above the valve - under no circumstances hit the pusher;
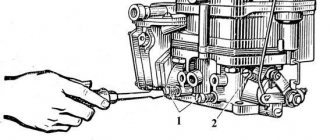
- Use a 11 wrench to unscrew the nut of the adjusting screw, holding the latter with a powerful flat-blade screwdriver or a 14 socket wrench;
- Use a feeler gauge to measure the gap - it should pass under the valve with little effort, and if necessary, adjust to the required values;
- tighten the nut back - check the gap again;
- repeat the operation with all valves.
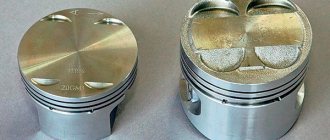
On some cars, the valves are adjusted using washers. Instead of the original one, a ring of smaller or larger thickness is installed. An alternative option is to replace the pushers with options with the required parameters. There are known engines on which adjustment is not provided at all - on internal combustion engines with hydraulic compensators. ZMZ-402 valves are adjusted with a special adjusting screw.
Then you need to reinstall the spark plugs, distributor cap and attachments. Then carry out a test run of the engine to check the oil supply to all pushers. If lubricant does not flow to any element, you should loosen the rocker arm axis fastening nut in the area of the fourth cylinder. You will also need to clean the entire oil system of the car.
Finally, stop the engine and put all the dismantled components back in place. Tighten the valve cover bolts to the required torque. After installing all the necessary hoses and tubes, start the engine again. Let it warm up to 80-90 degrees, then listen to the operation of the valves - they should not ring or click.
ZMZ 402 do-it-yourself valve adjustment (instructions with video and photos).
10/18/201910/18/2019 Good afternoon. In today’s article I will talk about how the valves on the ZMZ 402 are adjusted in two stages (this is faster).
Using the same instructions, you can adjust the valves on similar engines (ZMZ 21, UMZ-421, UMZ-417, ZMZ 24, GAZ-21), no matter the carburetor or injector. Traditionally for our site, the article is a detailed step-by-step instruction with a large number of photos and video materials.
For those who don't like to read, below is a detailed video:
Instructions for adjusting valves.
Required tool:
- screwdriver.
- open-end wrench (10,12,13,14).
- measuring probes for 0.35 and 0.45 mm.
Required spare parts and consumables:
- valve cover gasket. (Necessarily).
- sealant (if you are installing a rubber gasket).
- crankcase exhaust hose (if dry).
- studs, washers from UMZ 421, nuts, Grover washers (optional, if you want to remove oil stains).
How are the valves adjusted on the ZMZ-402?
Attention - valve adjustment is performed on a cold engine!
- Remove the valve cover.
- We bring the piston in the first cylinder to the top dead center of the compression stroke.
The easiest way to determine the top dead center in the first cylinder is to place a mark on the pulley (damper) to the casting on the front cover and, by removing the distributor cover, make sure that the slider is looking at the spark plug wire going to the first cylinder.
How often does it need to be tuned?
When operating a vehicle under high load - transporting heavy loads, driving in the mountains and at low speeds - the adjustment period is reduced to 8-10 thousand km. And if gasoline that does not match the cylinder head is poured into the tank, the valves need to be adjusted every 5-6 thousand kilometers. Otherwise they will burn out and the engine will lose compression.
To avoid stripping the threads while adjusting the valves, the nut must be rotated very smoothly with a wrench at the beginning of unscrewing and at the last turn of tightening. The tips of the valve mechanism rods of the ZMZ-402 engine are made of duralumin, and not steel, as on the ZIL-130, for example. Therefore, it is extremely difficult to adjust the valves by ear. Rattling and knocking noises can be made by:
- worn camshaft cams;
- unevenly operated rocker arms;
- worn out axis;
- loose springs.
Valves with a defective camshaft cannot be adjusted properly. Therefore, it would be more advisable to replace the camshaft. The same applies to worn-out spring retainers, since the rocker arms in this case will rest not against the valves, but against the spring cups.
How to determine when it's time to make adjustments
There are several signs that the mechanism needs servicing:
- a metallic knock is heard from the engine;
- drop in engine power;
- Unstable motor operation.
Even if nothing like this happens, after a run of 100 thousand km it is strongly recommended to inspect and service the unit. When adjusting the valve on the gazelle 402 model, do not forget to check the integrity of other structural elements.
The process of adjusting valves on the ZMZ 402 engine. For the work you will need to buy:
- set of probes;
- a new gasket for installation under the cover;
- nuts and bolts (in case the fastenings break);
- bearings for replacement.
The asking price is 600-700 rubles. If the valves fail, they can be replaced. The price for a set of Gazelle valves for the 402 model engine is about 1,500 rubles.
Table: useful technical data for 402
| Cylinder operating order | 1-2-4-3 |
| Direction of rotation of the distributor rotor | counterclock-wise |
| Ignition timing, degrees | |
| centrifugal regulator | 15-18 |
| vacuum regulator | 8-10 |
| Spark plug | A14VR |
| Spark plug gap, mm | 0,8-0,95 |
| Slider resistance, kOhm | 5-8 |
| Spark plug tip resistance, kOhm | 4-7 |
| Resistance of the central contact of the cover, kOhm | 8-13 |
| Stator winding resistance, kOhm | 0,4-0,45 |
If you have any questions, leave them in the comments below the article. We or our visitors will be happy to answer them
Step-by-step instruction
Once you have reached the valves and the 402 engine has completely cooled down, you can begin the adjustment process itself. Here's what will come in handy when working:
- spanners;
- probes.
The work sequence is as follows:
- The first thing to do is get the crankshaft in the correct position for the job. We take a 36mm wrench, hook the ratchet and start rotating it clockwise. We're not in a hurry. As soon as the last mark on the pulley is opposite the mark on the cover, stop the rotation.
- We begin checking the valves of the first cylinder. First make sure they are all closed.
- Adjustment begins with the exhaust valves. We take out the probes and start checking. Normal readings are 0.4 mm, but 0.05 mm less is acceptable. Loosen the locknut before tightening the screw. If the value is greater, tighten the screw, insert the probe and double-check. Twist until a satisfactory result.
- After adjustment, tighten the locknut. After manipulation, the large probe should not pass into the gap between the parts.
- Next is the inlet element. We check the gap again, but this time the limit is 0.4 mm + 0.05 mm. If necessary, loosen the locknut, tighten the screw, tighten the locknut. Let's check.
- Next, the cylinders are adjusted in the following sequence: 2, 4, and the last 3.
- When moving from one cylinder to the next, you need to turn the crankshaft half a turn (180°).
- Adjusting the valves will take a few hours the first time, but the next time everything will go much faster.
- After adjustment, clean the cover and valves.
- We put the gasket on and screw on the compartment lid.
- We put the air filter back and install everything that was previously dismantled, only in the reverse order.