Firing order
The cylinders in a car do not work chaotically, because for stable operation of the engine and alternate execution of all four strokes, their strict synchronization is required.
So there is a special order of operation of the cylinders of the VAZ 2114, thanks to which each of them at one point in time performs any of 4 strokes, namely:
- Injection of a mixture of fuel and air that fills the entire volume of the cylinder.
- Compression of the working mixture due to the upward movement of the piston.
- The combustion of the working mixture and the expansion of the resulting gases pushes the piston in the opposite direction, thereby driving the connecting rod and crankshaft.
- The release of exhaust gases from the cylinder with their further discharge into the exhaust system.
It is worth noting that on cars of different brands and even models, the engine may have a different operating diagram, but the order of operation of the VAZ 2114 injector cylinders always looks like this: 1-3-4-2. According to this diagram, the high-voltage wires should be connected.
For greater convenience, the cylinders are numbered accordingly, starting from the front cover of the engine.
Checking the ignition module
Checking the module consists of two stages: visual check and using a device. Let's start with the visual one.
Visual inspection
It is necessary to dismantle the module and during dismantling pay attention to the contact of the high-voltage wires with the MC, as well as to the contact of the low-side connector. The wires must be fixed securely, there should be no moisture or traces of oxidation.
Next, the removed MH must be inspected for chips and breakdowns. A breakdown of the coil causes signs of damage on the epoxy part of the module, namely on its lower part.
Checking with a tester
To carry out such a test, you need a multimeter that can operate in ohmmeter and voltmeter modes. Both of these parameters show what state the MH is currently in and whether its control circuit is working properly. It happens that the breakdown is not the fault of the MZ, but its control circuit, and then it is necessary to involve an experienced electrician in the repair, who can find the cause.
Checking the power circuit
Module check
Substitution
One of the most proven methods for checking a multimeter is to replace it with a working one. This method is used by most car owners. You need to find a VAZ 2114 with the same engine and remove it, install the MZ from this car on your own and start the internal combustion engine. If no previous problems are observed on the ignition module from another car, you can safely buy a new MZ and continue to operate the car.
Armored wires and their connections
Having found out how the location of the VAZ 2114 cylinders affects their connection, it is worth talking about the high-voltage wires with which this is done.
These wires themselves are quite different from ordinary electrical wires - they have an increased layer of insulation, protective shielding, as well as metal connecting tips and protective caps made of heat-resistant plastic. The main purpose of these wires is to transmit a high-voltage pulse from the ignition unit to the cylinders (it is this pulse that allows the spark plugs to ignite the working mixture).
The connection of armored wires should be made taking into account the ignition order of the VAZ 2114 injector and the numbering of the cylinders (this was mentioned above). For greater convenience, you should be guided by the numbering present on the ignition module - just connect socket number 1 to the corresponding cylinder, socket number 2 to cylinder number 2, etc. It is extremely difficult to make any mistake here.
Features of connecting high-voltage wires to the VAZ 2114
High-voltage ignition wires of the VAZ 2114 are part of the ignition system, through which an electrical impulse is transmitted from the module to the spark plugs. When the current hits the spark plugs, the fuel mixture ignites in the combustion cylinders, which gives rise to a new stroke of the engine.
BB wires must be of high quality
The design of the GDP, unlike conventional wires, is quite complex. In addition to the conductive core (which is made of copper) and protective insulation, they have metal tips and plastic protective caps.
Metal tips act as contacts; they fit into the sockets on the spark plugs and the ignition module. The durability of the GDP directly depends on how well the tips are made. When purchasing, be sure to check the strength of their attachment to the wire.
How to choose high-voltage wires
When choosing new high-voltage wires for your car, you should be guided by their two most important parameters - resistance and breakdown voltage. So, the less resistance the armor wire core has, the better it will transmit the impulse from the module to the spark plugs, and the easier it will be to ignite.
As for the second factor, this is the maximum voltage value, above which there is a risk of insulation breakdown, which can result in a number of unpleasant consequences. In addition, when choosing wires, you should pay attention to secondary indicators, for example, insulation resistance to cold, etc.
According to survey results, most car enthusiasts prefer high-voltage wires from Tesla - they have good performance, reliability, and are also resistant to cold and caustic substances.
Should high-voltage wires be replaced and when?
No matter how well the armored wires are made, they also have a limited service life. According to current regulations, they must be replaced after every 30,000 km traveled. In practice, many motorists ignore this rule, continuing to travel with wires that have already outlived their useful life.
Such inattention can cause a whole host of problems, including:
- poor ignition;
- overclocking problems;
- engine tripping;
- inability to start the car.
All these troubles are caused by one single factor - an increase in the electrical resistance of the core of high-voltage wires, as a result of which it becomes “more difficult” for the impulse from the coil to reach its destination.
You can check whether you can still drive with the old wires or not - at home.
To do this you need:
- Turn off the ignition.
- Remove one of the armored wires.
- Measure its resistance using a megohmmeter or multimeter in the appropriate mode.
- If the resistance turns out to be equal to or close to the figure indicated on the wire insulation, then it is in good condition, but if it turns out to be greater, then the wire should be replaced.
- Repeat this operation on the remaining three wires.
The principle of operation of a four-stroke power plant
You can understand why it is important to connect high-voltage wires correctly if you study the principle of operation of the power plant. The carburetor or injector of the VAZ-2109 operates on approximately the same principle, since both power plants are four-stroke.
- First, the cylinder volume is filled with the fuel mixture and exhaust gases. This process is called "inlet".
- The engine then goes into compression. With it, the valves are closed, and the crankshaft and connecting rod move the piston upward. The mixture of fuel and air is transferred to the combustion chamber.
- During the expansion stage, the ignition is switched on and a spark appears. It ignites the fuel mixture, resulting in the formation of gases. They put pressure on the piston, causing it to move down. This force is transmitted through the connecting rod to the crankshaft.
- The process is completed by the “release” of exhaust gases through the exhaust system.
In order for the engine to operate smoothly and without jerking, the processes must take place in a certain order. This, first of all, concerns the order in which the cylinders are put into operation.
What to do if the engine starts to stall
8-valve injection engine VAZ 2114
In order to determine why the engine in a VAZ 2114 is misfiring, you must follow the recommendations of professionals. First of all, you need to determine which cylinder is out of order, for this you need to:
- open the hood with the engine running;
- remember the sound and nature of the operation of the power plant;
- remove the high-voltage wires from the spark plugs one by one, if the sound and rhythm of operation changes, then continue further, as soon as it is discovered that when the spark plug is de-energized, the nature of the sound does not change, which means the faulty cylinder has been identified.
Next, you need to unscrew the spark plug and determine its condition and performance.
It is unscrewed using a special spark plug wrench, which is recommended to be carried with you in an emergency kit. It takes up little space, but is a unique key that cannot be replaced and can come in handy at the most unexpected time. After all, even simply by replacing a heavily carbonated spark plug with a new one, you can temporarily solve the problem with starting the engine.
The next step is to determine the condition of the removed spark plug. If the electrode is intact and clean, and there is a large amount of soot on the head, then with a high degree of probability it can be determined that dust has entered the combustion chamber of the cylinder, therefore the fault must be looked for in the air supply system through the air filter.
If the entire head, along with the electrode, is covered in smoke, and it is severely burnt out, it means that a lean mixture was supplied and detonation combustion occurred with ignition advance. When the head is also completely covered with smoke and the electrode is in good condition, this means that a rich mixture was supplied and there was a delay in the ignition supply.
Assessing the condition of the spark plug gives direction in finding the true cause of cylinder failure. However, you should also check the performance of the candle itself. There is a proven method for this - “by spark”. If a spark breaks through, even if weak due to carbon deposits, then you must definitely look further. But if there is no spark at all, then you should replace the spark plug with a new one and check it. If there is a good spark, you can try to start the car and monitor the dynamics of changes.
Spark plug faults
If the car has a fairly high mileage, then trying to find the reason why the engine is shaking, you must do the following:
- change the spark plug;
- change the set of high-voltage wires; during prolonged operation under conditions of high temperatures and voltages, microcracks appear on the shell, leading to breakdowns and failure; experienced auto electricians recommend periodically changing this set for prevention;
- measure the compression in the idle cylinder; if it is broken, then perhaps the rings are stuck or the valves are burnt out;
- adjust the valves, this procedure should be carried out for prevention every 15 - 20 thousand kilometers;
- determine the performance of the ignition coil, this is a fairly common failure, the best solution is to replace the old one with a new one;
- change the air filter;
- Check that the timing belt is installed correctly.
All the specified procedures have been completed, but the engine still “troubles”. We need to move on:
- Conduct diagnostics of the electronic control unit and replace if necessary.
- Check the fuel supply system, down to the injectors.
- Determine the performance of the oxygen sensor, if it is faulty or produces deteriorated indicators - repair or replace.
- The failure of the crankshaft position sensor is determined by the computer, and an error should be generated indicating a breakdown. If this happens, replace it.
Engine workflow through cylinders
The cylinders are activated as follows:
- In the first there is an upward movement. The gases expand and the mixture of air and fuel burns.
- In the third, to carry out the compression procedure, the piston rises.
- In the fourth, “injection” occurs - the piston moves down and at the same time a mixture of air and gasoline enters the cylinder.
- In the second cylinder, the piston rises and takes the upper position so that gases escape through the valve system. After which the exhaust gases are removed from the power unit.
Based on the principle of operation of the cylinders, their activation diagram looks like this: 1-3-4-2. It is important to connect them correctly so that the cylinders work in that order.
How to connect wires correctly
When replacing high-voltage conductors, they are first connected to the ignition distributor. The distributor cover is convenient in that it is always installed in one position. There is a special mark on it, thanks to which it will not be difficult to place the part in place. Before connecting the wires, inspect the cover. It must be intact, since if cracks appear, the performance of this unit is not guaranteed.
The mark on the distributor cover is located next to the wire socket of the first cylinder. The firing order of the cylinders is slightly out of order (1-3-4-2) due to the ignition slider. It moves around the circle (distributor) counterclockwise. It is precisely by this principle of movement of the slider that it is easy to remember the order of the wires. They need to be connected to carburetor and injection VAZ-2109 according to the same principle. On the distributor cover, connect the wires according to the principle of movement of the slider, this is the only way you can set the ignition correctly:
- the socket of the first cylinder is located at the mark;
- the third one is connected at the very bottom;
- on the same line with the socket of the first, there is a place for the wire to the 4th cylinder;
- at the top point the second cylinder is connected.
On the engine itself, the cylinder numbering goes from the location of the timing belt to the starter, that is, from left to right. The fourth cylinder is closest to the starter, and the first is closest to the timing belt. When connecting, it is important to look at which socket of the distributor cover the wire comes from, if you confuse their location, the car will not start.
If you have connected the wires correctly, but the car still does not start, then the problem may be in them. Check high-voltage conductors for integrity. If you haven't changed them in a while, it's worth buying a new set. The peculiarity of these wires is that over time microcracks can form on their surface. They lead to a lack of spark when the ignition distribution system is working. Moisture and dust get into these cracks, which damages the wire from the inside, although it appears intact from the outside.
Car enthusiasts recommend purchasing sets of high-voltage wires from foreign manufacturers, as they last much longer than stock or domestic ones. It is advisable to replace the spark plugs along with the wires, especially if cracks or carbon deposits appear on their surface. This is necessary so that after repair you definitely do not have problems with ignition.
Ignition circuit for VAZ-2113, 2114, 2115
The ignition circuit in the VAZ-2114 is almost completely identical to models 2113 and 2115 and includes a coil, wires, switch, module, etc. The main task of the parts is to generate voltage, which enters the spark plugs and causes them to create a spark.
A high-voltage coil ensures ignition of the fuel-air mixture, regardless of whether they are injection or carburetor engines with a sensor. With the advent of contactless power systems, distributors (distributors) are a thing of the past. They were replaced by new schemes from the VAZ-2114, the operating principle of which is based on the logic of standard structures. In older systems, voltage was generated by disconnecting the contacts. In new ones, the signals are supplied by a control unit, which collects signals coming from sensors on the motor, forms them into a control pulse and sends them to the ignition circuit. High voltage is generated by two coils and a two-channel electronic switch.
The system includes:
Contactless connection is ensured by a low-voltage power supply connector. High-voltage wires are connected directly to the spark plugs.
If there are problems in the unit, you must first check the spark plugs.
To do this you need:
The carburetor is checked last. In fact, this part can only be replaced.
The design of the injection 8-valve VAZ-2114 engine
Many motorists, especially beginners who have just purchased a VAZ-2114, have wondered how the 8-valve injection engine that is installed on this car works. This article will discuss the design of the motor, its main characteristics, as well as dismantling and repair features. This information will be very useful for beginners and those who do not know how the main power unit works.
Video about the VAZ-2114 engine
Video review of the VAZ-2114 engine operation, features and characteristics.
VAZ 2114 troits at idle
If the engine stalls when cold (at idle), there are three possible reasons:
- problems with fuel supply;
- problems in the ignition system;
- valves are poorly adjusted.
In this situation it is necessary:
a) do a general flushing of the fuel system, and also clean the injectors using ultrasound;
b) change the spark plug, a set of high-voltage wires and diagnose the ignition coil;
c) adjust the valves and, if necessary, replace them.
What to do if the engine stalls when hot. In this regard, professional auto mechanics believe that the reasons are the same as in the first case. At idle speed when the engine is warm, one of the cylinders may stop working due to malfunctions in the fuel supply system or lack of spark. The procedure is the same as for failures on a cold engine.
Although in a professional environment it is believed that engine tripling is a fairly rare failure, nevertheless, discussion of this problem on automobile forums, including for the VAZ 2114, suggests that these problems exist due to a large list of possible reasons for such failures, this becomes a serious headache for the motorist who encounters it. However, if you approach solving this problem calmly and thoughtfully, without trying to haphazardly replace one thing or another, it is quite possible to solve this problem.
We recommend
- Reasons for engine overheating on a VAZ 2114
- Secrets of changing oil in a VAZ 2114 engine
- Installation of a turbine on an 8 valve VAZ 2114 engine
- Replacing the timing belt on an 8-valve VAZ 2114 engine
Engine diagram and structure
General view of the engine
Before we begin to consider the issue of the engine design and description of the characteristics, it is necessary to consider the design of the components and parts that are located directly in the main power unit and outside.
Diagram and design of the Samara-2 engine
1 – generator drive pulley; 2 – oil pump; 3 – timing belt; 4 – toothed pulley of the coolant pump; 5 – front cover of the timing mechanism drive; 6 – tension roller; 7 – camshaft toothed pulley; 8 – rear cover of the camshaft drive; 9 – camshaft oil seal; 10 – cylinder head cover; 11 – camshaft; 12 – front cover of camshaft bearings; 13 – pusher; 14 – valve guide; 15 – oil separator mesh for the crankcase ventilation system; 16 – exhaust valve; 17 – inlet valve; 18 – rear cover of camshaft bearings; 19 – fuel pump; 20 – housing of auxiliary units; 21 – ignition distributor sensor; 22 – outlet pipe of the cooling jacket; 23 – cylinder head; 24 – spark plug; 25 – crankcase ventilation hose; 26 – flywheel; 27 – crankshaft rear oil seal holder; 28 – rear crankshaft oil seal; 29 – cylinder block; 30 – oil pan; 31 – oil level indicator (oil dipstick); 32 – crankshaft; 33 – piston; 34 – connecting rod cover; 35 – connecting rod; 36 – crankshaft main bearing cover; 37 – front crankshaft oil seal; 38 – crankshaft toothed pulley.
Also, it’s worth looking at a cross-section of the VAZ-2114 engine:
Cross section of the Samara engine
1 – oil pan drain plug; 2 – oil pan; 3 – oil filter; 4 – coolant pump; 5 – exhaust manifold; 6 – intake manifold; 7 – carburetor; 8 – fuel pump; 9 – cylinder head cover; 10 – camshaft bearing cover; 11 – camshaft; 12 – crankcase ventilation hose; 13 – valve adjusting washer; 14 – pusher; 15 – valve cotters; 16 – valve springs; 17 – oil scraper cap; 18 – valve guide; 19 – valve; 20 – cylinder head; 21 – spark plug; 22 – piston; 23 – compression piston rings; 24 – oil scraper ring; 25 – piston pin; 26 – cylinder block; 27 – connecting rod; 28 – crankshaft; 29 – connecting rod cover; 30 – oil level indicator; 31 – oil pump receiver
Characteristics of an 8-valve engine
Many motorists remember how at the end of the 90s of the 20th century and the beginning of the 2000s, the VAZ 2108-09, which was also called “Samara,” was popular on the roads of the CIS. These cars became legendary in that era. Due to the high popularity, the AvtoVAZ plant decided to resume production of these models with some modifications.
VAZ-2114 engine under the hood
Firstly, the VAZ-2114 received a modified engine . In essence, this is an injection version of the Samara. Although it received some features from modern engines. If we consider in more detail, the Samara-2 engine (this is the type installed on the VAZ-2114) is a mixture of two engine options into one: from the VAZ 2108 and VAZ 2110.
Many motorists liked the Samara-2 power unit and fell in love with it. The main indicator was ease of repair and inexpensive spare parts. Thus, the 8-valve engine has become the standard for “price-quality” indicator.
When the basic information has been reviewed, you can proceed directly to considering the characteristics of the motor.
Table of main characteristics of the Samara-2 engine 8 valves:
Disassembly and repair: basic facts
Let's consider this paragraph of the article as reference information, because if we talk about engine repair, then each individual component and unit is repaired separately. When operating the power unit, it may be necessary to dismantle it. In this case, you can consider replacing the power unit from a foreign car.
Therefore, let’s consider the main operations aimed at removing the engine from the car:
- At the preliminary disassembly stage, it is necessary to drain the oil from the engine, as well as the coolant from the system.
- Another point that should not be missed is turning off the power to the car. This is necessary in order not to short-circuit the system.
- Disconnect the fuel system.
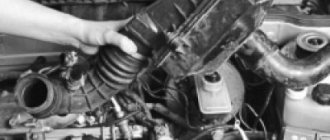
- We dismantle the components that supply air to the engine.
- Disconnect the throttle, as well as all remaining air pipes and cooling system pipes.
- We dismantle the injection system and receiver.
- We remove the ignition system completely.
- Let's disassemble the gas distribution mechanism.
- We remove the thermostat and pump.
- Remove the ignition module.
- Now, you can dismantle the collector.
- Remove the pan, oil filter and pump.
- Disconnect the gearbox and remove the clutch. The gearbox can also be removed for convenience.
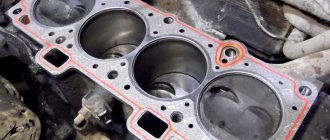
- Remove the cylinder head.
- We dismantle the power unit.
- We carry out final disassembly.
Engine crank mechanism
The design of the cylinder block of the VAZ-2111 engine is identical to block 21083. It is cast from cast iron, the cylinder diameter is 82 mm, and if the piston group is replaced, it can be increased by:
- 0.4 for the first repair;
- 0.8 at the second.
Crankshaft
The crankshaft is located at the bottom of the block and rotates on five main bearings that have removable covers, which are secured to the block with bolts. The covers are not interchangeable and are marked with marks on the outside. The middle support of the main bearing has slots into which support half-rings are installed, eliminating axial displacement of the crankshaft. The front half-ring is made of an alloy of steel and aluminum, the rear half-ring is made of cermet. If play in the crankshaft appears, the half rings must be replaced.
The bearing shells - support and connecting rod - are thin-walled, made of steel-aluminum alloy. There are grooves on the inside of all the upper main bearings, with the exception of the third bearing bearing.
The design of the crank (engine crankshaft) is as follows: it is cast iron, has four connecting rods and five main journals. Eight counterweights are cast together with the shaft. Channels are drilled inside the shaft, closed with plugs and having a dual purpose:
- they supply oil to the connecting rod journals from the main ones;
- they clean the oil, since centrifugal force throws all mechanical impurities that are not retained by the filter towards the plugs.
The latter circumstance must be taken into account when overhauling the engine, and when removing the crankshaft, and especially when balancing, it is necessary to clean the channels from accumulated deposits. After cleaning, the plugs are replaced with new ones.
The camshaft drive pulley is attached to the front part of the crankshaft, and to it is the generator drive pulley, which also works as a damping device, thanks to the elastic element between the outer and inner parts of the pulley. A cast iron flywheel is attached to the rear end using six bolts. It has a ring gear designed to start the engine using a starter. In addition, there is a conical mark on its surface, designed to determine TDC after the engine is assembled.
Operating procedure
Often when repairing an engine, it becomes necessary to disconnect high-voltage wires. Some drivers, after disconnecting the wires, do not remember the order in which they were installed. As a result, there may be confusion with the wires, and if they are connected incorrectly, the car will not start. To avoid an unpleasant situation, you need to know how the internal combustion engine operates.
Connecting wires to a VAZ 2109
The principle of operation of the power unit is based on such a property of gases as the ability to expand when heated. A standard four-cylinder engine operates in 4 strokes:
- During the first stroke, the air-fuel mixture and part of the exhaust gases are “injected”. This mixture completely occupies the volume of the cylinder.
- In the second cycle, the “compression” process occurs. In this case, the valves are closed, and the piston moves upward due to the movement of the crankshaft and connecting rod. The working mixture fills the combustion chamber.
- On the third stroke, called “expansion,” a spark appears thanks to the spark plugs, which ignites the working mixture. The expanding gases exert pressure on the piston and force it to move downward. Then, thanks to the connecting rod, the crankshaft begins to move.
- On the fourth stroke, the process of “release” of exhaust gases is carried out. Through the exhaust valves they enter the exhaust system of the VAZ 2109.
In order for the operation of a multi-cylinder engine to be smooth and the crankshaft not to experience uneven loads, it is necessary that the work processes be carried out in a certain order.
There are different schemes that determine in what sequence the cylinders will function. The VAZ 2109 uses the following scheme: 1-3-4-2. The cylinders are numbered starting from the front cover of the power unit.
Cylinder numbering on the VAZ 2109
If we imagine the working process of the engine through the cylinders, then the order of operation is as follows:
- In the first cylinder, an upward movement occurs, the working process takes place: the air-fuel mixture burns, the gases expand.
- In the third, a “compression” process is carried out, in which the piston moves upward.
- The fourth receives the working mixture as the piston moves downwards, thus carrying out the “injection” process.
- In the second, the piston moves upward, while the exhaust gases exit through the exhaust valves.
Video “The principle of operation of internal combustion engines”
This instructional video explains how the combustion system works.
Place the cylinder block in a convenient place and tighten the missing studs. Secure the generator with 2 bolts.
The crankshaft bearings and half rings, as well as the pistons and oil seals, must be lubricated with oil. When assembling the engine, the crankshaft seals must be new.
Install liners with a groove in the first, second, fourth, fifth sockets of the cylinder block, and liners without a groove in the third socket. Install the crankshaft into the main bearings and thrust half rings into the middle bearing seat.
Possible causes of failure
During the operation of the internal combustion engine, various malfunctions are possible. To detect them, you should perform the following sequence of actions:
- First you need to start the car. The engine should idle. At this time, you should listen to what sounds are coming from the exhaust pipe. If you hear regular popping noises, then one of the cylinders is faulty. The cause may be faulty spark plugs and lack of spark. The malfunction can also be caused by a large amount of incoming air or insufficient compression in the cylinder.
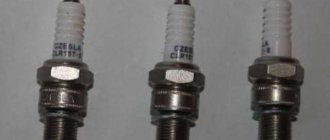
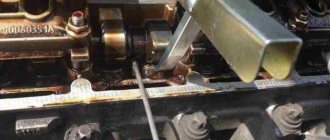
- It is necessary to inspect the candles. If there is carbon deposits, moisture or oxidation, you need to clean it. Check the gap between the electrodes, which should be 0.8 - 0.9 mm.
- Replace all spark plugs, regardless of their appearance and vehicle mileage.
- If there are irregular emissions, you need to inspect the high-voltage wires. There should be no traces of oxidation on their tips, and the insulation should not be damaged. If defects are found, the wire should be replaced.
Wires connecting to the coil
- The gas distributor cap should be inspected. There should be no soot or cracks on it. The carbon contact should be checked for damage and wear.
- The rotor needs to be inspected. It must be solid and have no signs of burnout. All parts with defects must be replaced.
- The pressure in the cylinders is allowed to be no lower than 1.1 MPa, and the compression difference should not exceed 0.1 MPa. If the indicators do not correspond, engine repair is necessary.
If after the above steps the problems remain, then you need to contact a service station to undergo a more accurate diagnosis of the VAZ 2109 engine and adjust the ignition system on the stand.