Cylinder head and valve mechanism (eng.) (disassembly, repair, replacement of cylinder head gasket)
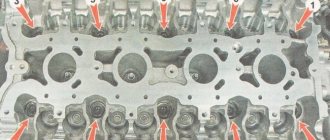
Section of the cylinder head along the exhaust valve: 1 - cylinder head; 2 - valve; 3 — oil deflector cap; 4 — valve lever: 5 — camshaft bearing housing; 6 - camshaft; 7 — adjusting bolt; 8 — lock nut of the adjusting bolt; A - gap between the lever and the camshaft cam
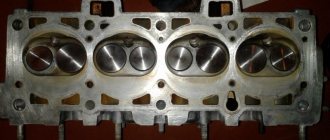
Main dimensions of valves, guides and valve seats
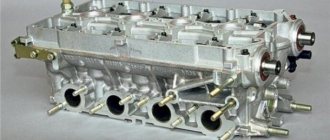
Details of the valve mechanism: 1 - valve; 2 - retaining ring; 3 - guide sleeve; 4 — oil deflector cap; 5 — support washer of the outer spring; 6 — lock washer of the internal spring; 7 — internal spring; 8 — outer spring; 9 — spring plate; 10 - crackers; 11 — valve drive lever; 12 — lever spring; 13 — adjusting bolt; 14 — lock nut of the adjusting bolt; 15 — bushing of the adjusting bolt; 16 — lever spring locking plate
Basic data for checking the outer (a) and inner (b) valve spring
We remove the cylinder head to replace the gasket, repair the valve drive mechanism and the head itself, as well as when completely disassembling the engine.
To replace the head gasket or connecting rod-piston group of the engine, remove the cylinder head from the engine complete with the receiver, intake pipe and exhaust manifold.
To remove the cylinder head:
- disconnect the negative cable of the battery;
- drain the coolant (see here);
- remove the throttle assembly assembly (see here);
- disconnect the hoses from the outlet pipe of the cooling jacket;
- disconnect the hose from the heater radiator inlet pipe;
- disconnect the fuel rail injector wire connector (see here);
- disconnect the connectors from the coolant temperature sensor of the injection system and the coolant temperature indicator sensor;
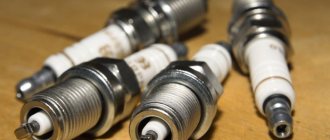
- remove the tips of the high-voltage wires from the spark plugs;
- disconnect the fuel inlet and outlet pipes from the fuel rail;
- disconnect the exhaust pipe from the exhaust manifold (see here), the heat shield of the starter and the bracket for the heater radiator outlet pipe (see here);
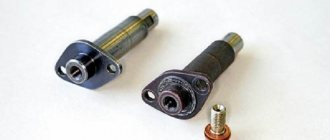
- remove the camshaft and valve drive levers (see here);
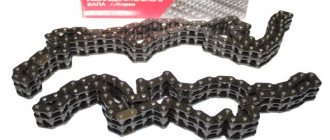
- remove the camshaft sprocket and tie the chain with wire.
Using a 13mm socket, unscrew the cylinder head mounting bolt located next to the ignition module bracket. |
|
Remove the cylinder head assembly with the exhaust manifold, receiver and intake pipe with the fuel rail.
The cylinder head can also be removed from the engine by first dismantling the receiver (see here), the intake pipe and the exhaust manifold (see here).
Remove the cylinder head without the exhaust manifold and intake pipe.
|
We install the cylinder head on the workbench.
Using a 10mm socket, unscrew the two nuts securing the heater radiator inlet pipe to the block head.
|
| Remove the sealing gasket. |
|
|
| Remove the sealing gasket of the pipe. |
When disassembling the valve mechanism.
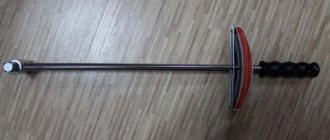
. We place a stop - a wooden block - under the plate of the valve being desiccated.
We dry out the valve (see here).
. and remove the valve from the guide sleeve of the cylinder head.
We dismantle the other valves in the same way.
We assemble and install the cylinder head in the reverse order. Before installing the valves, clean them from carbon deposits and lubricate the valve stems with engine oil.
Assembling the valve mechanism.
. We strike the ends of the valves with a hammer with a plastic striker for more reliable fixation of the crackers (the wooden stop must be removed from under the valve plate).
Before installing the cooling system pipes, we clean the mating surfaces of the pipes and the block head from the remains of old gaskets.
We install new pipe gaskets, applying a thin layer of sealant to them.
We clean the mating surfaces of the head and cylinder block from the remains of the old gasket, dirt and oil.
Using a syringe with a needle or a rubber bulb, remove oil and coolant from the mounting holes of the cylinder block.
We install the gasket and cylinder head using two centering bushings.
|
Having installed the cylinder head bolts, tighten them in the order shown in the figure.
To ensure a reliable seal and eliminate the need to tighten the bolts during vehicle maintenance, tighten the bolts in four steps:
1st step – tighten bolts 1–10 to a torque of 20 N.m (2.0 kgf.m); 2nd step - tighten bolts 1–10 with a torque of 69.4–85.7 N.m (7.1–8.7 kgf.m), and bolt 11 with a torque of 31.4–39.1 N.m ( 3.2–4.60 kgf.m). Then we turn bolts 1–10 by 90° (3rd step) and another 90° (4th step).
Video
Source
Procedure and torque for tightening the Chevrolet Niva cylinder head
Why do you need a wide torque range? Because all dynamo keys have an error. It is better to take the moment in the middle of the range. Minimum permissible - maximum tightening torque. For example: 100-110 Nm. Reminder: In places where there are many tightening points, such as the intake manifold. It is better to go through the final moment several times. The dots in the middle “sag.” Cylinder head (cylinder head) bolt. M12*1.25. Before installing the cylinder head, clean the threaded holes from oil and degrease the surfaces. If the length of the bolt shaft exceeds 117 mm (this may happen because they stretch over time), then it should be replaced with a new one. A non-shrinkable metal-reinforced gasket is installed between the block and the head. Reuse of the gasket is not permitted. To ensure a reliable seal and avoid tightening the bolts during vehicle maintenance, we tighten them in four steps: 1st step - tighten bolts 1–10 with a torque of 20 Nm; 2nd step - tighten bolts 1–10 to a torque of 70–86 Nm, and bolt 11 to a torque of 31–39 Nm. 3rd step - then turn bolts 1–10 by 90 degrees; 4th reception - and another 90 degrees; The procedure for tightening the cylinder head of a Chevrolet Niva 2123
>
cylinder head repair
Cylinder head repair or old songs about the main thing. Perhaps a lot has already been said about this on many sites. But since very often engine spare parts are asked for installation recommendations, I decided to try to present this in a separate form. 1. Defective cylinder head, which you removed from the engine, dragged from disassembly or bought in a store. There are no special tricks here. I personally do not use cylinder heads corroded by antifreeze. The second point worth paying attention to is the tunnel where the chain guide is installed on 2 bolts. If the places for threading are “eaten up” by the chain, then it is better to either abandon such a head or prepare bosses for pressing. Of course, if the cylinder head was removed for a reason, then it is even better to carry out a “pressure test”, that is, check for the presence of microcracks in the cooling and oil channels. Pay attention to the condition of the valve seats. As they are worn around the edges, it is important that the wear is even and subsequent adjustment of the seat is possible. In general, the summary is the following: if there are any doubts about the quality of the cylinder head, it makes sense to go for analysis or open a newspaper and take another head as a donor. Compared to the final cost of cylinder head repair, this is about 10%. 2. Now we begin work. Repressing the guides. I have never in my life done such stupid things as changing a few pieces, and a few are still the same. If this approach is closer to you, then there is no point in continuing to read this article. This operation consists of pressing out the old valve guides and pressing in new ones. Books from the 70s of the last century talk about mandrels with which guides are knocked out and hammered in. I beg you very much: don’t do this. This is a sure way for the valve guides to start to wobble. For a long time in this world this has been done by “hot landing”. That is, when pressing out, the cylinder head heats up, then the valve guide cools, and is pressed out with a light blow of a hammer. When pressing, the valve guides are placed in a “cooling” position, the cylinder head warms up and then pressing occurs with a light hammer. I stopped doing this with my own hands a long time ago. I prefer to take it to “motor” companies that have this simple operation on stream. 3. Expanding the guides. Throughout the civilized world, guides are made with a plus tolerance on the outer diameter and a minus tolerance on the inner diameter. In order to unroll them after pressing. I pay special attention to this, because VAZ guides sometimes do not need to be unrolled after pressing, the valves are already hanging out there. THAT'S BULLSHIT. Never in my life will I believe that they were made taking into account the change in size after shrinkage. This operation is usually performed either with a two-pass or adjustable reamer. It is controlled either by a bore gauge or a plug gauge. For me it is simply a hardened steel “stick” polished to size 8.04. If it suddenly gets through, then we throw out the guide and do everything again. Why don’t I do this operation on the “side”. As a rule, the reamers used by these companies go through more than a dozen cylinder heads. Somewhere around 5-7 heads, the reamer “sits down” and begins not to cut, but to press. The size sometimes falls down to 0.1 mm. I use a reamer for a maximum of 3-4 cylinder head, and then I just throw it away. 4. Editing saddles. I prefer to do this operation in motor companies using proprietary machine tools. There are actually two options. Or straighten the seats on a machine and manually grind the valves without any problems. Or straighten the seats with hand mills and get a possible headache when grinding the valves. I prefer the first option. 5. Grinding in valves. Well, I need to say something special about this operation. The fact is that now there is a very widespread opinion that after adjusting the seats on modern machines, there is no need to grind the valves. To solve this issue for myself once and for all, I straightened the seats, assembled the cylinder head, turned it over and poured kerosene into the combustion chambers. In three of the four cells he began to “leave.” I took everything apart, dried it, ground the valve, reassembled it and repeated the experiment. Nothing goes anywhere. Therefore, I believe that, as before, it is mandatory. And no smart talk about the fact that the valves “knock” on the seats. I provided evidence. I grind the valves using Permatex paste. Each valve takes approximately 5-10 minutes. I grind it in, as they say, “by ear.” As soon as the cutting sound becomes a thin whistle, the process can be stopped. 6. Grinding along the plane. I do this almost always. Even if the ruler seems that the head is visually not crooked, I prefer to have this operation, just to avoid headaches. Another point is that head gaskets come in different thicknesses. To the point that some people install “metal” gaskets, and in this case the planes of the block and head must be almost perfect. Along with sanding, I usually order a final chemical wash. Firstly, to flush all the channels, and secondly, when the cylinder head shines like new, I personally find it more pleasant to work with it. Well, this is a matter of taste and production culture. I won’t describe the assembly separately; there are no special secrets here. Just pay attention to how the rocker fits onto the valve tail. The rocker plane along which the camshaft cam moves should be “not skewed”. Otherwise, the cam will make point contact with the rocker, which will lead to destructive consequences. A little later I will try to post photos of the hand tool and a tube of lapping paste. With this article I do not pretend to be the truth. This is how old-school masters taught me how to work with cylinder head, and I tried to explain it. The funny thing is that no matter which engine you take, this technology remains the same. The number of valves and the number of cylinders change.
Source
Block plane and gasket penetration
To say that in Niva and Shnivy this is a birth disease is an understatement. At some point they just drove off en masse. At a mileage of 15-25 thousand, the cylinder head gasket was punctured, and so on down the list.....What do they do in the Papuan service center, they buy a "Fritex" metal package, tighten it, and after 10 thousand the client comes back with a new one, with the same question. Or rather, with two. How long? And the classic “what should I do?” It is not the gaskets or bolts that are to blame, it is the factory quality of processing of the block plane and the cylinder head plane that is to blame. Below I publish a photo of one of the blocks. I personally changed the gasket on it twice until I found the optimal set, which I now recommend.
The metal bag does not help, but rather hinders. It cannot be crimped and does not fill uneven spots. You need a shrink gasket that will completely accept the topography of the block surface and the bolts that will constantly press it. This is the reason why hardened bolts are not rolled here. Of course, there is an option with subsequent broaching, as was the case in all Soviet times, but this is too labor-intensive. For a long time, the plant installed the Yaroslavl metal package “Fritex”, and now they have switched again to shrink gaskets. In normal production, it would probably be easier to update the milling equipment, but with us it’s easier to go back ten steps on the technical line.
Source
Cylinder head repair
Even with gentle operation, the engine cylinder head sooner or later requires repair. For domestically produced SUVs, this issue is especially relevant. 1. “Niva” is not bought for traveling to the Bolshoi Theater on city roads. 2. Domestic off-road is not a training ground with calibrated obstacles; the loads on the car and engine are serious. 3. The quality of fuel and lubricants, unfortunately, does not contribute to extending the life of the cylinder head.
You can look at the video for signs of a malfunction :
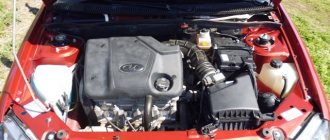
IMPORTANT! For such maintenance there is no need to dismantle the power plant. There is enough space under the hood to carry out work directly on the car. The design of the 21213 engine is quite simple. Major repairs or replacement of the cylinder head gasket are carried out in a garage, by one owner who has basic experience in servicing his car.
Let's prepare the tool:
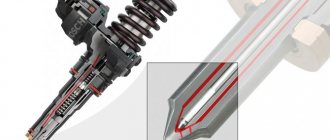
- Ratchet with a set of sockets (we will need sizes from 10 to 17 mm) and an extension. Open-end and ring wrenches with similar sizes. Torque wrench operating in the range from 10 to 110 N/m. Candle key. A flat-head screwdriver with a wide blade, a scraper (you can use a narrow construction spatula), they can be used to separate the stuck cylinder head gasket. Retaining ring pullers . Desiccant, a wooden block to support valve cotters. Crown-shaped brush, drill. A hammer with a rubber or polyethylene head (for seating valves). A syringe with a thick needle (for sucking out technical fluids from hard-to-reach cavities) Fire extinguisher, rags, containers of different sizes. Magnet on copper wire for removing fallen fasteners.
Before servicing, make sure that the hood lid stops are secure, put the car on the handbrake and block the wheels with shoes.
- Disconnect the battery and relieve pressure in the fuel rail. Unscrew the radiator expansion tank cap and drain the antifreeze. Carefully unscrew the throttle block mounting bolts, having first disconnected the throttle cable. We dismantle the unit as an assembly if it does not require maintenance. If the gasket is intact, it is not necessary to change it.
- We dismantle the pipes connecting the cooling jacket of the cylinder head and the radiator. First loosen the clamps. We open the connectors of the control cables of the injectors. Temperature may cause the fasteners to break off, so don’t apply too much force. Disconnect the connectors from the temperature sensors on the cylinder head. We pull off the caps of the high-voltage wiring from the spark plugs and simultaneously check the condition of the insulation. Disconnect the fuel supply and return lines. Before starting work, be prepared to catch any remaining fuel. Separate the intake pipe of the exhaust manifold. If necessary, replace the gasket with a new one.
- We dismantle the thermal protective screens. Loosen the timing chain tensioners and fix the chain itself to the gear using a wire. We unscrew the mounting bolts and remove the camshaft.
- Remove the levers pushing the valves. Unscrew the cylinder head mounting bolts. Their location on engines 21213 and 21214 is similar. Carefully remove the cylinder block, starting from the front. The gasket remains on the lower block.
16. Place the block on a flat surface and remove the cooling system flanges. If the gasket is damaged, replace it.
Maintenance includes replacing the cylinder head gasket, cleaning oil passages, and lapping valves. At the same time, the camshaft is inspected for scoring and other wear. The choice of a spare parts manufacturer is a personal matter for the owner. However, such an important part as the gasket has different quality depending on the manufacturer.
When comparing the three options, the branded spare part turned out to be the poorest quality, there are no complaints about the Spanish model (it is the most expensive), and the golden mean is the Yegoryevsk consumables.
The unit is installed in several stages, following the sequence:
- All bolts except 11, observing the order, are tightened with a torque of 20 N/m. Then, repeating the sequence, we tighten the same bolts with a torque of 69-85 N/m. We tighten bolt 11 in one pass, with a torque of 32-39 N/m. We replace the torque wrench with a regular handle, and turn all the bolts by 90°.
If you have the tools, you can do the work yourself. • We bore inlet and outlet flanges to a diameter of 34 mm. Figure 8
• Then, using sealant or plasticine, we align the flanges with the inlet holes, and mark the bore on the cylinder head. • Using the same cutter we machine the holes for the inlet and outlet channels.
• Then all that remains is to select and modify it to fit the new valve diameter.
By carrying out such work, you increase the power of the Niva SUV and torque at low speeds. This will help you drive confidently.
Source
Causes of cylinder head gasket failure
A crack or burnout of a gasket is a fairly common occurrence on a Chevrolet Niva. The vehicle is operated in extreme conditions; the engine runs at high speeds or with poor cooling off-road. The temperature in the combustion chambers reaches 1000°C, so the appearance of the slightest crack leads to rapid burnout of the gasket in this place.
A damaged node can be easily identified by the following symptoms:
- white steam from the exhaust pipe of the car (antifreeze enters the cylinders);
- drop in coolant level in the expansion tank;
- bubbling of antifreeze in the expansion tank;
- the appearance of an emulsion on the oil dipstick and timing components under the valve cover;
- increase in oil level due to antifreeze entering the crankcase;
- oil leaks from under the gasket outside the engine;
- the engine begins to stall and run intermittently;
- low compression in the cylinders.
Attention! The main reason for cylinder head gasket burnout is severe overheating of the engine, which leads to bending of the light-alloy cylinder head and the formation of cracks between the cylinder block. The manufacturer does not regulate gasket replacement on a Chevrolet Niva
It is designed for the entire service life of the engine - 125 thousand km. This part is disposable and is replaced with a new one every time the cylinder head is removed. Dismantling the engine head may be necessary to repair valves and their seats, replace pistons, piston rings
The manufacturer does not regulate gasket replacement on a Chevrolet Niva. It is designed for the entire service life of the engine - 125 thousand km. This part is disposable and is replaced with a new one every time the cylinder head is removed. Dismantling the engine head may be necessary to repair valves and their seats, replace pistons and piston rings.
cylinder head NIVA-VAZ-2121-21213-21214-2131
Replacing the cylinder head gasket NIVA-VAZ-2121-21213-21214-2131
The block is assembled and installed under the hood on supports, which means the whole thing can be ceremoniously covered with the cylinder head. I pick up the gasket that I bought back in the fall, according to the assurances of the seller (and they don’t give a damn why bother you there, as long as they buy it and leave) and a weighty doubt creeps into my soul that the gasket is some kind of worthless! I didn’t take any risks, but went to the store to see what was on sale there. And indeed, in the stores where I visited, there are two types of gaskets on sale, one is a conveyor type, the one I bought is Egoryevskaya, a little more expensive, but looks much better. I also bought it, 150 rubles is not a pity for such a thing. I brought it to the garage and compared it with the one I bought earlier.
At first, the only thing that catches your eye is that the material of the gaskets is strikingly different, that the “conveyor” one is loose, and the Yegoryevskaya one is dense. Then we turn the gaskets over and see
That on the jumper between the cylinders in the “conveyor” one there is not a single rolling of tin, but in the Egoryevskaya one there is only one! This somehow bothered me, and I decided to order an imported cylinder head gasket from the Exist. The choice fell on the gasket from the Spanish company Ajusa, article number 10002400, the price tag for it is 530 rubles! Ordered. A week later I received it and realized that it was worth the money, here it is next to the previously purchased ones
It is even denser than the Egoryevsk gasket, it has a rolled-up jumper between the cylinders, although on the other side, on the side of the block, and not the cylinder head,
which, in my opinion, has its own logic - the jumper does not deform the plane of the aluminum cylinder head. This is how the review of cylinder head gaskets turned out. I also purchased timing belt parts.
Stars LADA-IMAGE Baltic chain DITTON (aka Daugavplis)
Assembled the timing drive on the block
Tightened the sprocket bolts to the specified torque of 50 kN/m
I took the magical, long-suffering cylinder head
And a good gasket
And screwed the cylinder head to the block,
using a torque wrench, as described in the manual in four steps - the first bolts 1-10 in order with a force of 20 N*m, the second step all bolts with a torque of 70 N*m and the eleventh with a torque of 35 N*m, then tighten 10 bolts in order by 90 degrees and, following the advice of experienced people, the last step of turning it by 90 degrees was performed after a break of an hour and a half. I passed the chain into the cylinder head and paid attention to the damper
It is somehow obliquely positioned relative to the chain. I corrected it with editing and it became noticeably better, but of course not perfect
Here are the new parts from the “Three Whales” original spare parts store. The gap between the cylinder head and the engine shield has now become completely minimal due to noise.
Probably, it will sometimes rustle against the noise of the cylinder head, but I don’t want to do anything here, let it rub itself into the necessary groove and that’s it. Then I tightened the camshaft
and a split star,
on which the valve overlap mark was already set. I didn’t check the TDC on the block with an indicator, due to the lack of one