Experienced motorists can give thousands of examples when mud, ice or deep snow prevent the successful completion of a trip. The power of the driving wheels is powerless in such situations - only a tug or a winch. After such unpleasant moments, some owners refuse to travel in bad weather, while others decide studded tires. However, there is another category of drivers who prefer to independently manufacture additional equipment to increase cross-country ability.
Design features of homemade chains for car wheels
The basic design is a simple structure that consists of a set of steel links or reinforced wire. Uniform distribution of components over the entire tire area is the key to successful operation of the product.
Classic DIY snow chains in the video look like two elements that are located longitudinally along the radius of the wheel on the outer and inner sides. They are connected to each other by transverse parts, the so-called lugs. The manufacturing method is not difficult even for novice motorists. The arrangement of parts is carried out according to three schemes:
- Diamonds.
- Ladder.
- Honeycombs.
Each of the above types has its own disadvantages and advantages. The first option with a “ladder” is the most affordable in financial terms, as well as in terms of labor costs. No less interesting is the solution with bracelets, which are also convenient when installed on a wheel.
Varieties of design
Snow chains differ in size and shape of links. A variety of materials are used for their manufacture (steel, aluminum, titanium, reinforced plastic, etc.). Depending on the conditions of use and capabilities, three main types of weaving are made: 1
.
A ladder in which the cables are connected by straight transverse pieces. This is a fairly simple, fairly practical and easy to implement system. However, it has a drawback - the car can move jerkily. 2
.
A rhombus in which the connection is made obliquely, resulting in a pattern in the form of a web. 3
. Honeycombs. This design is a little more complex, the longitudinal cables are connected diagonally, resulting in an intertwined pattern.
What is needed to make homemade car snow chains for wheels?
The inability to purchase factory-made devices that increase cross-country ability, as well as their high price, push car enthusiasts to solve the problem on their own. It should be noted that this is a completely reasonable choice - the necessary components can be found in any hardware store, and every self-respecting driver has a minimum set of tools.
It should be said that information on how to make snow chains with your own hands and videos include a list of design elements. Let's focus on the simplest model, made according to the “ladder” scheme. To implement it you will need:
- chain with a cross section of at least 5 mm made of steel;
- carabiners with a threaded coupling;
- tension mechanism;
- washers, bolts and nuts;
- hooks, carbines.
On average, about 15 meters of chain ; more accurate figures will be known only after specific measurements. It is recommended to use stainless metal hardware as chains. The preparatory process ends with the collection of tools:
- Bulgarian;
- vice;
- hammer;
- set of wrenches.
Making an anti-skid bracelet
In order to assemble a set of bracelets, it will be necessary to choose a good chain. it must have welded rather than soldered link connections. This can greatly affect the strength of the structure in harsh conditions. The thickness of the lug is selected arbitrarily and the size of the chain link will depend on the size of the fasteners - bolts, nuts and washers.
The whole design consists of three bracelets for each wheel. Bracelets are fixed separately from each other, their number can also be regulated by traffic conditions. Each of the bracelets tightens the rubber and disc, the metal, chain part is closed with the help of straps on self-tightening buckles.
There are a lot of such rigging belts in construction stores; you can choose any one, both in width and thickness, not to mention the material. The belt itself will not be in contact with the road; its task is simply to tie and secure the chain bracelet.
We study the process: how to make snow chains for cars with your own hands and video of working moments
Experienced motorists assure that at critical moments a cable or even simple rigging comes to the rescue. You can simply wrap them around a wheel, another question is that such things are not always at hand. Moreover, this method is strictly contraindicated for cars equipped with a disc brake system. Therefore, it is better to be patient in advance and make a “chain body kit” yourself.
When making snow chains with your own hands using available videos, where the footage of the blanks is not always indicated, it is important to make accurate measurements of the radius and width of the tire. Based on the results obtained, calculate the parameters of the future product. The number of transverse elements ( lugs ) is also selected individually for each car model. Experts recommend focusing on the fact that there should be two transverse parts at once in the plane of the contact patch of the coated rubber.
The procedure for assembling a device to increase cross-country ability consists of performing the following points:
- cut longitudinal and transverse chain blanks with a grinder;
- secure the first transverse element to the 6th link of the longitudinal part using bolts and washers, hooks or welding;
- mount all subsequent crossbars every 8-9 links;
- in the center of one longitudinal element, install a segment consisting of 6-8 links and a tension device to securely fix the product;
- Install carabiners with a diameter of at least 5 mm at the ends of the longitudinal sections.
If you have certain skills and tools, the operation will take about 40-60 minutes. It will be useful to have experience in welding work, which will allow you to avoid threaded connections in practice, which will have a positive effect on the quality of the device.
Types of chains
Despite the negative qualities, snow chains increase the vehicle's maneuverability.
These funds differ from each other in:
- material of manufacture;
- geometry of the drawing.
These differences affect the vehicle's on-road behavior and off-road performance.
Material of manufacture
Based on the material used, chains are divided into:
- Tough.
- Soft.
Initially, such means of increasing cross-country ability were made of metal - rigid chains on wheels. The manufacturing materials were steel, aluminum, titanium. At the same time, the strength of such a product is affected by the metal, size and thickness of the links. The more links, the higher the cross-country ability.
Video: ABC of off-road. Anti-skid chains
The advantages of a rigid structure are improved vehicle cross-country ability and improved anti-slip and anti-icing performance on icy surfaces. Such a chain in the form of a bracelet “scoots” out from under the wheels better. At the same time, they make a lot of noise and accelerate tire wear. These bracelets on wheels have a speed limit of 40 kph. A product with large links has a significant mass, and not all cars have arch space that allows their use.
Structurally, they can be made entirely of metal chain, without a rigid base to which the transverse elements are attached.
Soft chains are distinguished by the fact that non-metallic materials are used to create them:
- rubber;
- plastic;
- polyurethane.
For the strength of such accessories, reinforcement is used. They are smaller and smaller. For them, the speed limit is already 80 km/h, and they do not have a strong noise effect. Their disadvantages include performance when moving on ice.
For driving in urban conditions in winter, it is better to choose soft anti-slip chains, for example, rubber ones. But when traveling outside the city, where there is a high probability of getting into a muddy area or ice, they use the hard type.
Geometry of the drawing
As for the geometry of the pattern, three types are available:
- "Ladder".
- "Rhombus".
- "Honeycombs".
The “ladder” consists of a base - two longitudinal branches, and it is located around the circumference of the wheel on both sides. To secure it to the wheel, locks are installed on the base. Working elements are attached to it perpendicularly. Externally, the straightened chain looks like a rope ladder, hence the name.
“Ladder” is the simplest type of cross-country ability, so such products are inexpensive. But such a chain has a number of disadvantages:
- working elements are parallel to each other. Because of this, the contact with the road for such a chain is variable, which is why the car can “burrow” on loose soil or snow;
- The “ladder”, due to the peculiarities of the arrangement of the working elements, is good only for longitudinal movement, while the lateral stability of such lugs is low;
- due to variable contact, high load on transmission elements.
Better in operational terms are diamond-type chains. Their design uses longitudinal branches, the working elements form a diamond-shaped pattern.
In “honeycombs”, the rhombuses formed by transverse branches also have a periodic arrangement, while they are additionally connected to each other by a linear connection.
Unlike the “ladder”, in the “diamond” and “honeycomb” the contact of the working branches with the coating occurs constantly, which reduces the negative impact on tires and transmission. They provide resistance to lateral impacts, meaning the car drifts less to the sides.
Details: which locks on homemade snow chains are better and why?
When making traction control devices in garage conditions, drivers most often use the following types of locking mechanisms to secure them to the tire:
- S-shaped;
- hook-shaped;
- with ratchet mechanism.
Some homemade wheel chains are equipped with an S-shaped lock structure, which is locked with a four- or hex key. However, many complain about unreliable fixation and lack of adjustments for this option. In addition, installing such equipment is a complete inconvenience.
The second option for fixing the chain device is more common and holds quite well. If the chain is correctly laid, fastening can be done with a screwdriver without any problems. For a complete guarantee, car enthusiasts advise tying the contact point with 1-3 mm soft wire. Disassembly of the equipment also occurs quickly without much effort.
The ratchet lock model was previously used on trucks. It is characterized by high reliability and ease of operation. The sample provides fixation without the use of additional materials.
Anti-skid chains. Purpose, advantages and disadvantages
To improve the off-road performance of a vehicle, snow chains or traction chains are used. The purpose of these accessories is to increase the vehicle's cross-country ability. They play the role of universal lugs.
After installing them, the driver receives:
- good cross-country ability on snowy roads;
- the ability to overcome ascents and descents with less likelihood of losing control;
- improved vehicle handling on icy surfaces;
- increased rowing properties when overcoming mud.
Thanks to anti-slip chains on the wheels, the car overcomes serious off-road conditions. But we note that cross-country ability depends on ground clearance.
Disadvantages of snow chains:
- Increased load on the steering mechanism and transmission elements.
- Inability to move quickly (you won’t be able to drive at speeds over 40 km/h).
- Intensive tire wear.
- Strong noise effect.
Chains for a passenger car will help in off-road conditions or snow drifts, but long-term use is not recommended.
How to install snow chains on a car with your own hands and video operation
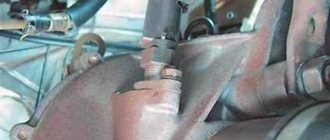
Experts recommend installing traction control equipment on all wheels, and not just on the drive ones. Incorrect installation can lead to damage to ABS sensors, brake system components and wheel arch liners, as well as side tire cuts . On SUVs with a plug-in second axle, the device is installed primarily on the pair that is constantly in operation. The installation operation is performed in two ways:
- With jacking.
- On a stationary car.
The essence of the question is not only how to properly make snow chains on a car with your own hands using a video - you should think about installation work even before entering the problem area. This is the only way to enjoy the operation, save your time and avoid annoying mistakes.
There is no point in describing the first method using a jack - the procedure is elementary and will not cause any difficulties even for a novice driver. The only recommendation is to reduce the tire pressure to make the work easier.
Another question is when this device is not at hand. In this case, you can install chains on snow wheels with your own hands using the following technology:
- place the product in front of the wheel pair, avoiding twisting of the links;
- run over the product with wheels;
- apply the handbrake;
- put on the device so that the hook and carabiner are on the outside of the wheel;
- connect the hook and the last link of the longitudinal part to the inside of the wheel;
- put the carabiner coupling on the tension system from the outside and fix the knot;
- distribute the transverse elements along the entire perimeter of the tire and tighten it.
Important! To ensure uniform distribution of equipment components, drive 20-30 meters and then make final adjustments. This event will guarantee maximum adherence of the product to the rubber.
What are snow chains?
In another way, this design can also be called anti-slip. It is put on the wheels of a car in order to improve its cross-country ability. The main advantage of such chains is ergonomics; they can be used when necessary.
In addition to the traction control system, the chains also help well on icy roads, which significantly increases safety.
Alternative options
Automotive stores sell traction control bracelets - a worthy alternative to chain equipment. They are distinguished by the possibility of quick installation and low price. But even here the engineering thought of our motorists does not stand still; they have skillfully learned to copy factory copies.
Bracelets are the same homemade snow chains , but without longitudinal elements, their advantages are as follows:
- Ease of manufacture.
- Quick installation.
- High efficiency and reliability.
To make it you will need a modest kit:
- VAZ muffler mounting element made of rubber;
- bolts 40-60 mm long, washers and nuts;
- a tube with a diameter equal to the diameter of the bolt;
- steel chain with a diameter of at least 5-6 mm.
To equip wheels with standard sizes 195 and 205 mm, 4-5 meters of hardware products will be required. Stores also sell ready-made kits for self-assembly of bracelets, with the exception of Chinese kits, they are of fairly decent quality and inexpensive. It consists of:
- blanks;
- fastening accessories;
- sling;
- clamp lock.
The kit is easy to use, transported in a special case and does not take up much extra space. An important advantage of metal bracelets is the possibility of installation on wheels with disc brakes. And if you take into account the reviews, then owners of expensive foreign cars do not hesitate to use such devices, which also says a lot.
How to make your own wheel chains
There is a very large selection of snow chains on the market now, but it is not necessary to purchase them, since they are not difficult to manufacture and you can easily make them yourself. But at home we make only a rigid chain.
First of all, let's decide on the geometry of the drawing. The simplest would be a “ladder”, but if desired, you can also make a “rhombus”, although it is more difficult to manufacture. Materials you will need:
- a metal chain whose links are connected by welding. In this case, we immediately determine the size of the links;
- fastening;
- stretching device.
Important to remember
Any traction control equipment adversely affects the safety of tires, as well as the condition of the chassis. You need to be especially careful when choosing locks for homemade chains on car wheels , since the trouble-free operation of the car depends on them.
Moving on hard surfaces is unacceptable. When driving on loose snow or mud, you should maintain a driving speed of 20-30 km/h; it is not recommended to allow wheels to slip. Experienced drivers advise periodically checking the tension of the equipment along the entire inner and outer perimeter of the tire while driving.
How to put chains on wheels?
It must be mounted on wheels in advance, before leaving for the problem area. If the car is already stuck in mud or a snowdrift, putting them on the wheels is problematic.
To put chains on wheels you need:
- In front of the wheels of the drive axle, we lay the chains on the ground longitudinally and straighten them. Fixing elements (hooks, locks, carabiners, etc.) must face the direction of movement.
- We drive the wheels onto the chains so that 20-30 cm of the product remains in front of the wheel.
- We throw the part located behind the wheel onto the wheel.
- We first connect the internal longitudinal branch with a fixing element, and only then the external one.
- If there is a chain tensioning mechanism, use it.
- We drive the car 20-30 meters so that the product sits properly on the wheel and straightens out.
Video: How to put a chain on a wheel without running over it and without a jack
And only after that we try to overcome off-road conditions. At the same time, this must be done in low gear and at high engine speeds so that the wheels can “shove out” from under themselves. In urban conditions, we drive on chains as usual, but before that it is better to do a test drive to determine the behavior of the car, and this should be done on the road with different conditions - snow, ice. And most importantly, you must not exceed the speed limit, otherwise you will lose control or break the chain.
Antibux from old tires
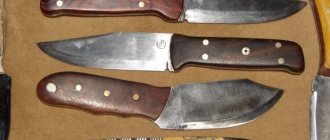
The simplest alternative to anti-traction chains is homemade snow bracelets made from old tires. Outdated rubber is put on the tire, creating a kind of “shoe” for the wheel.
Anti-skid bracelets made from an old tire
The materials can be taken free of charge at any tire shop. You need to choose the same tire diameter as the wheel, or a size larger. You will get a simple and budget version of anti-bux. You will also need a grinder or jigsaw.
To make anti-skid bracelets from an old tire, you need to cut out pieces of rubber along its entire circumference, having previously marked the cut points with chalk. It should look like a gear.
The next step is to cut off the excess material along the inner diameter of the tire so that the “shoe” fits freely on the wheel.
Types of anti-slip chains by type of material
Anti-slip equipment of various types ; it is also possible to make wheel chains with your own hands. They differ in the types of materials and in the characteristic pattern of the chains themselves.
Soft chains
Soft wheel chains are made of rubber, polyurethane and other plastics . They are a mesh with metal spikes along the entire perimeter.
The most popular soft anti-slip chains are made from polyurethane . They are highly resistant to wear and tear, very elastic and resistant to chemicals.
Rubber is much inferior in properties to polyurethane.
They are quite expensive , but they can be used in urban environments without damaging the road . In addition, the speed when driving with such chains on wheels can be kept quite high - up to 80 km/h . Such devices are not effective for severe off-road conditions and icy conditions .